
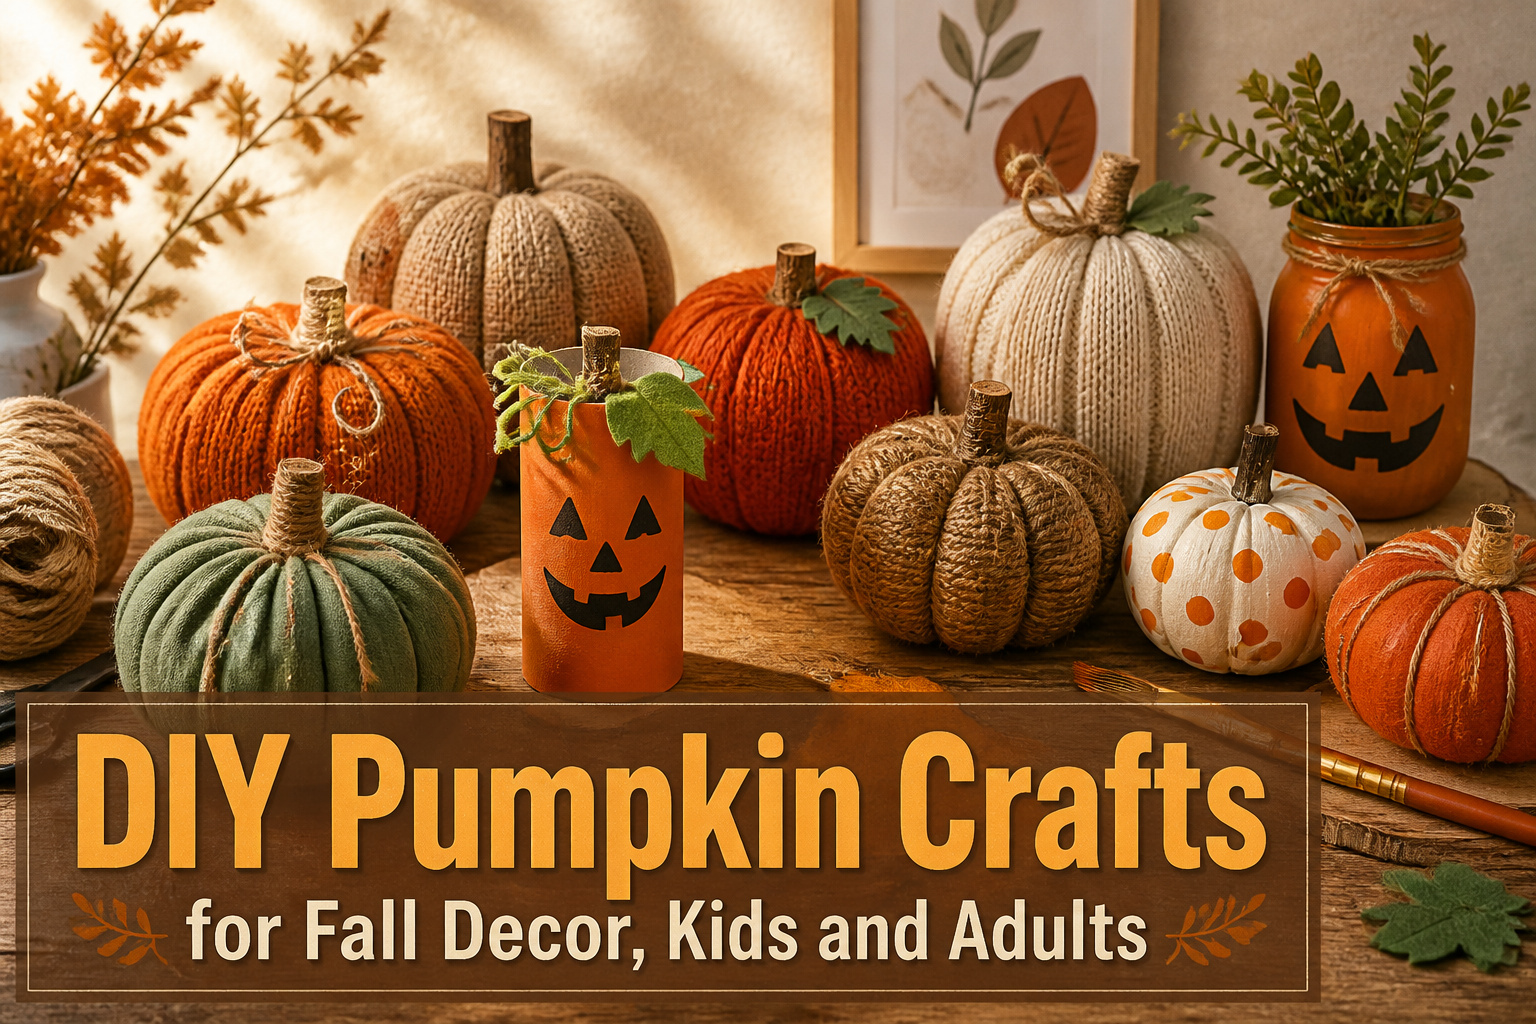
The best diy pumpkin crafts run from two-minute toilet paper roll wraps to concrete pieces that need a week to cure. What separates the projects worth doing from the ones that stall out is whether you already keep the core supply on hand, because most of these draw from the same short list: orange acrylic, twine, mason jars, and the styrofoam balls that bulk yarn into an actual sphere instead of a lumpy knot.
A single 18-inch fabric square covers a standard toilet paper roll for soft decor that stores flat after Thanksgiving. The catch is the hot glue and sharp scissors that move even "no-sew" sweater pumpkins out of true solo-kid territory.
1. Fabric Pumpkins From Upcycled Sweaters

Old quilts and soft sweaters in fall colors make the best fabric pumpkins, and the project works with or without a needle. A thrift store run usually turns up the right materials for a few dollars, and the scraps left after cutting are small enough that even damaged pieces work. Wine corks pressed into the center become stems, or real branches do the job with a rougher, farmhouse look.
The no-sew variation uses the same stuffing and gathering technique; embroidery thread pulled tight through the center creates the segments instead of a machine seam. Each pumpkin takes about ten minutes once the fabric is cut. Kids can manage the threading and tying with supervision, though the cutting is faster with sharp scissors in adult hands. Neutral colors read as modern farmhouse, while the faded prints of an old quilt keep the vintage feel intact. Either way, the result is soft-sided decor that stores flat after Thanksgiving and costs less than a coffee run per piece.
2. Yarn Pumpkins Around Styrofoam Balls
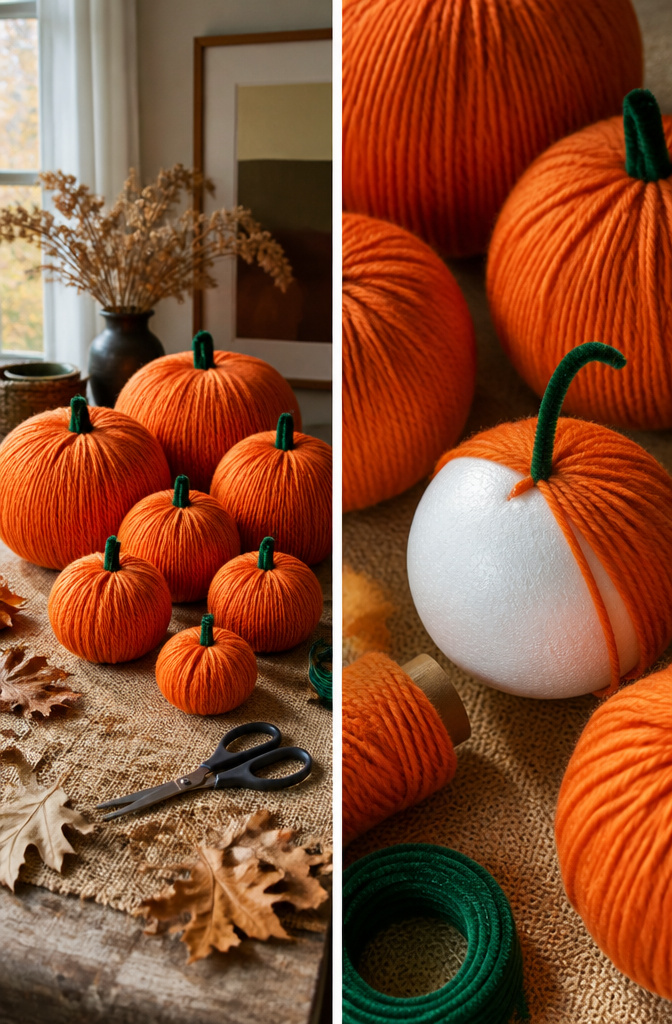
Chunky yarn wrapped around styrofoam balls makes a pumpkin that actually looks round, not lumpy, because the foam gives it structure the whole way through. The balls come in 1.9, 2.4, 2.8, and 3.8 inches, and every one of those sizes takes the same half-inch hole in the center. Go bigger than 3.8 inches and the yarn starts filling that hole before you can pull the last strand through.
Prepping the foam is the messy part, so batch it. Flatten the bottom with a serrated knife so the pumpkin sits steady, cut a smaller slice off the top, then drill your half-inch hole. About twenty-four balls takes 20–25 minutes, and after that the wrapping is couch work.
Fuzzy or bulky yarn fights you at the finish. A plastic yarn needle helps thread the tail through, or needle-nose pliers if the hole is already crowded. The muted orange that photographs well is Big Twist "Natural Mustard" from Jo-Ann, though any chunky acrylic works.
For a garland variation, skip the foam entirely. Wrap orange yarn around four fingers roughly 120 times, cinch the bundle with a separate strand, and twist a green pipe cleaner through the top for a stem. Space them about a foot apart on twine.
3. Toilet Paper Roll Pumpkins
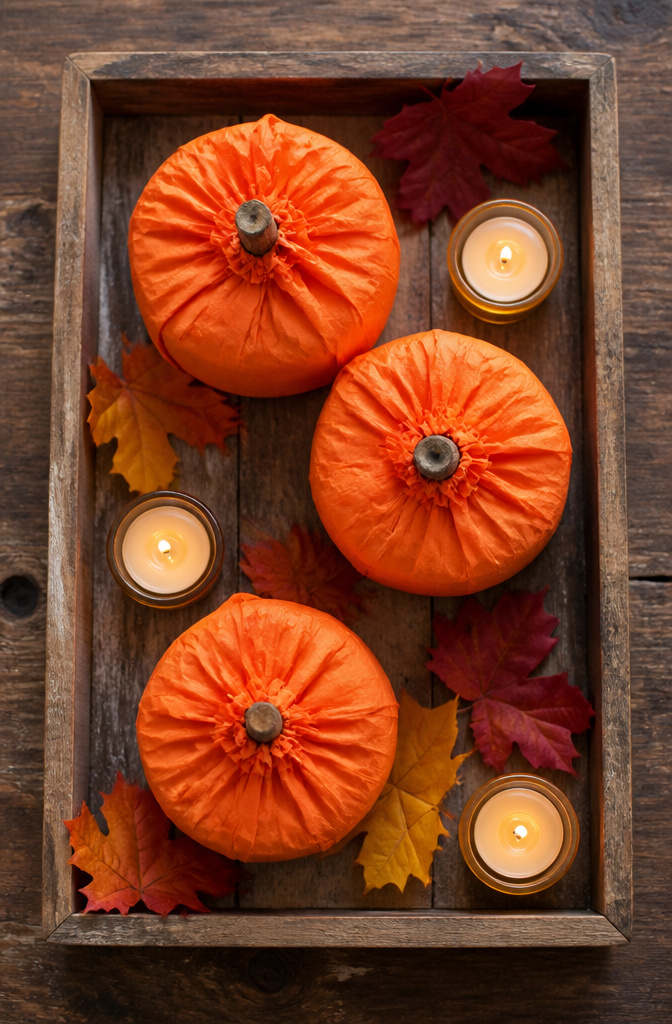
A toilet paper roll, still full and in its wrapper, becomes the body of a pumpkin in about two minutes flat. Wrap it with orange tissue paper or scrap fabric, gather the ends and tuck them into the tube, then add a stick or pipe cleaner for a stem. The finished shape is round enough to read as a pumpkin from across a room, and when the season ends you pull the paper off and use the roll as intended.
This one wins for speed and for zero cost if you already keep tissue paper on hand. It is soft and safe, so small kids can handle the wrapping and tucking without a sharp tool in sight. The roll keeps its structure without glue or tape, which also means no storage guilt; disassemble it in January and nothing goes to landfill.
Good for a last-minute centerpiece or a classroom party where you need fifteen pumpkins before the bell rings. The downside is the scale: a single roll makes a palm-sized decoration, not a porch statement. Cluster three on a tray with a few real leaves, or line them down a narrow windowsill where bigger crafts will not fit.
4. Mason Jar Pumpkins
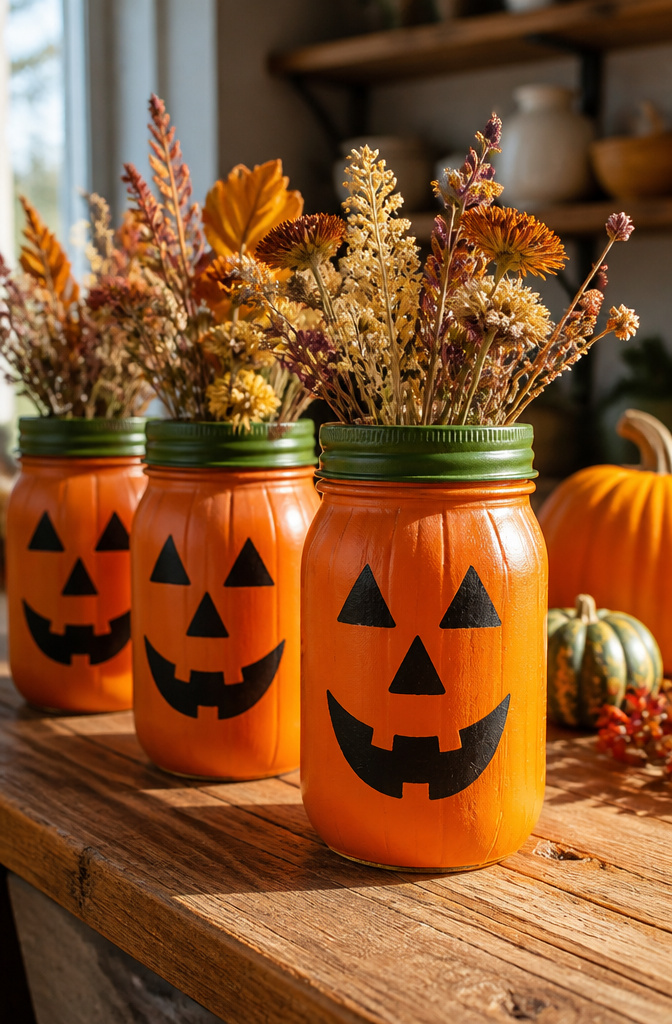
Mason jars take paint better than you’d expect from slick glass. A quick wipe with rubbing alcohol, two coats of matte orange, and the surface holds well enough for seasonal handling. The pumpkin shape comes from the jar’s own ridges; a coat of green on the lid finishes the stem without any extra pieces to attach.
A rubber band around the jar marks where the face goes, keeping the triangles even while you fill them in with black. I freehand the first one, then use that as a template for the rest so the batch matches.
These work on a shelf as-is, but the real payoff is utility. A wide-mouth quart jar swallows a pillar candle with room to spare, and the painted surface diffuses the light instead of glaring. Remove the lid and the same jar holds a few stems of dried grass or late marigolds. Come November, the faces can face the wall and the jars become straight storage for the pantry. The paint survives hand-washing; the dishwasher does not.
5. Embroidery Hoop Pumpkins
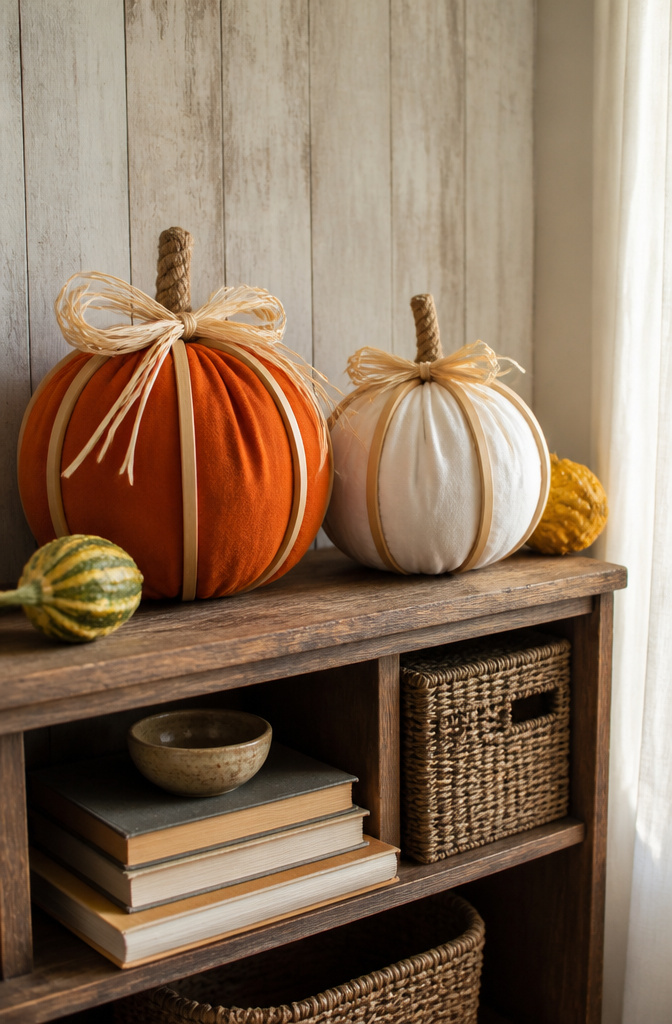
Embroidery hoops give a pumpkin its ribs without any sewing at all. Two or three nested wooden rings, stacked and offset slightly, trace the vertical segments that read as pumpkin geometry from across a room. The gaps between the inner and outer hoop become the grooves; light falls into them and the shape pops even in flat fabric.
Linen or a coarse cotton duck works best here, anything with enough body to stay taut but not so heavy it bows the hoop screws. Stretch the fabric drum-tight, trim the excess to a rough circle, and gather it behind with a running stitch and twine stem. A raffia bow hides the mechanics and gives you that farmhouse stem look without carving anything.
The finished piece stays light enough to pin to a bulletin board or prop on a narrow shelf where a ceramic pumpkin would tip and roll. I have seen these done in burnt orange, in cream with a cinnamon wash, and once in leftover olive canvas that looked surprisingly like a heirloom squash. The hoop size sets your scale: a 6-inch ring makes a respectable single accent, while an 8-inch paired with a 5-inch reads as a little-and-big grouping on a mantel.
6. DIY Pumpkin Vase

A real pumpkin works for a single weekend centerpiece, but the flesh softens fast once it is cut. If you want the arrangement to last from early October through Thanksgiving, a faux pumpkin is the safer bet, and the craft-store paintable kind hollows out cleanly with a serrated knife.
For a real pumpkin, cut the top at a wide angle so the lid seats back in place without falling through. Scoop every seed and string, then wipe the interior with a diluted bleach solution to slow mold. The shell itself will not hold water, so you need a liner: a small glass jar wedged in the center, or a block of floral foam soaked at the sink and pressed to the floor of the hollow. A water-filled vase is the easier of the two, especially if you are dropping in a store bouquet and calling it done. Floral foam gives more control over stem placement but dries out in a week unless you top it off.
Faux pumpkins seal differently. Once you cut the opening, the interior is already dry. Hot-glue a disk of cardboard to the base if the bottom is rounded and you need it to sit flat, then anchor your foam or a weighted vase inside with more glue. The pumpkin will not rot, so the only limit is whether your flowers outlast the arrangement.
7. Vintage Farmhouse Pumpkin From Canning Rings

Sixteen mason jar lid rings, a spool of wire, and a cinnamon stick are the core of this one. The rings get strung onto the wire and pulled tight until they fan into that squat pumpkin shape, then the wire gets twisted off at the back. Some tutorials have you wrap the rings in washi tape first, but for the farmhouse finish I would spray paint them before you wire them so the color sits even across every surface. A matte off-white or aged bronze reads more vintage than the tape patterns do. Once the paint is dry, thread the rings, cinch them, and tuck the cinnamon stick down through the center hole for a stem. Burlap ribbon tied around the base of the stick hides the wire and gives you that rough-textured farmhouse detail. The whole thing takes one sitting if the paint is already handled, and the rings cost next to nothing if you have been saving them from jam season.
8. Concrete Pumpkins for Indoor or Outdoor Use
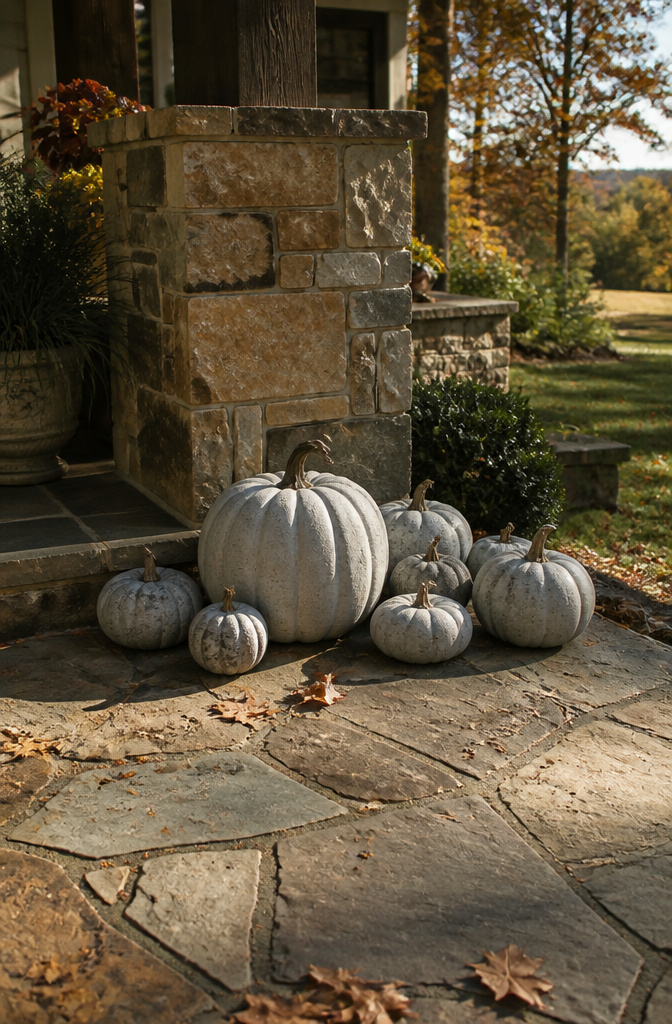
Concrete pumpkins sit where lighter crafts blow away. The mold process is straightforward: a plastic pumpkin bucket or silicone mold shapes the wet mix, and the hollow form cures for about 48 hours before you can unmold it, then another week until it is fully hard. That weight, roughly 15–25 pounds for a mid-size piece, means these work on a stoop or patio without staking, but it also means lifting one onto a mantel takes planning. I would not try to balance a concrete pumpkin on a narrow ledge or a glass-top table; the floor or ground is safer. The rustic, weathered surface only improves outside, and the same finish looks intentional beside a fireplace or on a bookshelf. For anyone wanting a jack-o-lantern version, cutting the face after the first day of curing, while the concrete is still green, saves blade wear and dust.
9. Pumpkin Planters From Upcycled Containers
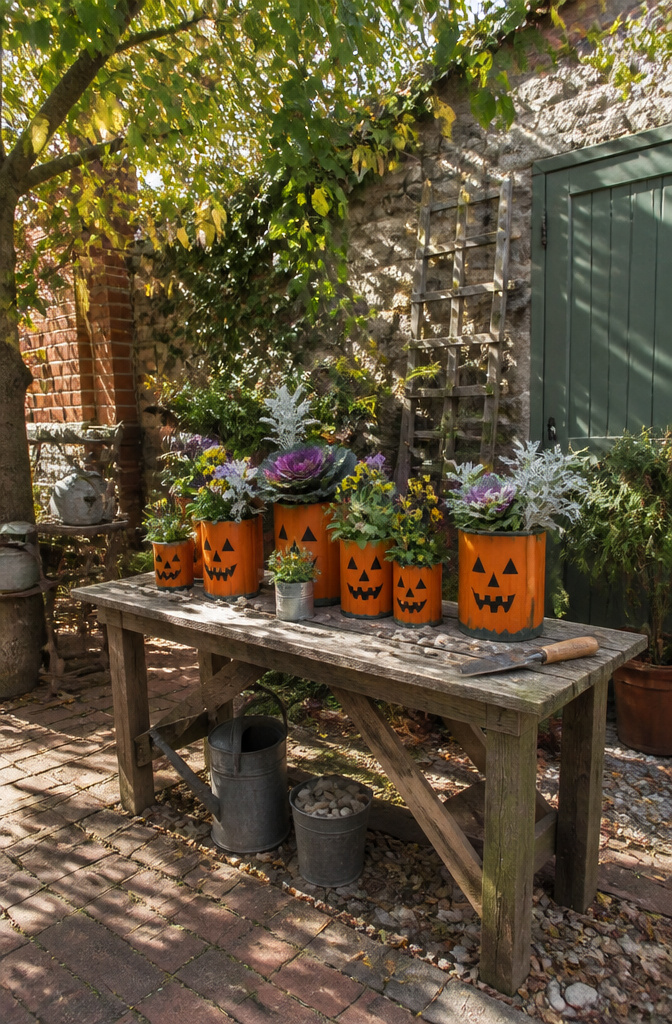
Coffee cans, yogurt tubs, and the kind of wide-mouth containers that held pretzels or mixed nuts all work for this. The plastic ones are easiest to cut, but a tin can with the rim dulled on sandpaper drills cleanly too. Drainage holes matter more than the container material: three or four quarter-inch holes punched in the bottom, then a layer of gravel or broken crockery so the roots do not sit wet. Paint the outside orange, black out a face if you want the jack-o-lantern look, and stick a real branch stem through the center hole, bark stripped from the end so it seats flush against the yarn or twine you pack inside to hold it.
For fall plants, cool-season annuals like pansies or ornamental kale handle the shorter days and the odd warm spell better than summer holdovers. A trailing sedum or small mum fills the space without demanding repotting before Thanksgiving. The whole project runs on what was already in the recycling bin, plus maybe a spray can of paint and a $3 six-pack from the garden center.
10. Paper Plate Pumpkins
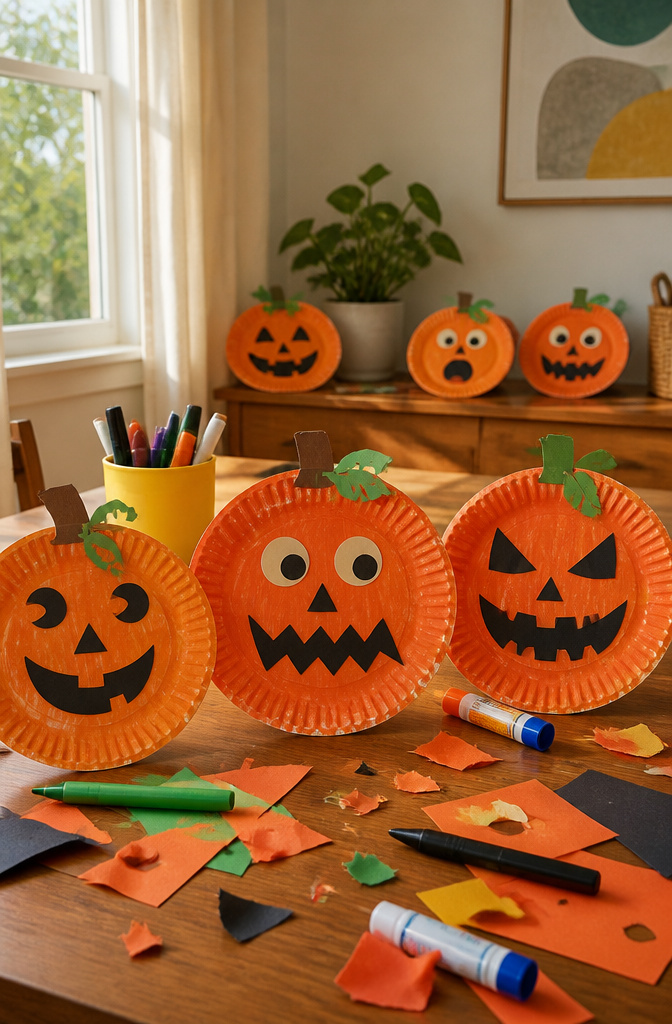
Paper plates give toddlers something solid to grip while they work, which matters more than you’d think when glue is involved. The classic build starts with an orange plate, either painted or left as-is, with construction paper eyes and a mouth stuck on front and a green stem curling from the top. What separates the forgettable versions from the ones that survive past Thanksgiving is texture. Torn construction paper, crumpled tissue paper, or even dyed pumpkin seeds pressed into the surface turn a flat circle into something a kid actually wants to carry around the house.
The paper plate pumpkin photo frame works because the center cutout gives the craft a job; suddenly it holds a picture from the pumpkin patch instead of cluttering the fridge. For even younger kids, skip the scissors entirely. One tutorial gets away with zero cutting or gluing: just markers on the plate, maybe a stick taped to the back for a mask. The 3D versions take more patience, layering strips or folding wedges to bulge the surface, but they also teach the thing that flat crafts miss, that a pumpkin is round, not a disk. My own preference runs toward the textured collages. They take twenty minutes, use what you already have, and the crumpled paper hides every glue smear a four-year-old makes.
11. Pumpkin Handprint Art
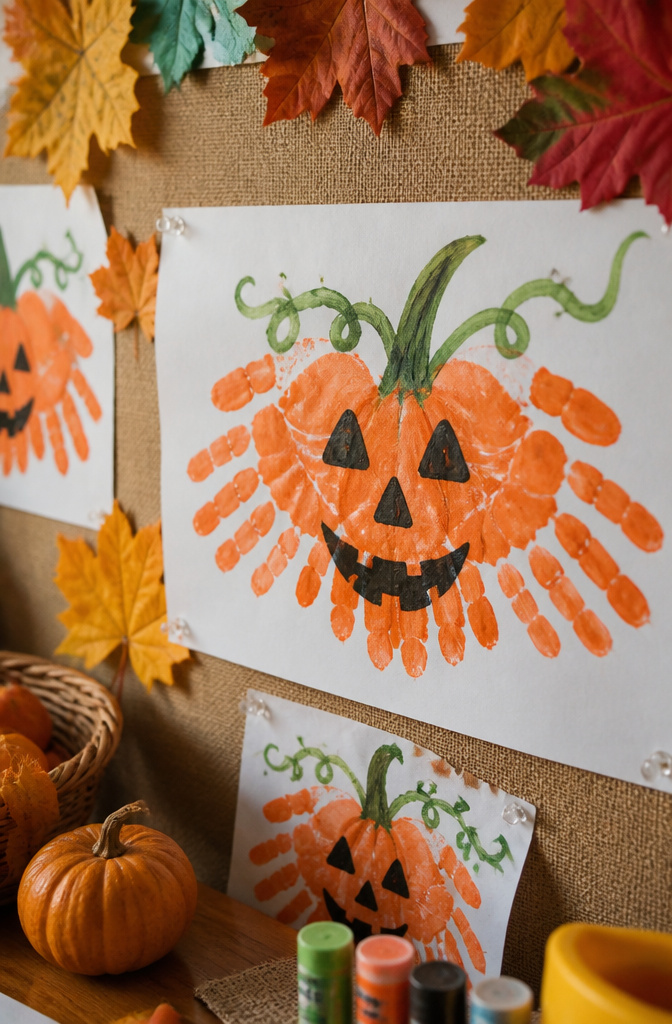
Orange paint on a palm and a firm press onto paper gives you the basic pumpkin shape, with fingers fanning out like the lobes of a real gourd. The sources split on what happens next. One route keeps the handprint itself as the pumpkin, adding a black thumbprint stem and a vine drawn with a finger dipped in green. The other reverses the colors: a large orange pumpkin painted first as the ground, then a white handprint pressed into the center for contrast and a ghostly, personal keepsake. Press the heel of the hand first, then roll the fingers down gently to avoid the smear that turns five distinct lobes into an orange blur. For a composition that reads as more than a single craft, arrange three or four prints across a horizontal sheet in descending size, parent to child, and add black facial details with the back end of a brush. The black paint works best applied last; it muddies fast if you switch between orange and black on the same wet palm.
12. Egg Carton Pumpkins
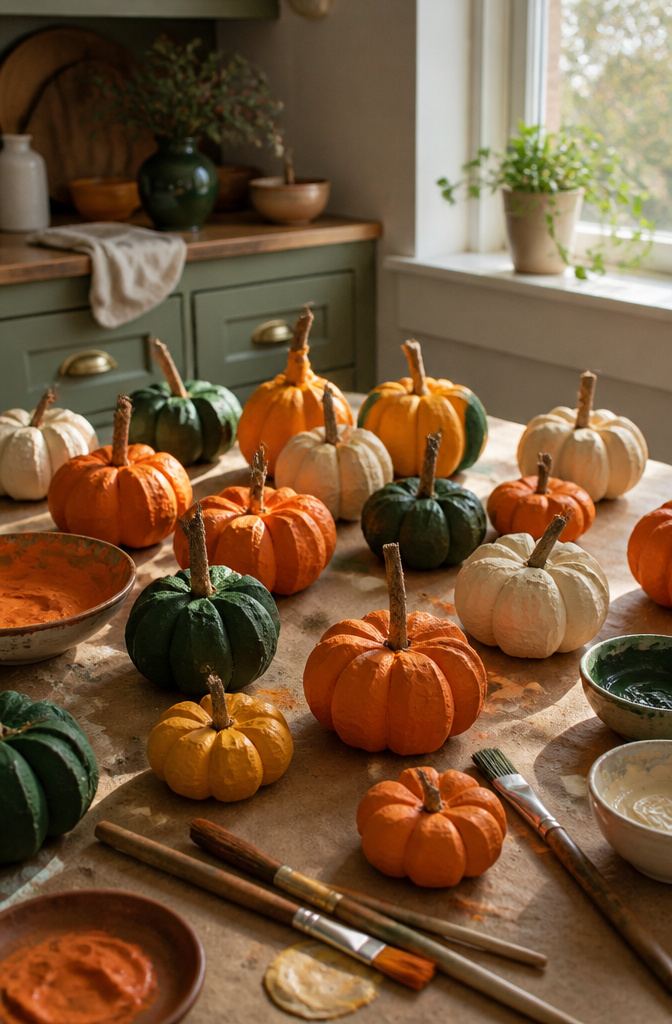
An egg carton gives you twelve little cups that already curve like pumpkin segments, which is why this project works so well for kids and for anyone who wants a pile of decorations without buying a pile of supplies. Cut the cups apart with scissors, leaving the tall center cones intact if your carton has them; those cones become the built-in stems on some pumpkins and get trimmed flush on others so you can swap in something better.
Painting goes faster if you prime first, but acrylic craft paint will grip the cardboard either way. Orange is the obvious move, though cream and deep green look more grown-up on a mantel. Two coats cover the gray speckles that egg cartons always seem to carry. Let the first coat dry to the touch before the second, or the paper fibers lift and you get a fuzzy surface that no amount of paint fixes.
For stems, a real stick from the yard beats pipe cleaners every time. Look for a branch about 1/2 inch thick at the base and cut pieces one to two inches long with pruning shears. Strip the bark from the bottom half-inch so the raw wood grips hot glue, or press the stem straight into the center of the cup if the cardboard is still firm. The yarn-wrapped pumpkins I saw in one tutorial hold stems without any adhesive at all, which matters when small hands are doing the assembly and you would rather not plug in a glue gun.
13. Pumpkin Luminaries
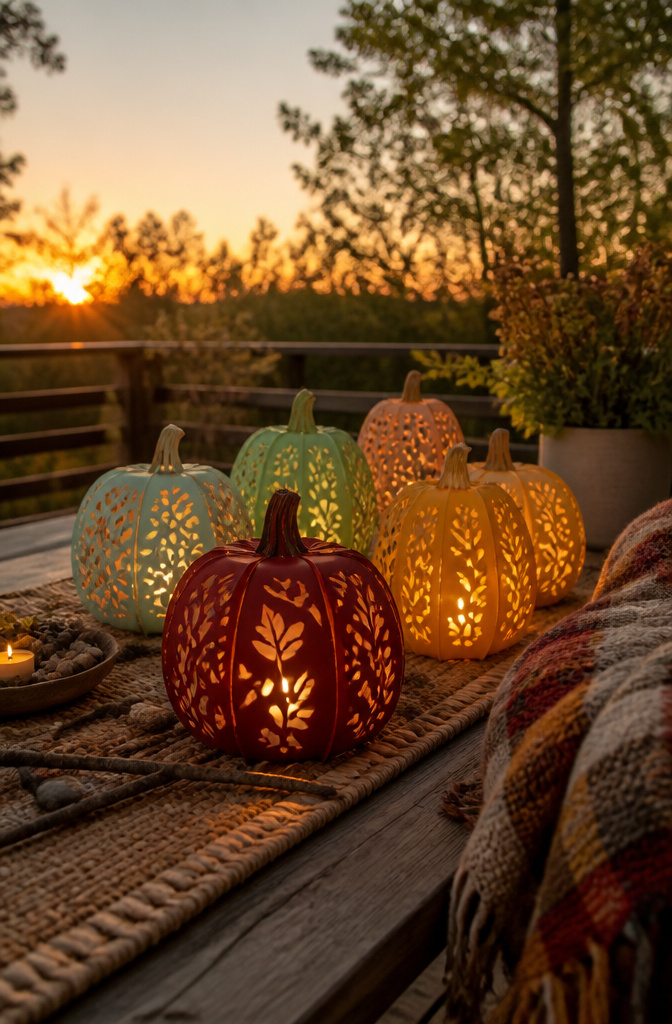
Paper luminaries start with a simple cylinder or box shape, and the magic is all in what you cut away. A craft knife or hole punch opens up repeating leaf, vine, or jack-o’-lantern shapes; the light behind them does the rest. Battery-operated tea lights are the only source worth using here. A real flame inside paper is a risk that saves no money and buys no charm, since the glow effect is identical either way. Set the light on a flat glass dish or ceramic tile, not directly on wood or fabric, and keep the luminary away from doorways where a sleeve or curtain could brush it. The paper itself can be anything from vellum for a soft, diffused glow to orange cardstock for bolder shadow lines. I like to punch a few extra holes near the top rim so heat escapes upward rather than collecting inside.
14. Pumpkin Wreaths

A grapevine wreath from the craft store gives pumpkins something to climb on without fighting hot glue on plastic. I wrap the vines with burlap ribbon first, which covers gaps and gives stems and leaves a surface they can grip.
Real mini pumpkins last about two weeks on a door before they soften and attract fruit flies. Craft pumpkins, the hollow foam kind sold in September, screw straight into the vine with a 1-inch wood screw through the stem hole. No glue needed, which means you can pull them off after Thanksgiving and store the whole wreath in a bin.
For attachment, floral wire beats hot glue on grapevine every time. Poke the wire through the pumpkin stem, twist it around a vine, and the thing stays put through wind and a slammed door. Wire cutters trim the ends flush so nothing scratches the paint.
The look changes fast with the base you pick. A straw wreath reads harvest festival; grapevine reads farmhouse. Either works, but straw sheds and grapevine snags sweaters. If the door gets daily use, grapevine wins.
Spend the extra four dollars on craft pumpkins. Real ones turn a wreath into a compost experiment by week three, and replacing them costs more than buying fake once.
Materials I Keep On Hand

Most of the pumpkin crafts I bookmark use the same dozen supplies, so I keep a bin ready from September through Thanksgiving. An 18–20-inch square of fabric covers a standard toilet paper roll for soft pumpkins. Orange yarn, green pipe cleaners, and twine string together a garland with nothing more than scissors and patience. Mason jars and old toilet paper rolls handle the recycled-material projects; the rolls get shaped into stamps or wrapped whole, and jars take paint and glitter for treat holders. Acrylic paint, craft glue, and a basic brush set finish almost everything else. Cinnamon sticks and green ribbon upgrade the fabric pumpkins when I want them to read Thanksgiving instead of Halloween.
What Works for Kids and What Needs Supervision
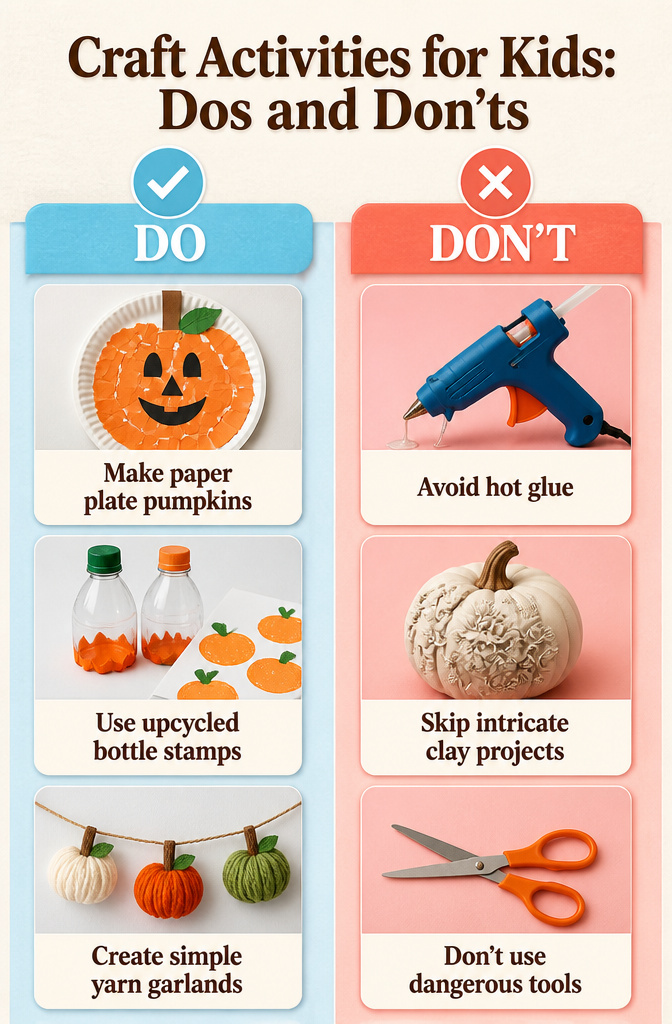
Paper plate pumpkins with torn construction paper land squarely in the all-ages column. The materials handle rough toddler hands, and cleanup is mostly a broom situation. No cutting tools means no blood pressure spikes for the adult in the room.
Stamped pumpkins from upcycled bottles hit the same easy mark. Even small kids manage the stamping, and the bottle shapes add interest without adding steps. Plan on under an hour start to finish, paint drying not included.
Where the line draws itself is anything involving hot glue. Beaded pumpkins, boho embellishments, vintage doilies glued to foam or real gourds: the burns are real and the glue strings worse than the burns. An adult handles the gun, the kid handles placement. Same split applies to cutting-machine filigree on glass pumpkins and clay molded details; the machine does the work, but someone steady sets it up.
Sweater pumpkins and burlap pumpkins read "no-sew" but need scissors through thick fabric and a glue gun to close. Older elementary kids can manage with someone nearby. Wine cork pumpkins stack and glue; tedious for short attention spans, though not technically hard.
The genuinely lengthy projects sit at the adult end. Intricate clay embellishments, filigree cuts, anything aiming for "regal" or "ceramic-look" finish. Those eat an afternoon and patience a six-year-old does not possess.
From Halloween Through Thanksgiving
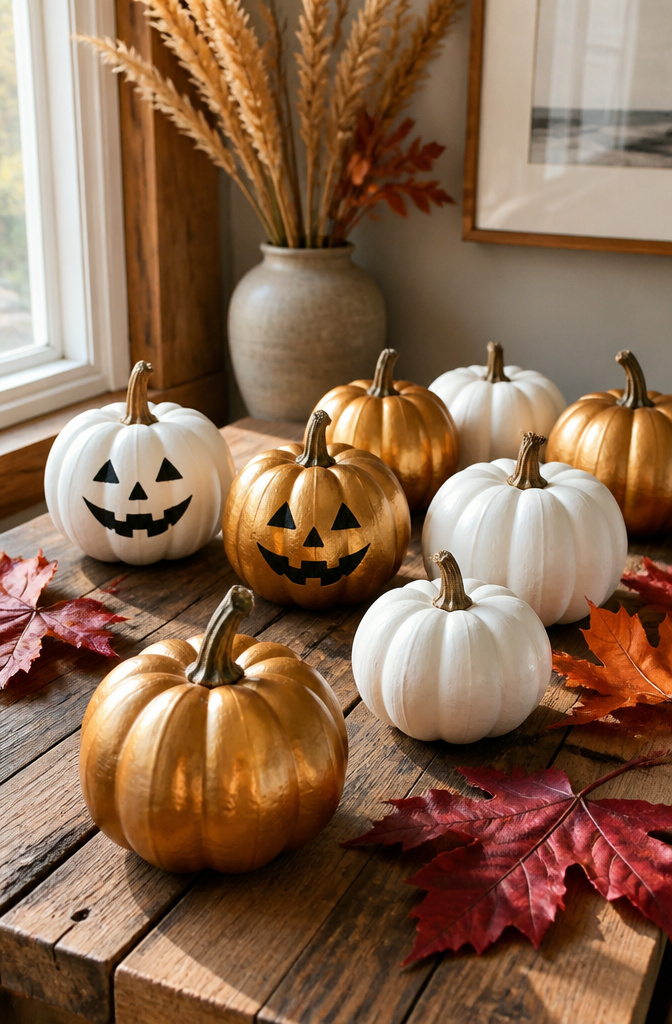
The foam pumpkins you find at dollar stores right now are the same ones that will carry you through two holidays without a new purchase. A coat of white or gold paint on the outside, maybe a jack-o’-lantern face drawn on with a marker, and they read Halloween through October 31. November 1, that face wipes off with rubbing alcohol and the same pumpkin sits on the table as neutral fall decor straight through Thanksgiving. The terracotta paint technique works the same way: spooky now, rustic later, no extra storage bin required.
What convinced me, reading through these projects, is how many are built to shift rather than to lock into one date. Paper crafts and treat holders made from ordinary household items or dollar-store supplies work for a kids’ Halloween party and then become the activity at a Thanksgiving gathering with the same crew a month later. A pumpkin vase filled with burgundy and orange flowers in October only needs the stems swapped to deep reds and dried grasses for November. Even the decoupage pieces, the ones with day-of-the-dead napkins, can be turned to face a wall or repainted if the black-and-pink palette clashes with your November table.
Make some of the crafts entirely using affordable, ordinary objects you may already have around the house, or that you can scoop up easily and cheaply at the dollar store. So assemble those DIY supplies and get ready for some family fun, any time from Halloween to Thanksgiving.
That "any time" part matters for renters and first-home owners who do not have shelf space for single-holiday decor. The projects that survive a real budget are the ones that earn their place for more than three weeks.
Frequently Asked Questions
What can I make with pumpkins for DIY crafts?
You can make fabric pumpkins from old sweaters, yarn-wrapped pumpkins around styrofoam balls, toilet paper roll pumpkins, mason jar pumpkins, embroidery hoop pumpkins, pumpkin vases from real or faux gourds, vintage farmhouse pumpkins from canning rings, concrete pumpkins for outdoor use, pumpkin planters from upcycled containers, paper plate pumpkins, handprint art, egg carton pumpkins, paper luminaries, and grapevine wreaths with attached pumpkins. Many use household or recycled materials and cost less than buying seasonal decor.
How do I make a pumpkin craft?
Each project has its own steps, but most follow a simple pattern: gather your base material, add orange color through paint or fabric, create segments or texture for realism, and finish with a stem. Fabric pumpkins need stuffing and gathering at the center. Yarn pumpkins wrap foam balls until covered. Toilet paper roll pumpkins wrap the roll in tissue paper and tuck the ends. The article gives specific times for each, from two minutes for toilet paper rolls to about ten minutes per fabric pumpkin once materials are prepped.
What materials do I need for pumpkin crafts?
Common materials include fabric scraps or old sweaters, orange yarn and styrofoam balls, toilet paper rolls and tissue paper, mason jars and matte paint, embroidery hoops and linen or cotton duck, concrete mix and plastic molds, canning rings and wire, egg cartons and acrylic paint, paper plates and construction paper, and grapevine wreaths with craft pumpkins. An 18–20 inch fabric square covers a standard toilet paper roll. Orange yarn, green pipe cleaners, and twine handle garlands with just scissors.
Are pumpkin crafts suitable for kids?
Many are designed for children, though supervision varies by project. Paper plate pumpkins with torn construction paper work for toddlers with no cutting tools needed. Toilet paper roll pumpkins are soft and safe for small hands. Handprint art and egg carton pumpkins suit elementary ages. Projects needing hot glue, like fabric pumpkins with wine cork stems or beaded embellishments, require an adult to handle the gun while kids manage placement. Intricate clay work and cutting-machine details are better left to adults or older kids with patience for longer projects.






