

Some gingerbread projects take an afternoon and a glue gun; others need a weekend, a kitchen, and patience with drying clay. The difference is not skill, but whether you want the finished piece to last past New Year’s or to smell like cinnamon every time you open the storage bin. A $5 grapevine wreath and a bag of Dollar Tree wooden snowflakes can look as intentional as a hand-piped cottage if the paint color is right, and the same royal icing that holds walls together also stamps snow texture onto a roof.
1. White Shiplap Gingerbread Cottage
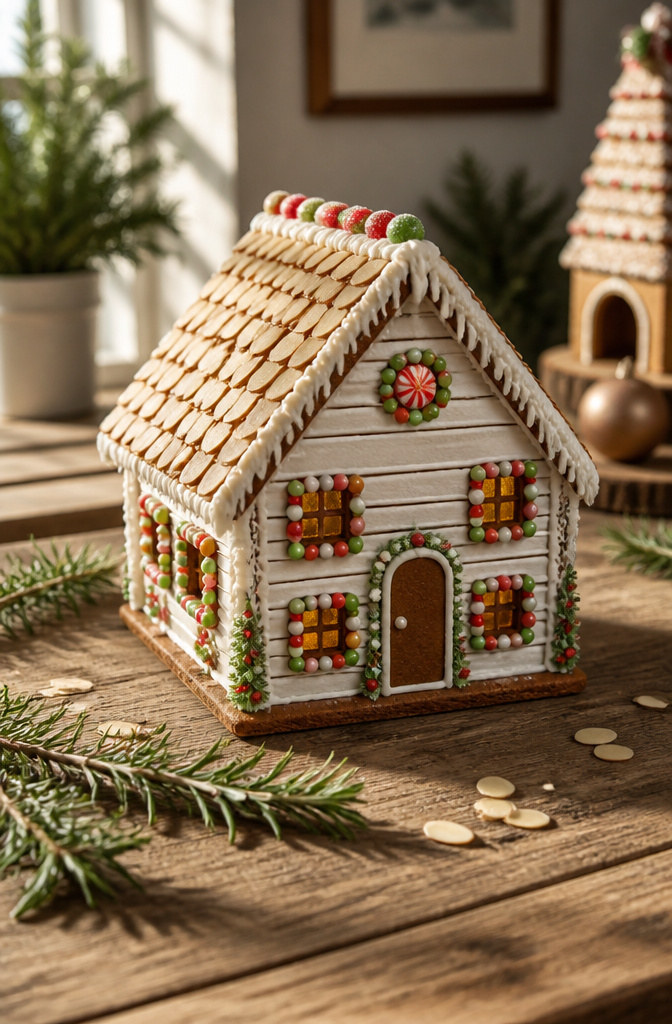
A store-bought gingerbread house kit can become something entirely different with a coat of white paint and a little patience. The idea came from watching how actual coastal cottages look in winter: the white siding makes every colored shutter and door jump forward, and the same rule holds for candy trim on a gingerbread base. Almond slices on the roof, fresh rosemary tucked in as greenery, and bright candy windows all read sharper against white shiplap lines than they ever would against brown.
I built mine from a kit, which meant the walls were already uniform and the roof pieces fit without fuss. The trick was painting before assembly, flat on a table, so the white stayed clean and the shiplap lines could be drawn with a straightedge and a fine brush in soft gray. Cardboard works for a one-season version, but a kit’s firmer walls hold up if you plan to pack it away carefully and reuse it next year. Either way, the white base is what lets cheap candy read as intentional design rather than clutter.
2. Primitive Painted Cinnamon Gingerbread Men

Flat wooden gingerbread men cut from 1/4-inch plywood or heavy cardboard take paint differently than you’d expect. The edges drink it in and leave a darker line that works in your favor if you want that primitive, found-in-a-barn look rather than something cute enough for a nursery.
Mix ground cinnamon straight into off-white latex paint, about a tablespoon per half cup, rather than painting it on top. The pigment sinks in with the paint instead of sitting on the surface where it brushes off by New Year’s. A drop of cinnamon oil in the final coat helps, but the ground spice in the base layers is what survives storage.
The folk art part is simpler than it looks. Load a flat brush with burnt sienna, wipe most off on paper, and drag it across the surface so the high spots catch color and the recesses stay light. Don’t outline the eyes and buttons with a careful line. Stamp them with the wrong end of a paintbrush, offset slightly, like a child did it in 1890.
A coat of matte polyurethane over everything locks the scent in without turning them glossy. Store them in a paper bag, not plastic; the trapped air keeps them smelling like something you want to hang, not something you want to throw out.
3. Wood Decorated Gingerbread Houses
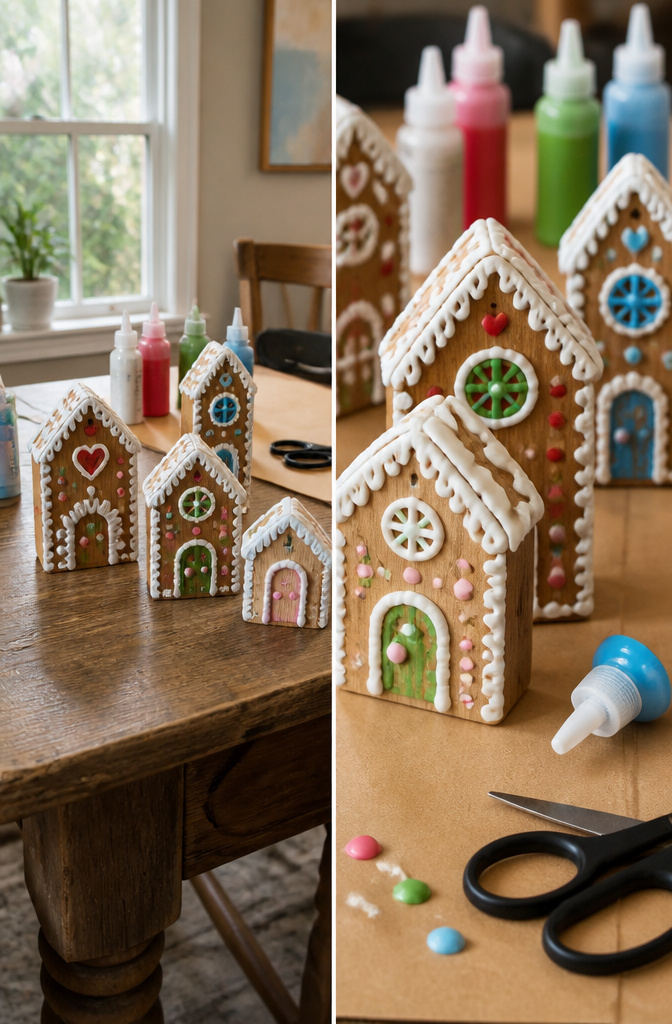
Small wood house blanks from craft stores and dollar spots take paint more reliably than you’d expect, especially the ones with a little grain but no slick varnish. The porous surface grips acrylics without the beading you get on resin or plastic holiday decor. Puffy paint, the same stuff from the fabric aisle, is what gives you that piped-icing look without mixing royal icing or waiting for anything to dry overnight. Hold the bottle like a pastry bag, squeeze slow, and let the line sit proud of the surface. The cheapest bottles work fine for dots and swags, though the tip size varies by brand, so snip carefully if you need a fatter bead.
Target Dollar Spot has carried these wood house shapes seasonally, and craft chains stock them year-round in the plain wood section, sometimes labeled as ornaments or miniatures. Thrifted toy houses and discount decor pieces with good roof angles work too if the finish isn’t glossy. A coat of flat brown base paint, then the dimensional white lines for "icing," and the illusion holds from across a room. The whole village fits a weekend and costs less than a batch of real gingerbread ingredients.
4. Dollar Store Tile Embossed Gingerbread Men
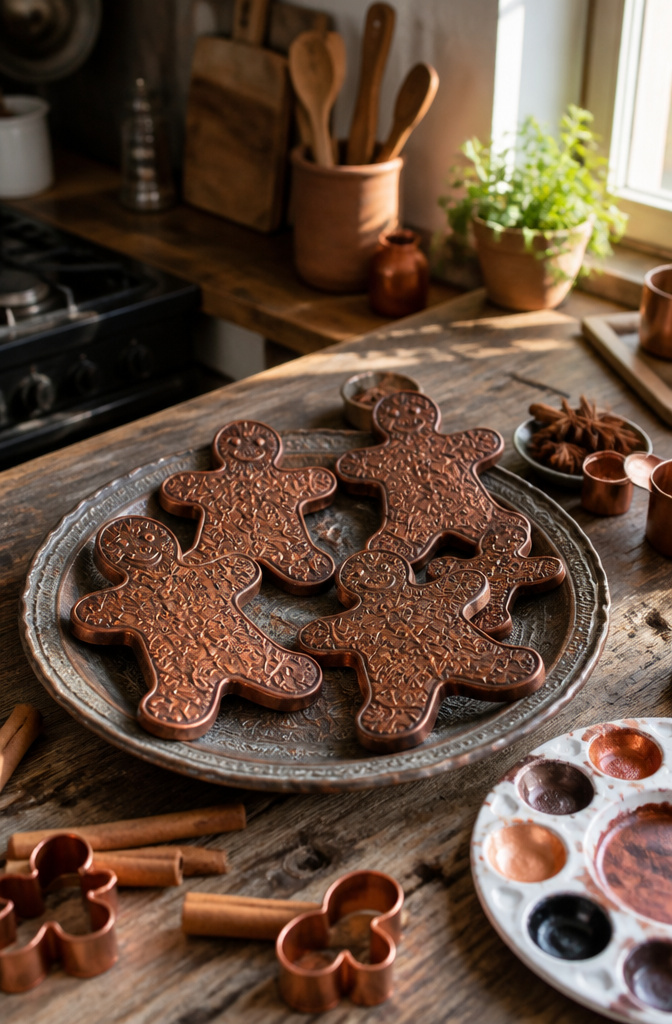
The raised pattern on those embossed tin-look ceiling tiles from the dollar store already reads as gingerbread texture before paint ever touches the surface. I noticed it walking the aisle: the repeating swirls and crosshatches catch light the same way piped icing would, and the matte gold finish underneath reads warm enough to pass for baked dough with only a quick wash of brown acrylic.
Cutting the tile takes tin snips, not scissors, and the metal edges bite back if you rush it. Wear gloves. The tiles are thin enough to trace a cookie cutter shape onto the back with a Sharpie, then work the snips in small bites rather than one long curve. Straight cuts are forgiving; the rounded head and flared feet of a gingerbread man are where the metal fights you, so nibble the curve in short segments and file the edge with sandpaper afterward. The leftover scraps cut down into small gingerbread house shapes without wasting material, and they hang just as well as the figures.
A coat of burnt sienna craft paint, wiped back slightly while wet, settles into the low spots and leaves the high ridges reading as highlight. No glaze needed. The ornament hole punches clean with a standard hole punch if you stay near the top of the head, well inside the border where the metal has some stability.
5. DIY Clay Gingerbread Man Reverse Canvas Sign
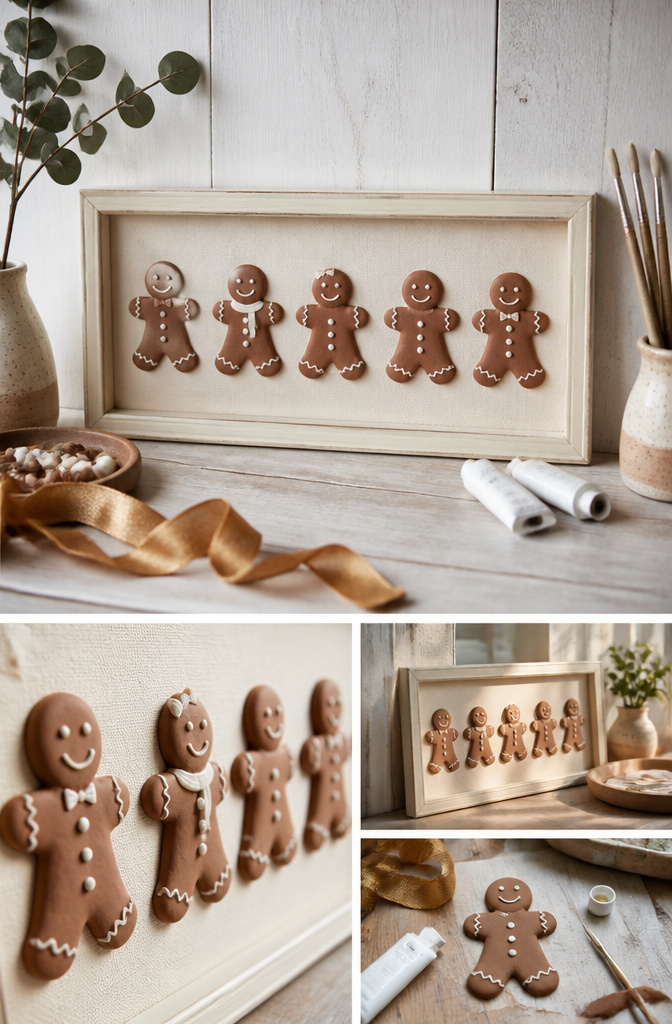
A reverse canvas starts with a standard stretched canvas you flip inside out. The fabric gets stapled to the back so the wooden frame faces forward, giving you a clean, shadow-box edge to work against without building from scratch.
For the gingerbread men, air-dry clay holds enough detail for buttons and faces without oven time, though it needs patience. Roll it flat, about a quarter inch, and keep the shapes thin. Thick clay curls as it dries and will not sit flush against the frame later. A metal cookie cutter gives clean edges; wiggle it rather than dragging so the sides stay square.
Baking is not the right word here, since air-dry clay never sees heat. Lay the cutouts on parchment, flip them once in the first hour so the underside does not dome, and let them dry for a full day. They should feel room-temperature all the way through, not cool in the center, before you glue them on. E6000 or hot glue both work; hot glue sets faster if you are holding a curved arm in place.
The finished sign reads like a giant cookie tray. Paint the frame background in cream or soft ginger, attach the dried figures in a loose row, and add a ribbon hanger through the staple holes already in the wood.
6. Cinnamon Salt Dough Gingerbread Garland
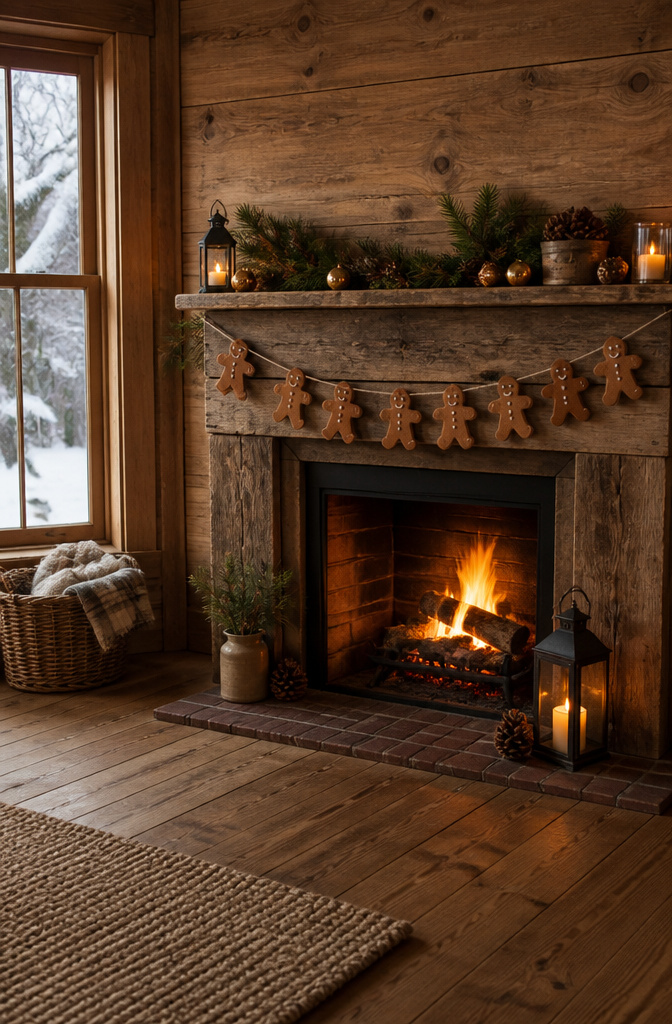
Cinnamon salt dough behaves almost exactly like cookie dough, which makes cutting out gingerbread men feel familiar from the first batch. The basic ratio is one part salt to two parts flour, with water added until the dough holds together without sticking to your hands. For color and scent that reads as gingerbread rather than pale craft clay, two tablespoons of cinnamon and one tablespoon of instant coffee per cup of flour does the work of both paint and fragrance.
The dough needs to be rolled thick enough to hold its shape, about a quarter inch, and transferred carefully to a parchment-lined baking sheet before cutting. The real trouble comes while drying. Thin limbs and heads will sag if the ornaments hang before they are fully hard, so lay them flat and turn them once a day for even drying. A low oven, around 200°F, speeds this to a few hours instead of several days of air drying.
These keep for years if stored dry, and the cinnamon scent lingers longer than you would expect. String them on twine when they are fully cooled and hardened, spacing them six to eight inches apart so they knock gently against each other rather than overlapping.
7. Thrifty High Gloss Gingerbread Cottages
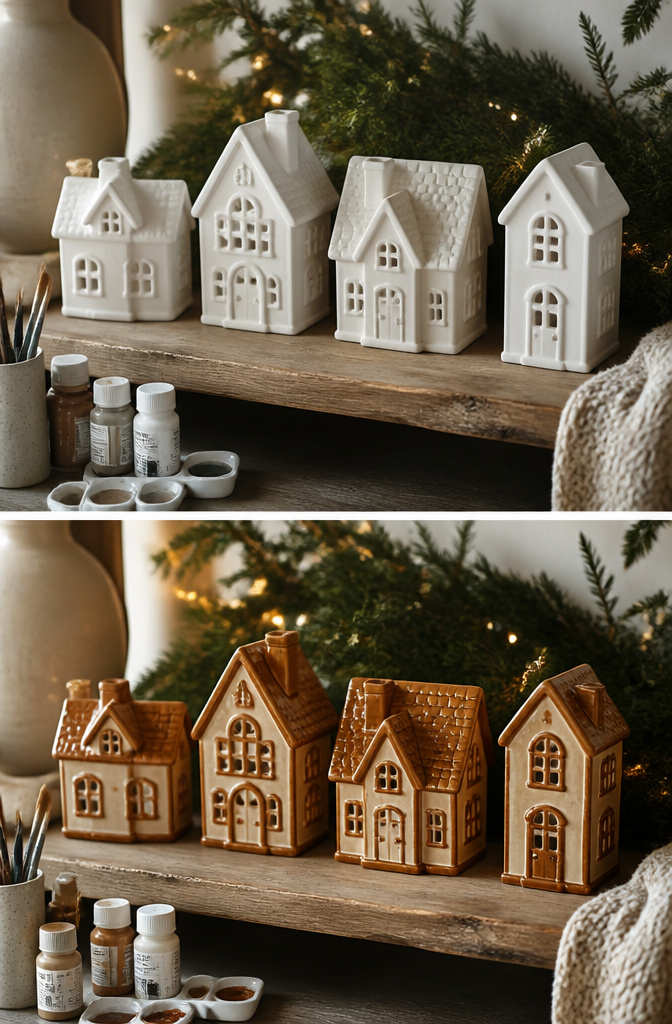
Ceramic village houses from dollar stores and thrift stores already have the right roofs and windows for a gingerbread look; the problem is the paint job underneath. The original colors that cover easiest are the muted ones: beige, cream, off-white, or light gray bases. Bright reds and forest greens fight every coat, so those pieces cost more in paint than they are worth.
For the wet-icing effect, high gloss reads as fresh royal icing in a way satin or semi-gloss never quite manages. Spray enamel from a craft or hardware store goes on fast and self-levels over the molded details better than brushing. Rust-Oleum Warm Caramel is the color that keeps coming up for the gingerbread base itself, though a reader could push lighter or darker depending on what the thrift store had that day.
Outdoor use is where this project gets complicated. No source recommends a sealer that actually holds up through freeze-thaw cycles on painted ceramic. The gloss paint gives some protection against light moisture, but a soaked piece will craze and flake by spring. These cottages live longest on a mantel or under a covered porch where only the look faces the weather, not the material itself.
8. Gingerbread House Wreath
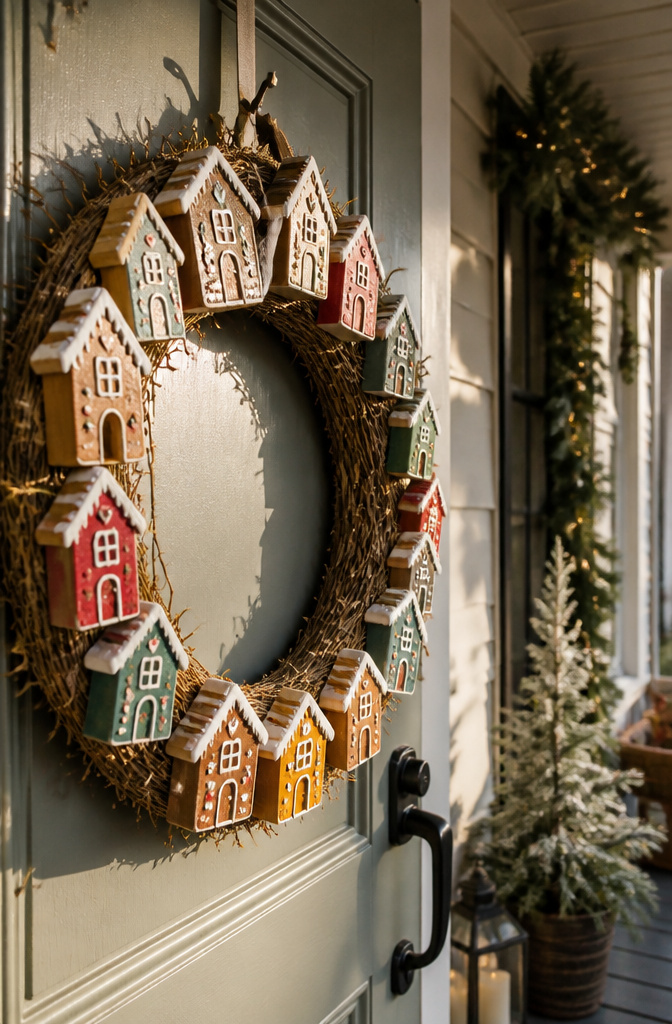
A wreath reads from the porch, not from six inches away, so the gingerbread houses need to sit in a single plane with their fronts facing outward. I learned this the hard way with a foam base that let me angle everything toward the center; from the street it looked like a brown smudge. A flat wreath form, grapevine or straw, keeps every house visible.
Attach the houses with floral wire threaded through the back, not glue on the edge. Two points of contact per house, one high and one low, stops the weight from cantilevering and tipping the whole ring. I skip anything heavier than a graham-cracker-sized house unless I counterweight the bottom with a bow or a final house.
Edible houses last one season and smell like the holidays for real. Permanent ones, baked from salt dough or cut from craft foam, store flat in a shoebox and go up faster next year. The foam reads almost as warm from a distance, and you can hot-glue it without the sweating that ruins icing on a humid afternoon.
9. Faux Gingerbread Snowflake Wreath

The grapevine wreath form from Hobby Lobby runs about $5, and the wooden snowflakes come from Dollar Tree. That is the entire material list before paint, which is what turns bare wood into something that reads as gingerbread without screaming it.
The color is where most gingerbread projects fall apart. Go too literal with the brown and you end up with a wreath that looks like a craft fail from 2008. What works is a base of warm raw sienna or burnt umber cut heavily with cream, then a wash of slightly darker brown dragged across the high points so the grain catches it like baked dough. The snowflake shape does the rest of the work. It is still recognizably holiday, still reads winter, but it sidesteps the gingerbread man or house silhouette that every other tutorial defaults to. That geometry keeps it up past New Year’s without the cognitive dissonance of a cookie-shaped wreath in January.
Layer the snowflakes at slight angles rather than flat, and the shadows between them do more for the homespun texture than any amount of distressing.
10. Gingerbread Village
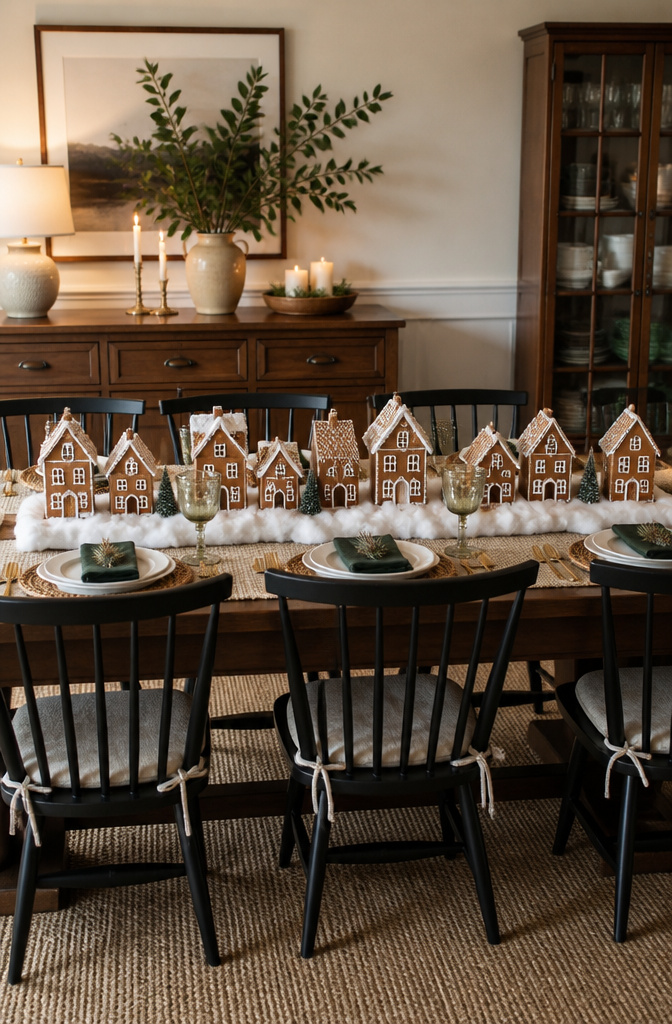
A gingerbread village only reads as one scene if every house sits at the same scale. Mix a two-inch cottage beside a six-inch manor and the eye catches the mismatch before it sees the charm. I learned this the hard way one December, arranging houses I’d collected over years, each from a different kit or craft fair. The group looked like a garage sale until I pulled the outliers and kept everything between three and four inches to the eave line.
For a standard dining table, four to five houses fill the center without blocking sight lines across the plates. Six starts to feel like a traffic jam. The question of base versus individual stands comes down to how often you move it. A shared platform, even a painted plywood slab with cotton batting, lets you lift the whole village at once when you need the table for Tuesday dinner. Separate houses shift when bumped and scatter crumbs or glitter into the grain. That said, individual bases win if you plan to break the collection apart after New Year’s and use pieces on shelves or a mantel. The permanent craft-foam houses I switched to three years ago sit on a single base all season; the one edible house I still build each year stands alone on a cake board, close enough to look included but easy to lift out when the grandkids get hungry.
11. Gingerbread Gift Wrap Ideas
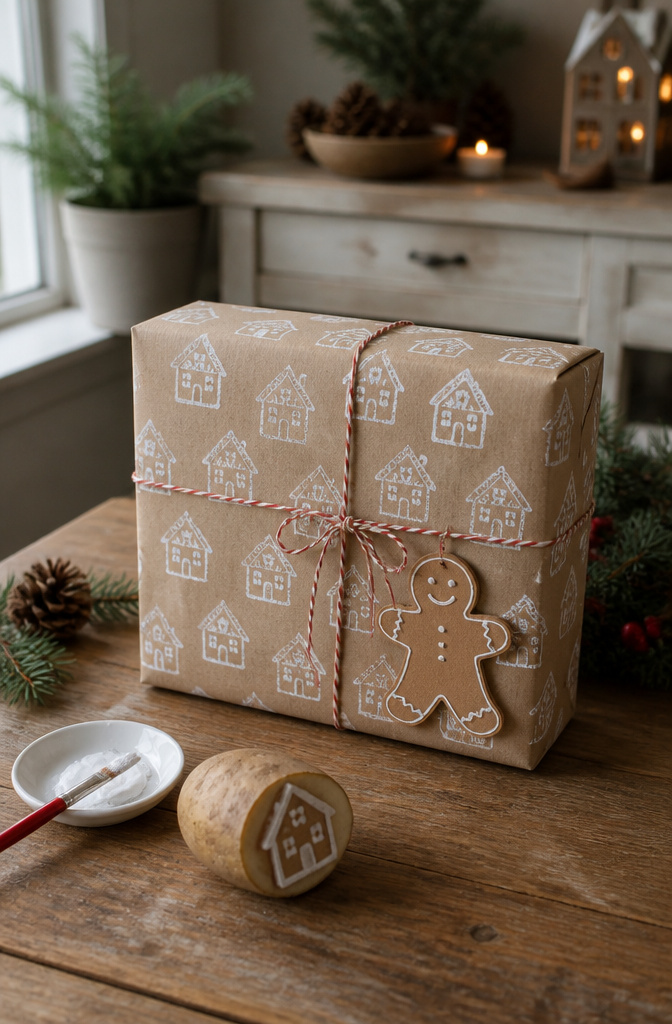
Gingerbread wrapping paper starts with a potato stamp and brown craft paint. I cut a simple house silhouette, pressed it into a dish of paint thinned with a little water, and stamped in rows across kraft paper. The trick is letting the stamp sit in paint for ten seconds between prints so the image stays solid without turning to mush. For color, cinnamon-brown reads festive; anything darker than a paper bag starts looking muddy under tree lights.
Tags are easier. A gingerbread man punched from cardstock, outlined with a white gel pen for icing, and hole-punched through the head works on any package. I tied mine with baker’s twine instead of ribbon because the matte finish keeps the whole thing from looking like a bakery ad.
Whether gifts should match tree ornaments depends on how busy your tree already is. Last year my gingerbread ornaments were simple salt dough shapes, so the stamped paper tied the room together without competing. If your tree holds full glitter houses and candy garlands, let the gifts stay quieter with just the tags. Two gingerbread motifs in the same sightline is usually one too many.
Gingerbread House Kits and What They Actually Include
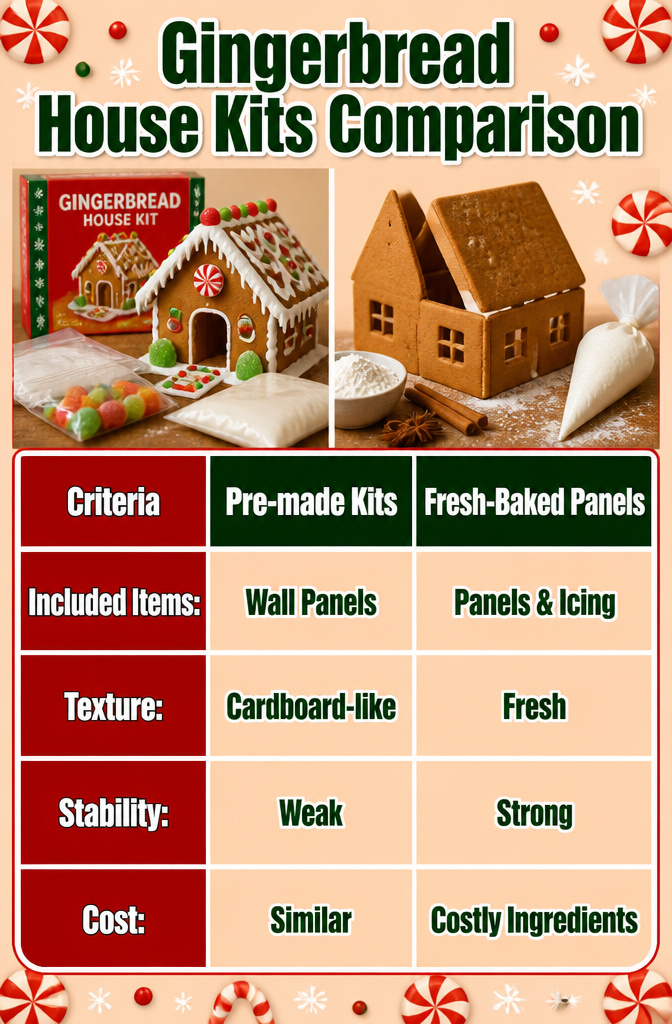
Pre-made gingerbread house kits usually ship with pre-baked wall panels, a bag of royal icing mix, and a handful of hard candy decorations. The panels save time, but the icing is often the weakest part of the package. It dries too soft or cracks under pressure, so most people who build more than one house end up mixing their own batch from powdered sugar, meringue powder, and water.
The gingerbread itself in these kits is technically edible, though the texture tends toward cardboard after a few days of air exposure. For decorations that sit on a mantel for three weeks, that shelf stability is actually useful. For eating, fresh-baked panels win every time.
Treat kit gingerbread as craft material, not dessert, and you will stop worrying about whether it tastes good.
Price-wise, a standard kit runs about the same as buying a bag of flour, molasses, and spices separately, but the kit saves you the oven time and the risk of walls that warp while cooling. The real savings come from skipping the kit’s candy accessories, which are mostly filler, and buying your own gumdrops or peppermint disks in the colors you actually want.
Brands that use thicker panels, around a quarter inch, hold their shape during assembly without bowing at the roofline. Thinner panels need internal bracing or they sag within hours. If the box does not list panel thickness, the weight of the finished house is a decent proxy. Heavier kits tend to be sturdier.
Royal Icing, Fondant, and Edible Markers
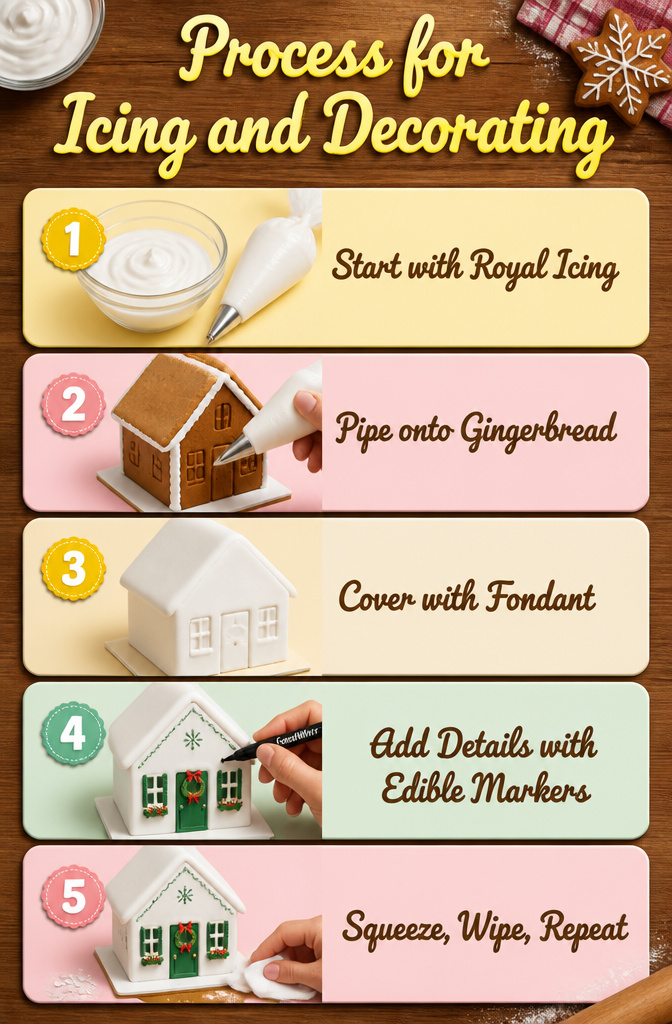
Royal icing is the one that keeps gingerbread houses from sliding apart, and the same batch pipes snow texture onto roofs and icicles along eaves. It dries rock-hard, which is the point, but that also means a clogged tip or a shaky hand turns into a cracked line you cannot smooth away. Fondant covers surfaces the way drywall covers studs: lay a thin sheet over a wall or roof and you have a blank plane for cutters to stamp out shutters, doors, or delicate snowflake shapes. The catch is air pockets trapped underneath, bulges that show through like a wrinkled tablecloth no amount of sanding sugar will hide. Edible markers, the FoodWriter kind, skip all the squeeze-bag drama; draw trim, window crosses, or a front-door wreath directly onto that fondant base, or straight onto bare gingerbread if the surface is smooth enough. Fine details are their strength, but the ink can feather on anything porous, so fondant first is the safer play. Beginners should start with royal icing. It is forgiving in the only way that matters: squeeze, wipe, squeeze again, and the mistakes flake off once dry.
Piping Bags, Cookie Cutters, and the Rest
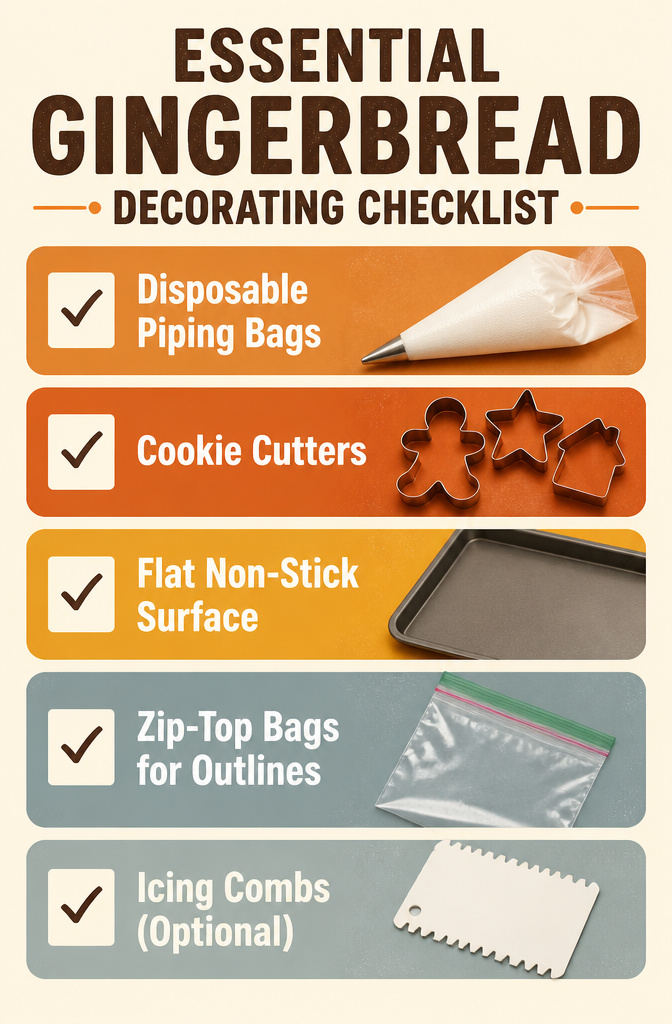
Royal icing work comes down to three tools that show up in every project: something to squeeze with, something to cut with, and a flat surface that does not stick.
Disposable piping bags win for gingerbread because the grease from buttercream or royal icing lingers in fabric ones no matter how hot the wash cycle runs. A pack of fifty costs about what two reusable silicone sets do, and for a single weekend project the math is obvious. If you are out of bags, a zip-top sandwich bag with one corner snipped works for thick outlines; it will not hold a metal tip for fine detail, but it gets the cookie decorated.
Cookie cutters in the three-to-four-inch range get the most use. Anything under two inches breaks when you lift the raw dough, and five-inch cutters eat too much of a standard batch. A basic set of five or six shapes runs under fifteen dollars and covers houses, people, and the pieces for a small village.
The one tool I would skip is the icing comb or textured scraper. Gingerbread decoration is about the line work, not the flat surface finish, and a butter knife dragged through wet icing gives you the same roof-shingle look without another purchase.
Frequently Asked Questions
What are some easy gingerbread decorating ideas?
Painting a store-bought gingerbread house kit white and adding gray shiplap lines makes candy trim read as intentional design rather than clutter. Puffy paint on small wood house blanks gives a piped-icing look without mixing royal icing. Dollar store embossed tin-look ceiling tiles, cut into shapes and washed with brown acrylic, already have the texture of piped icing before you start.
How do you make a gingerbread house?
Kit panels save time and hold their shape better than thin homemade walls; paint before assembly for a clean finish. For edible versions, royal icing made from powdered sugar, meringue powder, and water works more reliably than most kit icings. A standard kit costs about the same as buying flour, molasses, and spices separately, but skips the oven time and warping risk.
What materials do I need for gingerbread decorating?
Essentials include royal icing for assembly and piping, disposable piping bags rather than reusable fabric ones, and cookie cutters in the three-to-four-inch range for the most useful sizes. For non-edible projects, air-dry clay, wood house blanks, or embossed metal tiles work as bases. Ground cinnamon mixed into off-white latex paint gives primitive gingerbread men both color and lasting scent.






