
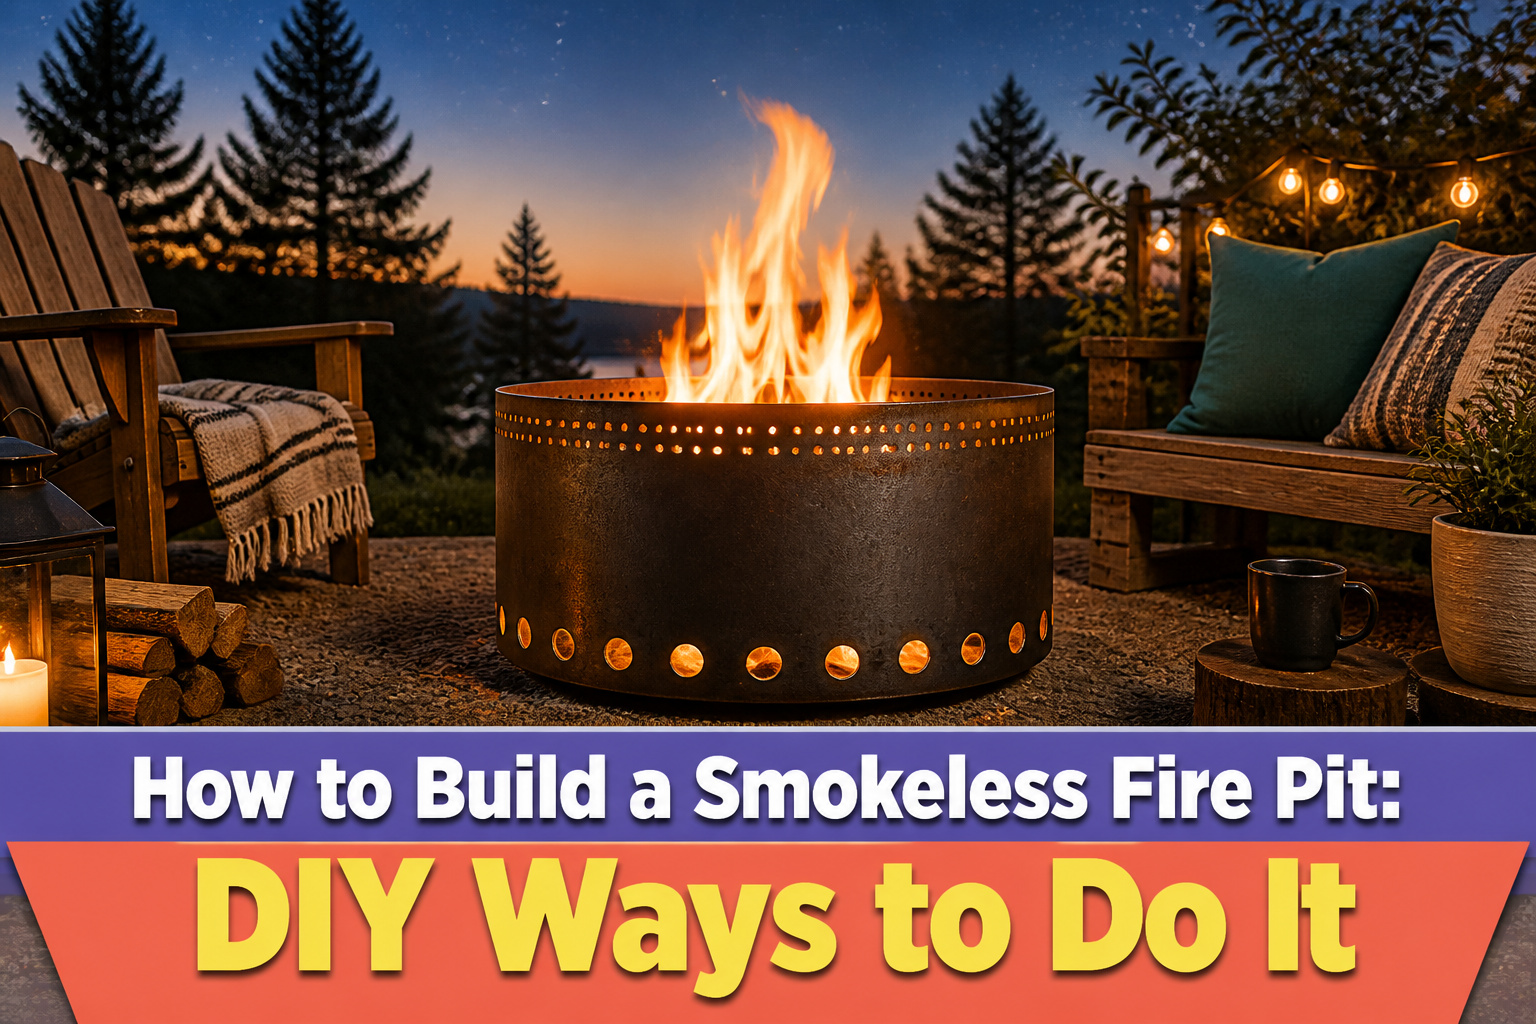
A smokeless fire pit you can build for roughly $20 in salvage steel and one weekend, though most first-timers ruin the airflow by drilling matching holes top and bottom. The holes must differ: 1/2 inch and tight at the top for secondary combustion, 1 inch and wider at the bottom for oxygen feed. Get that wrong and the fire smokes no matter how dry your wood is.
1. Build the Fire Pit Structure
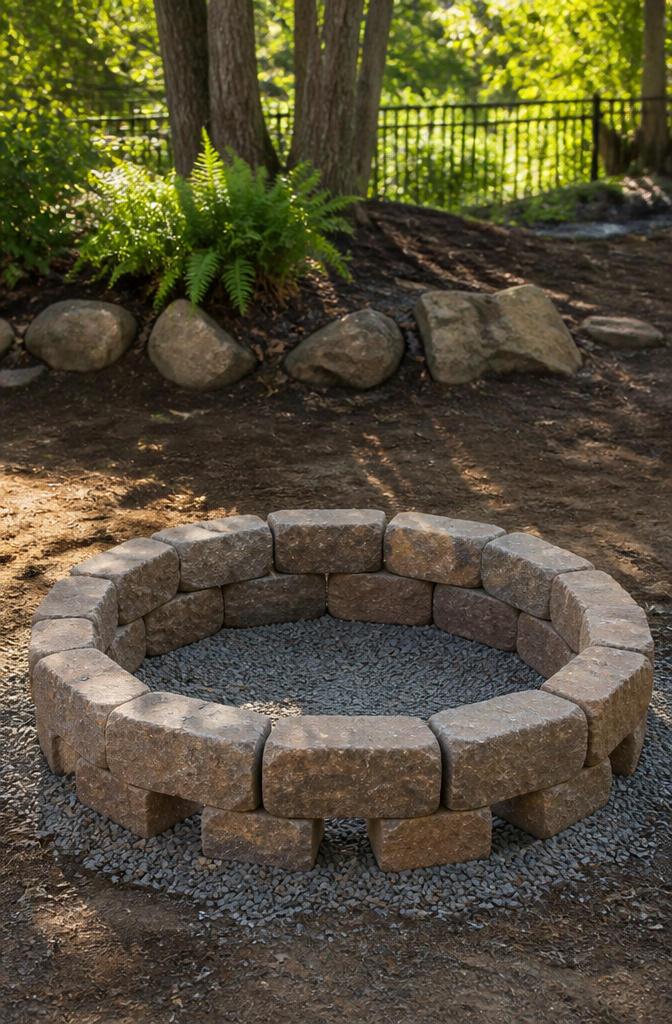
Tumbled fire pit stones or standard pavers both work for the base ring, though the tumbled ones seat together with a little more forgiveness if your circle isn’t perfectly round. Lay them dry first and walk the ring to feel for wobble before you commit. Twelve stones gave me an inner diameter of about 33 inches, which leaves just enough room to drop a 30-inch segmented fire pit ring inside with a snug fit.
Leave four gaps in the bottom row where the stones should sit. These openings pull air up through the gravel bed instead of choking the fire at the rim. Speaking of that bed, pour in a layer of gravel after the ring is set and before the final course of pavers. It locks the base in place and keeps drainage from turning your pit into a birdbath after rain. The gravel also means you can level a slightly uneven patio slab without mixing concrete.
2. Add the Fire Pit Ring
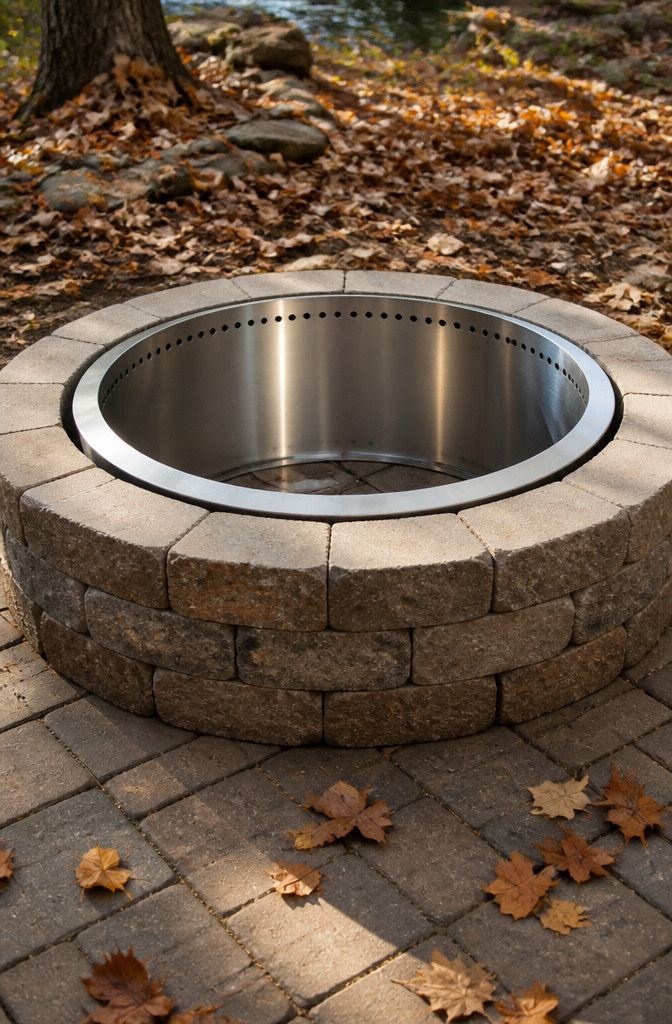
A 30-inch segmented fire pit ring drops into the center of the structure and rests on the pavers below. That ring needs to sit about 2–3 inches inside the wall all around, leaving a gap that becomes the air chamber. The flange at the top should overhang the stones by roughly an inch, covering the joint and holding everything in place.
Without that gap, the smokeless design does not work. The chamber is what feeds secondary air up the walls to reburn smoke before it escapes. A ring that fits too tight leaves no space for airflow; one that sits too loose wastes fuel and lets heat escape sideways.
I watched three builds before I understood why the lip matters. The overhang is not decorative. It shields the gap from debris, keeps the ring from sinking, and gives you a clean edge to brush ash off of. If the ring you found has no flange, find one that does, or plan to fabricate a rim. The rest of the smokeless logic depends on this fit being right.
3. Drill Holes in the Fire Pit Ring
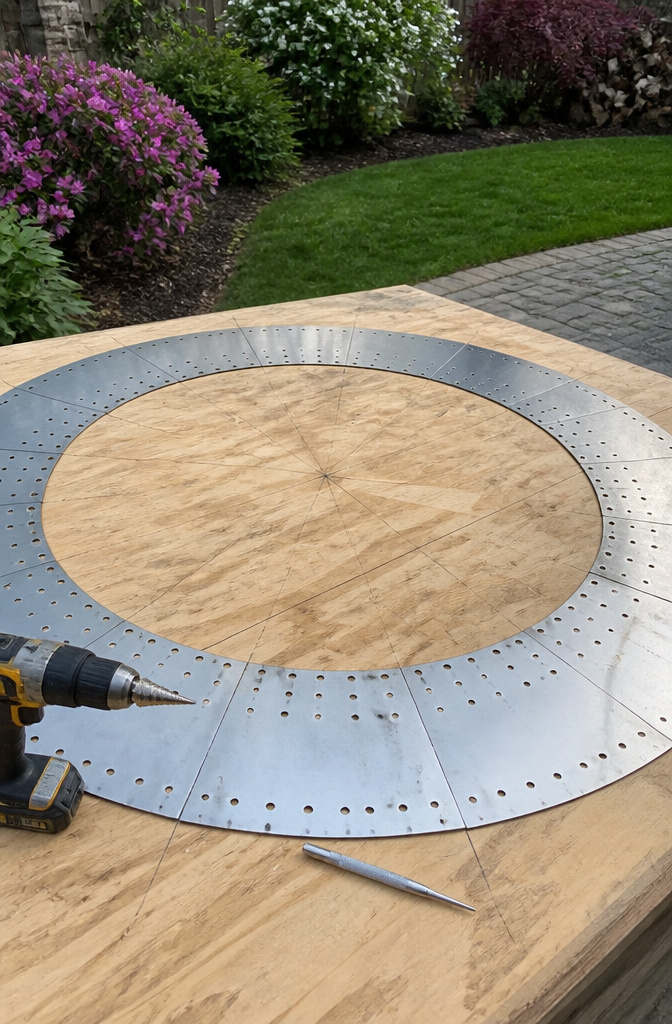
Air needs two separate paths through the fire pit ring to make this work. Top holes should be 1/2 inch in diameter, spaced 1-1/2 inches apart; bottom holes should be 1 inch in diameter, spaced 3-3/4 inches apart. That difference in size and spacing is not a mistake. The smaller, tighter top holes feed secondary combustion, burning off the smoke before it escapes, while the larger bottom holes pull in the fresh oxygen the fire needs at its base.
I laid out the ring on a scrap of plywood first and marked every hole with a center punch so the bit would not wander. A step bit works better than a twist drill on thin steel; you are less likely to grab and chew the edge. The bottom row sits about an inch up from the floor of the ring so ash does not immediately clog it.
The counts I have seen are 60 holes up top and 24 below, but I stopped counting once the spacing looked even. What matters more than the exact tally is keeping that air gap consistent so the draw stays balanced between the two zones.
4. Test the Fire Pit
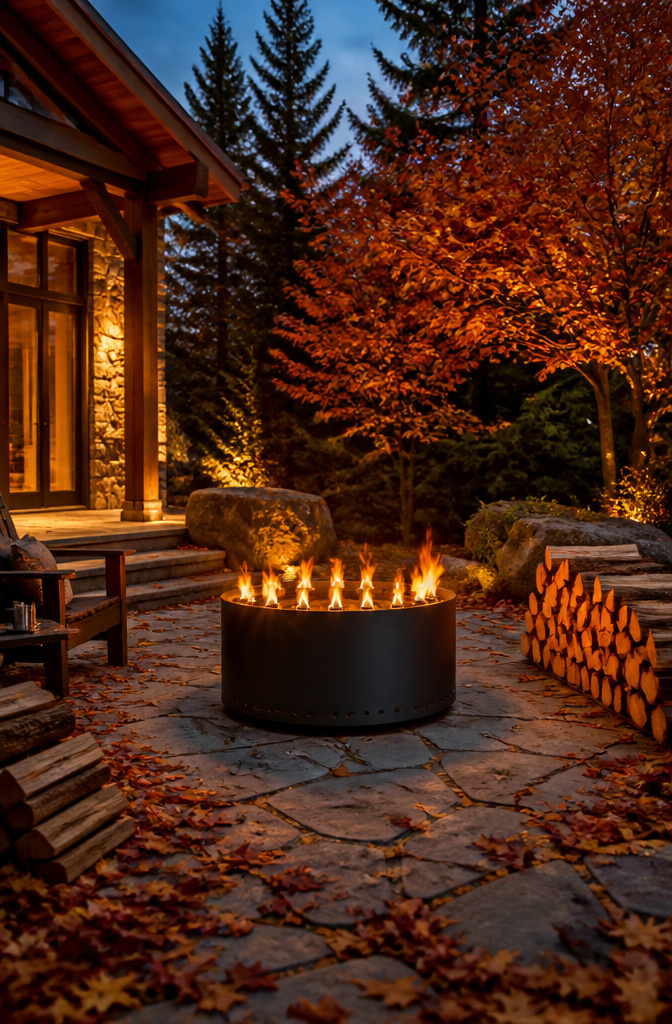
Dry firewood is non-negotiable for this test. Wet wood will smoke no matter how good your airflow design is, so I keep a pile of split hardwood that sat under cover for at least six months before I even think about striking a match.
The fire needs to run hot: 550–700 degrees Fahrenheit is where secondary combustion kicks in. I feed it steadily for the first half hour without fussing, letting the walls heat through and the draft establish itself. Rushing to judgment in minute ten is the mistake I made on my first build. The smoke hangs around until the temperature climbs high enough to burn those exhaust gases a second time.
You know the airflow is working when the flames start dancing from the top holes, not just the base. That upward blast of heated air hitting the fire from inside the rim means your double-wall gap is drawing and preheating correctly. I watch for the smoke to thin to near nothing and for the flame to tighten into a cleaner, more intense column. If it stays smoky and sluggish past forty minutes, the holes are probably too small or the gap between walls is clogged with ash from the build.
5. Steel Drum Smokeless Fire Pit
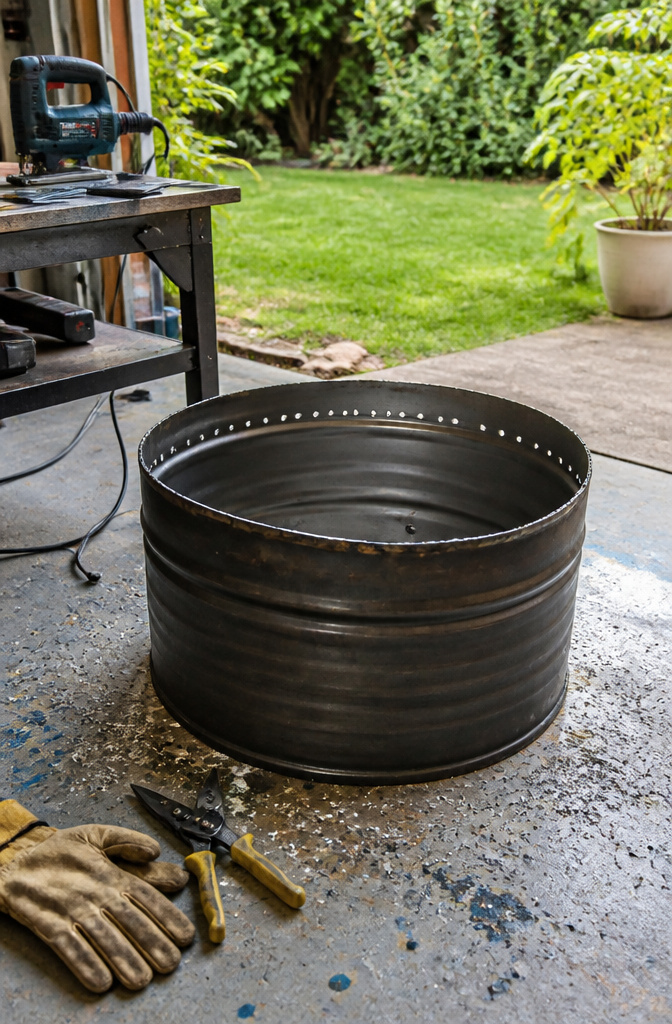
A 55-gallon steel drum runs about $20 at a salvage yard, which puts it well below the cost of a store-bought ring and a stack of pavers. The trade is effort: this build needs a way to cut metal clean, and the ring-and-paver method never asks for that.
The drum starts whole, lid and locking strap included, plus a spare lid for the cap. Cutting it roughly in half horizontally gives you the outer shell. One of those halves then gets slit straight down the side, squeezed to a smaller diameter, and nested inside the other to create the double-wall gap that makes the smokeless draw work. A bottom gets added, the cap bridges the inner and outer walls at the top, and holes go in three places: around the base outside, through the bottom inside, and around the top edge inside.
Checking the label matters. A drum that held orange juice concentrate is one thing; a drum full of chemicals you cannot name is another, and those are worth walking past. The finished pit will not match the clean look of a retail model, but the airflow geometry is the same.
6. Fire Ring Smokeless Fire Pit
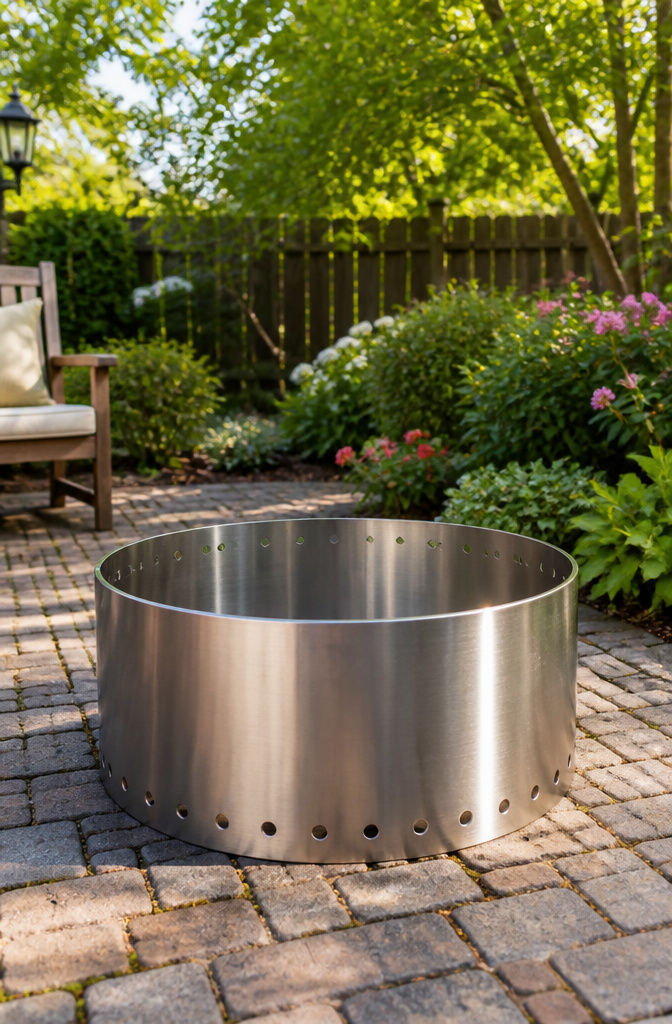
A steel stock ring with drilled holes is the less theatrical cousin of the segmented burn barrel, and sometimes the better choice. You are not cutting apart a 55-gallon drum and wrestling with jagged edges; you are buying a ready-made ring, marking a pattern, and boring holes at two levels. The holes near the bottom feed the fire directly with oxygen for primary ignition, while upper holes draw heated air down the wall to burn off smoke before it rises.
I spent a long evening comparing the two approaches after realizing the drum build demands a jigsaw with a metal blade, a deburring tool, and enough patience to keep the cuts square. The stock ring skips all of that. It also sits lower to the ground, which matters on a small patio or anywhere you want the fire visible from seated height without building a raised surround.
The catch is airflow geometry. A drum’s full cylinder lets you stagger intake and exhaust holes around the full circumference. A stock ring gives you less vertical wall to work with, so hole placement needs to be precise. Too few holes and the fire smolders; too many and the ring weakens. I would rather own one mistake with a $40 ring than with a drum I already cut wrong.
Pick the ring when you want a metal fire pit in one evening, not one weekend. Pick the drum when you need the volume for longer burns or want the project itself to feel like a build.
7. Battery-Powered Blower Smokeless Fire Pit
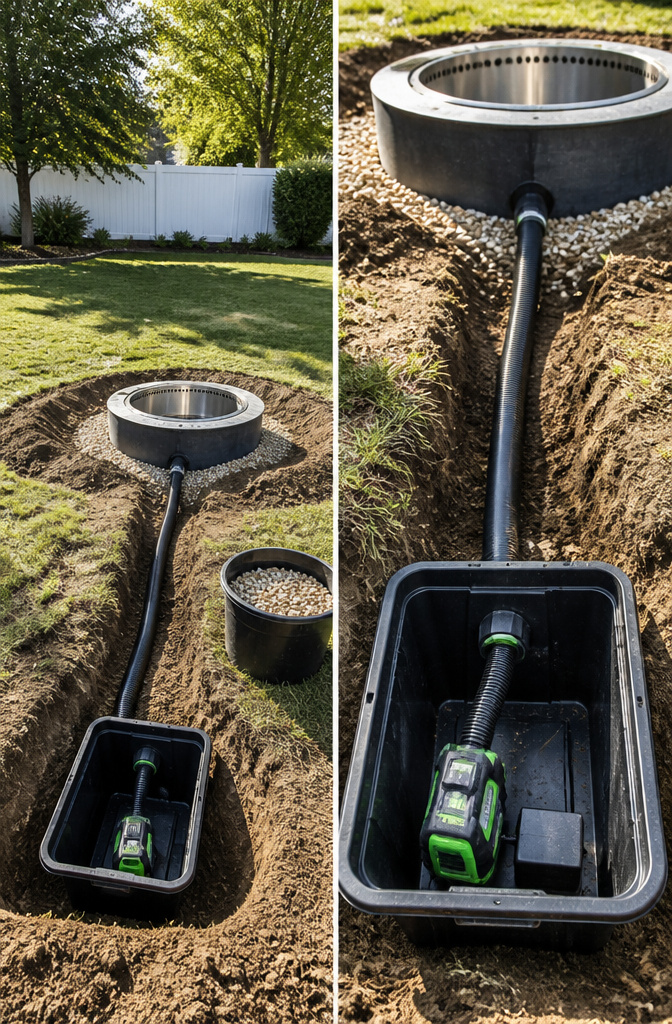
A battery-powered blower setup gives the most precise control over airflow of any DIY method, though it also demands the most digging. The trench for your blower piping needs to run 6–8 inches deep and wide from the pit to wherever you house the mechanical box, which for most builders means a heavy-duty plastic tote with a removable lid buried roughly 16 inches down at the trench’s midpoint.
What convinced me, reading through builds where people walked through their mistakes, was how much grief the groundwork causes. One builder hit rock three inches down and spent hours muscling stone out before the ventilation system went in smooth. The pit ring itself sits in a 36-inch diameter hole about 6 inches deep; the trench extends another 3.5 feet to the mechanical box, then continues 2 to 7 feet past it to your air intake depending on dryer hose length.
Inside the tote, a scrap 2×4 bolted to the floor raises the blower off the bottom. You will want to drill drainage holes after the first few rains. Cut 4–5 inch circles in the tote sides for ducting, test the 12V connection with winged wire connectors before you bury anything, and keep the whole assembly accessible without tearing up your yard.
8. Dakota Fire Hole
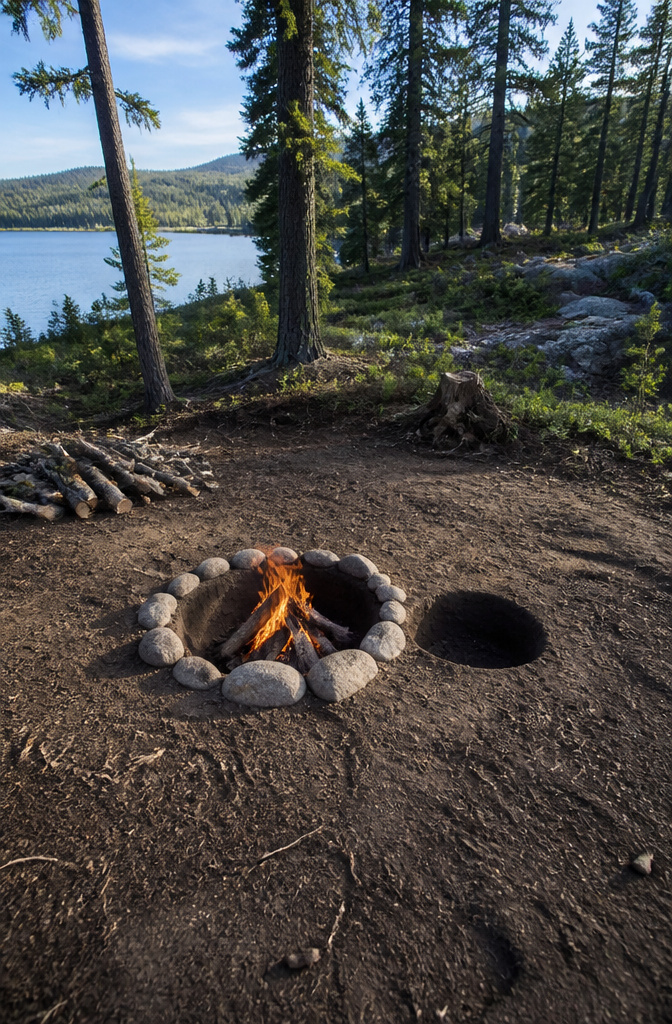
The Dakota fire hole is about as simple as a smokeless setup gets: two holes in the ground, one for the fire and one to feed it air through a connecting tunnel. The fire burns in the bottom of the first pit, and the second hole draws fresh oxygen underground so the flames get hot enough to reburn their own smoke before it ever reaches your eyes.
This is a weekend camping trick, not a patio plan. You need bare mineral soil you can legally dig, and you need to fill both holes back in when you’re done. The grass on top of a suburban yard will not forgive you, and the neighbors will not either.
I looked into this for my own rental after I priced out steel rings and gave up. The appeal is real: a shovel, a trowel, and maybe thirty minutes of digging replaces a whole shopping list. The catch is that every burn starts with excavation, and every burn ends with a scar in the lawn that takes a season to heal. For a permanent backyard gathering spot, the work repeats itself or the yard suffers.
If your goal is one night of cooking over clean flame with gear you already own, the Dakota hole delivers. If you want to walk outside, light a match, and have company over, this is the wrong tool.
How Smokeless Fire Pits Work
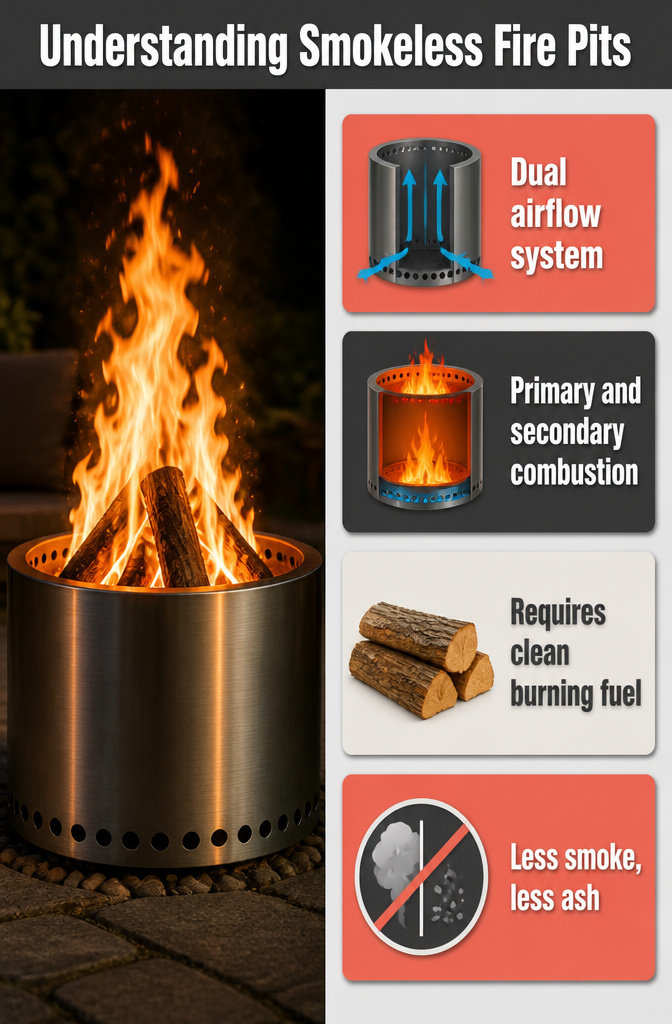
Smokeless fire pits work by feeding oxygen to the flame from two directions instead of one. Fresh air enters at the base through gaps in the structure, feeding the primary fire directly. More air gets drawn into the space between the inner and outer walls, heats up as it rises, and shoots out through holes drilled around the top of the fire pit ring. That second blast of hot oxygen ignites the exhaust gases that would otherwise drift off as smoke, a process called secondary combustion. The result is a hotter, more complete burn with less leftover ash. Some designs trap smoke inside double walls to burn it there; others channel the heated air through a convection cavity to the upper part of the pit. Either way, the airflow system matters more than the fuel. Get the air moving from bottom and top in roughly the right proportions, and even ordinary firewood burns surprisingly clean.
Materials and Tools
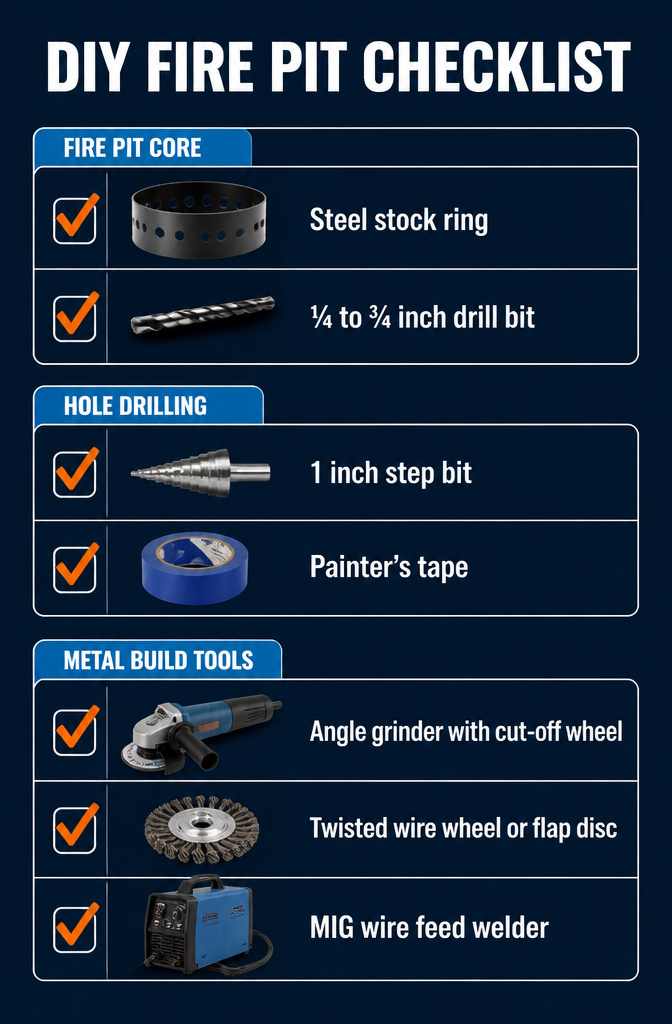
The steel stock ring sits at the center of most builds, and the holes you drill into it are what separate a smoky hole from a clean burn. A ¼ to ¾ inch drill bit handles the primary air supply near the bottom of that ring, where oxygen feeds the fire directly. Some builders mark their spots with painter’s tape on the inside, then start with pilot holes before opening them to 1 inch with a step bit for a cleaner edge.
For metal builds, an angle grinder with a cut-off wheel cuts the drum, and a twisted wire wheel or flap disc strips paint before welding. A MIG wire feed welder joins the pieces; a flux core welder works too, though the slag needs cleaning after.
Brick or paver builds stack around the ring with gravel spread across the bottom so the wood can breathe. High-heat black spray paint finishes the steel if you want it to look intentional after the first rain.
Passive vs. Active Airflow
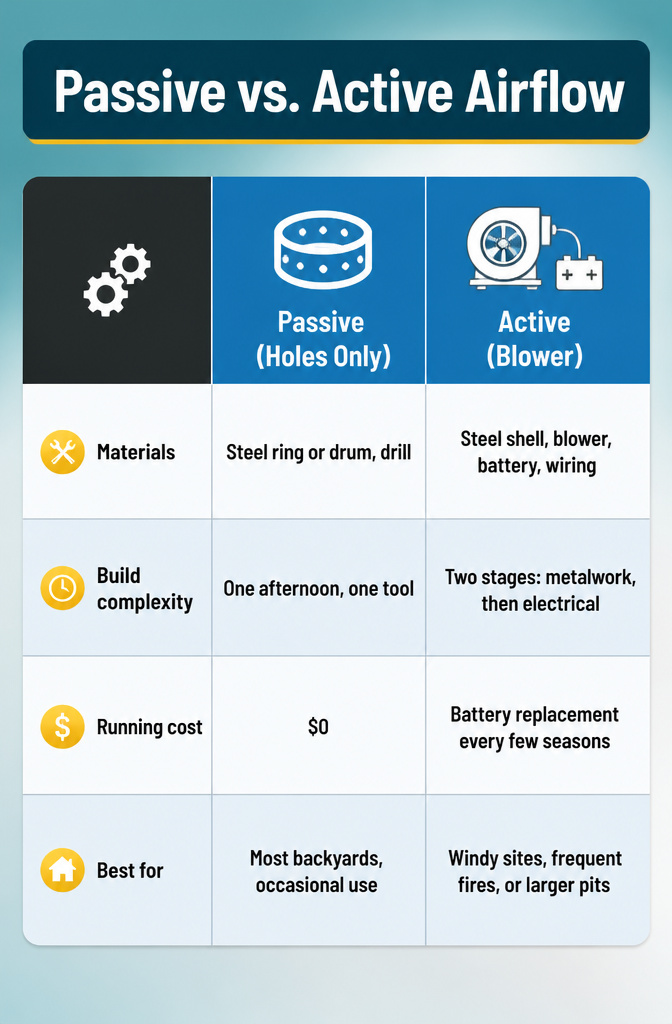
The difference between passive and active airflow is what separates a weekend project from something that needs a hardware run and a power source nearby. Passive designs rely on holes drilled at two levels: intake low on the outer wall and exhaust higher up, creating a natural draft that pulls air through the burn chamber. That airflow is enough for most backyard fires, and the build stays simple enough to finish in a single afternoon with a drill and a steel ring or drum.
Active systems add a battery-powered blower that forces air into the same channels. The fire burns hotter and cleaner, but the cost jumps by the price of the blower unit and the weatherproofing to protect it. You also need a charged battery every time you light up, which means one more thing to store and maintain.
| Passive (Holes Only) | Active (Blower) | |
|---|---|---|
| Materials | Steel ring or drum, drill | Steel shell, blower, battery, wiring |
| Build complexity | One afternoon, one tool | Two stages: metalwork, then electrical |
| Running cost | $0 | Battery replacement every few seasons |
| Best for | Most backyards, occasional use | Windy sites, frequent fires, or larger pits |
For a first build on a real budget, passive airflow is the place to start. The blower is a meaningful upgrade only if you already know you will use the pit enough to justify the extra cost and the extra step every time.
Frequently Asked Questions
How do I make my outdoor fire pit smokeless?
Build a double-wall design that pulls air in at the base and feeds heated oxygen through holes near the top of the fire ring. The secondary combustion this creates burns exhaust gases that would otherwise escape as smoke. A snug-fitting ring with top holes spaced 1-1/2 inches apart and bottom holes spaced 3-3/4 inches apart gives the balanced airflow you need.
What makes a fire pit smokeless?
A smokeless fire pit introduces air from both the top and bottom so the fire achieves secondary combustion. Fresh oxygen enters through gaps or holes at the base to feed the flames directly, while more air rises through the gap between inner and outer walls, heats up, and exits through upper holes to ignite smoke before it leaves the pit. The result is a hotter, more complete burn with little visible smoke.
What do you put under a smokeless fire pit?
Sand, bricks, or concrete slabs give you the stable, non-flammable base a fire pit needs. For paver builds, pour a layer of gravel inside the ring after setting it in place; this locks the base, aids drainage, and lets you level the pit without mixing concrete. Keep the pit at a safe distance from your house and any overhangs even though smoke and sparks are reduced.






