

DIY spooky decor is homemade Halloween decoration you build yourself, and the difference between a prop that lasts the season and one that collapses by Wednesday is usually a single choice you make before you start. A tomato cage scarecrow stuffed with straw, for instance, will fold at the waist after three days of rain; the same frame filled with plastic bags and tighter twine stands through a freeze. The projects below are tested, failed, rebuilt, and sorted by what actually worked.
Floating Halloween Candles
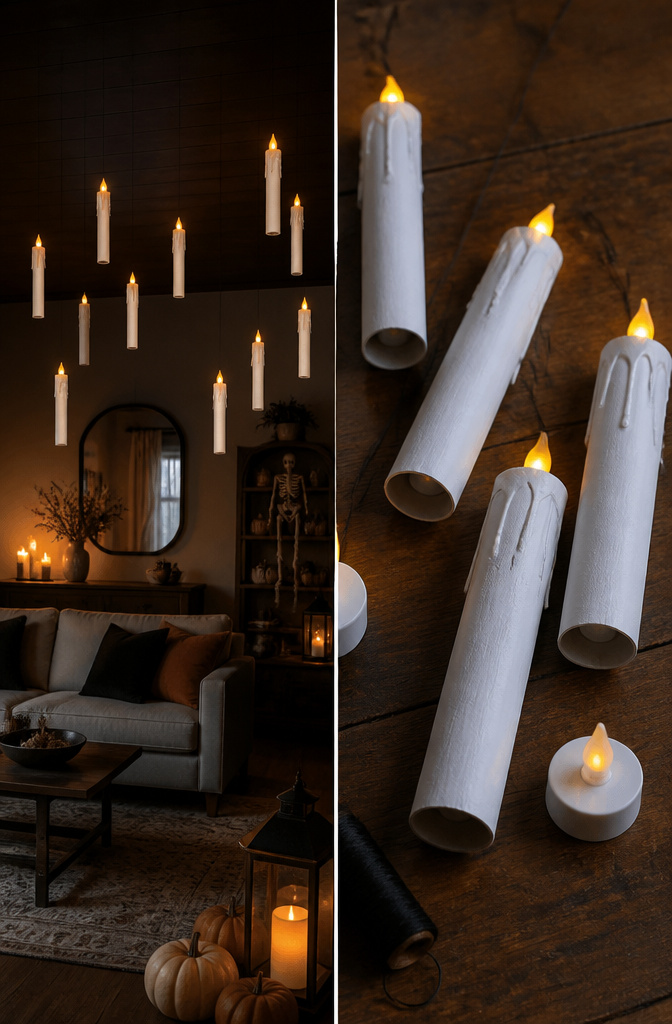
Paper tubes from toilet and kitchen rolls make the best floating candle bodies, since the cardboard takes paint evenly and weighs almost nothing. I cut mine to different heights, sealed one end with a glued disk of the same cardboard, and painted the outside with two coats of matte white acrylic so the surface looked like wax instead of fiber.
The illusion of levitation depends on hiding your suspension. I tried clear fishing line first, but it caught the light. What worked better was thin black thread against a dark ceiling or doorway, where the eye reads it as shadow. I punched three holes near the sealed base of each tube, knotted three threads, and gathered them to a single point above.
For the flame, I learned the hard way my first year. Real tea lights heated the cardboard enough to soften the glue and drop a candle into my punch bowl. Battery-operated LED tea lights with a warm flicker setting give the same glow without the risk, and the plastic ones with a slightly domed top look more convincing than the flat discs when viewed from below.
Light Up Spider Mason Jar
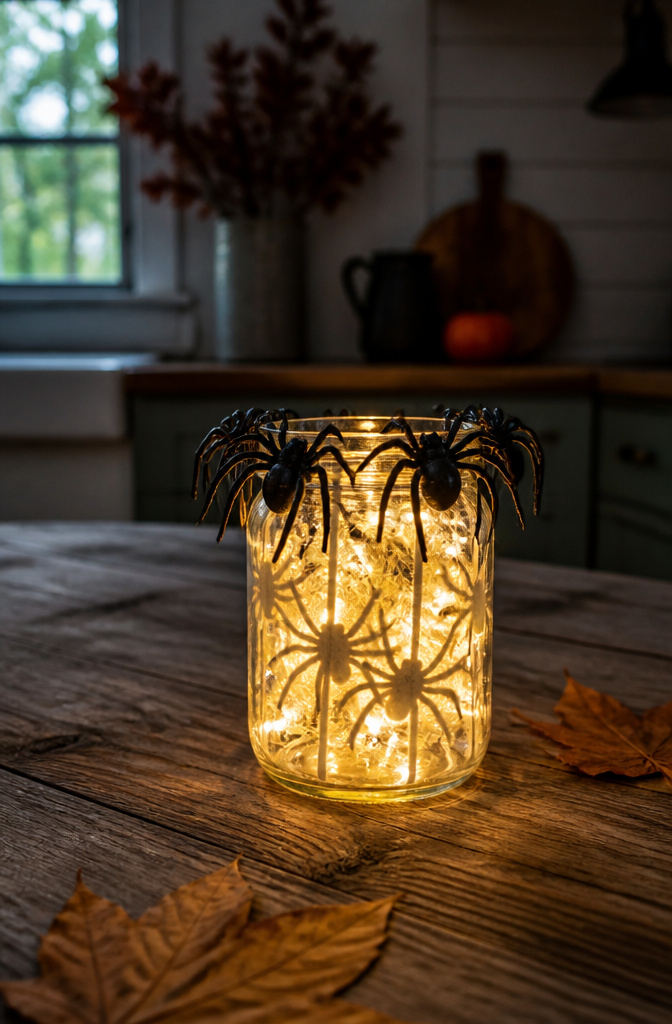
Mason jars and a string of battery-operated lights turn into spider-lit lanterns when the bulb sits low enough to cast the ring’s shadow upward against the glass. The plastic spider rings came from the dollar store Halloween aisle, the kind sold twelve to a pack in neon orange and black. I hot-glued them to the inside rim so the legs straddled the light, but the first jar I placed the bulb dead center, and the shadow shrank to a fuzzy blob no scarier than a smudge. Dropping the light two inches lower stretched the legs across the whole curve.
One jar stayed dark the whole night. The little slide switch on that strand had corroded where the battery box sat too close to condensation from the ice bucket nearby. Now I keep the battery pack outside the jar, running the wire through the lid’s vent hole, and check the switches before I set anything out.
Hocus Pocus Magic Spell Books
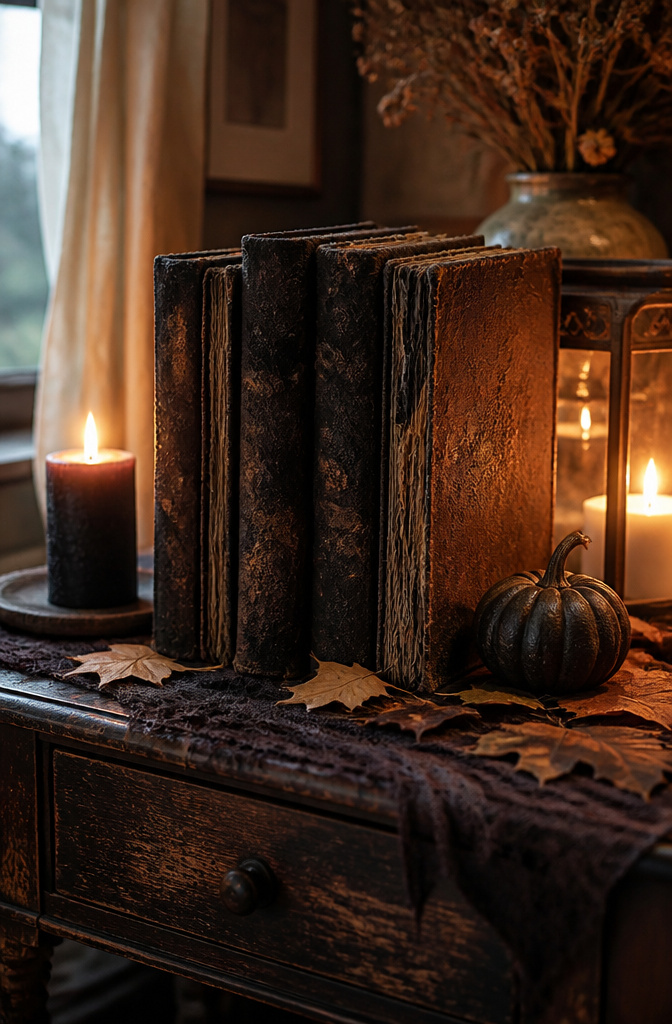
Old hardcovers from a thrift store run work better than anything new. The ones with fabric spines take glue and paint without warping, but I bent a 1970s chemistry textbook too far trying to give it that cracked-ancient look and the spine split clean through the binding. That one became a "burnt" book instead.
I used Apple Barrel Burnt Umber and FolkArt Licorice Black, both under $2 at Walmart. The brown went on first, watered down so the pages darkened at the edges without turning to mush. For texture, ground cinnamon and coffee grounds stuck into wet Mod Podge gave the covers a raised, grimy patina that reads as aged leather from across a room. The black acrylic came in last, dry-brushed over the high points to sink the titles into shadow.
The kitchen spices smell like autumn for the first week, which either adds to the effect or means you store these in a sealed bin until October 31. Cinnamon works; paprika just looks like you spilled marinara.
Wicked Witch Legs
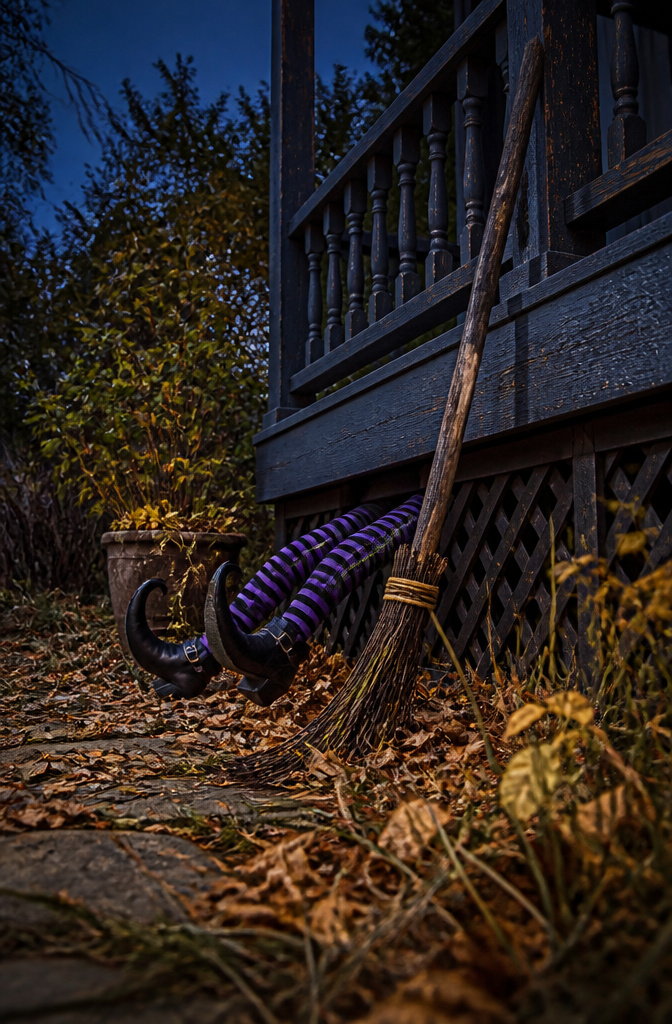
Striped stockings and witch shoes make the legs read instantly, even from the street. I bought a pair of black-and-white tights and two cheap pointed flats from a Halloween pop-up, then stuffed each leg with a pool noodle cut to length. The noodle bent wrong after two nights in damp grass, sagging at the knee so the whole thing looked like a broken umbrella. Wire coat hangers, straightened and taped the length, held their shape through rain and a hard freeze.
For the crushed-under-the-house look, I tucked the legs under my porch skirt with just the shoes and a few inches of stocking showing, like something dropped from above. In a garden bed, the same assembly works backward: stake the wire core deep and let the shoes kick up at an angle, as if the rest of her is still buried. A learner-driver sign on a broken broomstick, scattered nearby, turns a single visual joke into a small story passing parents will repeat.
Head in a Jar Prank
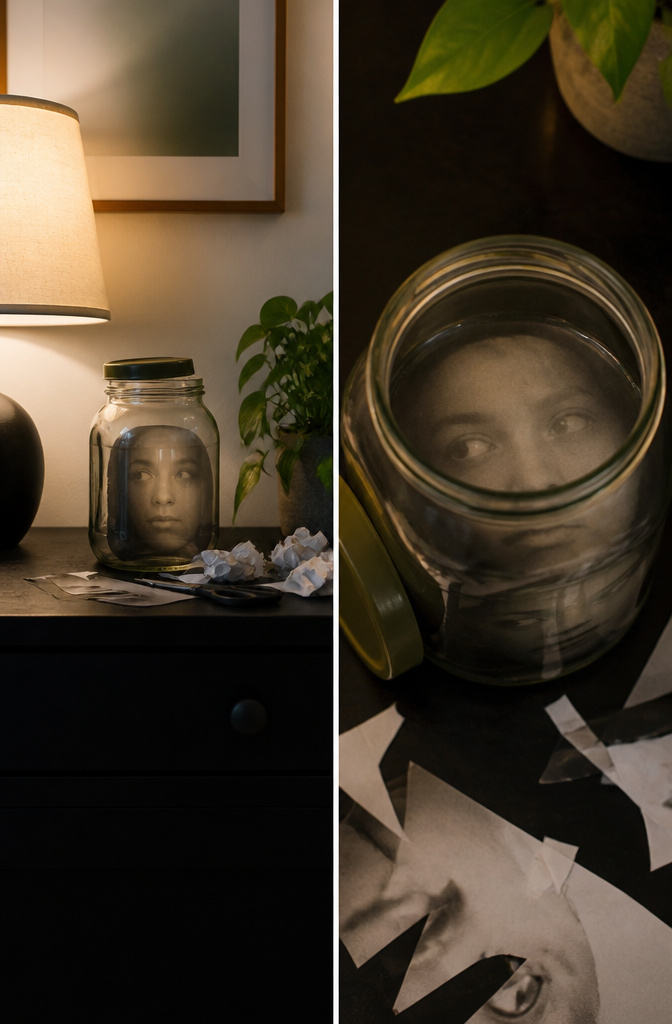
The head-in-a-jar illusion starts with a photo that looks flat wrong at first. I learned this going through tutorials online: you need a face shot straight on, not angled, then stretch the proportions in editing so the features look normal again when viewed through curved glass. GIMP handled the warp tool without trouble, and printing on standard letter paper let me trim to fit a gallon pickle jar I’d emptied and scrubbed clean.
My first print came out with a green cast that made me look seasick. The issue was the color profile; switching to sRGB before exporting fixed it, but not before I’d wasted about two dollars in ink on a face that looked better suited to a witch’s brew. A gallon jar leaves just enough room for a scaled head to float without folding, though anything smaller and the cheeks bunch at the sides.
DIY Giant Scarecrow
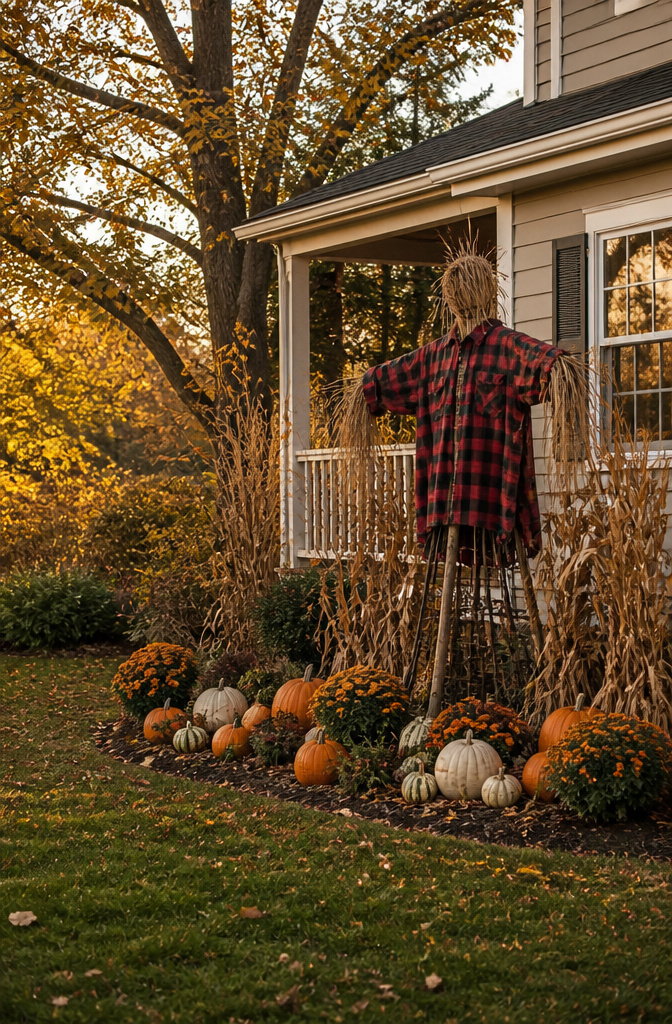
A tomato cage flipped upside down gives you the armature for a giant scarecrow in about twenty minutes, but the stuffing choice is where most builds split. I went with straw for the first version because it smelled right and the flannel shirt I found at a thrift store for four dollars hung better over organic bulk. Plastic bags would have saved the whole thing when the rain came. Three days after I set it up, the straw absorbed enough water to torque the cage wires past their balance point, and the scarecrow folded at the waist like a man taking a bow. The second build used bags, a tighter wrap of twine at the shoulder joint, and a drill to pre-punch the PVC arm crosspiece so the cage legs could zip-tie flush. Total time ran four hours, most of it stuffing and re-stuffing the shirt sleeves until the proportions stopped looking like a scarecrow in a muscle suit. A jigsaw is useful if you want to notch the crosspiece for a head-post seat, but a handsaw works fine. Power tools matter less here than patience with the stuffing density; too loose and the shape collapses in wind, too tight and the shirt buttons strain.
Painted Pumpkins
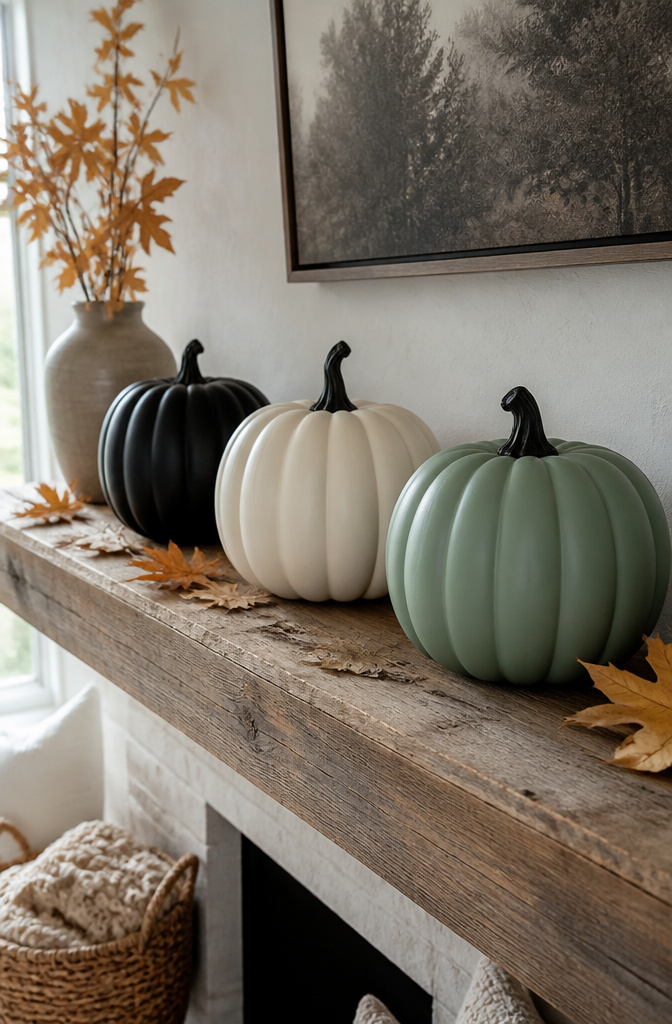
A monochrome pumpkin sits longer on the mantel than an orange one because it reads as intentional decor rather than leftover produce. I paint mine in flat black, warm ivory, and a muted sage that almost passes for dried moss. Annie Sloan Chalk Paint in Graphite covers a small pumpkin in a single coat with no primer, which matters when you are working through a dozen of them on a Sunday afternoon.
I learned the hard way about sealant. A spray acrylic I trusted for outdoor furniture turned every ivory pumpkin the color of old nicotine within two months. The ones I left unsealed faded slightly but kept their color; now I skip the topcoat entirely on indoor pieces.
Twelve small sugar pumpkins fit across my mantel with two inches between them, enough to read as a line without looking like a display at a garden center. Pastel versions, a dusty lavender and a blue-gray, work for October but slide straight into November without the bats-and-cobwebs dissonance of traditional Halloween orange.
Haunted House Garland
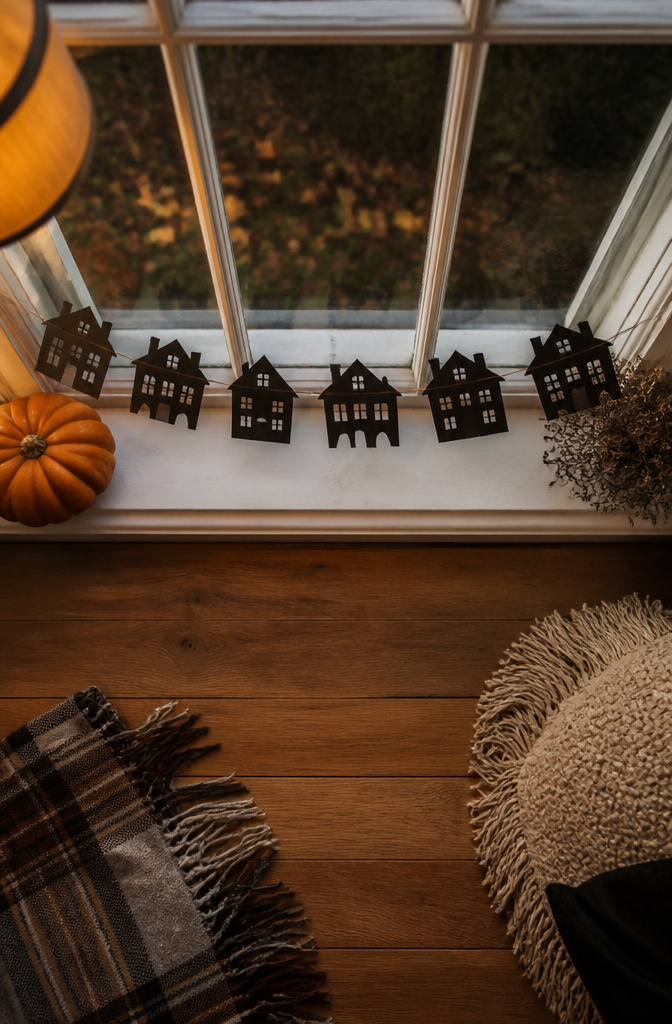
The first template I printed scaled to half the size of the window frame, so freehand drawing the house shapes took ten minutes and saved the evening. I cut the silhouettes from 110-lb cardstock, the heaviest my home printer feeds without jamming, and that weight held its shape through three Halloweens now. Twine strung across the back of each house gives the strand a rustic, slightly sagging line that reads abandoned; fishing line looked too invisible and too perfect for the mood I wanted. A standard hole punch set the string points an inch down from the roof peaks, and the houses spin less with two holes per piece than with one. I space them a hand-width apart on a six-foot swag, which leaves enough twine at each end to tie around cup hooks screwed into the window frame.
Paper Ghosts
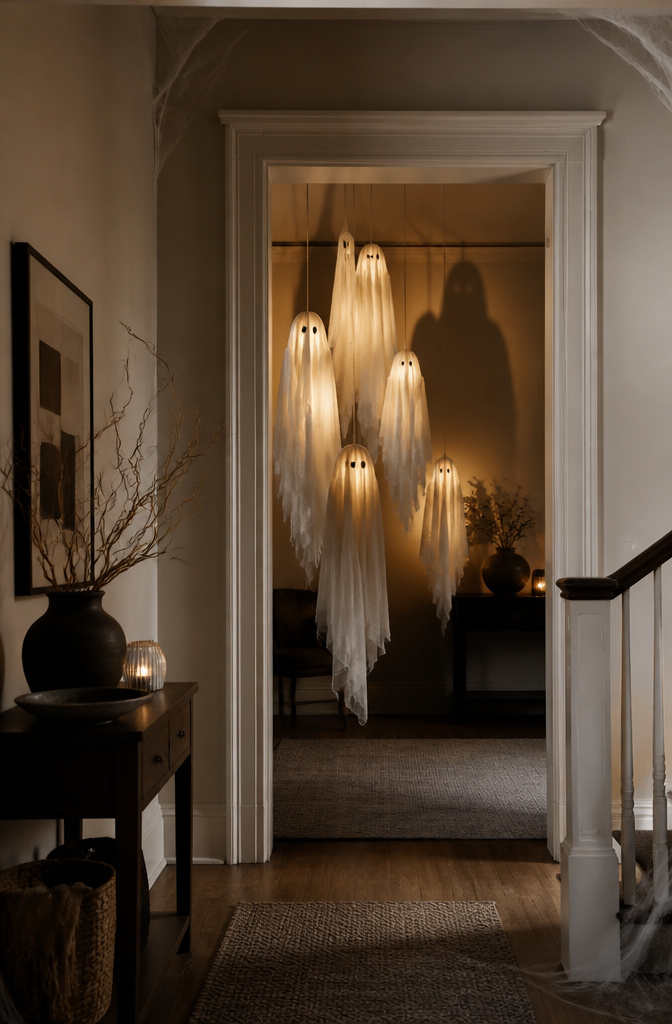
White paper and scissors will get you most of the way there. Fold a sheet in quarters, cut a half-oval with a tail, and you have a basic ghost that spins when hung from a doorway. The flat paper stays stiff, though, so the shape reads more like a cutout than something drifting.
Crepe paper fixes that. The same cutout in thin crepe falls open and shudders in any breeze from a vent or an open window. The weight is nearly nothing, so a single strip of Scotch tape holds it for the night.
A Sharpie face bleeds on crepe. The fibers wick the ink outward until the eyes look bruised. I switched to a fine-tip gel pen and pressed gently, dotting instead of drawing lines.
Where these matter is after dark. A porch light or a lamp behind them throws a double shadow: the ghost itself and a larger, softer silhouette on the wall or ceiling. Hang them at staggered depths, not in a straight row, and the shadows overlap in ways that fool peripheral vision. The paper version gives one shadow layer; the crepe gives two, the body and the fluttering hem, which is the difference between decoration and something that catches your eye twice.
DIY Halloween Skull Garland
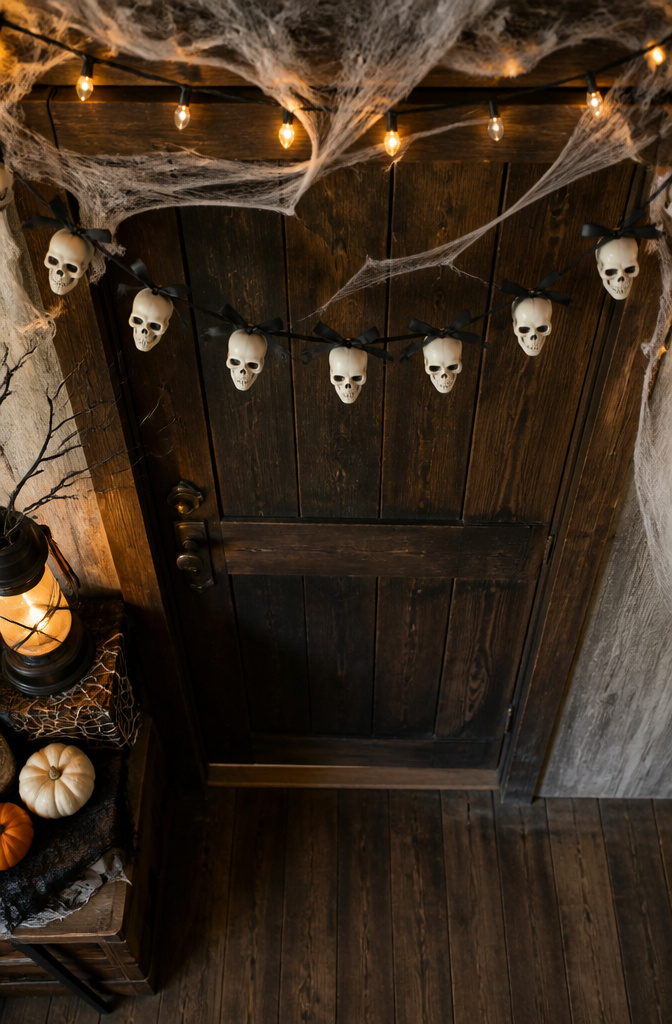
Paper skulls from the dollar store come in packs of twelve, which is just enough to stretch across a standard doorway without looking crowded. I spaced mine about eight inches apart, which kept the line from sagging and gave each skull room to read as its own shape rather than a clump. Thread was my first choice because it disappears, but after the third skull spun backward and stared at the wall, I switched to thin black ribbon. The extra width gives the skulls something to grip, so they hang face-forward without any fuss.
Spooky Birdhouses
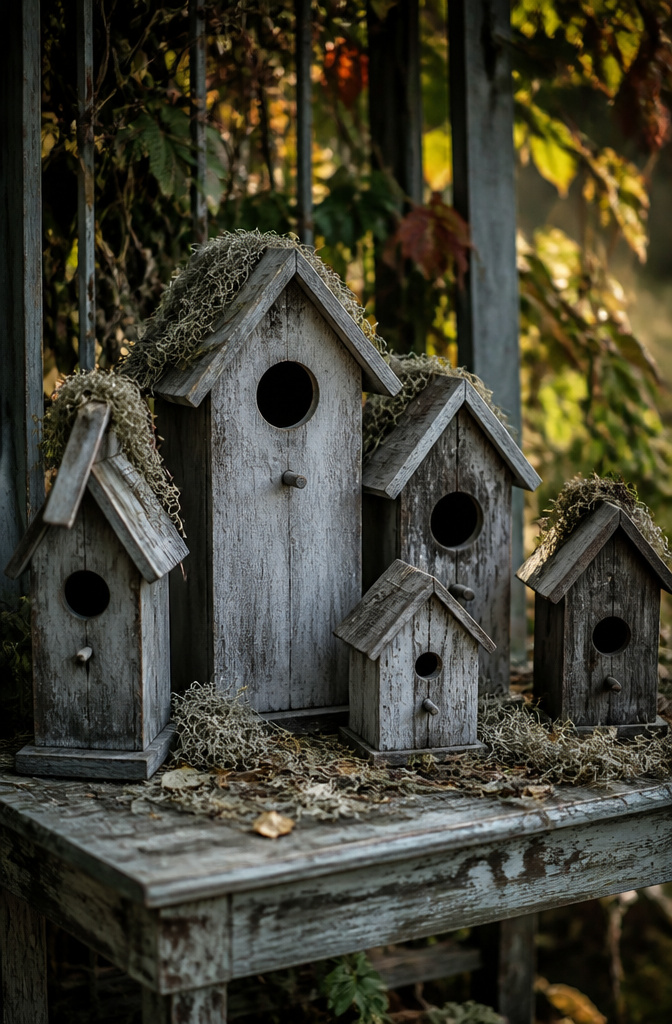
The little plywood birdhouses from the craft store, the kind that run a few dollars each, take paint better than you’d expect. I mix a gray wash from one part black acrylic to four parts water, brush it on, and wipe it back with a rag before it sets. The grain still shows through, but the whole thing reads as weathered wood rather than bright hobby plywood.
The hole size is what sells the look. A one-inch entrance looks like something a wren might still use. A two-inch hole reads as abandoned, the kind of place spiders have taken over. I learned this by setting six on a shelf and asking a friend which felt haunted. She picked the larger holes every time.
Moss was where I overreached. I glued sheet moss from the floral aisle to the roofs, misted them with water to set the glue, and set them on the porch. By November they had mold spots. Dried moss, or none at all, is the safer call. The gray wash alone, maybe a toothpick perch snapped halfway, reads as spooky without the maintenance failure.
Three or four clustered at different heights, two with small holes and two with large, give the sense of a village where some residents stayed and some did not.
Creepy Candle Holders
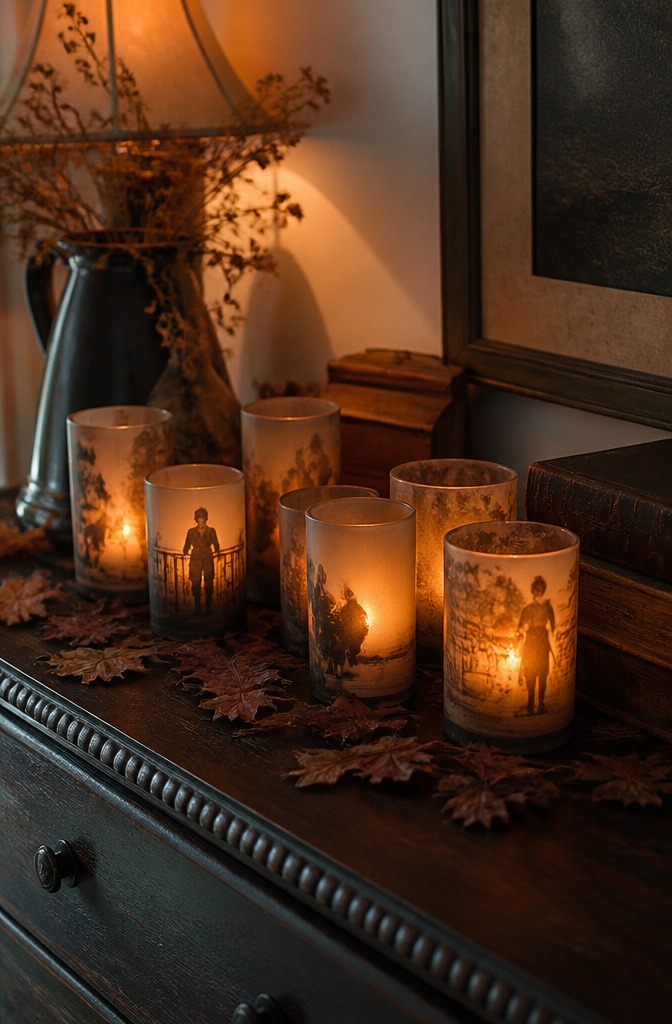
Glass votives from the dollar store and a bottle of matte Mod Podge turned into the project that actually looked haunted instead of craft-store cute. I printed a few vintage portraits I found online, one of a stern-faced family group that already looked like they were waiting for something, and trimmed the photos to wrap around the cylinders with a half-inch overlap.
The first attempt taught me the hard limit fast. I used a tea light, and within twenty minutes the glue bubbled at the seam where the paper met the rim. Tealights run too hot for Mod Podge on thin glass; votive candles no taller than two inches keep the heat low enough that the finish stays flat. That bubbled holder went to the back of the mantel, seam turned to the wall, where the flicker hides the flaw.
Matte Mod Podge was the right call against the glossy version. The finished surface catches light like aged varnish on an old frame, not like something that came out of a kindergarten class. Three thin coats, letting each dry to the touch before the next, gave me the depth I wanted without ridges.
Cheesecloth Ghost
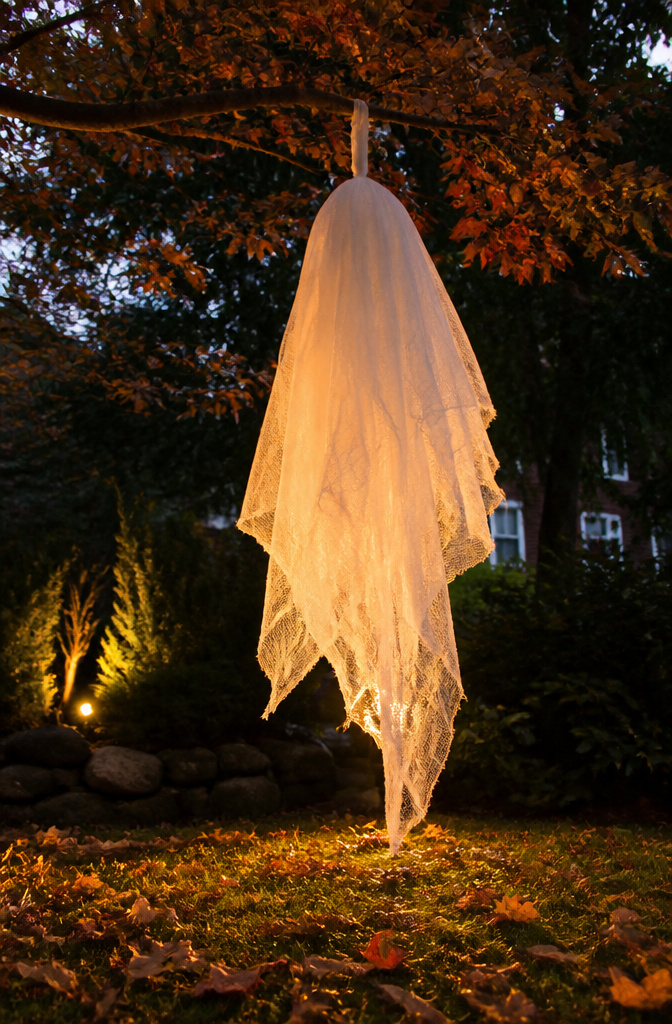
Cheesecloth ghosts start with a mold. A balloon or crumpled foil shaped into shoulders works fine, but the real work is in the fabric stiffener. I tried starch spray first because the can was already in the laundry room. The cheesecloth stayed too soft, the folds collapsed overnight, and the whole thing looked like a damp rag draped over a ball. Liquid stiffener, brushed on in two coats, dries hard enough to hold its shape through October.
The drying time runs about four to six hours between coats, longer if the air is humid. A fan speeds it up without risk. The wire armature I poked through the top to make a hanging loop was a mistake. Once the stiffener set, the wire tore straight through the hardened fabric when I lifted it. Now I form the loop from the same cheesecloth, twisted and stiffened into a rope, and let it cure with the body.
Peeling the dried shell off the mold takes patience. Work the balloon neck first, let air in slowly, and the whole thing releases without cracking.
DIY Witch Hat Garland
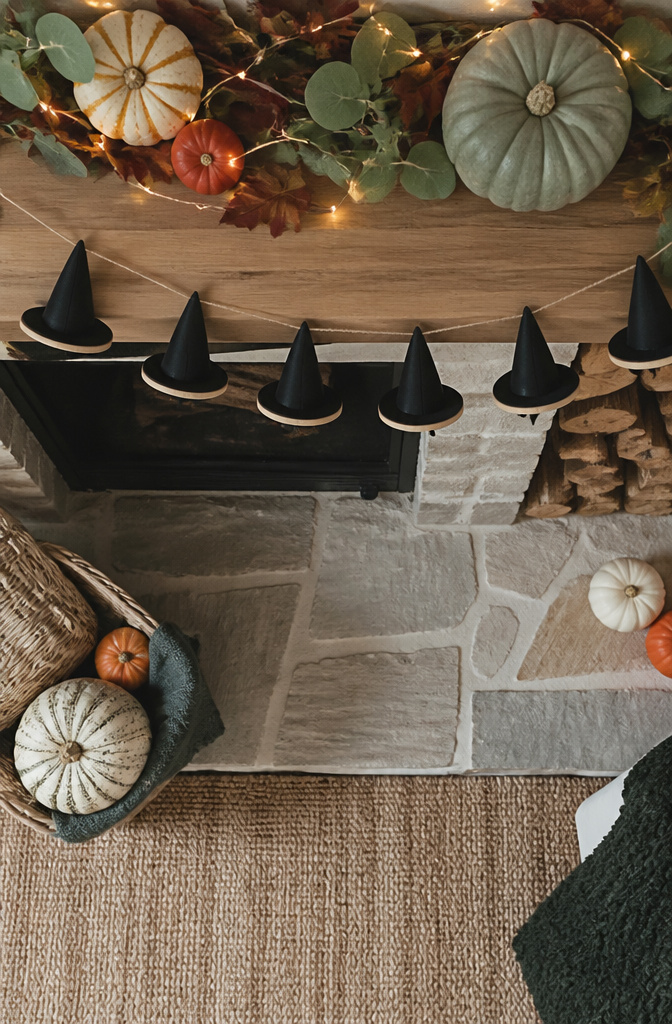
Wood circles from the craft store and black foam cones make a garland that reads as witch hats from across the room. The circles are the brim, the cones are the crown, and hot glue marries them at the center. Ribbon ties at the top held up all season; twine stretched and let the hats flip after a week of October humidity. I learned the glue temperature the hard way, twice on the same thumb, because black foam shows every scuff and I kept adjusting placement after the bond had already set. One pack of twelve cones, three inches tall, plus a matching sleeve of six-inch circles, strung about eight feet of garland with a six-inch gap between brims. That length dressed a standard fireplace mantel with a little left to drape the side.
DIY Haunted Skeleton Mirror
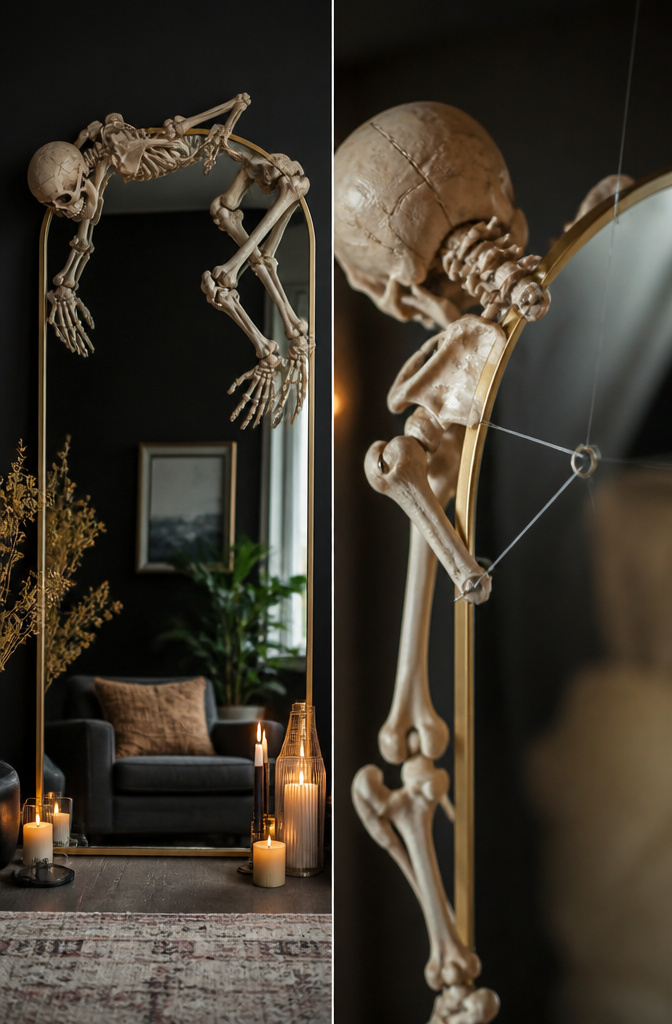
A plastic skeleton draped over a mirror frame reads instantly as haunted vanity, and the size that carries the gag without blocking your own reflection is roughly 18 by 24 inches. Anything smaller turns the skeleton into a cluttered afterthought; anything larger and the bones start competing with your face for real estate.
The floating effect comes from fishing line looped through the rib cage and vertebrae, then pinned to the top of the frame where the molding hides the anchor. Clear line disappears against dark glass, so the bones seem to hover an inch forward. I tied off at three points, minimum, or the torso sags and the whole thing looks like a medical school prank.
My first attempt used the same removable adhesive strips I trust for lightweight frames, but bathroom humidity softened the backing inside forty-eight hours and the skeleton slid down the glass in slow motion. Hot glue on the back of the plastic bones, applied directly to the wood frame, has held through two Octobers now. The mirror itself stays functional, which matters more than you’d think when you’re shaving at 7 a.m. and forgot the bones are there.
DIY Spooky Pumpkins
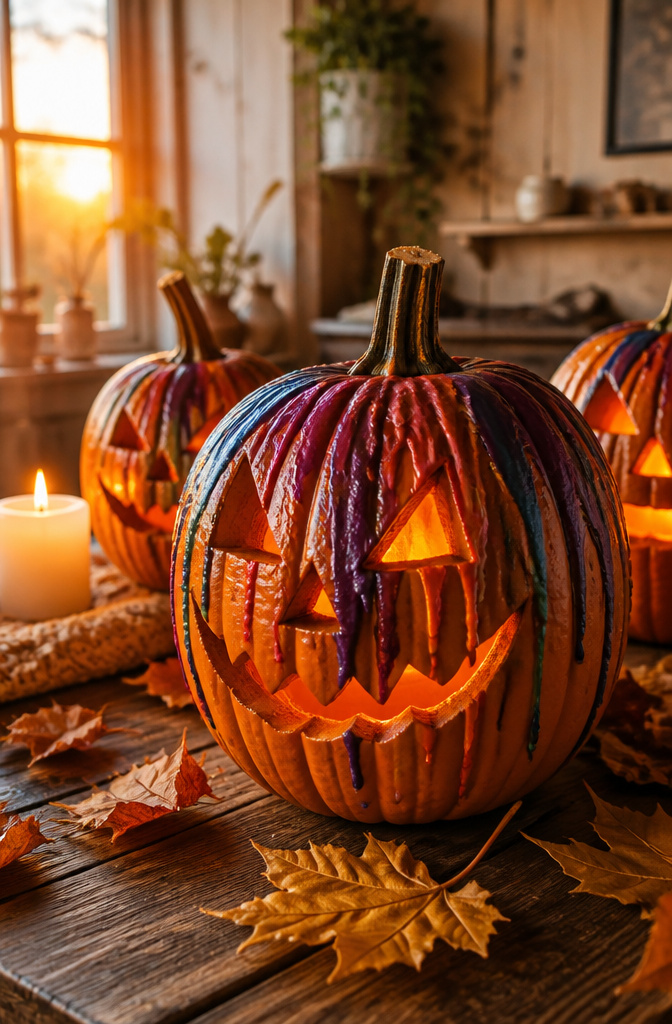
Carved pumpkins with melted crayon drip and other altered-surface techniques hit different than the painted kind, mostly because they survive the porch longer when the weather turns. The standard spooky face carve still works, but heating crayons over the top until they run in webs down the sides gives the same candlelit silhouette with something extra happening on the surface.
Preservation is where the weekend either pays off or collapses. Bleaching the inside, the full carve, and the cut edges bought me three extra weeks before the first soft spot appeared. The bleach sat about ten minutes, then a thorough rinse. A petroleum jelly coat on those same edges, which I’d read about as the gentler option, rotted faster, almost as if sealing the moisture in worked against me. Skip the jelly; the bleach rinse is the move that actually holds.
For the crayon drip, a hairdryer on high does the melting without the open flame risk of a candle held underneath. The wax pools thick enough that a tea light inside still flickers through the gaps in the face, and the color runs change completely under porch light versus daylight.
Scary Skull Centerpiece
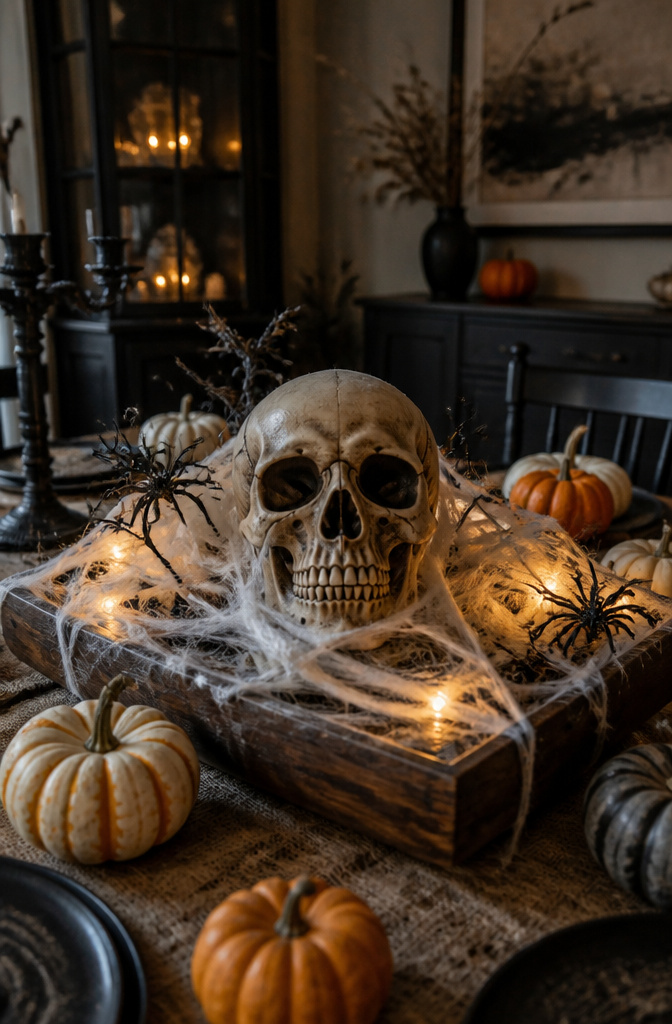
A skull centerpiece looks dramatic until it blocks the person across the table from you. The first one I tried sat too high on a straight stack of books, and we spent the whole night leaning around it to talk. Keep the total height under 14 inches if you want people to still see each other.
Start with a low tray or shallow wooden box, then anchor a block of floral foam inside with hot glue or double-sided tape. A plastic skull from the dollar store or a papier-mache one from the craft aisle both work; foam is lighter if you are moving it around. Press the skull onto the foam so it grips, then build outward with the fake spider web. One stretched bag looks sparse and sad. Three to four bags, pulled thin and layered, give that thick, abandoned-attic look that actually reads as spooky rather than afterthought. Tuck the web into the foam and around the skull base so it does not look like it is floating on top.
I like to add a couple of battery tea lights in the tray corners, low enough that they light the web from below without adding height. The whole thing takes maybe twenty minutes and stores flat if you pull the skull off the foam block after the party.
Deathly Tombstones

Carved tombstones look heavier than they are once you switch from wood to insulation foam. My first batch was actual 1x pine, cut with a jigsaw and routered edges, and by the third one my arms were done plus the weight meant stakes ripped out in soft ground. Foam solves both problems. The cleanest cuts came from a #11 X-Acto blade; the pointed tip and sharp angle melted through the EPS instead of tearing it, which meant lettering stayed crisp instead of looking chewed. For paint, exterior latex marked "porch and floor" held color through two seasons on the ones I sealed with a coat of Mod Podge first. The single-season failure was a generic craft spray paint, no primer, no sealer; by November the surface was chalky and the corners started crumbling. Renter-friendly bonus: foam stores flat in a garage corner and weighs almost nothing to carry out each October.
DIY Floating Witch Hat Luminaries
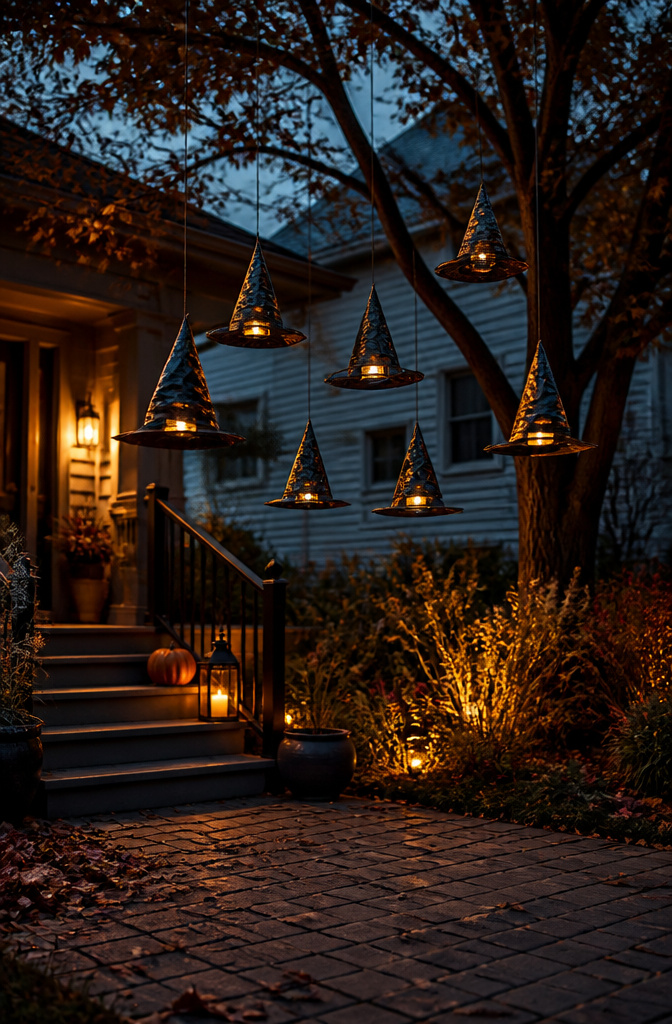
The invisible thread method sounds more complicated than it is. A thumbtack in the soffit, a loop of fishing line tied with a figure-eight knot, and a witch hat with a battery puck light inside. The line disappears after dark, so the hat seems to float.
I tried sewing thread first because it was already in the junk drawer. Anything above a light breeze sent the hats spinning into each other and the thread tangled into a bird’s nest I had to cut free. Monofilament fishing line in 10-pound test fixed that. The stiffer strand pushes back against wind instead of wrapping around itself, and it does not absorb water and sag the way cotton does.
The LED puck lights I used were the cheap push-on kind from the hardware store bin, two for five dollars. Warm white, not color-changing; the orange gel I taped over the lens did the tinting. One light per hat lasts about six hours, so I swap batteries the afternoon of Halloween itself rather than tempting the weather for a week.
Set the hats at staggered heights, lowest about eight feet so nobody walks into the brim. The highest I hung was twelve feet, which needed a pole with a hook to lift it into place.
DIY Paper Lanterns
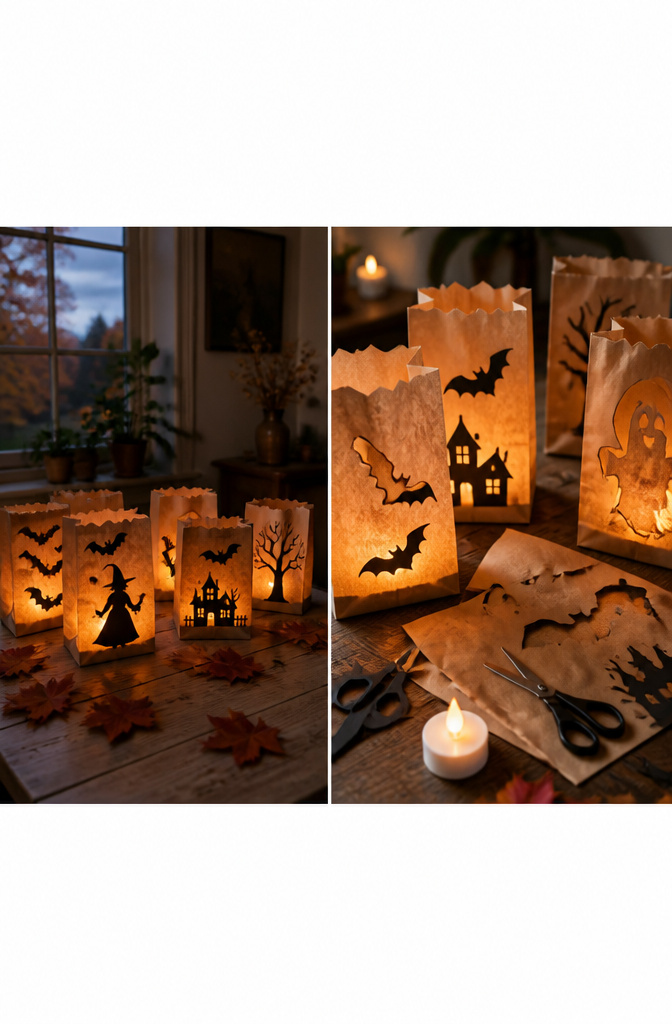
Paper lanterns with spooky cutout designs need a light source that will not set the house on fire. I learned this the hard way. A real tea light, the kind with an actual flame, caught the vellum lining on the second try. The paper went up faster than I expected, and that lantern was scrap before the glue had even dried.
Battery-operated LED tea lights are the only safe option here. They put off no heat, which means you can line the lantern with either material and not watch your mantelpiece smolder.
Vellum gives that frosted window effect, diffusing the glow so the cutout shape reads as a silhouette. Cardstock holds the structure stiffer but blocks more light; the lantern stands up straighter, yet the design stays darker. For a graveyard scene or a bat outline, vellum wins. For a lantern that needs to survive a porch breeze, mix the two: cardstock for the frame, vellum for the windows.
Black metallic paper cuts cleanly on a Cricut Maker if you own one, but an X-Acto and a printed template do the same job at the cost of an hour. The finished piece is small enough for a shelf or a dining table, and the whole build runs under ten dollars in materials.
Frequently Asked Questions
How can I decorate cheaply during Halloween?
Shop your own home first, then add small spooky accessories to what you already own. Paper tubes, mason jars, thrift store hardcovers, and dollar store plastic rings all become decor with paint and glue. Reuse your builds each year instead of buying new.
What are some easy DIY Halloween decorations?
Painted pumpkins, cheesecloth ghosts, and floating candles made from toilet paper tubes all come together with basic supplies. Battery-operated LED tea lights eliminate fire risk and run for hours. Most projects need only scissors, hot glue, and acrylic paint from Walmart or the dollar store.
How do I make a spooky Halloween wreath?
This article does not cover wreaths. The projects here include garlands instead: haunted house silhouettes cut from 110-lb cardstock, paper skulls spaced eight inches apart on black ribbon, and witch hat garlands made from foam cones and wood circles.
What materials do I need for DIY Halloween decorations?
Paper and cardboard tubes, mason jars, acrylic paint, Mod Podge, battery-operated lights, and fishing line or black thread for suspension. Ground cinnamon and coffee grounds age book covers. Pool noodles and wire hangers shape witch legs. Insulation foam and an X-Acto #11 blade carve tombstones.






