
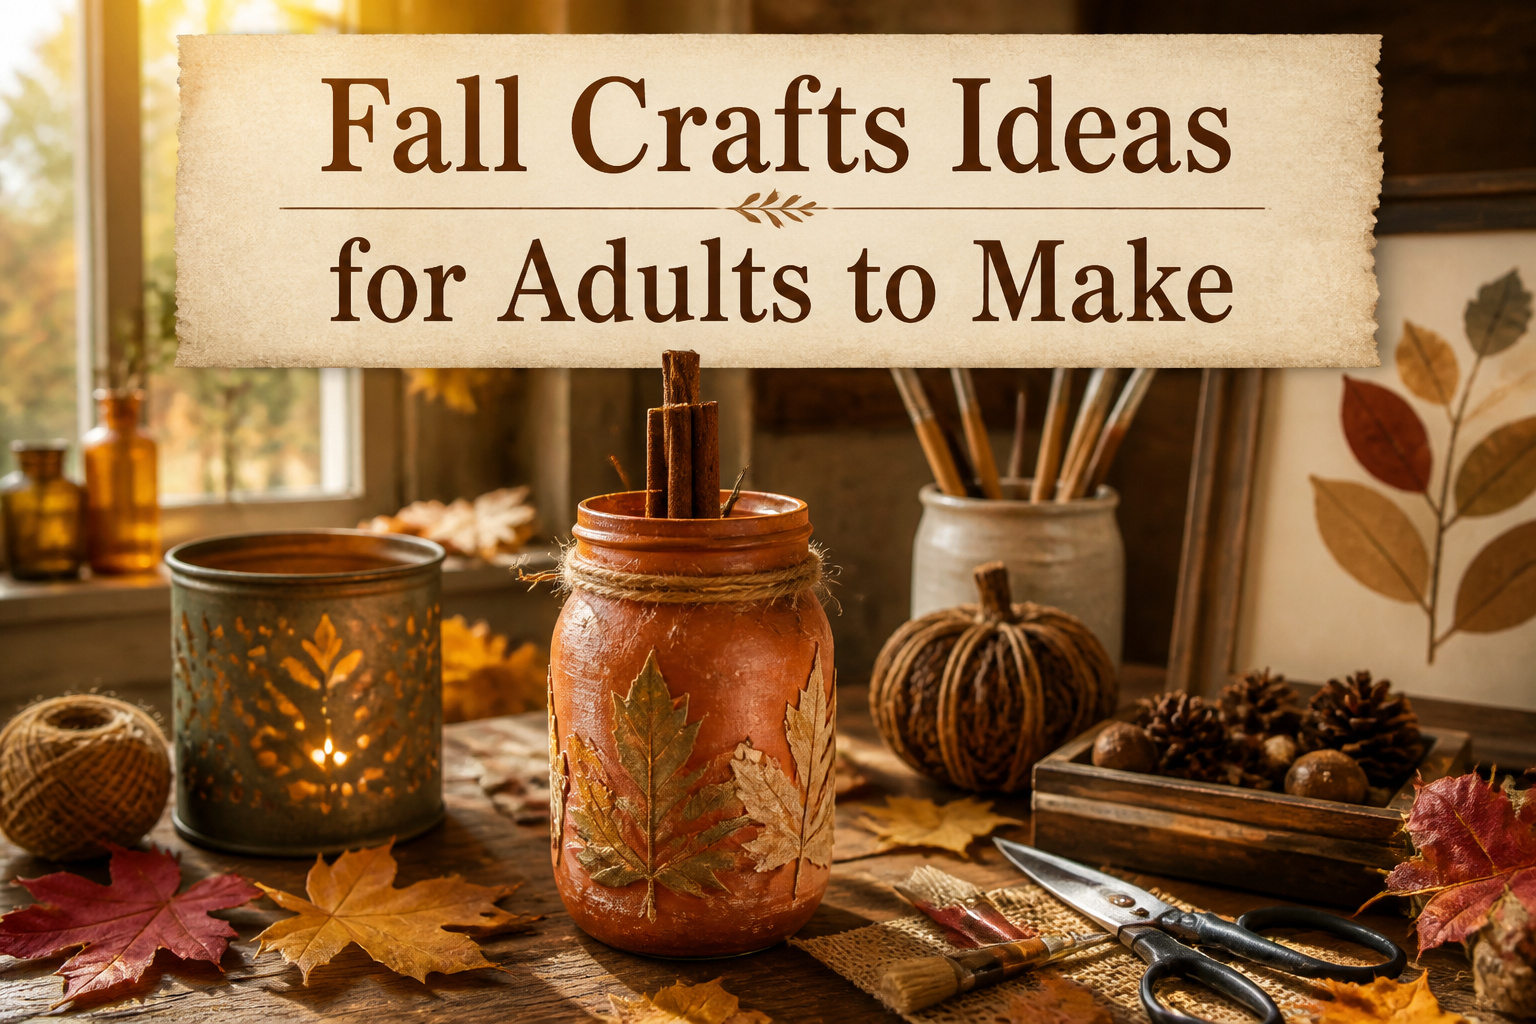
The best fall crafts ideas for adults span from a five-dollar tin can luminary to a weekend-long paper mache build, and the deciding factor is usually drying time, not skill. What separates the projects that actually get finished from the ones that languish is whether you can stand to wait. A mason jar painted with multi-surface acrylic is usable by evening; three layers of paper mache need three full days before the shell holds. The cinnamon stick stem on that jar costs under ten dollars and smells real when it sits near a candle, which is the kind of detail that matters once the project leaves the table and lives in your house.
1. DIY Pumpkin Mason Jars

Mason jars with a pumpkin shape bridge the gap between Halloween and Thanksgiving without swapping out your whole shelf. A coat of orange paint on the outside, a stem and leaf wired to the lid, and the jar works for candy in October and for holding dried wheat or utensils by late November. The paint matters more than the shape: acrylic marked "multi-surface" grips glass without the week-long cure of enamel, so three light coats in one afternoon gets you to usable by evening. I skip the fancy brushes and use a foam wedge; the texture evens out as it dries and the ridges hide brush marks anyway. For the stem, a cinnamon stick hot-glued to the lid ring looks more convincing than rolled felt and smells like something real when the jar sits near a candle. The dual-holiday trick is in what you put inside: plastic spiders and candy corn read October, but a tea light and a few unshelled nuts shift the same jar to harvest once the witch decorations come down. Cost stays low because the jars are the kind you already have from pasta sauce or pickles; the paint and a pack of cinnamon sticks run under ten dollars and leave enough for four or five more projects.
2. Fabric Pumpkins
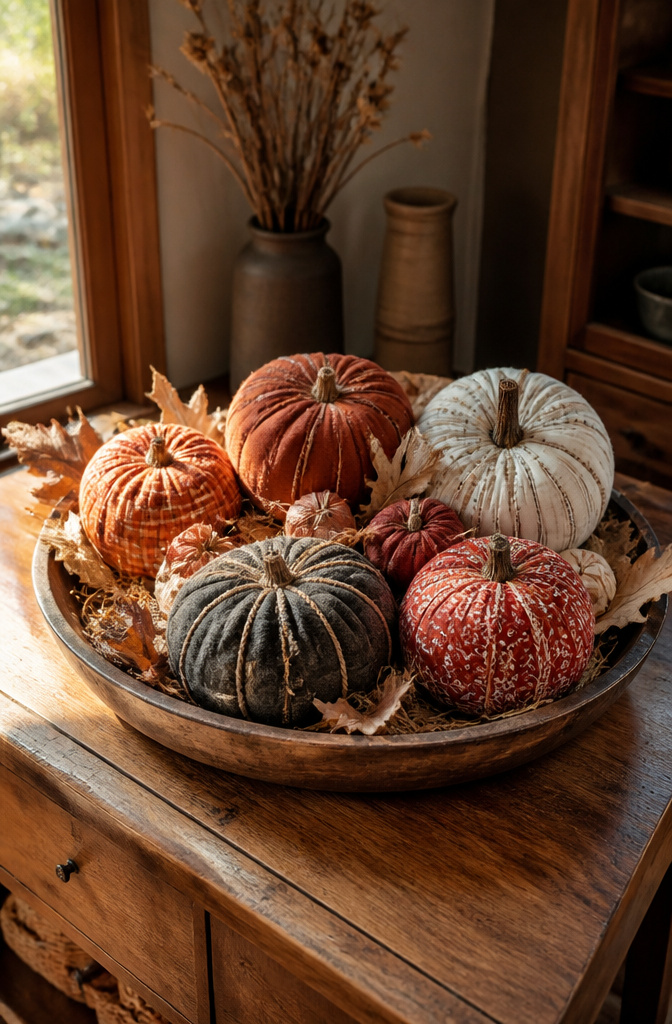
The best fabric pumpkins come from material you already own. An old flannel shirt, a worn velvet skirt, a bandana from the junk drawer, even a felted sweater with holes in the elbows. Each one gives a different surface: flannel reads cozy and farm-stand, velvet catches light like something from a shop window, and bandanas hold their orange without fading. The scrap sourcing matters because it keeps the project under five dollars if you already have needle, thread, and stuffing. A bag of polyester fill runs a few dollars if you do not.
This works for groups because the skill level is flexible. One person can hand-stitch a simple running seam, another can machine-sew faster and add a twine stem. No one is waiting on glue to dry or paint to cure, so conversation actually happens while hands move. The finished pumpkins also travel home intact, unlike a wet mason jar or a fragile leaf bowl.
The shape is forgiving. A circle of fabric, gathered at the top, stuffed full, cinched with thread and wrapped with twine for segments. Imperfect circles look more like real pumpkins anyway, the lumpy ones from a field bin rather than a plastic mold.
3. Painted Acorns

Painted acorns sit in a wooden bowl on my kitchen table from October through Thanksgiving, and guests always pick them up. That handling is the test. Acrylic craft paint goes on easy, but without a topcoat the color chips off within a week of being rolled between someone’s fingers.
The finish that actually holds is a water-based polyurethane or a brush-on Mod Podge sealant, not the spray versions that pool in the cup of the cap and never fully harden. Two thin coats, brushed, with a full dry between them. The acorns stay matte enough to look natural but survive the bowl-to-hand circuit.
For gifts, a dozen in a small kraft box with a paper band reads intentional rather than leftover. Pick colors that match the recipient’s usual décor, not literal fall orange. I have sent them in soft sage, warm gray, and a deep burgundy that looks expensive against white shelves. The whole batch costs the price of a walk in the park and an afternoon.
4. Fall Wreaths
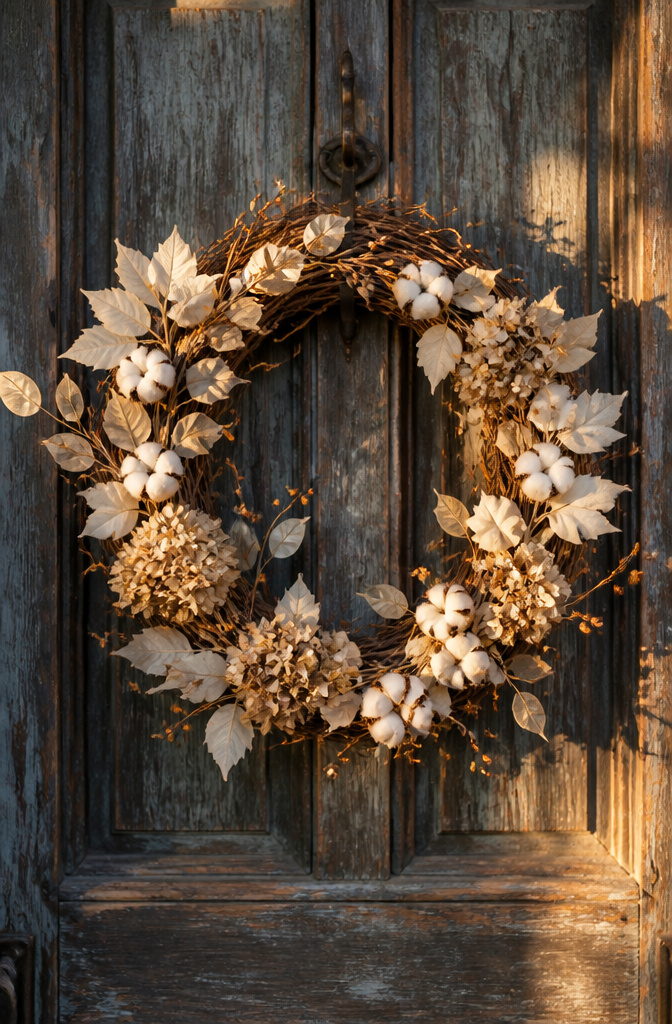
Grapevine bases take hot glue and wire better than foam or straw, which is why most of the wreaths that survive a season or two start there. The grapevine base is the one item worth buying new: a 12–18 inch form runs a few dollars at craft stores, and the open weave leaves gaps for stems without fighting the structure.
Ivory leaves, white pumpkins, and cotton stems press straight in and hold. The muted palette reads as intentional rather than leftover, and it carries past Halloween into November without clashing with a Thanksgiving setup. Dried hydrangea works on a straw form instead if you already own one, though the shape takes longer to fill out and the faded green and pink tones sit quieter against wood doors than brick.
Bittersweet vine, if you can forage it, wraps around the grapevine for color that dries in place. Otherwise craft-store berry sprays wired at intervals do the same job. The whole build takes an hour once materials are laid out, and the weight stays light enough for an adhesive hook rated to five pounds.
5. Cork Pumpkins
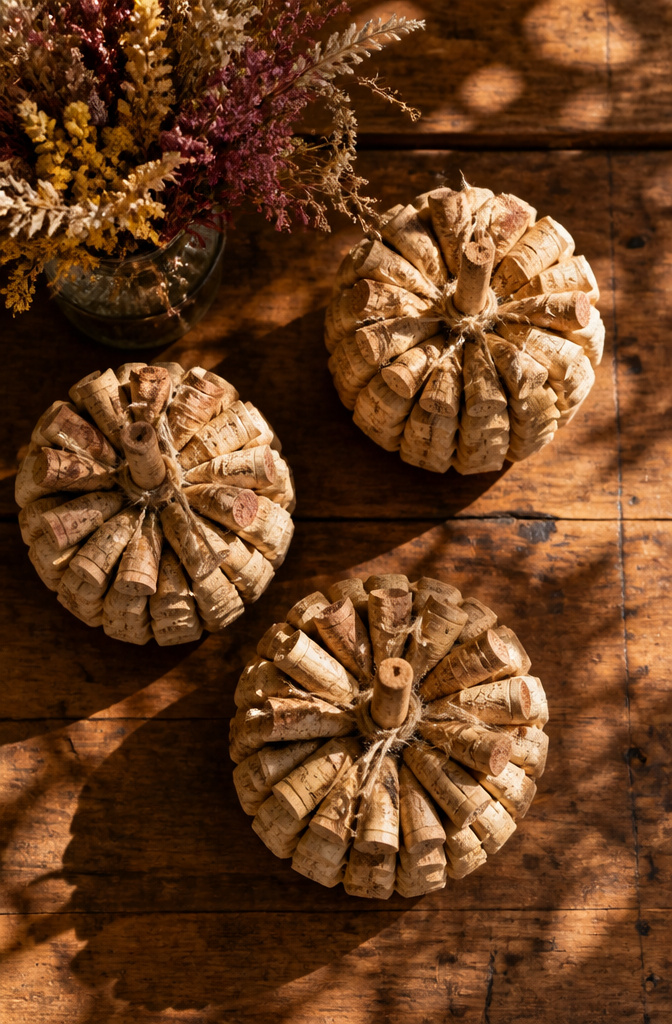
Wine cork pumpkins sit somewhere between rustic charm and outright tedium depending on how many corks you actually need. The tutorials from Mod Podge Rocks and Our Home Made Easy both treat this as a quick family craft, but neither spells out the count. From what I pieced together reading through builds, a palm-sized pumpkin runs somewhere around thirty to thirty-five corks, and anything larger doubles that fast.
Thirty corks is a lot of Tuesday night Chardonnay if you do not already have a jar going. Craft stores sell bags of synthetic corks that look close enough from across a room, though real ones slice cleaner with a craft knife. Thrift shops and restaurant friends are the usual lifelines for genuine corks in bulk. One builder mentioned asking at a local wine bar and walking out with a paper grocery bag full.
The standard shape is a vertical stack in three rows, hot-glued and tied with twine. A real cork will want to split when you halve it for the stem end, so a sharp blade and a slow cut matter more than pressure. Synthetic corks skip that risk entirely, which is worth weighing against the texture trade-off.
6. Dried Orange Garland
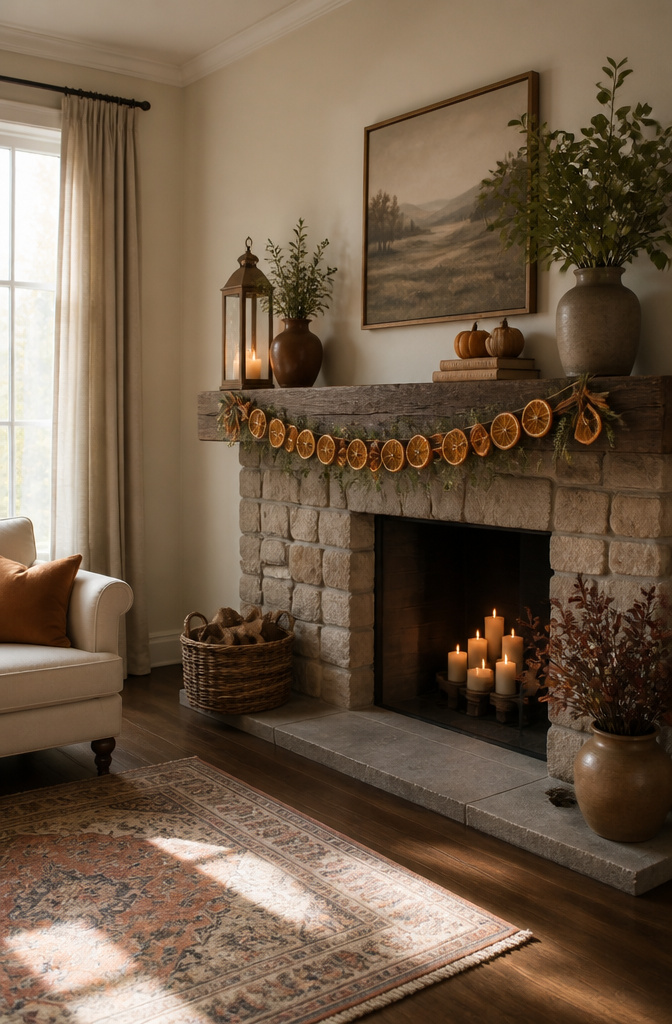
Dried orange garlands cost almost nothing once you own a knife and an oven. Thin slices, roughly a quarter inch, laid on a wire rack at the lowest setting for three to four hours, turn leathery and translucent without burning. The house smells like a bakery for the afternoon, which is half the reason to bother.
What convinced me, reading through a dozen of these tutorials, is that dried citrus keeps for months if the slices go fully brittle. Store them in a paper bag and they will string onto twine in December just as well as October. A single orange yields eight to ten usable rounds, enough for a short mantel swag or a cluster around a candle. Two or three bags of grocery-store navels, the cheap ones in the mesh sack, cover a whole staircase railing.
The look is spare and a little Scandinavian, not country-kitsch, which matters if you are renting and want the holiday decor to feel like yours rather than your grandmother’s. Thread them with cinnamon sticks or leave them plain. Either way, the same garland works from late September through January if you store it dry between seasons.
7. Yarn Wreath
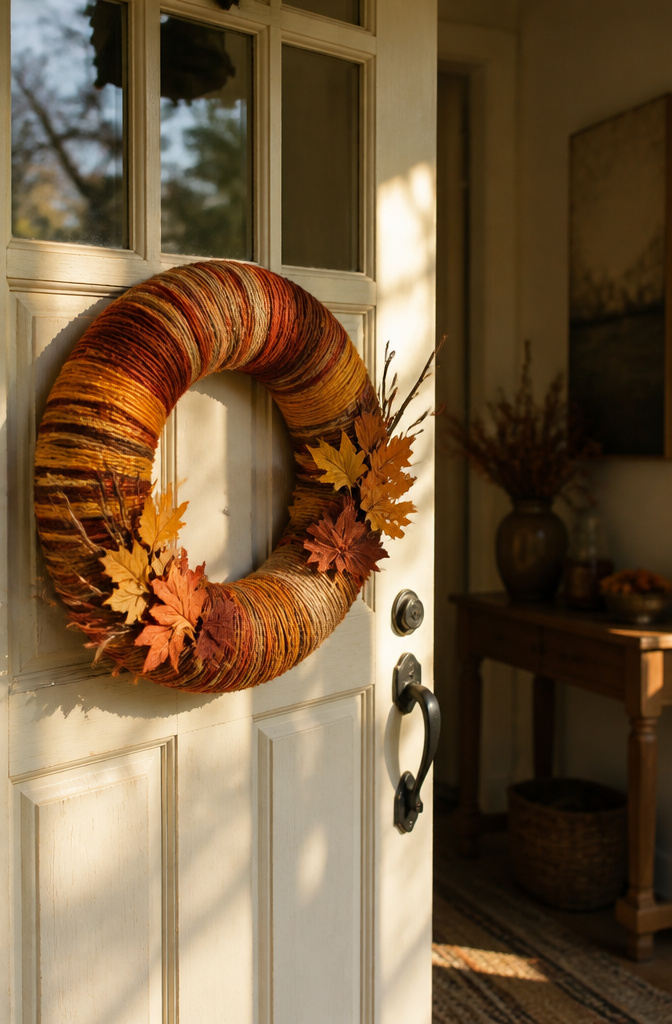
A yarn-wrapped wreath reads cozier than grapevine once the temperature drops, but the wrong yarn turns a two-hour project into an evening you won’t get back. Worsted weight, or anything labeled medium #4, covers a 14-inch foam form in about forty-five minutes without the gaps that lighter weights leave behind. Chunky yarn fills space faster, yet the bumps stack unevenly and the finished shape looks lumpy on a door.
Wrapping is just a continuous spiral held with a dot of hot glue at the start and another at the frame’s crossbar. The real time sink is hiding that bar; I loop a separate piece over it in the opposite direction, then keep wrapping. For fall, rust or mustard yarn needs nothing else, though a few clipped twigs from the yard tucked under the last layer bridges the gap between craft-store bright and actual autumn. A skein and a half usually finishes one wreath, so buy two and return the extra, or start a second while the glue gun is hot.
8. Succulent Pumpkins
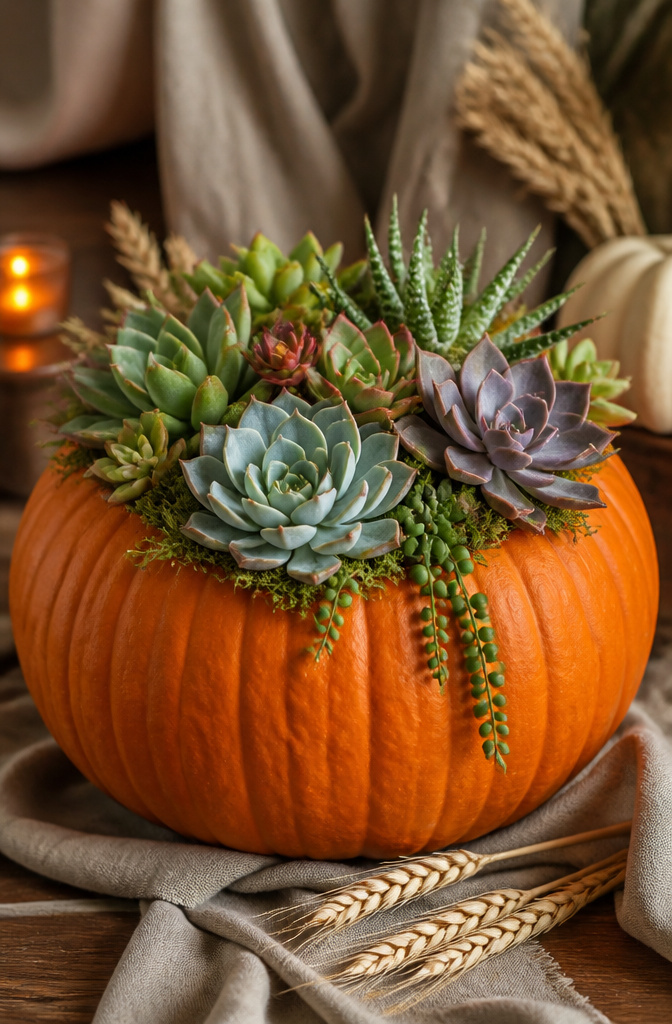
Live succulents on pumpkins look photographed for magazines, but the reality is a countdown. The damp pumpkin flesh starts breaking down around day five, and by week two the whole arrangement turns soft. If you want the display past Halloween, faux succulents are the saner bet, though they cost more up front and the attachment is trickier since nothing grips plastic the way roots grip organic matter.
For either version, hot glue is the wrong call against raw pumpkin. The heat accelerates the rot, and the bond fails the moment the surface starts weeping. Tacky glue or a cool-temp glue gun with floral adhesive holds long enough without cooking the base. I have also seen people carve a shallow divot where each succulent sits, which buys a couple extra days for live ones by reducing the direct contact.
Weight matters more than you expect. A dense cluster of echeveria can tip a hollow craft pumpkin right over. Either keep the design airy, or set the whole thing on a low, wide dish for the insurance.
9. DIY Leaf Bowl
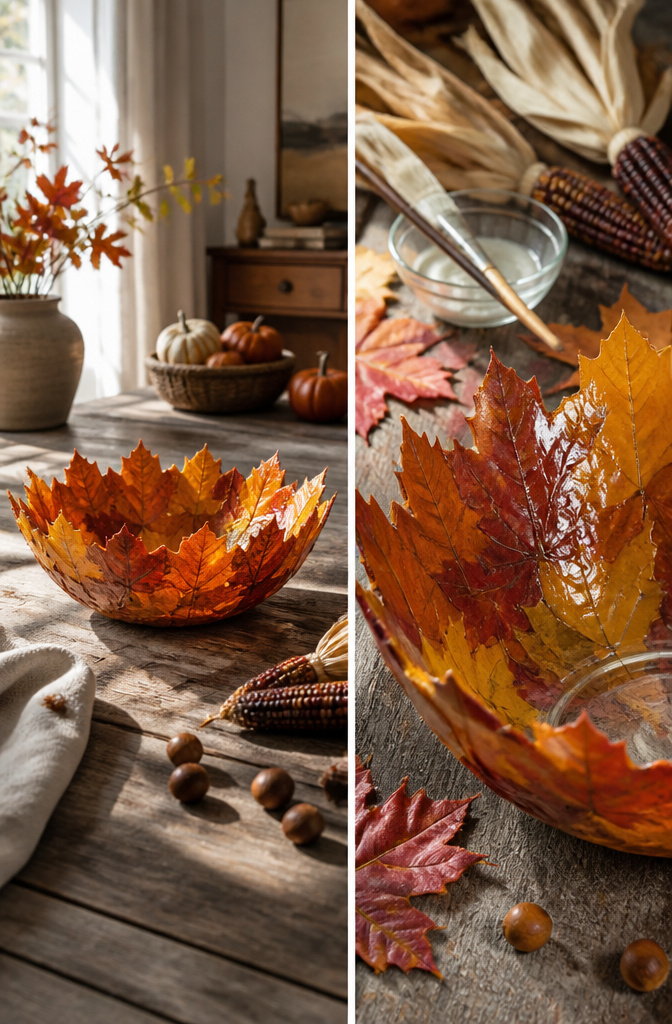
Artificial leaves from the dollar store need more than a thin coat of glue to hold a bowl shape. The first time I tried this, I used regular white craft glue and ended up with a limp, collapsing disk that took three days to dry and still fell apart when I lifted it. Fabric stiffener is what actually works, and it is cheap enough that the whole project stays under five dollars. You brush it onto both sides of each leaf, layer them across the bottom and up the sides of a glass bowl you use as a mold, and let them dry overnight. The stiffener bonds the leaves to each other while it hardens, so the bowl holds its form once you pop it free. Mod Podge can work in a pinch, but it dries more slowly and the leaves stay flexible longer, which means they sag if your mold has any curve to it. Skip hot glue entirely; it creates ridges that show through and it does not penetrate the fabric enough to bond layers together. A six-inch bowl takes about fifteen leaves and one bottle of stiffener, and the whole job fits into a Saturday afternoon plus the overnight wait.
10. Paper Mache Pumpkins
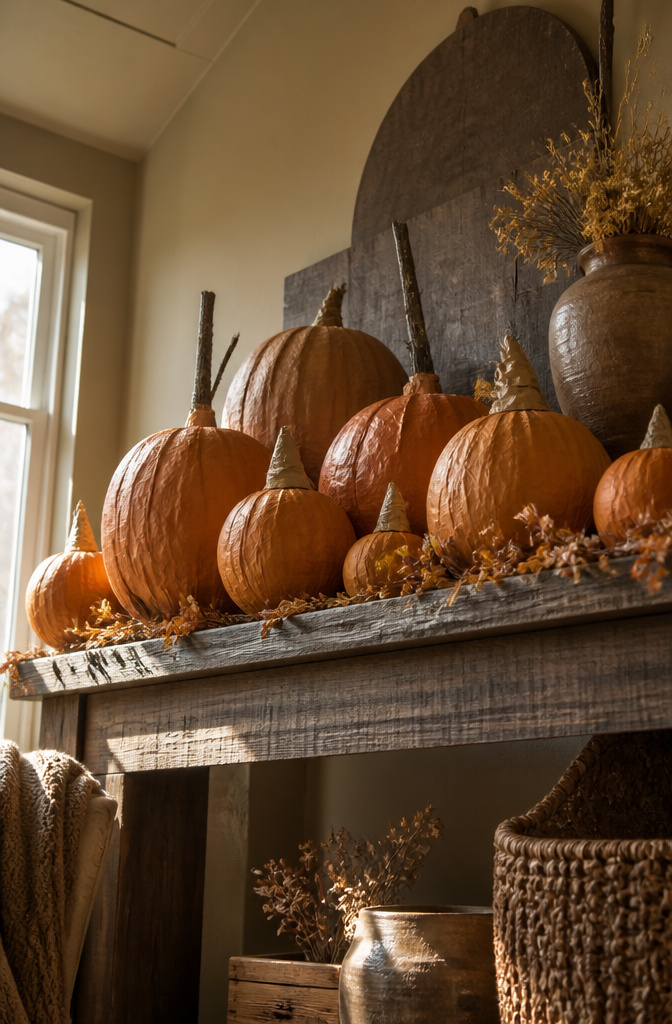
Paper mache pumpkins start with a balloon or a crumpled grocery bag taped into a round shape, then strips of newspaper soaked in a simple flour-and-water paste layered on top. Each layer needs a full day to dry before the next goes on; three layers is usually enough for indoor pieces, but anything headed outside needs four or five to survive a damp porch. The balloon gets popped once the shell holds its shape on its own. A base coat of cheap orange acrylic paint works fine, but the finish matters more than the color. For mantels or coffee tables, matte acrylic with a dry-brush of brown on the creases looks warm and handmade. Covered porches need exterior acrylic or a spray sealant, or the first heavy dew will soften the whole thing back into paste. I have left paper mache out unsealed; it sags within a week and draws ants. Mod Podge on the surface buys you a little time, but it is not waterproof, just water-resistant. If you want the pumpkin to last past Thanksgiving on a covered step, budget for a can of clear exterior spray and apply two coats with four hours between them. The stem is just a rolled paper cone glued on and painted brown, or a real stick from the yard hot-glued into a slit in the top.
11. Fall Button Letters
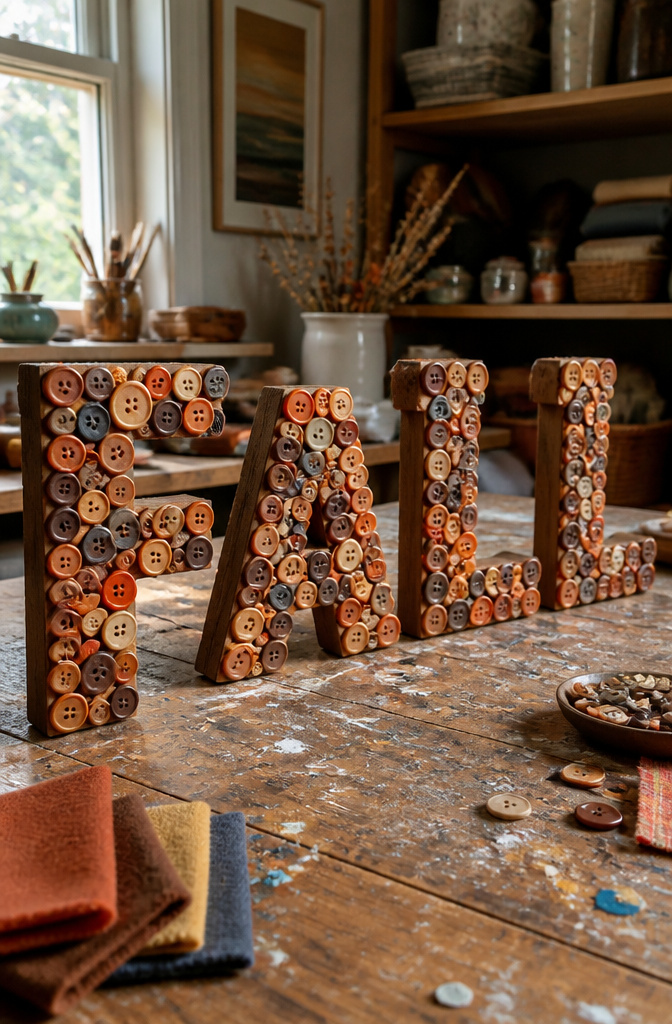
Thrift store wooden letters or a hand-cut cardboard base both work fine for this, though the cardboard needs a heavier coat of primer so the glue doesn’t warp it. I laid my buttons out on a towel first, sorting by whether the shank was flat or raised, because the flat ones sit tighter and the raised ones catch light differently. Warm tones read instantly as fall, but the trick is mixing in a few cool ones, a slate blue or a dull green, so the whole thing doesn’t flatten into pumpkin spice monotony. Start gluing from one corner and let the edge shape itself rather than tracing a pattern first. The gaps become part of the texture; a letter that is too perfectly filled looks like a factory job. A toothpick dot of hot glue on each button back is faster than squeezing from the gun, and it keeps the front face clean. I stopped when the letter still read clearly from six feet back; past that point you are just covering surface for the sake of it.
12. DIY Napkin Rings
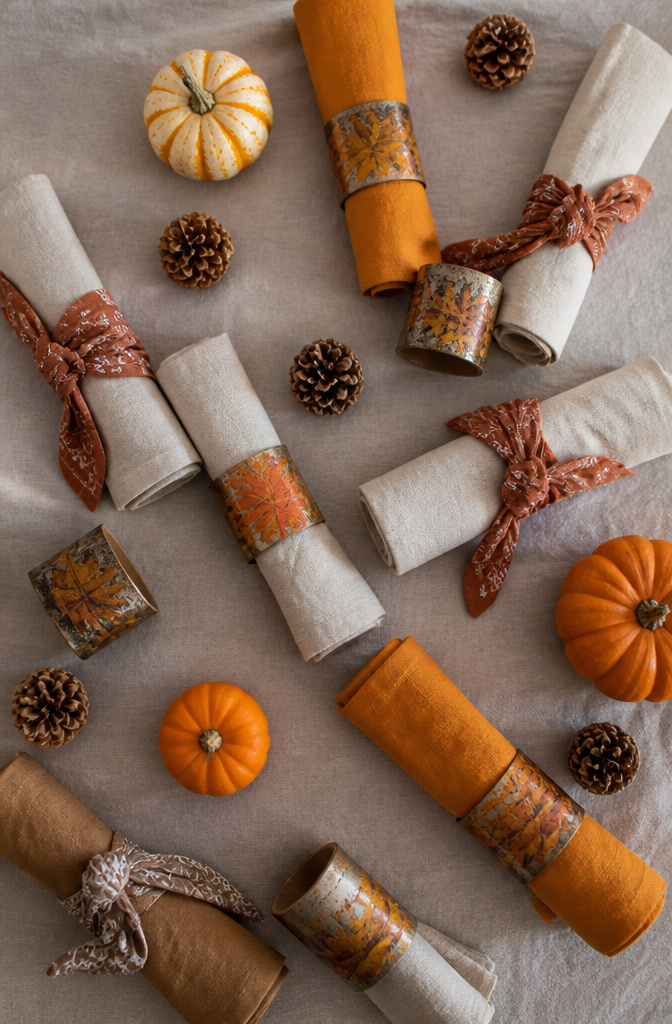
Printable Thanksgiving napkin rings from cardstock work fine for a single dinner, but paper softens the minute gravy splashes near the rim. For something that survives the wash cycle and the storage bin, tin cans or fabric bandanas hold up far better. A cleaned soup can, cut into rings and decoupaged with fall leaves, handles the table and the wipe-down afterward. Bandanas torn into strips and knotted around rolled napkins go straight into the laundry with the linens, no disassembly needed. Cost stays under five dollars either way, and both look intentional rather than like a craft-project placeholder. If the gathering is adults-only and the menu runs to red wine, the fabric route forgives a drip that cardstock never will.
13. Fall Luminaries

A glass jar with a pressed maple leaf glued to the outside makes a luminary that actually looks like autumn, not a craft-store leftover. I learned the battery versus real candle question the hard way after a neighbor’s paper-bag lantern caught an edge from a tea light. Battery candles win for anything paper, fabric, or dried botanical, and the small ones run twenty to thirty hours on a cell you can replace. Real flame needs glass or ceramic thick enough that you can hold your hand on it for a count of five after the candle’s out; thin mason jar glass concentrates heat at the base and can crack. For the leaf jar, a flickering battery votive behind the leaf throws a shadow that moves, which a real flame in a narrow neck never does well anyway. Tin cans punched with oak-leaf patterns are the cheap option that handles real heat, but the edges inside need filing or a reader will slice a finger reaching to light it. I skip the spray paint on those; bare metal reflects more light through the holes.
14. DIY Gnomes
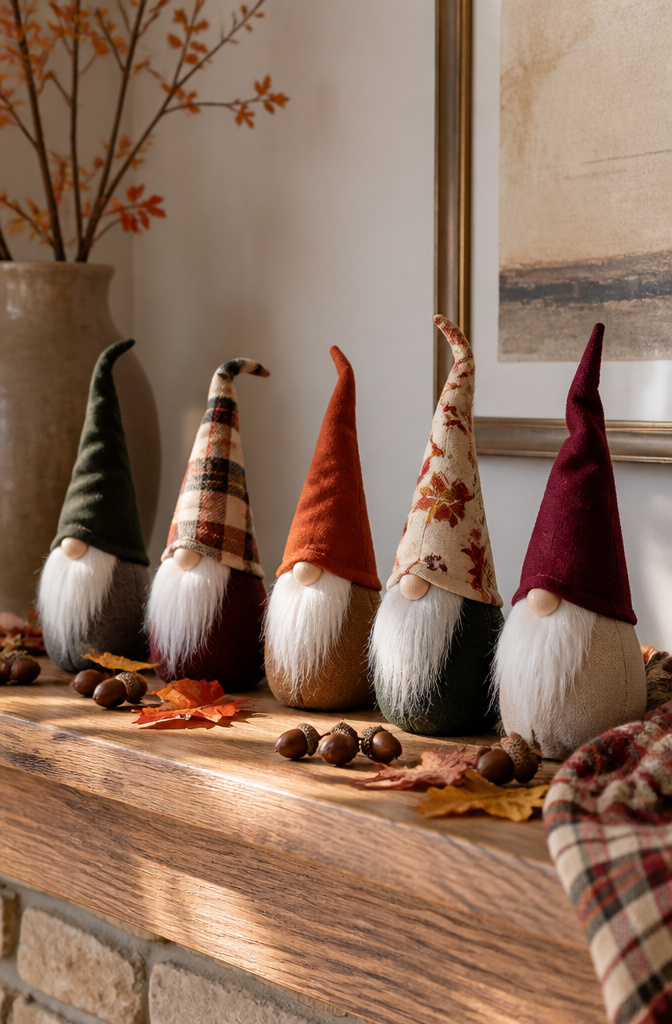
The first gnome I ever made sat down like a tired toddler until I figured out the filling. Rice or dried beans in the base gives the body enough heft to stay upright on a shelf or mantel; polyester fluff alone floats the thing upward and tips it over. A knee-high sock works for the body, or any scrap of heavy cotton or fleece you have from another project.
The hat is where most people lose patience. A cone of fabric needs to be cut wider at the bottom than geometry suggests, because the seam allowance eats the circumference and the turned-out tip never comes to a true point. Leave the hat a half-inch too long, stuff the end lightly so it droops rather than pokes straight up, and tack it to one side of the body with a few hidden stitches. The beard is just brushed-out yarn or a scrap of faux fur glued under the brim.
What convinced me, reading through a dozen of these, was that the face barely matters. A tiny wood bead or a drawn-on dot is enough; the hat and beard do the character work.
15. Chunky Braided Yarn Pumpkins
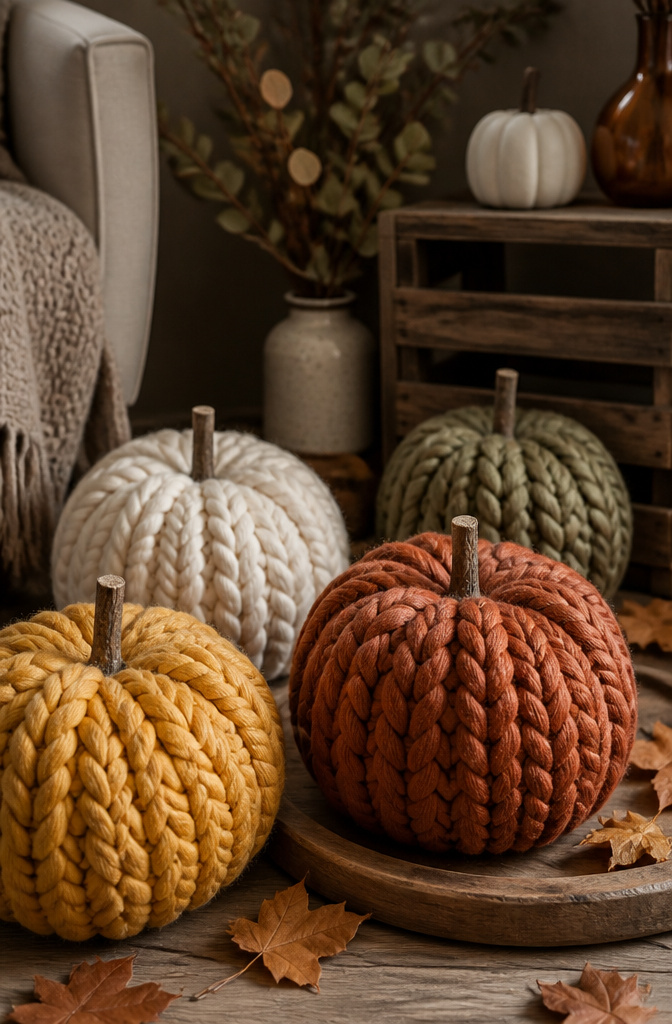
Thick yarn does the structural work in this pumpkin, so the braid itself becomes the shape, no stuffing required. I looked at a lot of yarn pumpkin tutorials before I understood why this one held up better than the stuffed fabric versions. A single braid of super-bulky or jumbo-weight yarn, coiled and tied at both ends, creates a solid ridge pattern that reads instantly as pumpkin. The thickness matters: worsted weight collapses into a flat spiral, but yarn labeled 6 or 7 on the standard thickness scale keeps that rounded cross-section when you cinch it tight.
The braiding is simple three-strand, worked with the full thickness of the skein rather than pulling it apart. Each ridge sits higher than the last because the previous round pushes the next one outward. Tuck the tail from your starting knot into the center hole, then thread the finishing tail through a few coils to lock it. A real twig or cinnamon stick pressed into that center gap finishes it without glue. I have seen these flatten after a season if the tying cord is too thin; a strip of the same yarn works better than thread or fishing line for the cinch.
Crafting With Friends
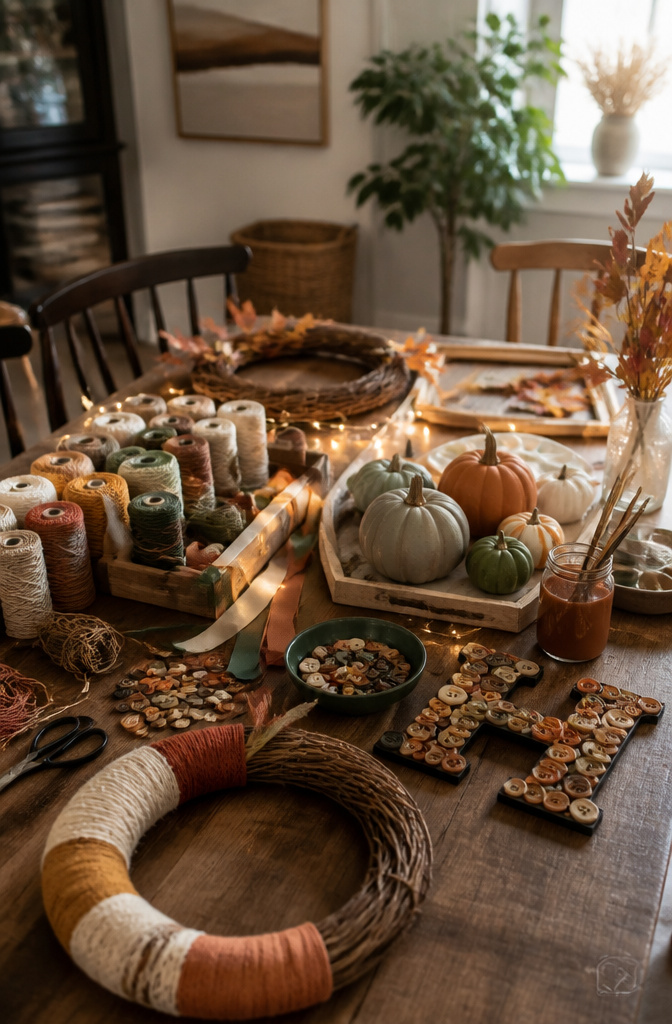
The best fall crafts for a group are the ones nobody finishes alone. A wreath station with grapevine bases, pre-cut ribbon, and wired burlap leaves lets one person go maximalist while another stops at three elements and both look intentional. Paint-your-own pumpkins work the same way: acrylics in a shared palette keep the table cohesive even when skill levels scatter from careful ombre to abstract splatter.
What keeps the evening moving is the setup, not the project. I lay out one complete sample at each seat so guests see the goal without a tutorial, and I keep backup supplies in a basket rather than hovering. The print-and-make crafts that use scissors and glue hold up well here too; nobody waits on a dry time, and conversation survives the lulls.
Fall crafting is even better when shared… It’s a wonderful way to laugh, connect, and create memories together while making something beautiful.
That line matters because the pressure is off. The point of the gathering is the gathering; the craft is just the excuse. Choose projects that look finished after an hour, send everyone home with something for their door or mantel, and let the season do the rest.
Seasonal Decor That Lasts
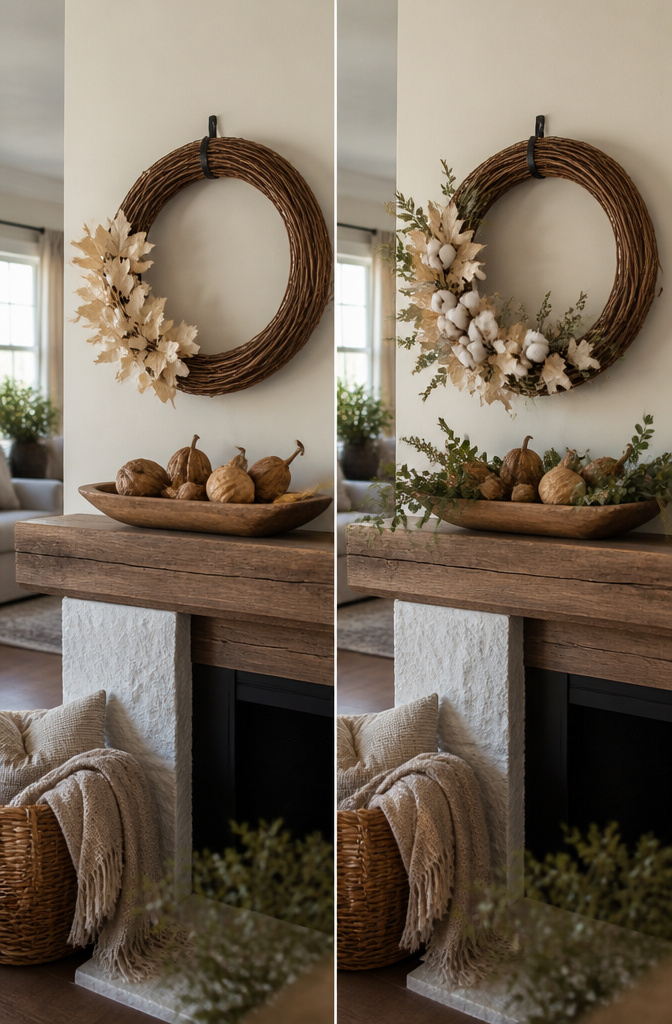
A grapevine wreath with ivory leaves and cotton stems keeps working well past Halloween because the palette never shouts. I swap the small white pumpkins for a cluster of dried hydrangea once November arrives, and the same base carries through to winter greenery if I feel like pushing it further. The trick is building neutral from the start so you are editing, not replacing.
Dried gourds take even less effort. A light stain and a dough bowl grouping with mixed greenery sits on my mantel from early October through Thanksgiving without looking dated. The warm tones match both the orange-heavy weeks and the quieter November stretch.
Storage matters more than the craft itself. Grapevine and straw forms crush if anything rests on top of them, so I keep wreaths flat in under-bed bins with the decor still attached. Dried hydrangea and gourds go into open cardboard boxes in a closet corner where air still moves; sealed plastic traps moisture and ruins them in a month.
What Costs Under Ten Dollars

A tin can luminary runs under $5 if you already own a hammer and a nail for punching the leaf pattern. The only purchase is the can itself, which costs pennies if you saved it from dinner, or a dollar or two for a clean one from a craft store. Mod Podge and tissue paper for the leaf overlay add another couple of dollars, but most households have glue and scrap paper on hand.
Bandana pumpkins land in the same range. One orange or black bandana from a discount store costs about $3, and stuffing comes from plastic bags you already own. The only question is whether you need a needle and thread; if you do, that pushes the project closer to the $10 mark unless you borrow from a neighbor.
DIY napkin rings fit the same budget when you start with toilet paper rolls and scrap ribbon. The unlikely supply most tutorials point to is twine or jute, which runs $2 to $4 for enough to cover a dozen rings. Before heading to the store, check your junk drawer. Most people already have the core materials and just need the seasonal accent.
One-Hour Projects

Not every fall craft needs to swallow a Saturday. The projects that actually finish in under an hour share a simple structure: one material, one action, and no waiting period. A burlap and pumpkin wreath built on a wire frame takes roughly that long because the dollar-store pumpkins come ready to attach; the burlap tucks in, you secure with hot glue or floral wire, and the door is dressed before the kettle boils. Printable crafts operate the same way, printing on cardstock, cutting, and stringing on twine or hemp cord with no drying stage to stall you.
The slower projects from this list can still land inside the hour if you front-load the prep. Printing and cutting templates the night before means assembly day is pure motion. For anything involving paint or glue, a hair dryer set on low shaves twenty minutes off dry time without the cracking that heat guns cause. Skip the sealant coat on pieces that sit indoors and out of traffic; one coat of acrylic handles fall humidity fine on its own.
What kills the one-hour promise is starting too ambitious. The clay-molded pumpkin with hand-built details and glaze firing? That was the project I planned last October and never touched, because rest turned out to be the better choice. Choose the wreath, the banner, or the treat bags with folded kraft toppers instead. A finished modest project beats an elaborate one that lives in the supply bin until November.






