The ideas run from a bamboo board that rests across the sink basin to a full island with a built-in stovetop, which brings plumbing or wiring along with it.
Measure your open floor and check what your cabinets can hold, and the right pick from this list usually shows itself.
A galley or corner kitchen with narrow walkways does better with a counter extension or a clearing trick, while a kitchen with floor to spare can take an island.
Anything that means cutting into cabinets needs a landlord’s okay if you rent.
1. Moveable Island
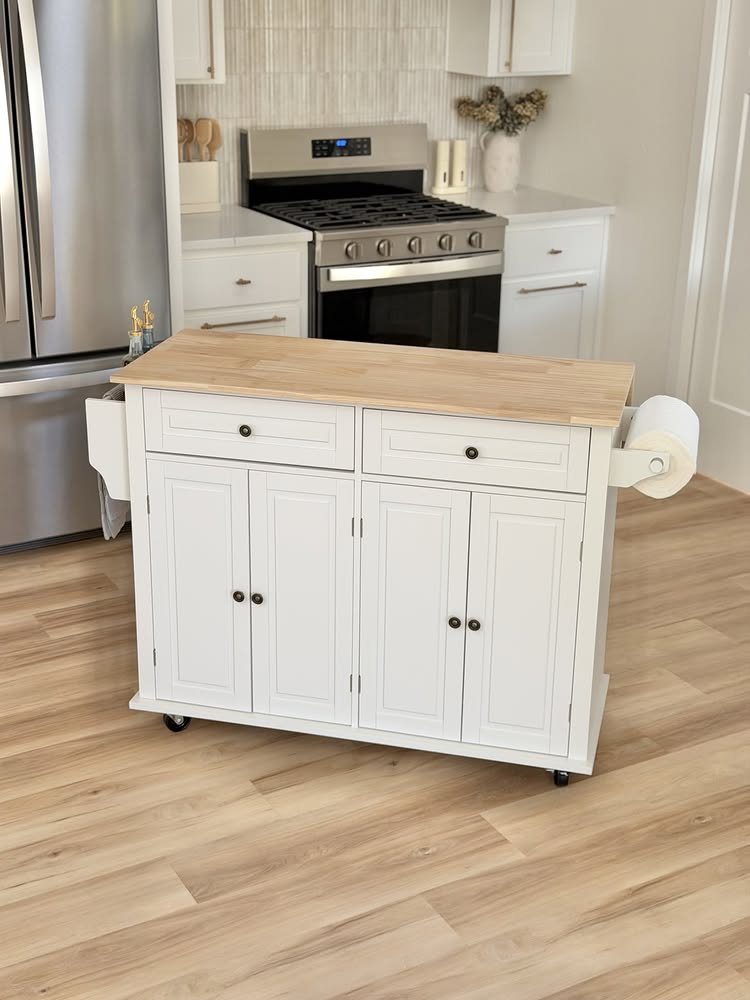
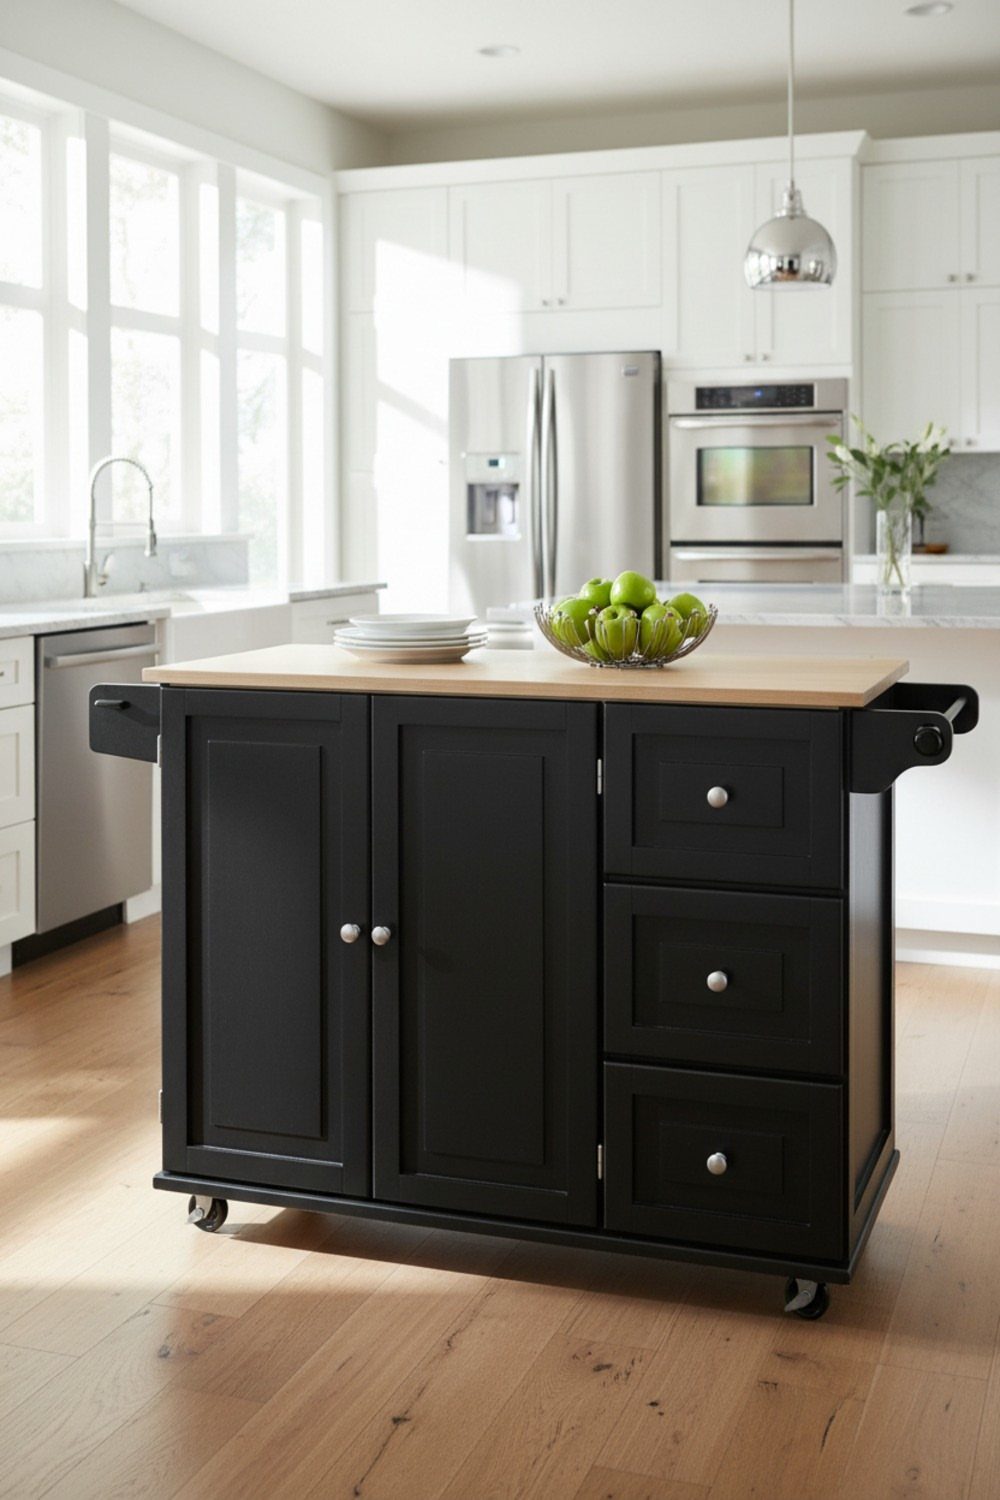
A rolling island with a wood top gives you a prep surface only when you need one, then tucks back against a wall so the floor stays open.
I prefer one with drawers and a lower cabinet, since a bare cart just trades counter clutter for cart clutter.
The budget is better than most people expect. A moveable island can come in under $200, a fraction of what a built-in island costs.
Lock the wheels before you chop or knead, because a surface that shifts under a knife is worse than no surface at all.
2. Over-sink Cutting Board
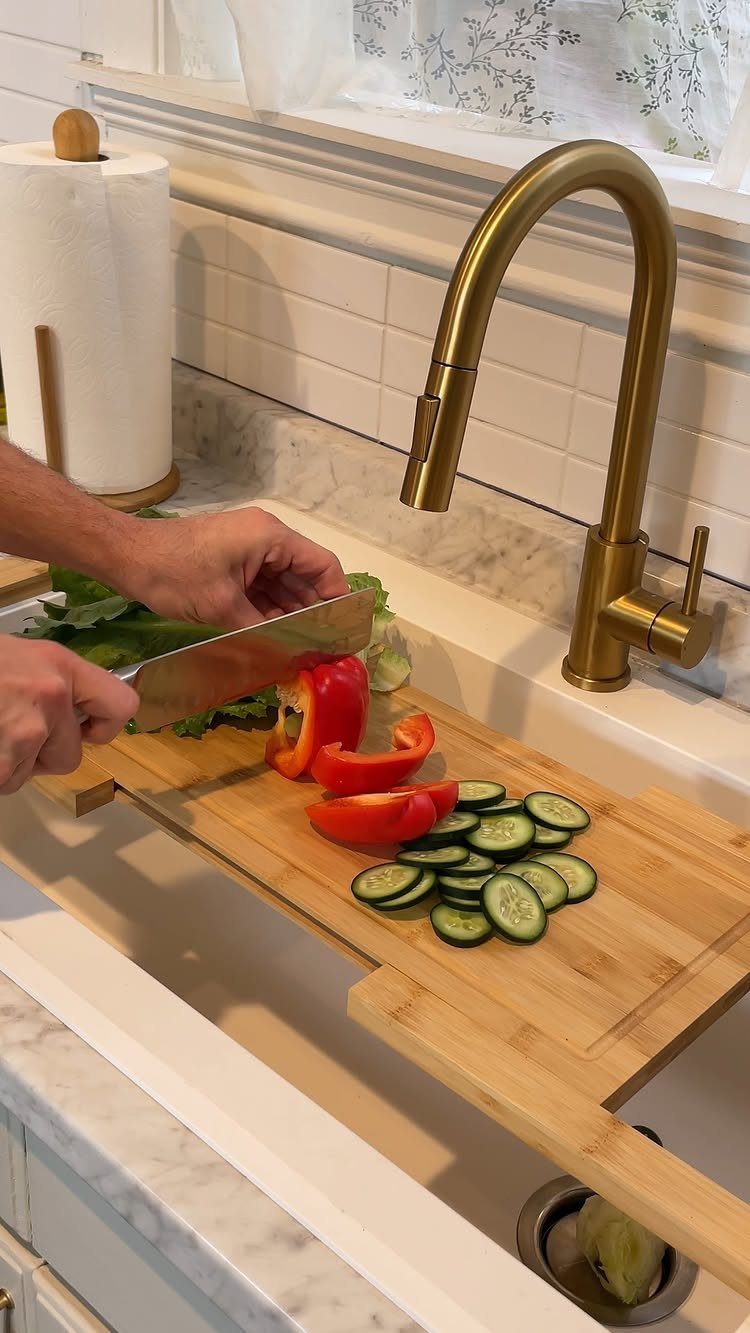
A board that spans the sink basin borrows space you already have. Pick one wide enough to rest on both sides of the rim, and a slab like this bamboo one is light enough to lift off with one hand.
Prep vegetables there and the scraps can drop straight into the basin or a bowl set inside it. Slide it away when you need the sink for dishes.
Your sink and stove aren’t in use all the time. Attachments like a dish drying rack or cutting board that go over the top of the sink or the range turn that unused space into counter space.
3. Back-of-door Organizers
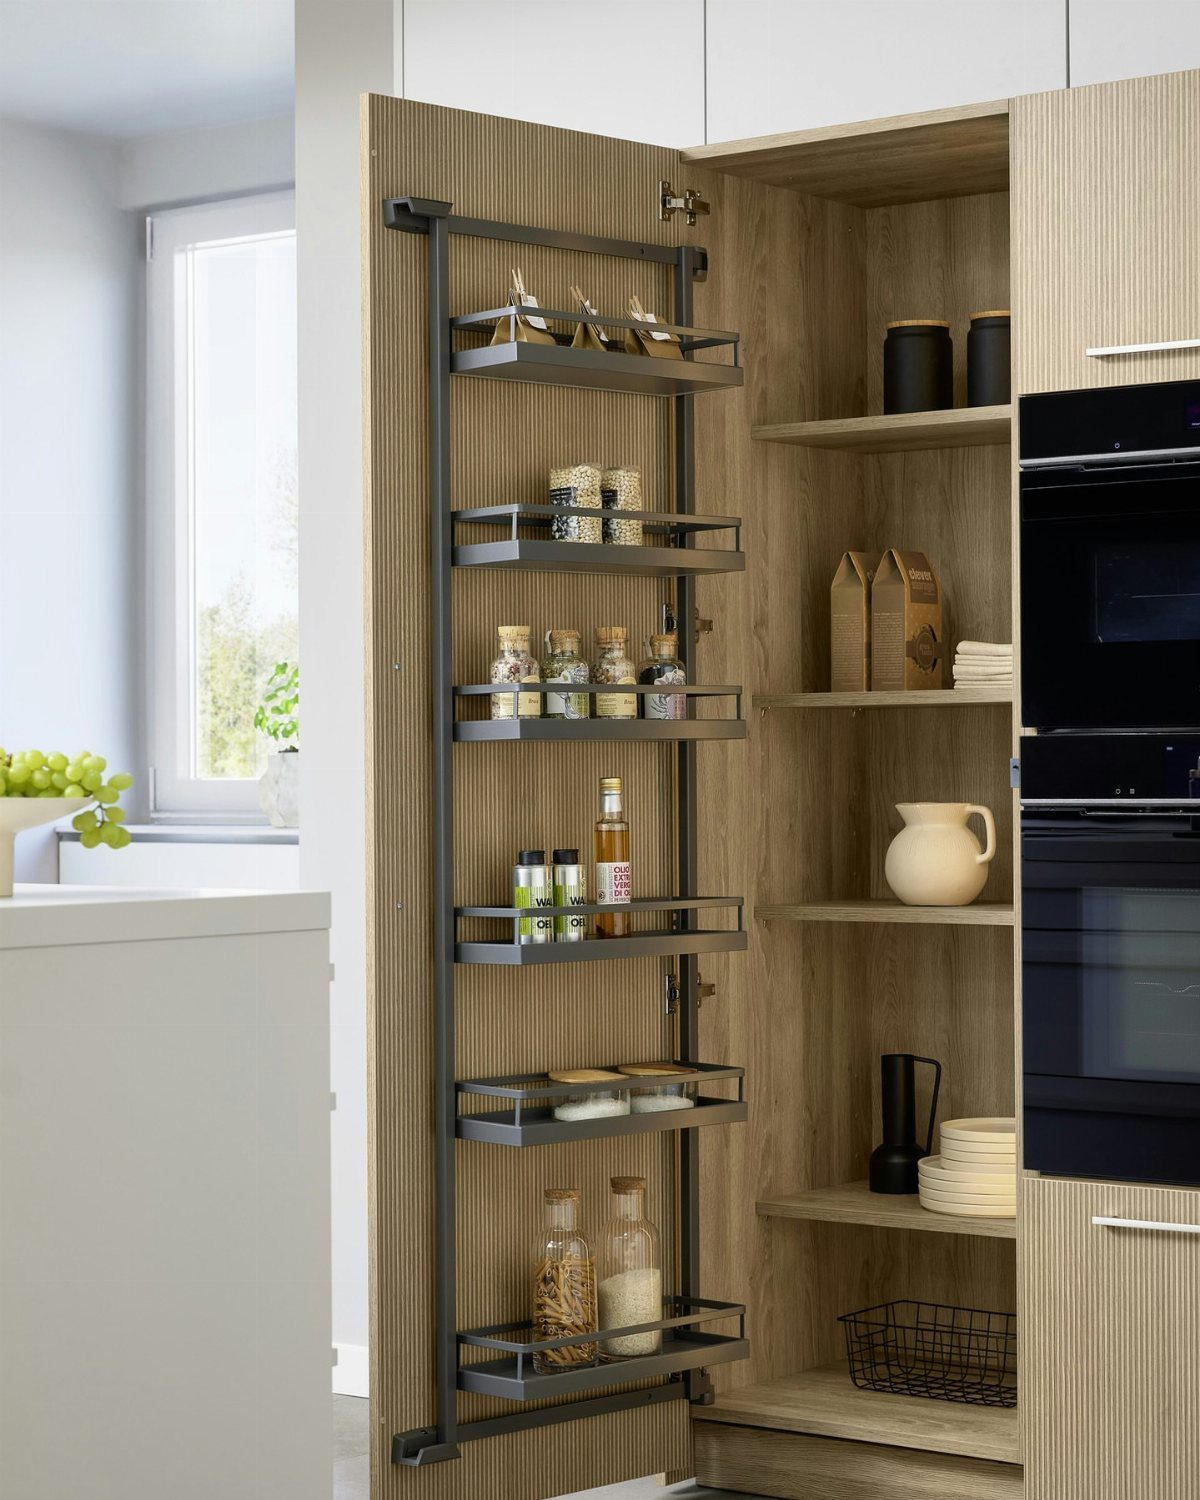
Spices, oils and small bottles are the quiet counter hogs, and the inside of a cabinet door is dead space that can hold them. A narrow metal rack mounted on the door, like this tiered one, does it.
Measure the door’s depth and check that the rack clears the shelves inside when the door closes, then order.
Keep heavier bottles on the lowest tier so the door doesn’t strain.
4. Add More Shelves
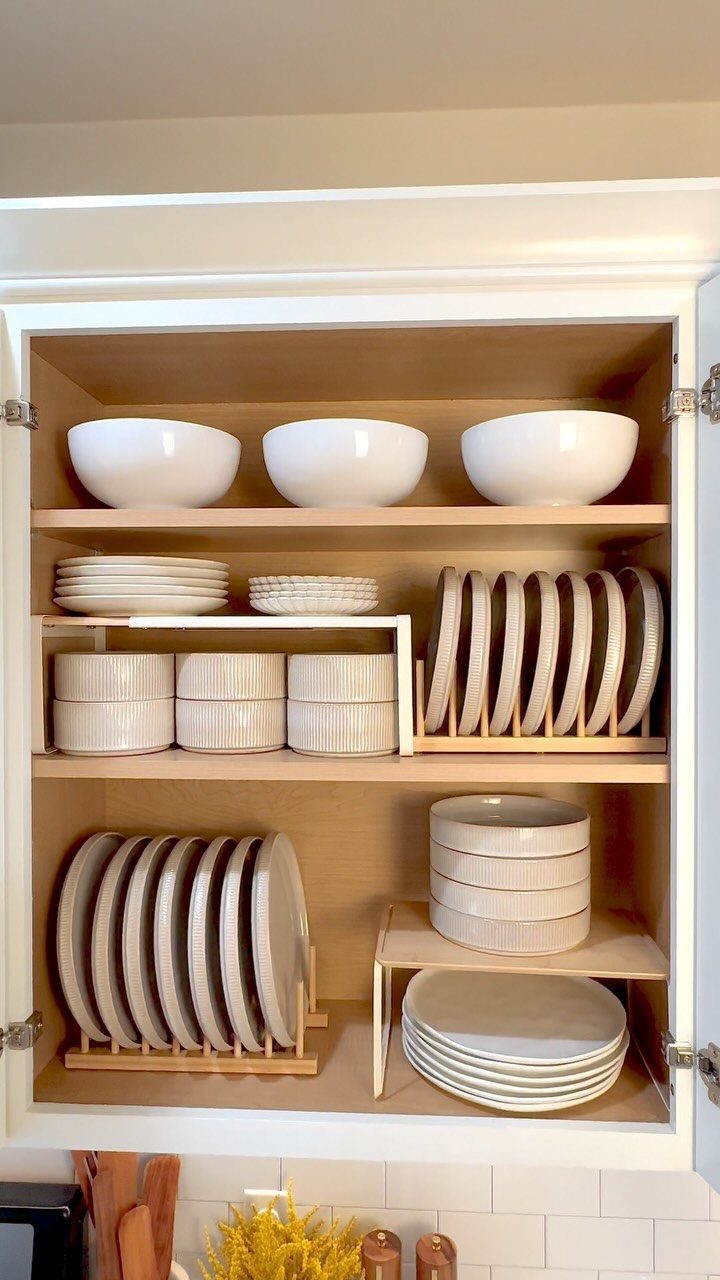
Stacked plates and bowls waste the air above them. Wooden shelf inserts split one tall cabinet into two or three levels, so dishes sit in a single layer you can grab without unstacking.
Added shelves free the counter stretch where a dish rack or a mixing bowl tower might otherwise sit. Measure the inside height first and leave room for your tallest bowl.
I’d go with wood inserts over wire: they hold flat dishes without rattling.
5. Use Space Over Fridge
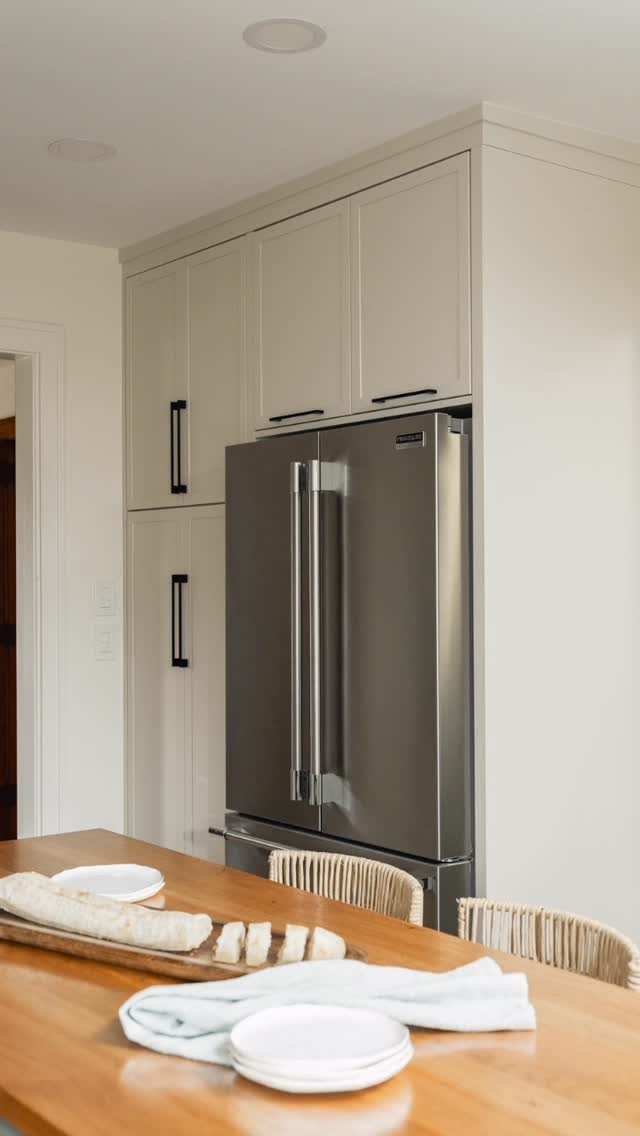
Anything you reach for only a few times a year belongs above the fridge: the turkey roaster, the punch bowl, the extra serving trays. Cabinets built over the refrigerator, as in this kitchen, make that space easy to use.
Without cabinets, a few baskets or bins on top of the fridge do the same job. Label them, since you won’t see inside from the floor.
Keep it to light, rarely used items and a step stool nearby.
6. Under-cabinet Appliances
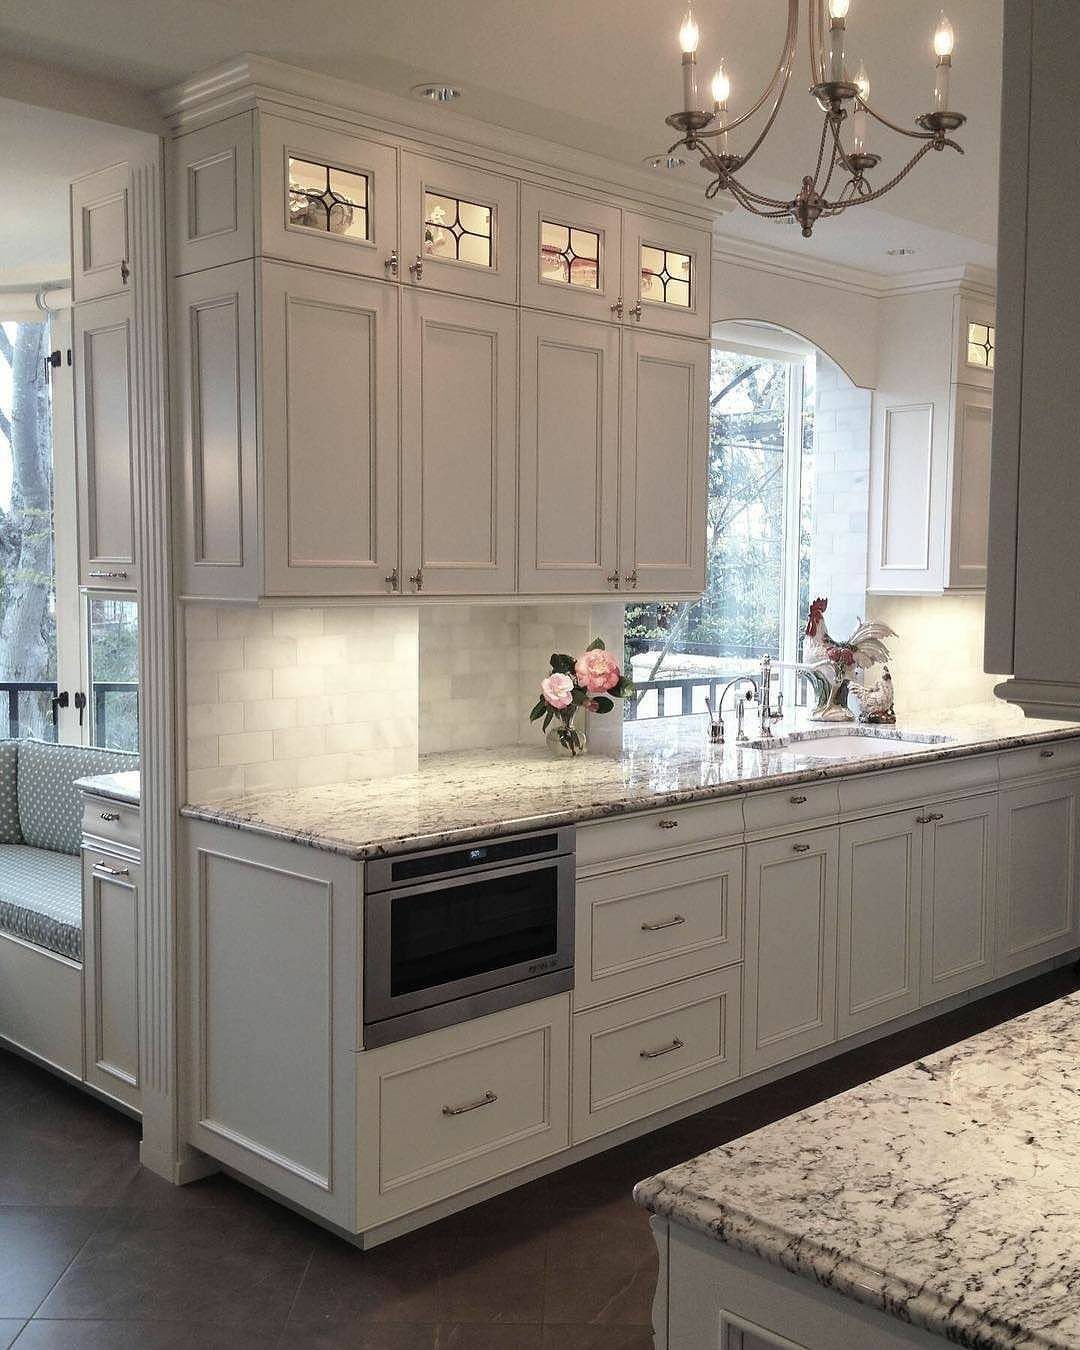
A microwave set into the cabinet run under the counter gives back a patch of worktop that the appliance used to sit on. Of all the clearing tricks, this one frees the most contiguous space in a single move.
It does take a built-in or a model sized for the opening, and that usually means cabinet modification, so it suits owners or renters with a landlord’s okay.
The microwave also sits low, which is awkward for hot dishes and small children.
7. Cabinet Slide-out Systems
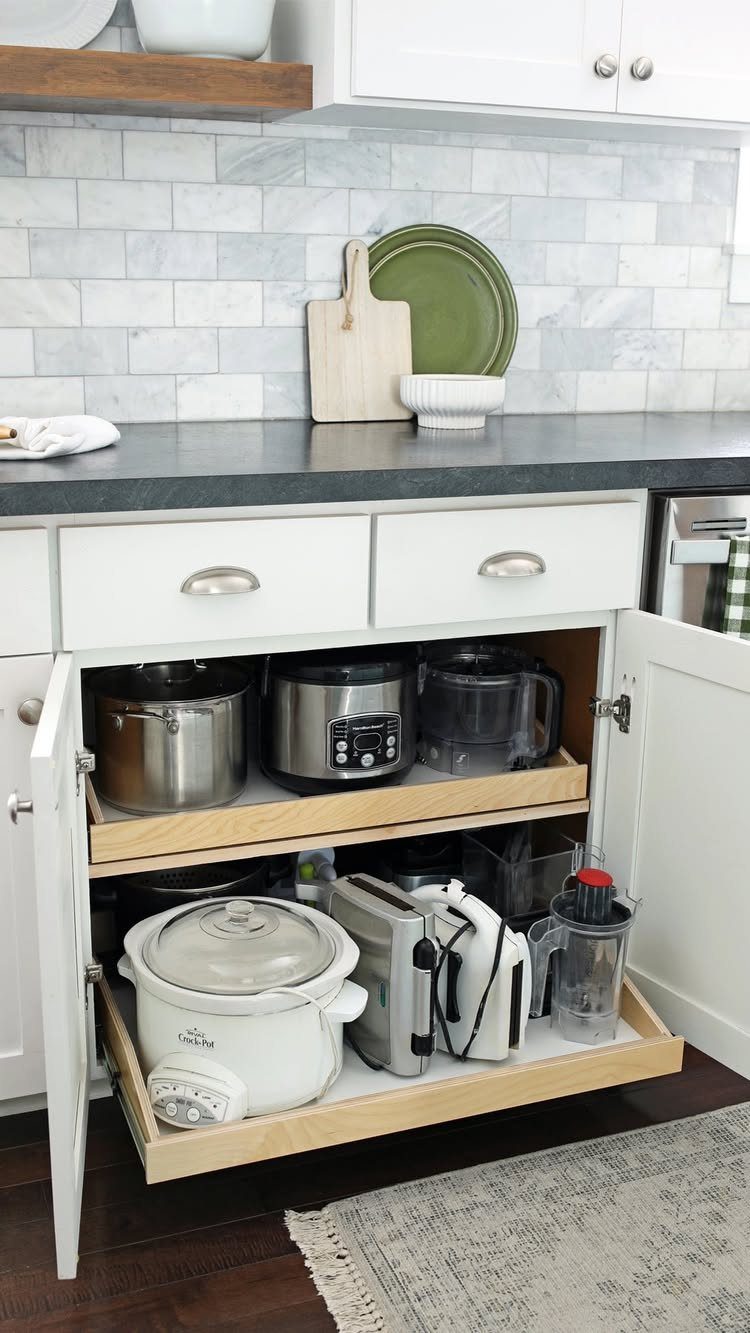
Deep lower cabinets swallow slow cookers and air fryers; you end up kneeling to dig them out, so they migrate back to the counter.
Full-extension slides let a wooden tray roll all the way out of the cabinet, so the appliance comes to you instead of you reaching in.
Measure the cabinet’s interior width and depth before ordering, and check the door opening, since hinges can block the tray’s path. I’d give the heaviest appliance the lowest tray.
Once the cooker lives inside, the counter stretch it used to hold is free for good.
8. Pull-out Surfaces
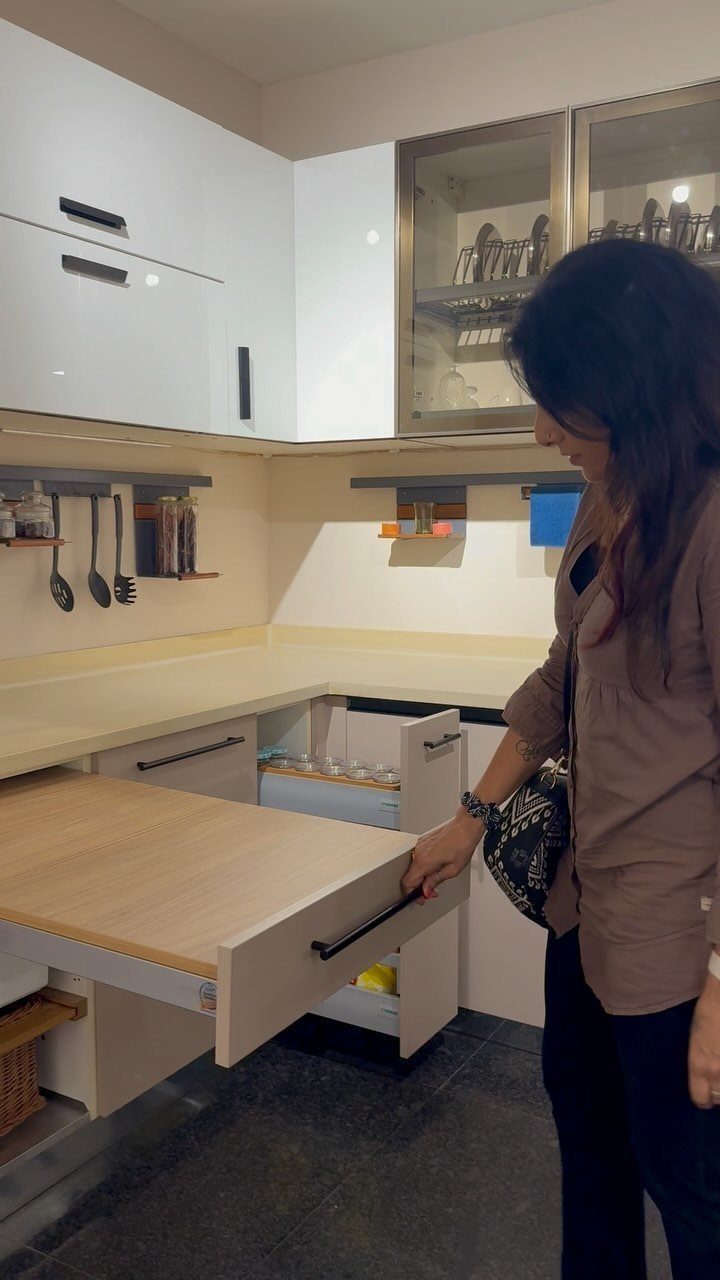
Under a fixed countertop sits a spot that usually goes unused: the slim band just below the work surface.
A light-wood board that slides out from there gives you extra room for rolling dough or chopping, then disappears when you’re done.
It suits a kitchen that is short on floor space, because nothing stays standing in the way. Expect some cabinet work to fit the slide, so renters should get a landlord’s okay first.
Wipe it down before pushing it back in.
9. Kitchen Island
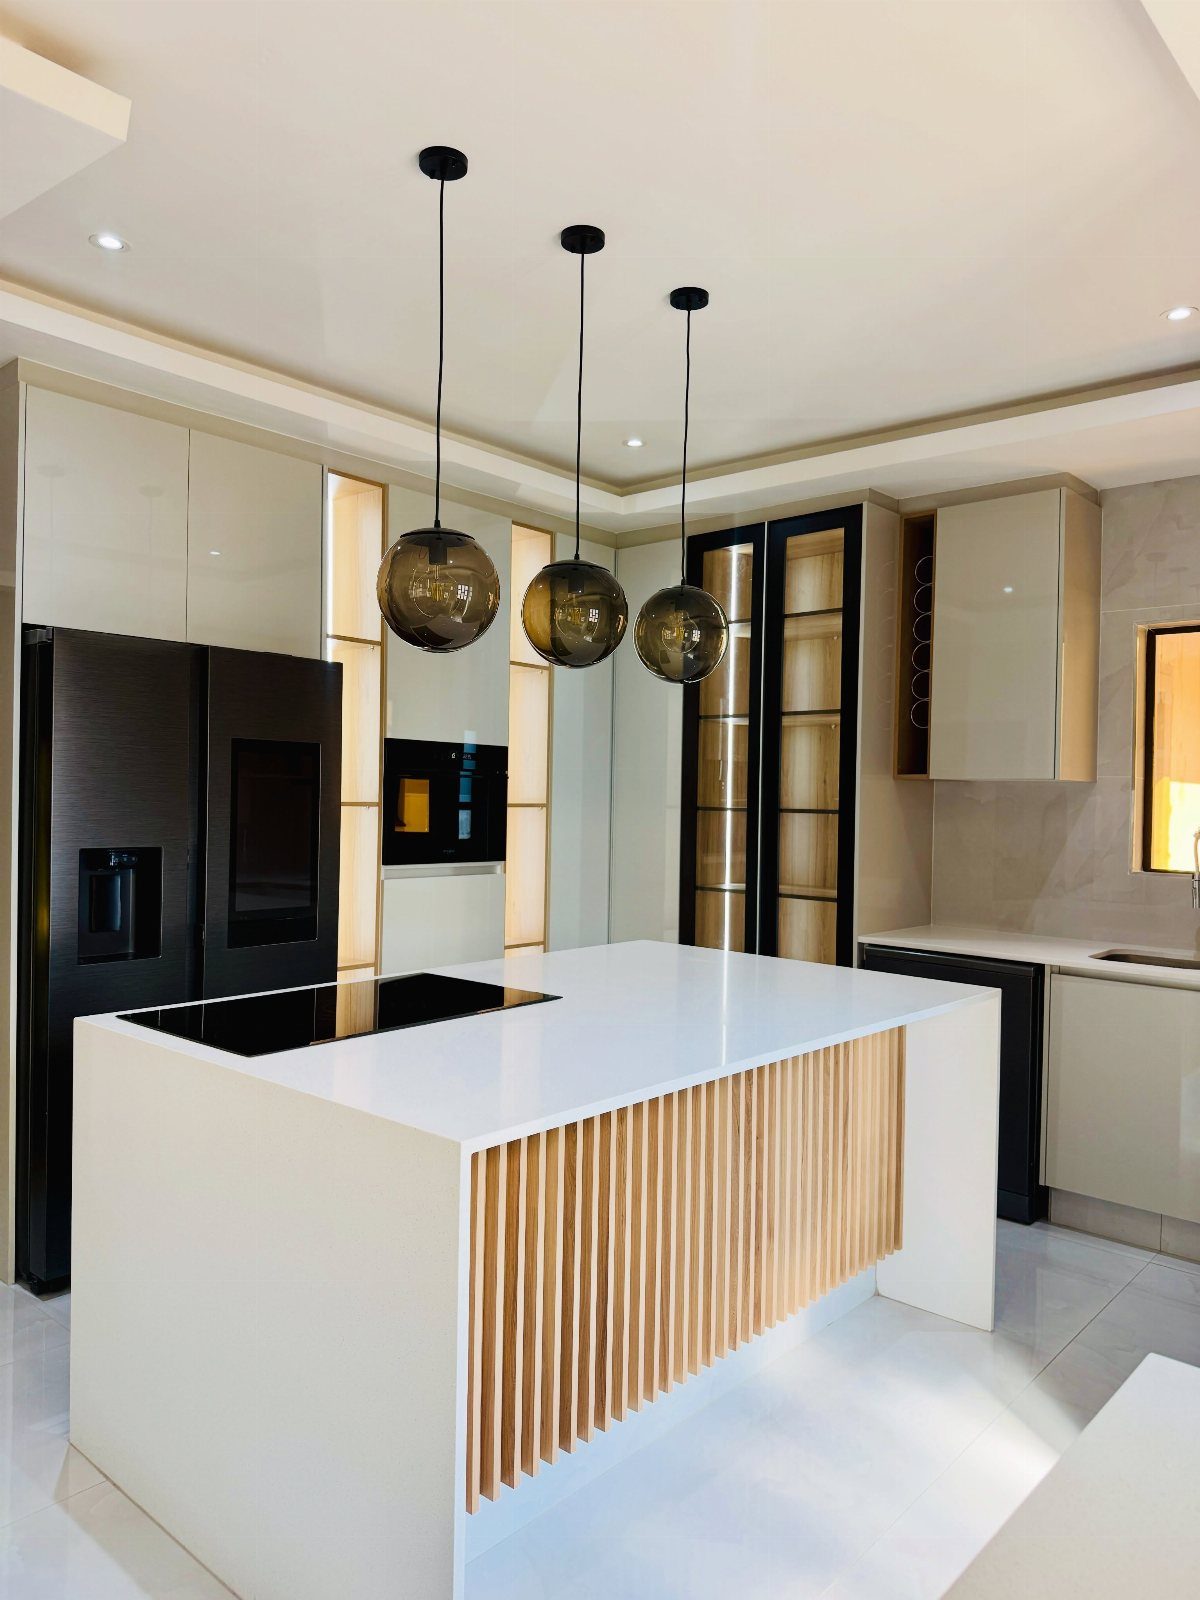
A central island is the one idea here that gives you a second room’s worth of work area.
A stovetop built into the top, as in this white island, lets you cook facing the room instead of a wall, and slats on the side add texture without adding bulk.
Seating along one edge turns it into a spot for homework or coffee.
It is a real renovation, though, with plumbing or wiring if you add a sink or burner, so it fits a kitchen with floor to spare and a bigger budget than a weekend.
10. Countertop Shelving
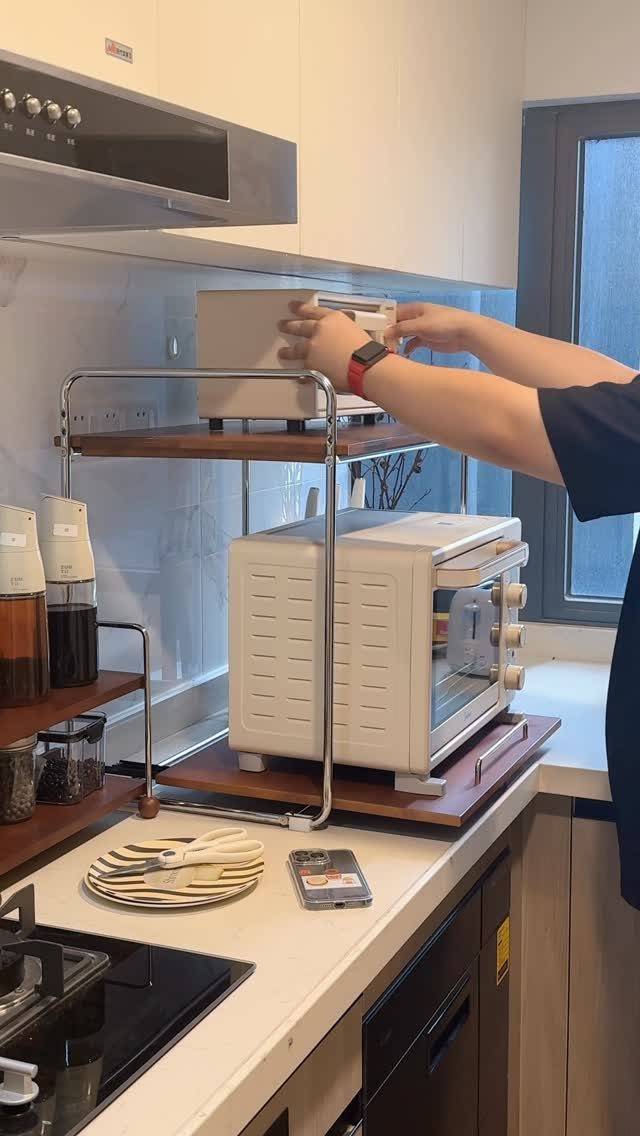
Wasted height is the problem a tiered shelf solves. A metal-and-wood unit stands on the counter and lifts a toaster onto the top level while a toaster oven fits below, so two appliances share one footprint.
Measure your tallest appliance against the gap between tiers, and leave room to pull plugs without moving everything.
I like the mix of metal and wood: the frame stays sturdy-looking and the wood keeps it from feeling like a restaurant rack.
Put the item you use daily on the top tier, where it is easy to reach.
Assess What Stays on Counters
Start by clearing the counters of everything except what you use daily, then cook a normal meal or two and watch what you reach for.
Whatever you never touched goes into a cabinet, a pantry shelf or a box in the garage.
Counters shrink slowly, one appliance or canister at a time, so most people stop noticing how much workspace they’ve lost. Putting everything back and seeing the bare surface is often the quickest way to spot the problem.
Keep the daily items grouped by task: coffee things in one corner, cooking oils and salt near the stove. Then the clear stretch of counter stays reserved for actual prep.
Kitchen Layout Limits Islands
Not every kitchen has room for an island. If walkways would drop too narrow, or the room is a galley or a corner layout, a counter extension is the better route.
Even a temporary one helps.
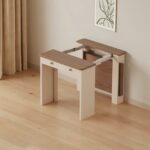
A folding or drop-leaf panel attached to the edge of an existing counter, or a board that rests on the counter and a sturdy base cabinet beside it, gives you extra prep room only while you’re cooking.
If you have a bit of floor space, a freestanding piece with wheels and shelving underneath can take over for a built-in island. The IKEA Bekvam is a classic, and it’s easy to hack to fit your kitchen.
Mark the island’s footprint on the floor with painter’s tape and leave it there for a full day, so you can tell whether you can still walk around it comfortably.
Frequently Asked Questions
What to do with extra space in the kitchen?
Put the dead space to work first.
Cabinets or baskets above the fridge can hold things you use only a few times a year, like a turkey roaster or a punch bowl, and a narrow metal rack on the inside of a cabinet door takes spices and oils.
In a kitchen with open floor, an island adds a second work zone, and a built-in one is a full remodel that runs well past a weekend budget, while a moveable island can come in under $200.
Can you add a countertop to an existing countertop?
Yes, and the easiest versions are temporary. Yes: mount a fold-down or drop-leaf extension along the counter’s edge, lay a thick board over the existing surface, or set a sturdy base cabinet right next to it.