
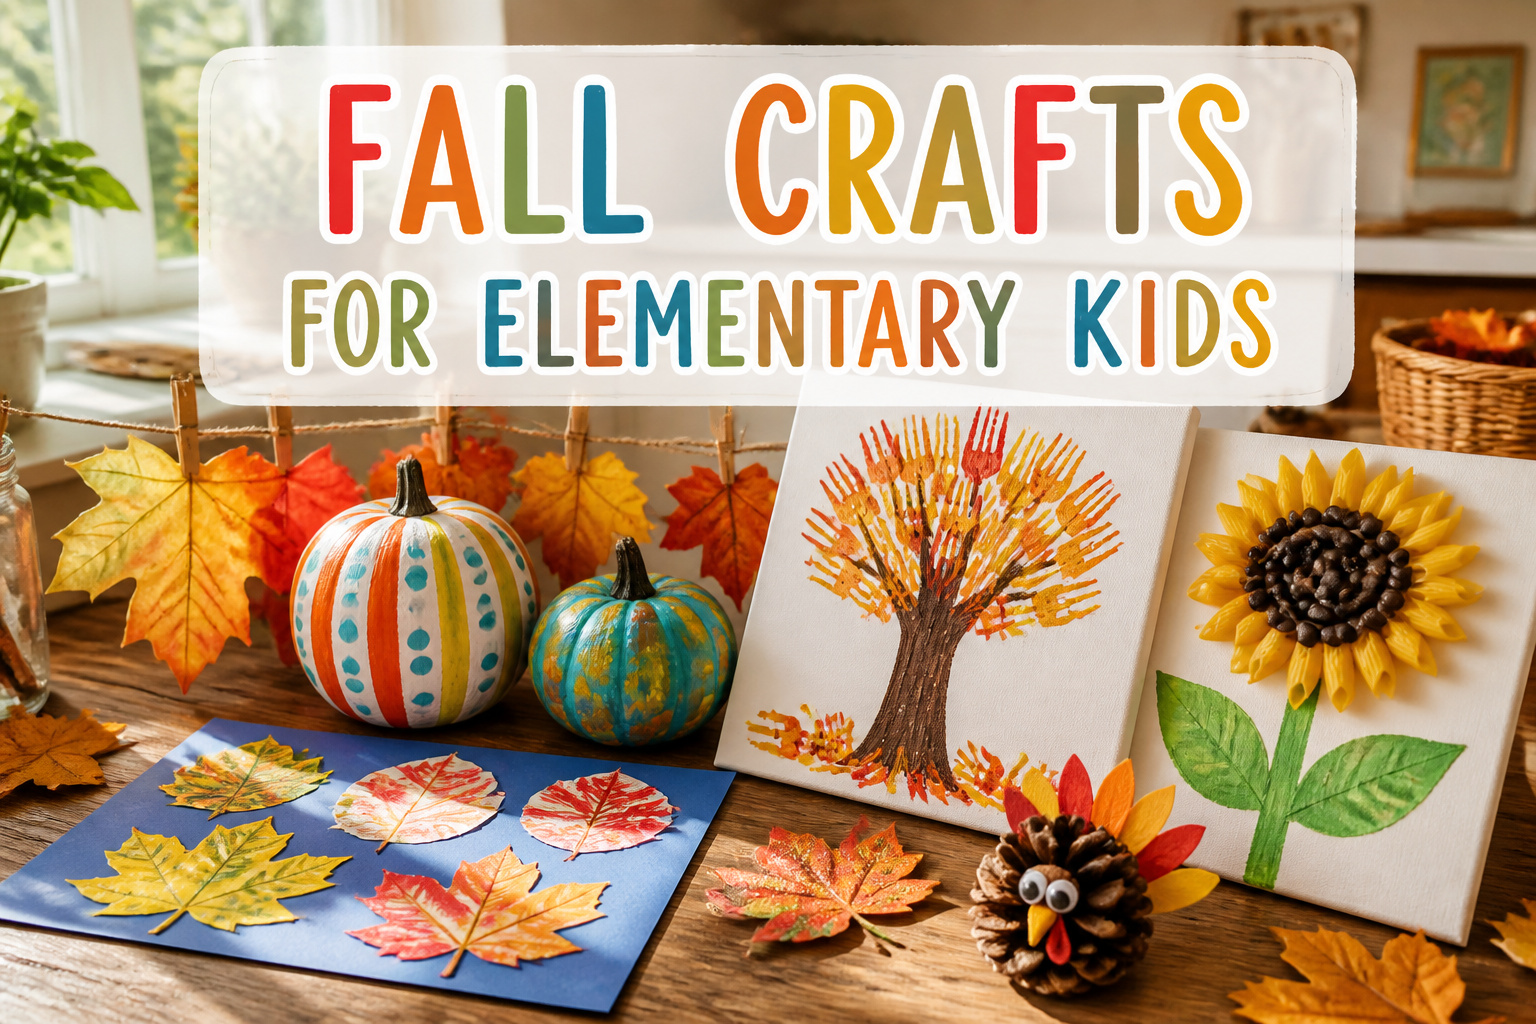
Most fall crafts for elementary kids sit at the messy end of the spectrum, but the real deciding factor is drying time. Start puffy paint after dinner and you are still staring at wet glue at bedtime; start it Saturday morning and the raised texture rewards patience. The fork-printed tree and coffee-filter leaves both finish in a single session, while the pasta sunflower needs overnight drying before it is ready to display.
1. Sunflower Noodle Craft
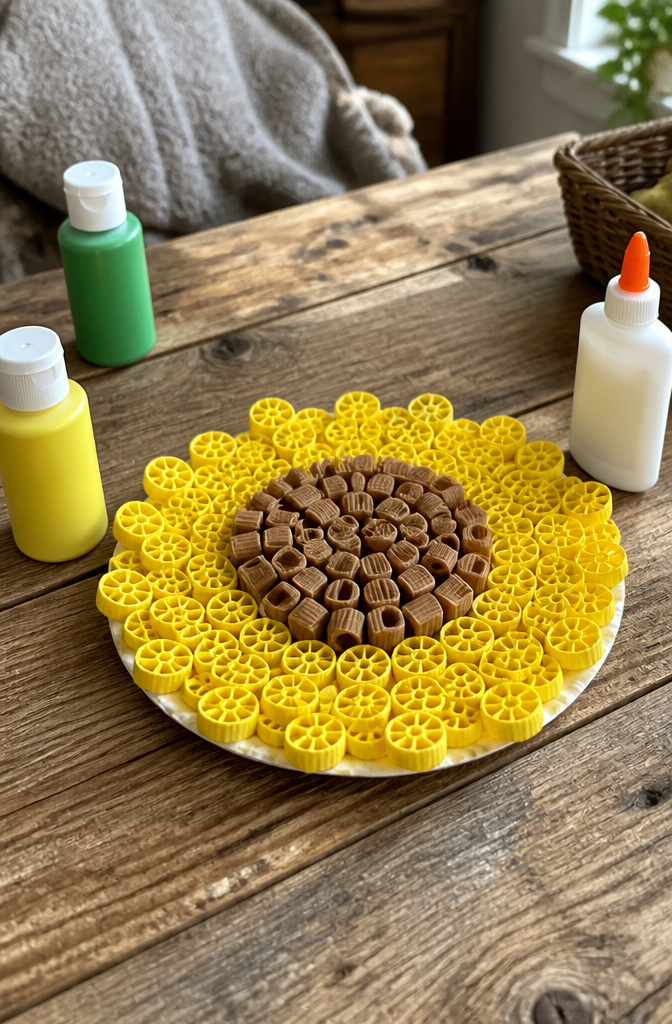
Pasta noodles make a surprisingly good stand-in for sunflower petals, and the shape kids reach for first is usually the wheel. Rigatoni or penne work for the center disk, while the ridged wheels radiate outward like seeds in the head. A paper plate gives you the backbone: glue the center down first, then arrange the wheels in a ring so they overlap slightly. Yellow acrylic paint covers the whole thing in one coat if you thin it just a touch, though tempera works fine if you seal it after with a quick spray of clear craft finish.
The sensory side of this one is what keeps kids at the table longer than a flat paper project. Running glue along the ridged edges, pressing each wheel into place, the slight crunch if one breaks; it all registers differently than markers on paper. Start the ring from the outside and work inward, or the center disk ends up too small and the petals splay. Dried pasta is brittle, so set out more wheels than you think you’ll need. A few always crack in half when the glue bottle squeezes too hard.
2. Fork Printed Tree Craft
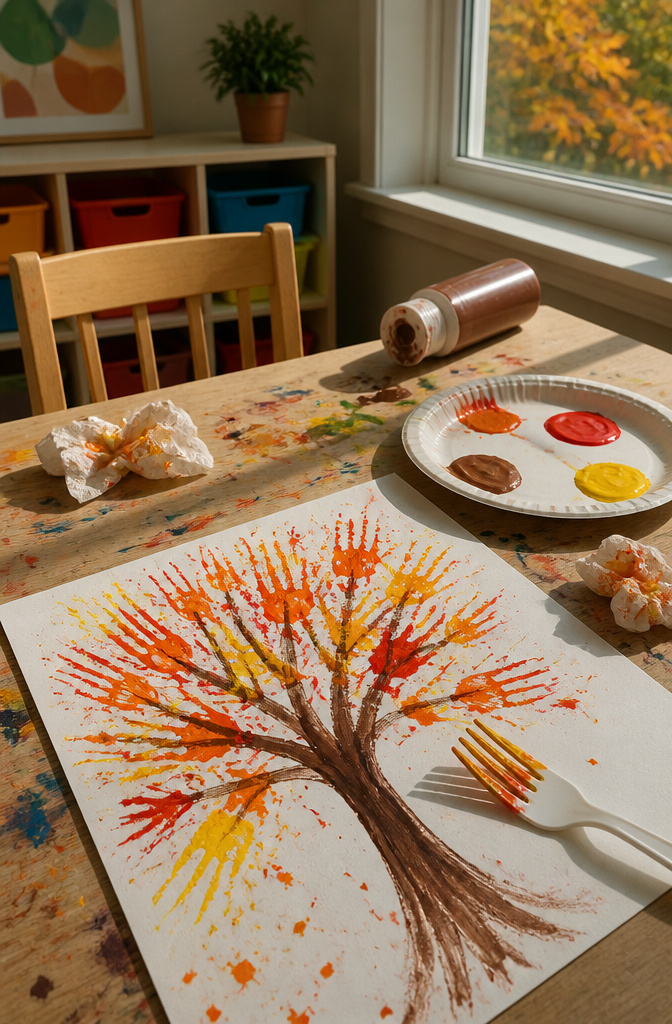
A fork dipped in paint makes a surprisingly good stand-in for autumn branches. The tines leave thin, spreading strokes that look like twigs reaching upward, and the flat back of the fork can stamp a rough trunk shape if you rock it slightly. I tried this with a group of second graders last October after watching another parent struggle with more complicated brushwork that the kids abandoned in minutes. The fork gave them control they could actually manage.
Set out a paper plate with puddles of red, orange, and yellow paint, plus a separate plate with brown. The child dips the fork tines into a color and presses or drags onto paper. Multiple dips without cleaning between colors make the muddled, realistic shades actual leaves turn. The wrist action of rocking the fork back and forth builds the same fine motor control that Q-tip dotting or tissue crumpling develops, but with a tool most kids already know how to hold. That familiarity matters on a busy Saturday when you want the project running, not you coaching grip positions for twenty minutes.
3. Alphabet Pumpkins
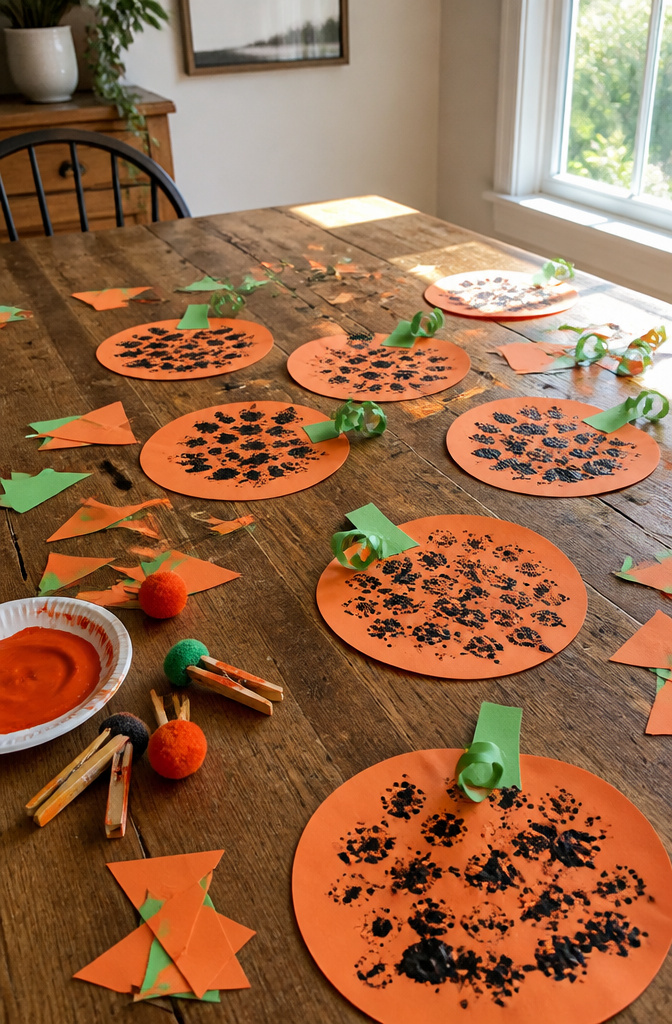
A clothespin and a craft pom turn plain paper pumpkins into a letter-recognition drill that feels like play. The child grips the clothespin, dips the pom into orange paint, and waits for you to call out a letter. They find the matching pumpkin on the page and dab the paint inside it. The physical act of searching, then stamping, keeps early learners focused longer than tracing worksheets manage.
This setup works best for ages four to six, the window where letter names are still locking in and fine motor control benefits from the clothespin squeeze. The learning outcome is straightforward: matching a spoken letter to its printed form, repeated until all twenty-six pumpkins are filled. The clothespin grip itself builds the same hand strength kids need for writing later, so the craft is doing double duty while they think they are just making a mess with paint.
You probably own the supplies already. A paper with drawn pumpkins, a clothespin, a craft pom, and orange paint. No drying time or prep beyond the pumpkin outline. The activity stops when attention drifts, and you pick it up again tomorrow with the remaining letters.
4. Scarecrow Craft
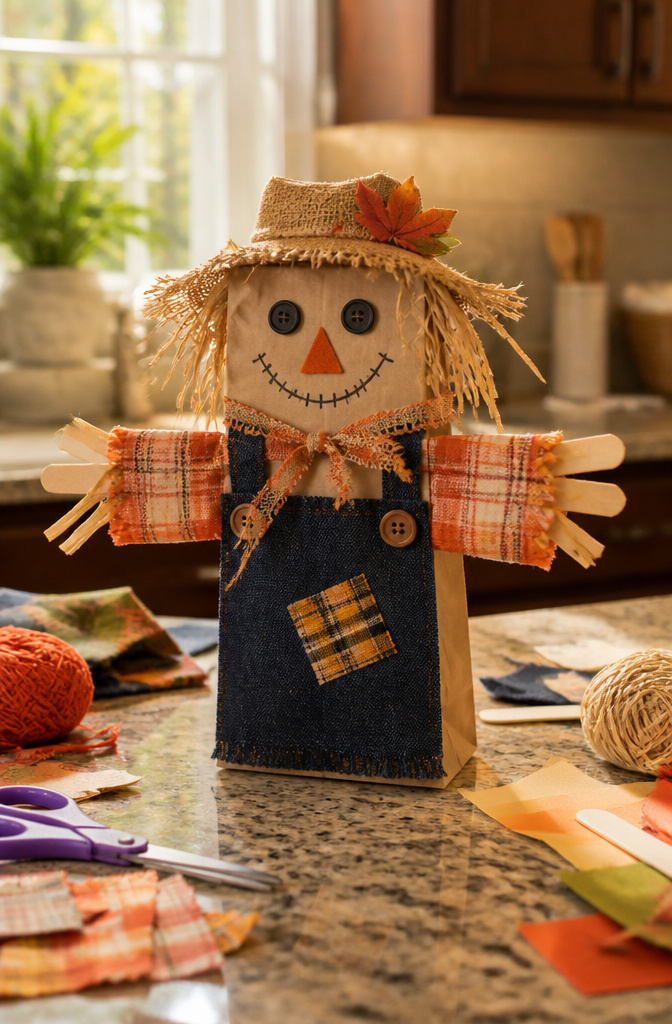
A scarecrow craft recurs across nearly every fall round-up for a reason: the shape is forgiving, and the materials are already in the house. Paper lunch bags, toilet paper tubes, empty coffee cans, and popsicle sticks all serve as the body. Fabric scraps or construction paper become the hat and clothes, buttons mark the eyes, and a length of rope or drawn line finishes the smile. What changes is the armature, not the idea. Bags flatten and stand on a shelf; tubes and cans sit upright without tipping; sticks string together into something poseable. The coffee can version wins for durability, since a straw hat and layered scraps hold up to actual garden display, while the bag version takes fifteen minutes and survives an afternoon of pretend play. Sources disagree on whether a printed pattern for the hat helps or limits the child, and the honest answer is that it depends on the kid. One of mine needed the outline; another treated it as a suggestion and cut a three-cornered pirate hat instead. Both looked like scarecrows. Both went on the porch.
5. Apple Tree Name Craft

Red construction paper and a brown marker are about all it takes for an apple tree name craft, which is why it survives the walk from the kitchen table to the classroom bulletin board so well. Each kid draws a trunk and branches, then cuts out one red circle per letter in their name. Gluing the apples in order from left to right turns the seasonal picture into actual spelling practice without them noticing.
A standard sheet of construction paper fits names up to about eight or nine letters. Longer names need a second tree trunk or smaller apples, which is worth deciding before the scissors come out. The cutting itself eats most of the thirty to forty minutes; the gluing and branch-drawing go faster.
Brown crayon works in a pinch, though marker holds up against the glue better. I have seen teachers pre-trace circles with a lid so kids just cut along the line, which saves time but costs some of the fine-motor benefit. For a name like "James" with five letters, the math is simple enough that early learners can count their own apples and feel clever doing it.
6. Coffee Filter Leaves

Coffee filters handle watercolor better than most people expect. The paper is thin enough that red, orange, and yellow markers bleed together the moment water touches them, which means kids get to watch the color spread in real time rather than waiting for a reveal. I like this one for the small science moment tucked inside the craft: the filter separates pigments as the water wicks outward, so the edges often turn a slightly different shade than the center.
The setup is simple. Let your child scribble fall colors across the filter, then give them a squirt bottle or a wet brush to saturate the paper. The color pooling is half the point, so an art tray underneath saves the table. Once the filter dries, cut it into leaf shapes and tape them to a window. The light coming through turns the blended edges into something that looks intentional, even when the original scribbling was not.
7. Fall Puffy Paint Crafts
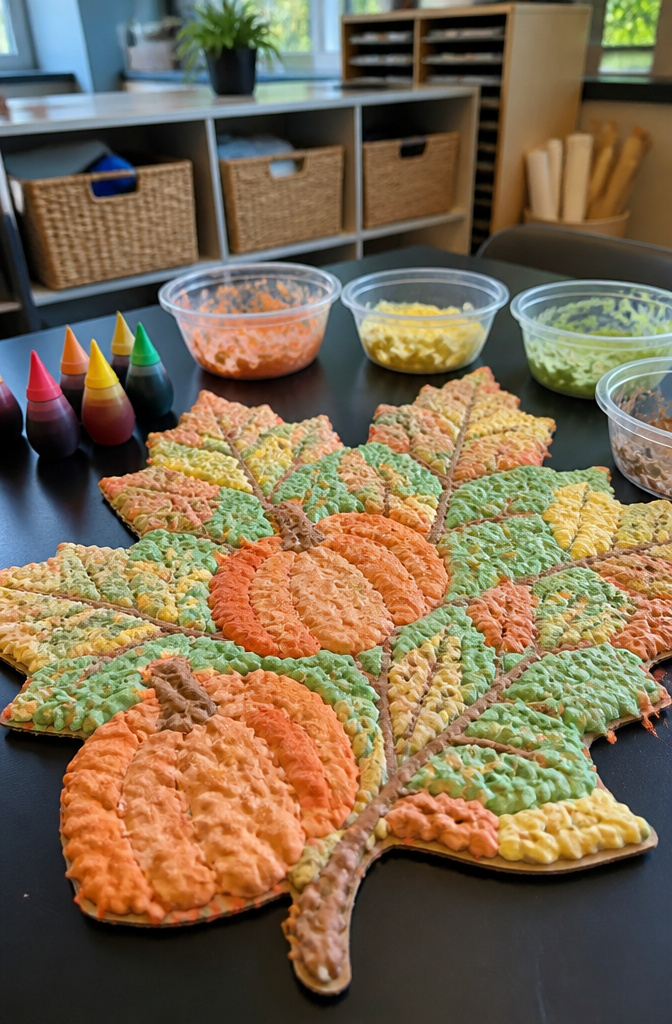
Puffy paint with shaving cream and glue lands somewhere between craft and science experiment, which is exactly why elementary kids stay glued to it. The recipe is simple: equal parts foam shaving cream and glue, stirred together in a bowl until it holds soft peaks. Food coloring turns the mixture into fall colors, and from there the kids spread it onto cardboard cut into leaves, pumpkins, or whatever shape you traced the night before.
The sensory payoff is real. The paint feels cool and squishy going on, and it puffs up as it dries, giving the finished piece a raised, almost popcorn texture that regular paint never manages. My own hesitation with this one has always been cleanup. Shaving cream means the table ends up slick, and the glue in the mix means whatever lands on sleeves or hair sets up fast. I keep a damp rag within arm’s reach and accept that the floor around the chair will need a pass afterward.
Drying takes longer than you’d guess from the airy texture, sometimes overnight, so this works best started early in a weekend morning rather than after dinner on a school night.
8. Paper Loop Sunflower Craft
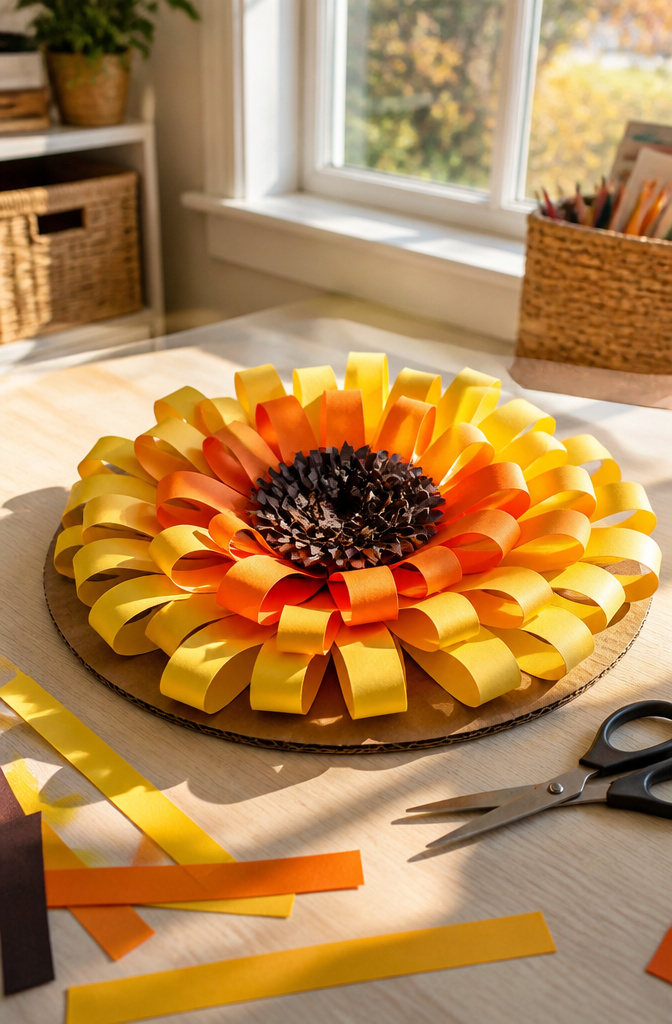
Paper loops give a sunflower real depth without any need for special materials. I start with a stack of construction paper cut into strips about an inch wide. Each strip gets curled into a ring and sealed with a glue stick, then the rings are pinched at one edge so they stand open like little tunnels. The center stays tight with smaller loops, while the outer petals grow larger as you work outward, and that size change is what tricks the eye into seeing a flower instead of a pile of rings.
A circle of cardboard underneath keeps everything from collapsing. Glue the loops upright onto that base, working from the middle out, and the thing becomes surprisingly sturdy. My nephew knocked his off the table twice and the loops just bounced; a noodle version would have scattered across the kitchen.
The real payoff is watching kids figure out the structure themselves. They want to lay everything flat at first, but once they see how the third dimension works, they start engineering their own arrangements. Yellow and orange paper read as fall without any need for seasonal stickers or glitter.
9. Noodle Pumpkin Craft
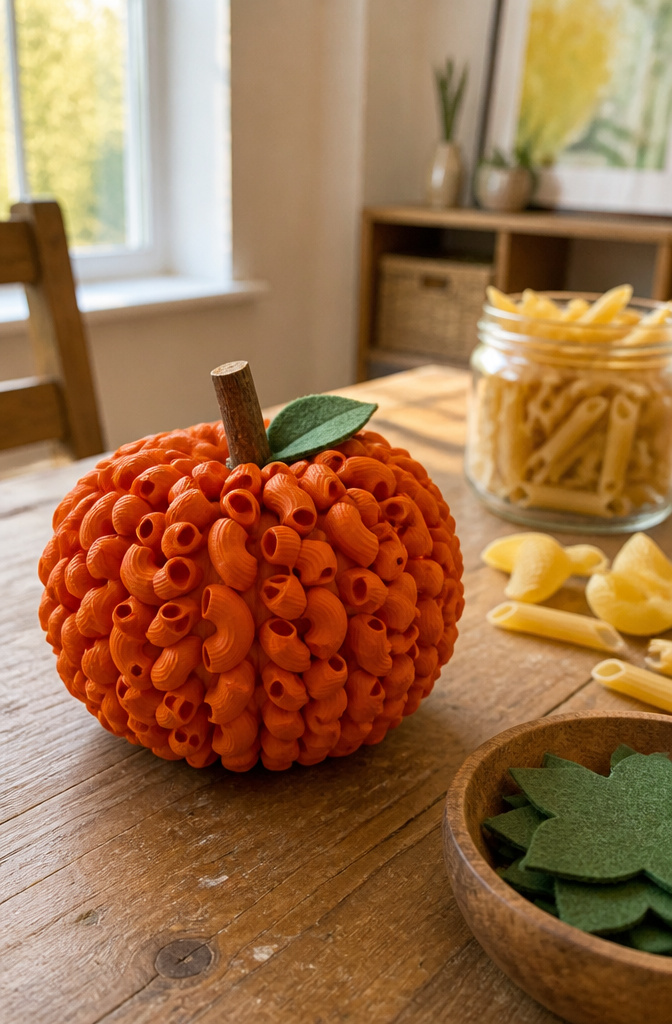
Elbow macaroni has a natural curve that sits upright, so it reads instantly as a little pumpkin on a page. The bumps line up like ridges on a gourd, and the hollow ends catch a second, darker paint color inside for that bit of shadow real pumpkins carry.
Paint sticks to raw pasta without any primer. I have found it easier to dye the noodles first with watered-down tempera in a bag, shake them dry on wax paper, then let the kids glue the shaped shells into a circle on orange cardstock. The craft holds better if you include a straight piece of penne across the back as a stem. A small leaf cut from felt or a real something green presses in between.
Compared to the sunflower noodle craft from earlier, this one builds faster and needs less direction. The sunflower wants radiating lines and a flat face glued center; younger kids lose patience sorting lengths. A pumpkin forgives a lopsided circle. It also dries harder, since the noodles rest on edge rather than flat, and that gap behind makes it easier to thread into a garland later if you want.
10. Apple Tree Cotton Ball Painting
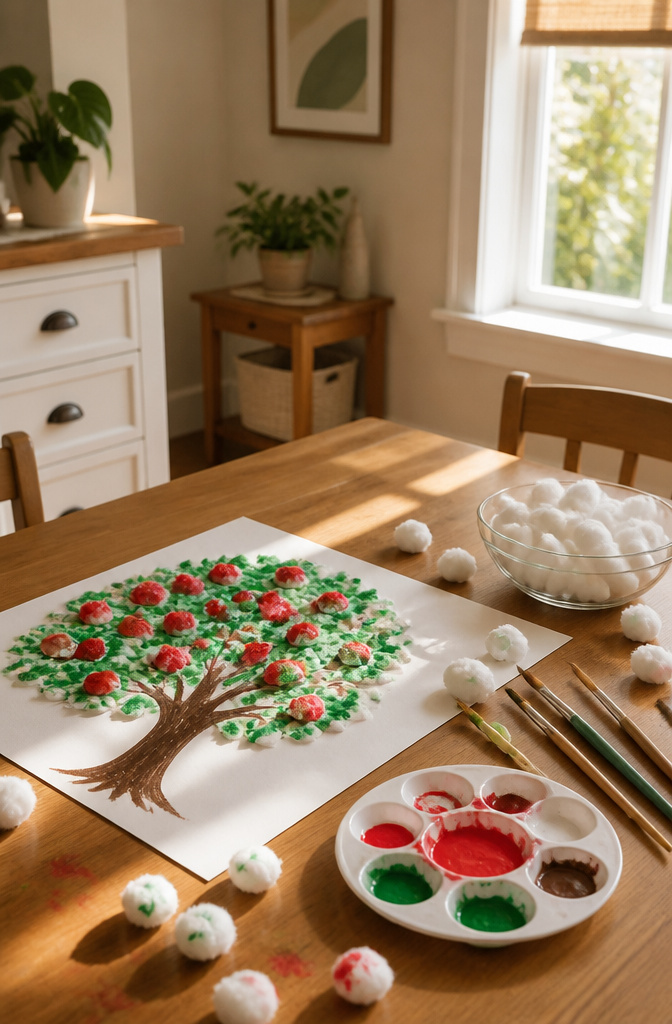
Cotton balls clipped to clothespins make the simplest dabber for small hands, and the texture they leave behind actually looks like clustered leaves rather than flat brushstrokes. I watched this method work best with younger elementary kids because the clothespin acts as a built-in handle, so they are not gripping a soggy ball or getting paint up to their wrists. The cotton soaks up enough green paint to stamp several times before reloading, which keeps the rhythm going for kids who lose patience with frequent dipping. After the foliage is down, a finger dipped in red paint drops apples onto the branches and around the base, no extra tool needed. The finished tree has a mottled, almost sponged canopy that reads as real growth, not a solid green blob, and the fallen dots at the bottom give a narrative a six-year-old can explain without prompting.
11. Fingerprint Fall Tree Craft

Finger paint and small children are a combination that sounds messier than it has to be. A damp paper towel within arm’s reach saves the table and the mood; I keep a stack by the workspace and another by the sink. Brown crayon or marker draws the trunk and branches first, then each child presses a fingertip into red, orange, or yellow paint and dots it where leaves would fall. Thumbprints work for fuller foliage, pinky prints for the tiny branches near the top. The real payoff is letting them sign their name in the corner or add a squirrel in the roots, something no two trees end up sharing. A hairdryer on low finishes the piece in about two minutes if the afternoon is sliding toward dinner.
12. Leaf Hedgehog Craft
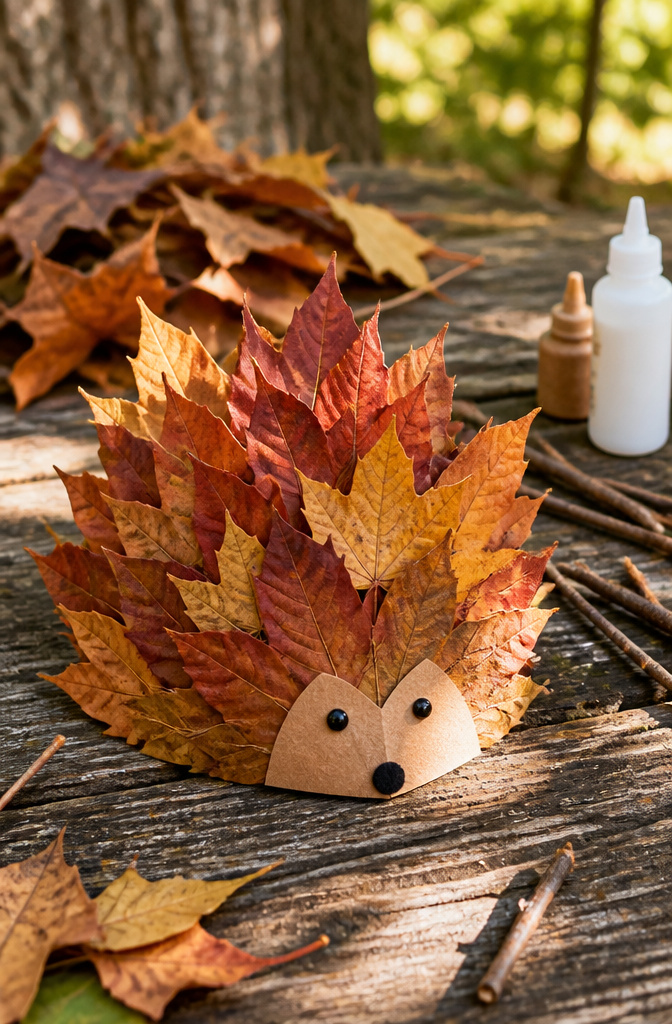
Real leaves hold their shape better than you might expect if you collect them at the right moment. I like to send kids out after a dry morning in late September or early October, when the maple and oak leaves have turned but still carry some moisture in the veins. Crisp brown curls won’t lie flat against paper no matter how much glue you use.
The hedgehog body is a simple oval drawn on cardstock or cut from a paper plate. School glue applied to the leaf stem ends, not the paper, keeps the spines from sliding while the adhesive sets. Press each leaf so the tip points outward and the stem meets near the center; overlap them like shingles and the whole structure gains stiffness.
Acrylic paint can extend the season if your local leaves are still green. Let the kids brush on reds and yellows, then dry the leaves thoroughly before gluing. Wet paint against paper warps the backing and the spines loosen within a day.
The nature collection matters as much as the finished piece. A walk to gather ten or fifteen good specimens burns energy before the sit-down work begins, and kids notice more when they know the leaves have a purpose waiting at home.
13. Apple Threading Craft
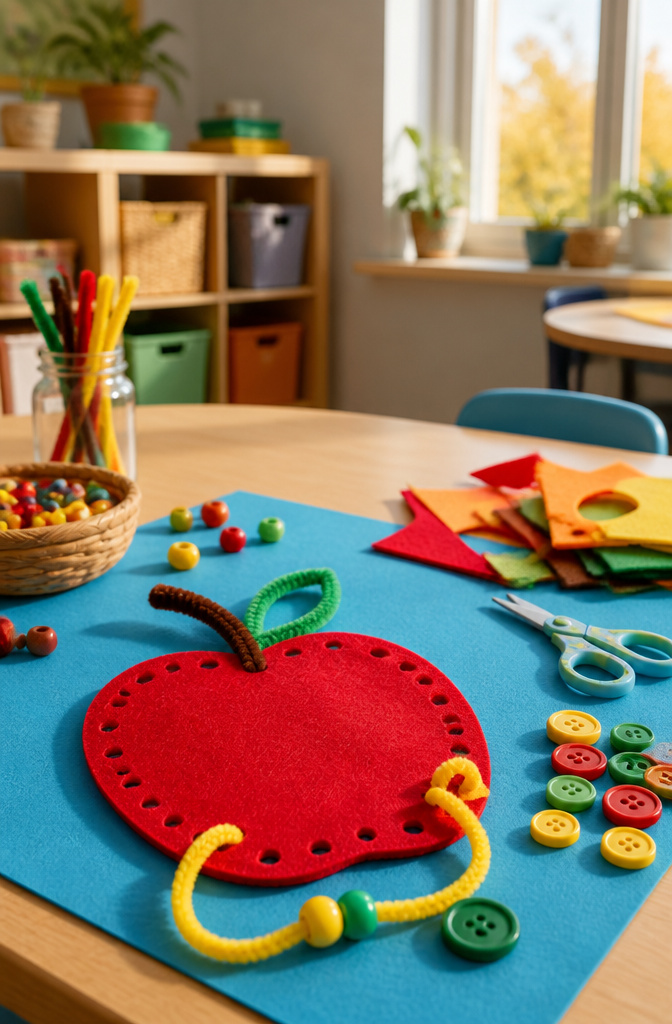
Threading yarn or pipe cleaners through punched holes turns a simple apple cutout into fine motor practice that actually holds a child’s attention. The motion of pushing through and pulling back builds the same finger strength kids need for shoe-tying and buttoning later on.
Paper works, but felt holds its shape through repeated threading without tearing at the holes. A standard hole punch makes openings just wide enough for yarn; pipe cleaners slip through more easily and hold their bent shape if kids want to form the apple afterward. Beads strung halfway up the pipe cleaner let them bend the bottom, bring the sides up, and finish the round apple form before twisting the top closed.
A second brown pipe cleaner twisted around the top becomes the stem, with a bent green one for the leaf. The finished piece stands up to being threaded and re-threaded, which matters more than it looks like it would. A kindergartner who sat still for this one at our table last fall went back to it three times that afternoon, each pass a little faster and a little more controlled.
14. Pumpkin Seed Counting
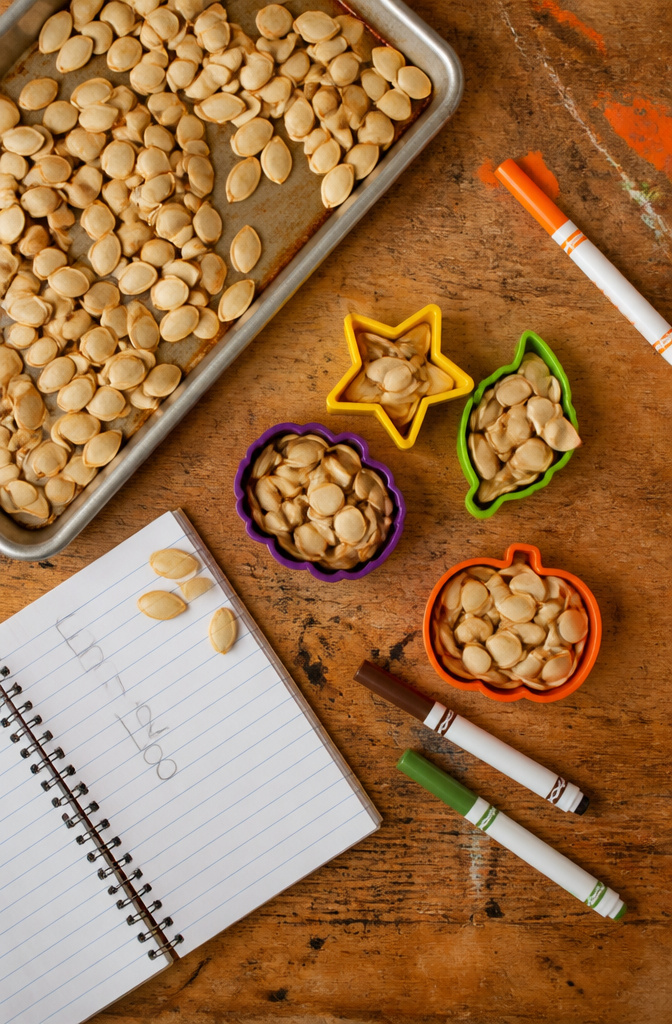
Pumpkin seeds pulled from a carved jack-o’-lantern usually go straight to the trash, which is a missed opportunity. Spread them on a baking sheet to dry overnight, and they become a free manipulative that bridges craft time and early math. The hands-on sorting and counting work keeps younger elementary kids engaged longer than worksheets do, and the slightly irregular shapes force them to really look at each number rather than glide through memorized sequences.
Cookie cutters turn the activity into something more structured. A child fills each shaped outline with seeds, then counts how many fit inside a star versus a circle, or estimates which cutter holds more before they start. Plan on about 10 minutes of adult prep the night before to wash and dry the seeds thoroughly; damp ones clump together and frustrate small fingers. The activity itself runs 15 to 20 minutes, which matches the attention span of most kindergarten through second-grade kids. Skip the dyeing step some blogs suggest; plain seeds are easier to grip and less likely to leave colored residue on the table.
15. Leaf Fall Tree Craft
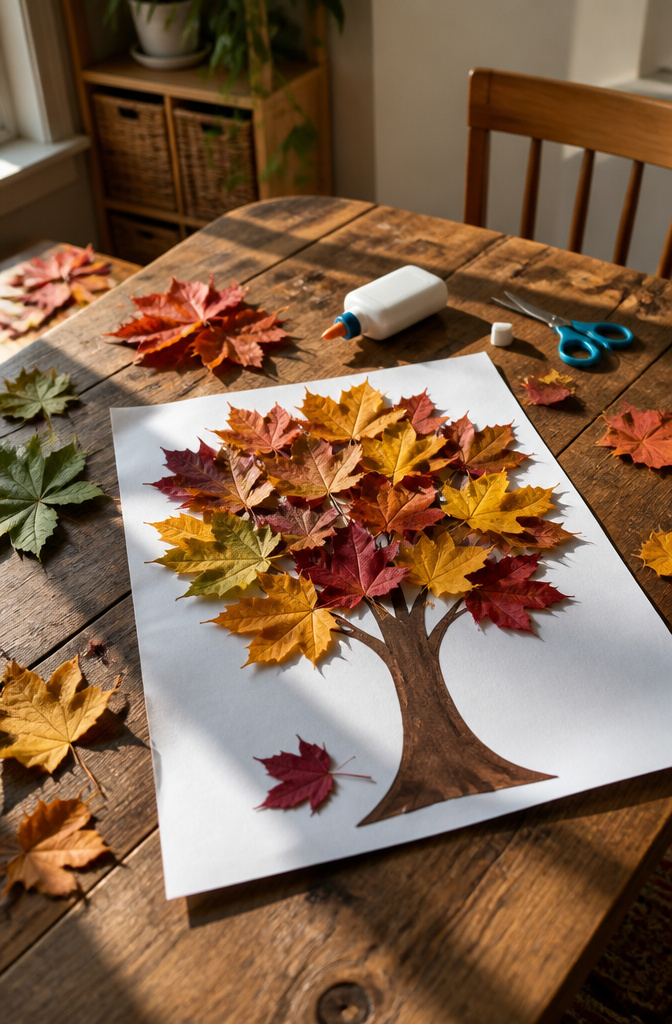
Real leaves glued as foliage on a tree silhouette hit differently than the coffee filter or fingerprint versions floating around the same Pinterest boards. The coffee filter method bleeds watercolor into soft, blurry rounds that look pretty but identical to every other kid’s project. Fingerprint trees read as keepsakes for parents, not something the child actually built. A leaf tree lets elementary kids curate their own palette from the yard, and the final piece carries the irregular edges and vein patterns no stamp can replicate.
The hunt matters as much as the glue. My kindergartener spent twenty minutes rejecting yellow-brown leaves for ones that still held red, and that deliberation became half the craft’s value. Press the leaves flat under a book for a day first; waxy or curled edges refuse adhesive and peel by morning. A simple trunk and branch silhouette cut from brown construction paper gives enough structure without demanding precision scissors work. White glue thinned slightly with water brushes on easier than straight from the bottle and dries flatter.
Where this craft stumbles is in longevity. Sealed leaves crack within weeks, and laminated versions lose the dimensional quality that made them interesting. Treat it as a seasonal window piece, not a keepsake, and nobody leaves disappointed.
16. Pasta Owl Craft

Wheel pasta, with its ridged circles and open centers, makes the eyes on these owls almost by accident. The first time my niece and I tried this, she held up a rotelle and said it already looked like it was staring at her. That is the shape that carries the craft: wheel pasta for the eyes, a ridged conchiglie shell for the body, and two bowtie farfalle for wings folded flat against the sides. A small shell or a single ziti piece glued underneath rounds out the feet.
The assembly is forgiving, which matters more than it sounds. Elementary kids do not have the fine motor control for precise placement, and the pasta tolerates being nudged around while the glue is still wet. Acrylic paint sticks to the dried noodles better than school glue does, so paint first, assemble second, and let everything dry overnight before adding googly eyes or drawn-on details. The wheel pasta centers are deep enough to hold a dot of yellow paint that reads as an iris from across the room.
What breaks the illusion is scale mismatch. A jumbo shell with tiny wheels looks like a mistake rather than a stylized owl. Match the body shell to a wing pasta that is roughly half its length, and the proportions hold. We learned that the second time through, after the first owl looked more like a surprised potato.
17. Candy Corn Noodle Craft
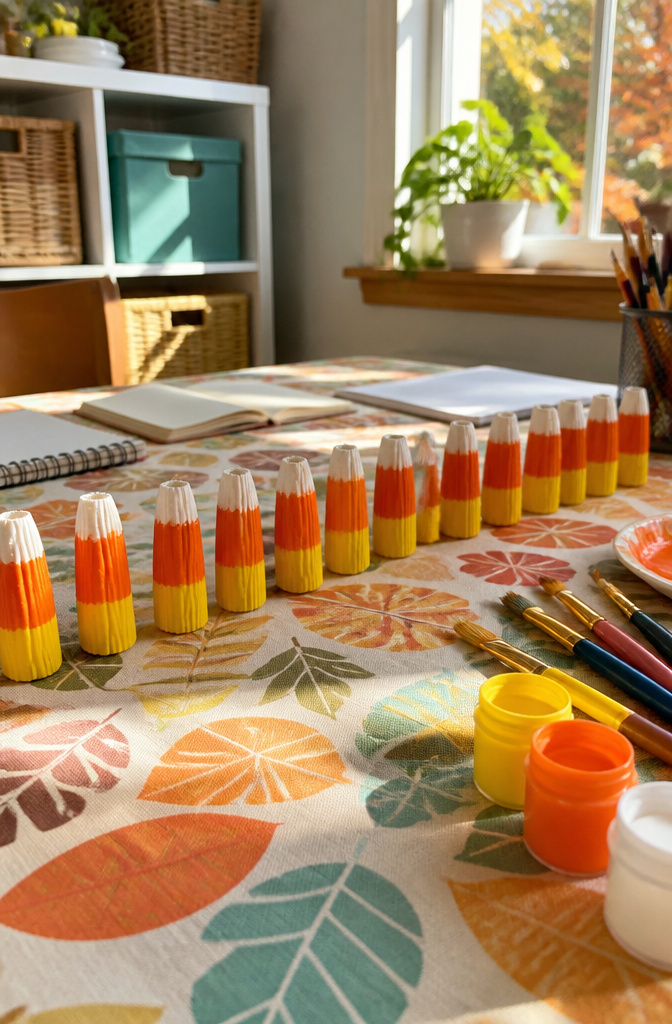
Candy corn’s three-color stripe is easier to paint onto straight pasta than onto a curved pumpkin shape. I learned this the hard way after two noodle crafts where the round surface kept smudging. Rigatoni or penne gives you a flat side to work on, and the yellow base, orange middle, white tip reads instantly as October even if the proportions wobble.
Acrylic paint covers in one coat and dries within twenty minutes, which matters when a second-grader wants to see the finished band right away. Tempera works too but needs a second pass; by then my own kid usually wandered off to check whether the glue had set on something else.
The seasonal reference lands sharper here than with the pumpkin or sunflower versions. Those patterns work for any harvest theme; this one ties specifically to the candy bowl on the counter, the costume parade, the last warm week before November. String the finished pieces onto yarn for a necklace, or pile them in a glass jar where the stripes stack like the real thing.
18. Fall Leaf Portrait
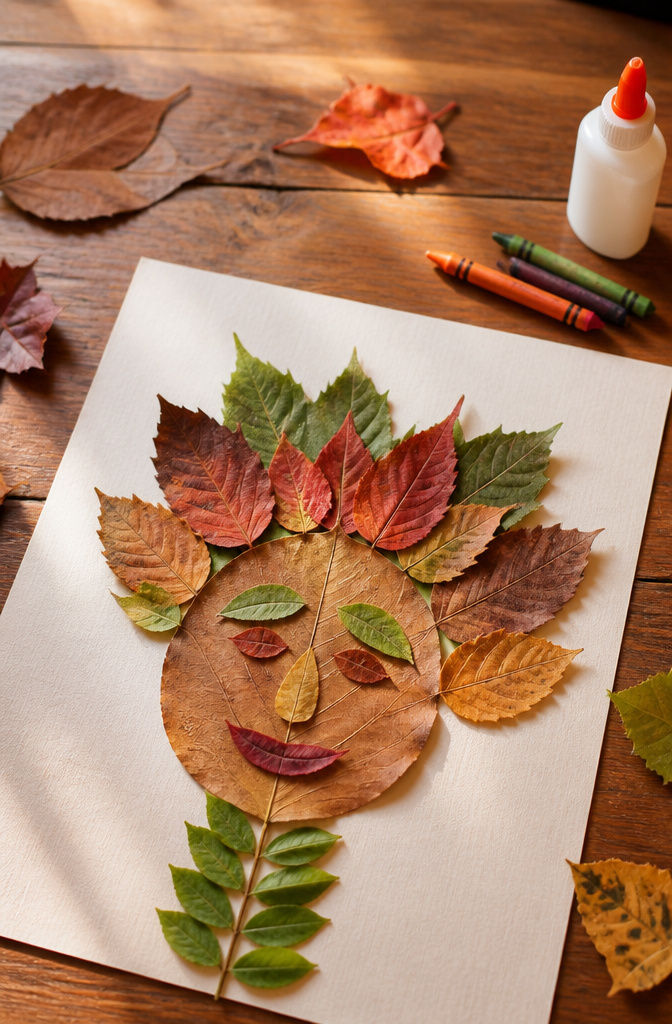
Small leaves with jagged edges make the best hair, while a single broad oak leaf pressed sideways becomes a nose that actually looks like a nose. The trick is choosing leaves before they curl; once the edges roll, they will not lie flat against paper no matter how much glue you add. I learned that the hard way last October with a pile of beautiful red maple leaves that cracked by afternoon.
For the face itself, a simple oval drawn in pencil lets kids rearrange leaves without committing. Place the eyes first, slightly higher than feels natural; leaves read heavier than crayon lines, and low-set eyes turn a cheerful portrait into something from a nightmare. A stem or thin grass blade makes a convincing mouth with almost no effort. Glue sticks work fine for flat leaves, but slightly dried ones need white craft glue dotted on the back with a cotton swab so it does not squirt through the veins. Press the whole thing under a book for an hour, or the hair slides south by morning.
19. DIY Autumn Placemats
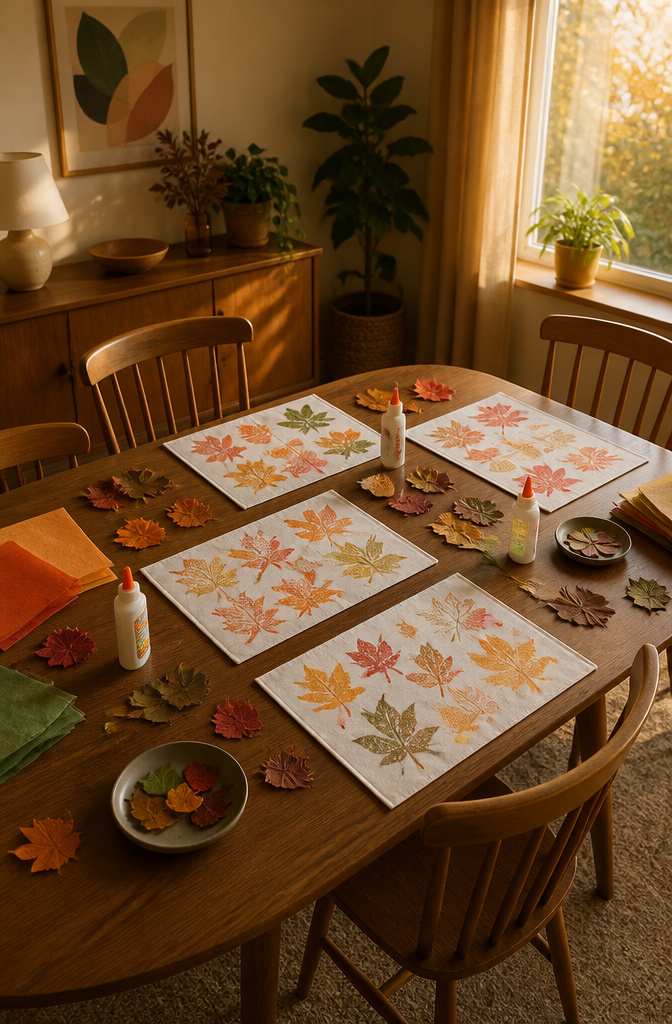
Laminated placemats turn a single afternoon of leaf-stamping into something that survives actual spaghetti night. The contact paper method from leaf sun catchers adapts well here: kids arrange tissue paper bits and real leaves between two sheets, you press the air out, and the result is a flat, wipeable surface. For Thanksgiving specifically, potato stamps on linen look sharp, though that version needs clear vinyl layered on top or premade placemats underneath since sewing isn’t a weekend project for most renters.
The durability question is where contact paper beats lamination for home use. Pouch laminators seal edges completely and look more finished, but the stiff plastic cracks after a few bends and you can’t run a standard pouch through most home machines at placemat width anyway. Contact paper stays flexible, peels up for repositioning if a corner traps air, and costs a fraction per mat. Either way, the art layer sits exposed enough that sharp utensils will eventually score it, so these work best as holiday-only tableware or under plates rather than as daily workhorses.
20. DIY Shaped Birdseed Feeders
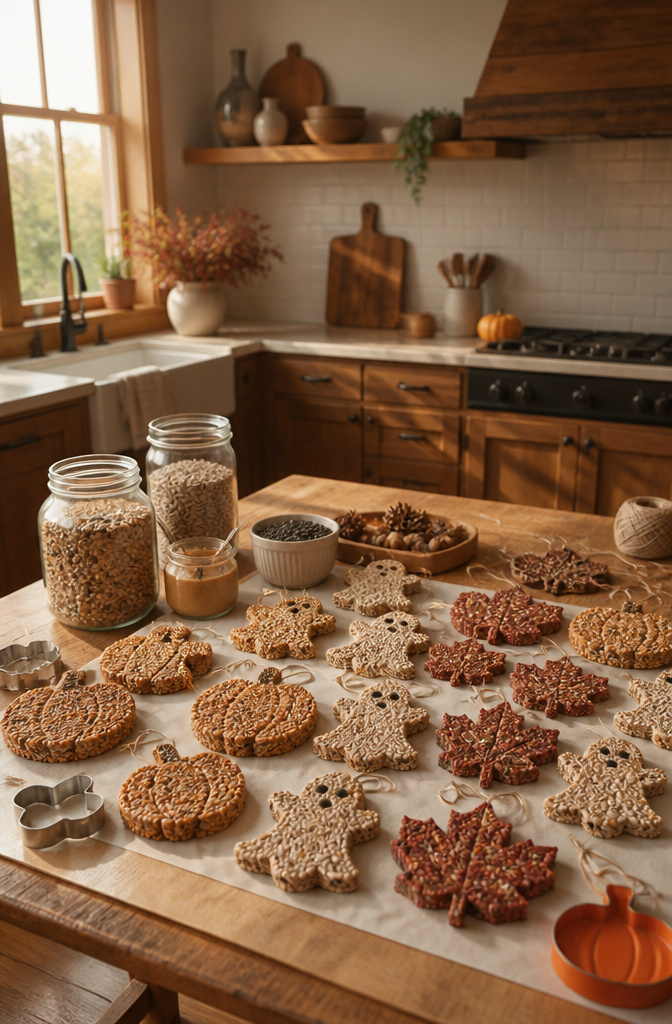
Gelatin or peanut butter will hold birdseed together long enough to set inside a cookie cutter. Autumn leaves, ghosts, or pumpkins all work, though the shape only matters for about a day before squirrels rewrite the design. Hang them on a branch thin enough that a squirrel cannot reach it from above or below, because anything sturdy enough for a bird becomes a squirrel lunch counter within the hour.
The peanut butter version is faster: press the seed mix into the cutter, poke a straw through for the string hole, then freeze until solid. Gelatin takes longer to set but holds up better if rain hits before the birds find it. Either way, the feeder lasts maybe two weeks in fall weather before it crumbles or gets carried off piece by piece.
If peanut allergies are a concern in your house, skip the jar entirely. A nut-free sunflower seed butter works, though birds seem slower to find it. The real win here is not the feeding itself; it is watching a six-year-old decide whether a ghost-shaped feeder counts as Halloween decoration or bird hospitality, and discovering it can be both until the squirrels vote otherwise.
Frequently Asked Questions
What are some easy fall crafts for kids?
The article covers twenty options that use simple materials already in most homes: pasta noodles for sunflower and pumpkin shapes, forks dipped in paint for autumn trees, coffee filters with watercolor for leaves, and paper loops built into 3D flowers. Many projects, like the scarecrow craft built from lunch bags or toilet paper tubes, need only glue, scissors, and scraps from a junk drawer. The fork printed tree and fingerprint tree both keep supplies to paint, paper, and a tool or finger.
What materials do I need for fall crafts?
Most projects rely on paper plates, construction paper, glue sticks, and acrylic or tempera paint. Pasta noodles show up repeatedly: wheels for sunflower petals, elbow macaroni for pumpkins, rigatoni for candy corn stripes. Other common items include coffee filters, cotton balls with clothespins, real leaves from the yard, and shaving cream mixed with glue for puffy paint. A few crafts add felt, yarn, or pipe cleaners for threading and shaping.
Are these crafts suitable for toddlers?
Several projects work for younger children with minor adjustments. The apple tree cotton ball painting uses a clothespin as a built-in handle so small hands avoid gripping soggy cotton directly. The alphabet pumpkin clothespin activity targets ages four to six. Simpler options like the fork printed tree or fingerprint tree need less precision than the pasta crafts, which require placing brittle noodles carefully. The article notes that dried pasta cracks under too much squeezing, so extra pieces help with younger kids.
How can I incorporate learning into fall crafts?
The alphabet pumpkins turn letter recognition into a stamping game: you call out a letter, and the child finds and fills the matching pumpkin. The apple tree name craft spells out names left to right with one paper apple per letter. Pumpkin seed counting fills cookie-cutter shapes for comparing quantities and estimating. The clothespin grip in several projects builds hand strength for writing later, and the coffee filter leaves include a small science moment watching pigments separate as water wicks outward.






