
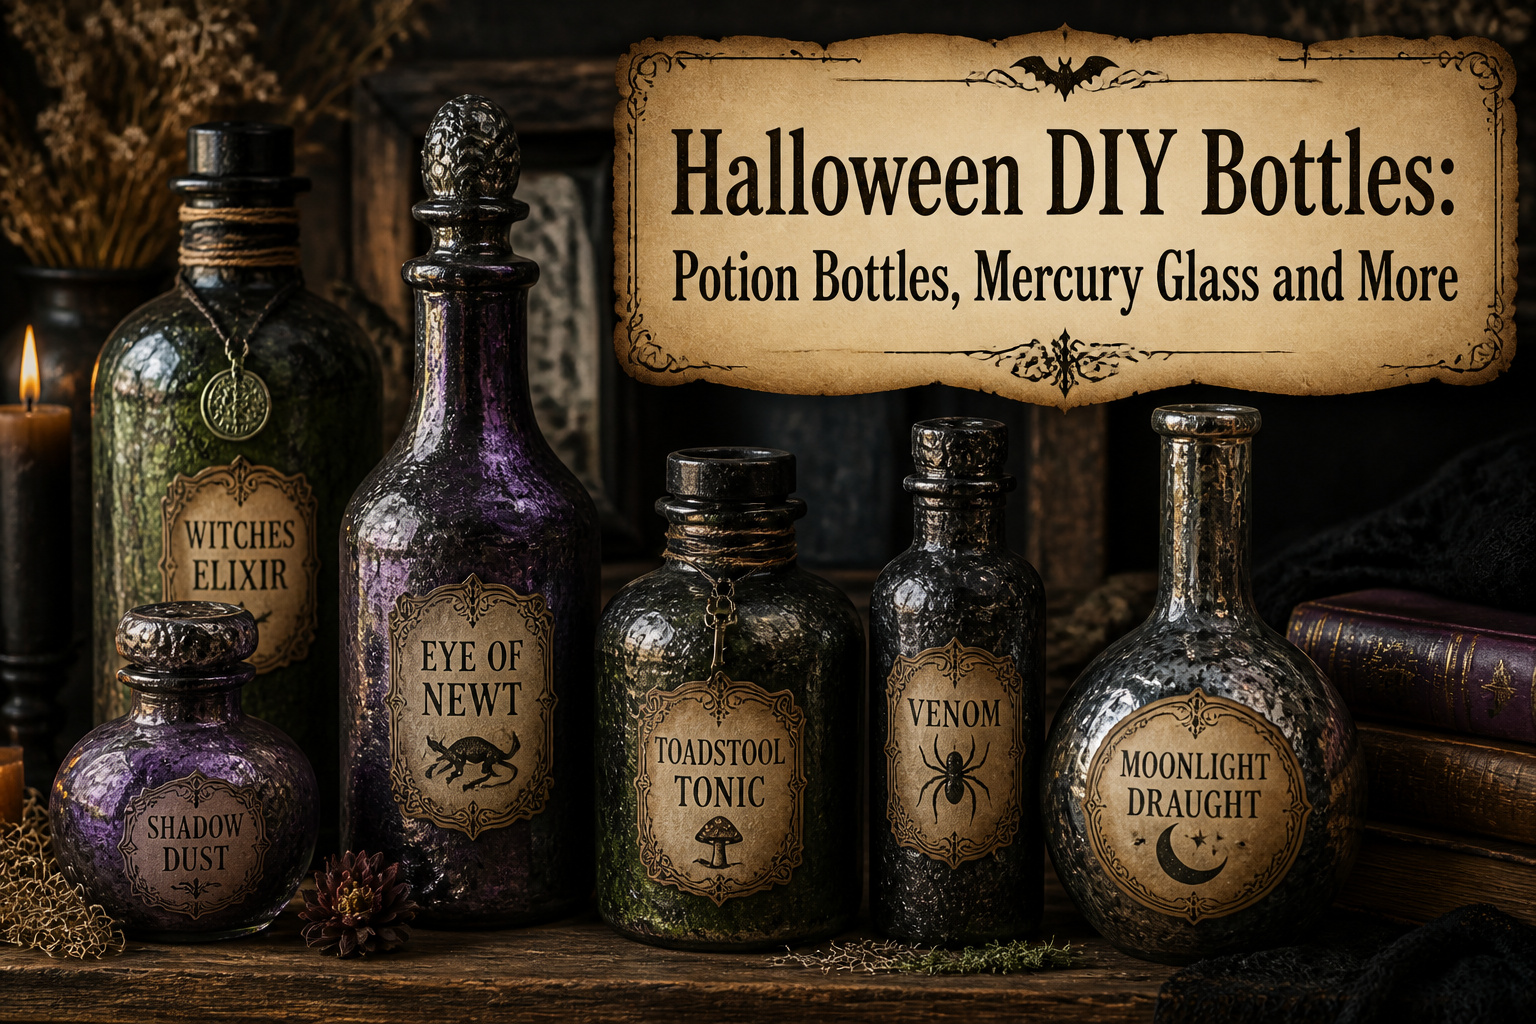
Halloween DIY bottles are glass containers, usually old wine or vinegar bottles, that you paint, texture, and label to look like potion bottles, mercury glass, or aged apothecary ware. The catch is that most people stop after one coat of paint and wonder why the finish looks like plastic craft store junk. Two coats of black acrylic, with baking soda stirred into the second, builds the ridges and valleys that catch light like corroded metal.
Collect and Clean Old Bottles
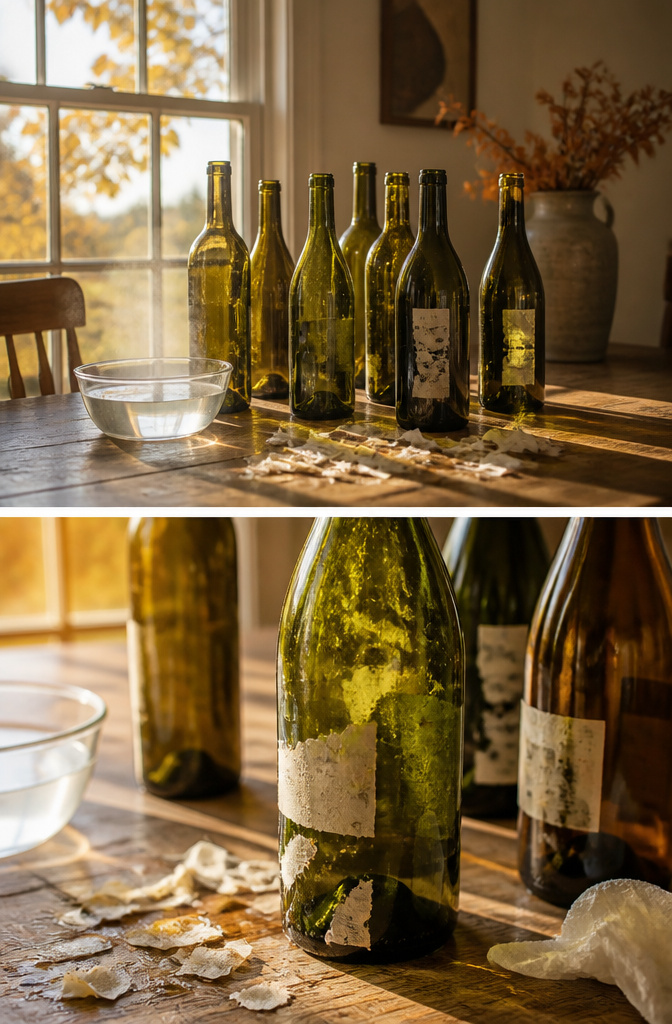
Empty wine bottles from friends are free material that looks expensive once it’s dressed up for Halloween. I started by asking a few neighbors to save theirs, and within a couple of weeks I had more than I needed. Three bottles is the minimum that reads as a display rather than a single odd object on a shelf.
The labels peel off easiest after a long soak in warm water. Some people skip this step and layer new labels right over the old ones, and that works in a pinch, but the surface stays lumpy. For anything painted, Goo Gone is worth the extra pass to strip the sticky residue the water leaves behind. Let the bottles dry completely before you decorate; trapped moisture under paint or paper will bubble up and ruin the finish within a day or two.
Paint for Texture and Coverage
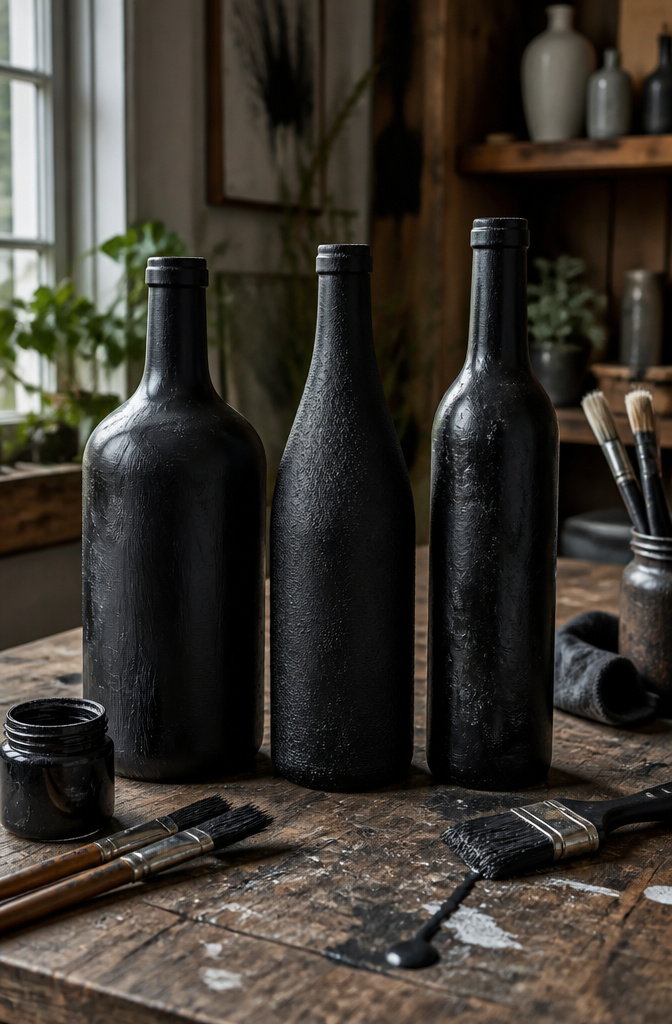
Black acrylic paint goes on every bottle first, no exceptions. Thin craft-grade paint will need two coats; the first layer always looks patchy on glass, especially where labels left residue. Let it dry to the touch, about twenty minutes, before the second coat goes on.
Mixing baking soda into the second coat builds the surface you want for aged potion bottles. A tablespoon of baking soda stirred into a half-cup of black paint thickens it enough to hold ridges and valleys. The ratio is forgiving, but more soda means heavier texture that catches light like old iron or corroded lead. I have gone as high as two tablespoons and ended up with something closer to volcanic rock than Victorian glass, which works for certain labels but not others.
Apply the textured paint with a stubby brush, working in small sections. The soda starts reacting almost immediately, so stirring a fresh batch every ten minutes avoids the gritty sludge that settles at the bottom of the cup. Two total coats, plain then textured, gives complete coverage without the plastic shine of single-coat shortcuts.
Wrap Necks With Twine and Add Embellishments

Twine around the neck of a bottle does more than hide the rim. It gives the eye something to stop on, a texture that reads handmade even from across a room. I use hot glue in short runs, about two inches at a time, pressing jute twine into the bead before it skins over. Three or four tight wraps cover the glue, and a dab underneath the last strand locks the end without a visible knot.
The plastic skulls are what move these from "crafty" toward "cabinet of curiosities." A pack of small ones from the seasonal aisle costs less than a coffee and weighs almost nothing, so one failed placement is not a crisis. I set them slightly off-center, where the twine meets the glass, so the skull seems to guard the bottle rather than wear it. Hot glue holds twine and skulls both, but let it cool ten seconds before pressing; fully molten glue will string across the finish and turn glossy where you wanted matte.
Charms or old keys on a short loop of wire work the same way. The rule is one focal point per bottle, not three competing for attention. Two bottles with skulls and four with plain twine reads as a collection. Six skulls all shouting at once reads as a clearance aisle.
Attach Labels With Mod Podge
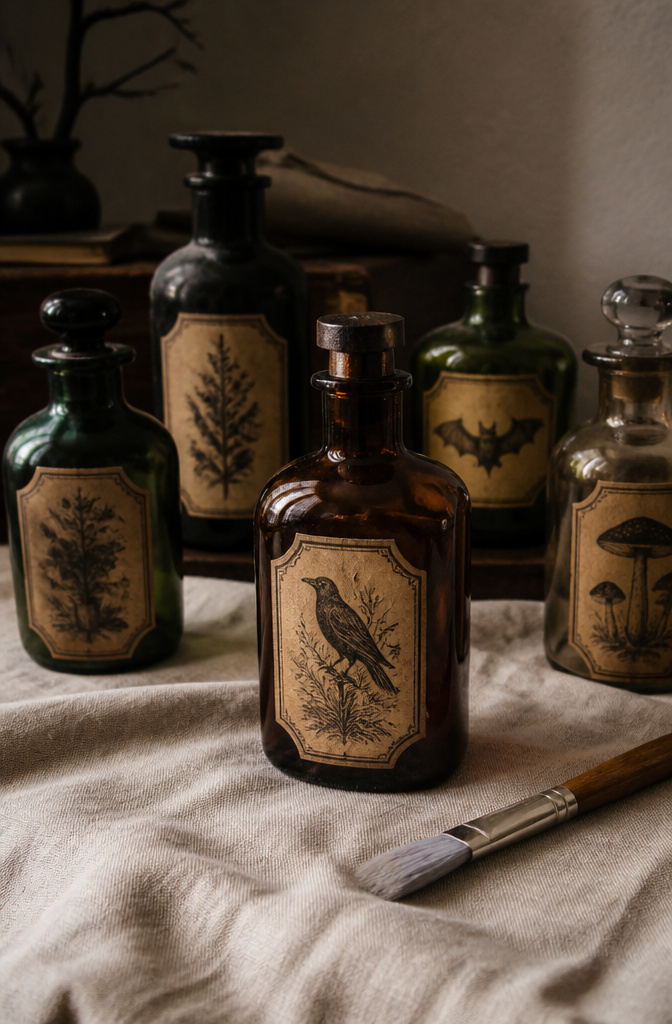
Mod Podge works on regular printer paper and on cardstock, so whatever’s in the printer tray is probably fine. Brush a layer onto the back of the label, press it to the bottle, and smooth it flat from the center out. The label sits where you put it, and the glue stays workable long enough to adjust if the first grab is off-center.
A top coat over the paper protects the print from handling and from any moisture in the display. One smooth pass is enough. The surface dries in 10–15 minutes and goes clear, so the label looks printed straight onto the glass instead of sitting on top. At that point the bottle can move to the next step, or to the shelf, without a tacky finish picking up dust.
Arrange a Finished Display
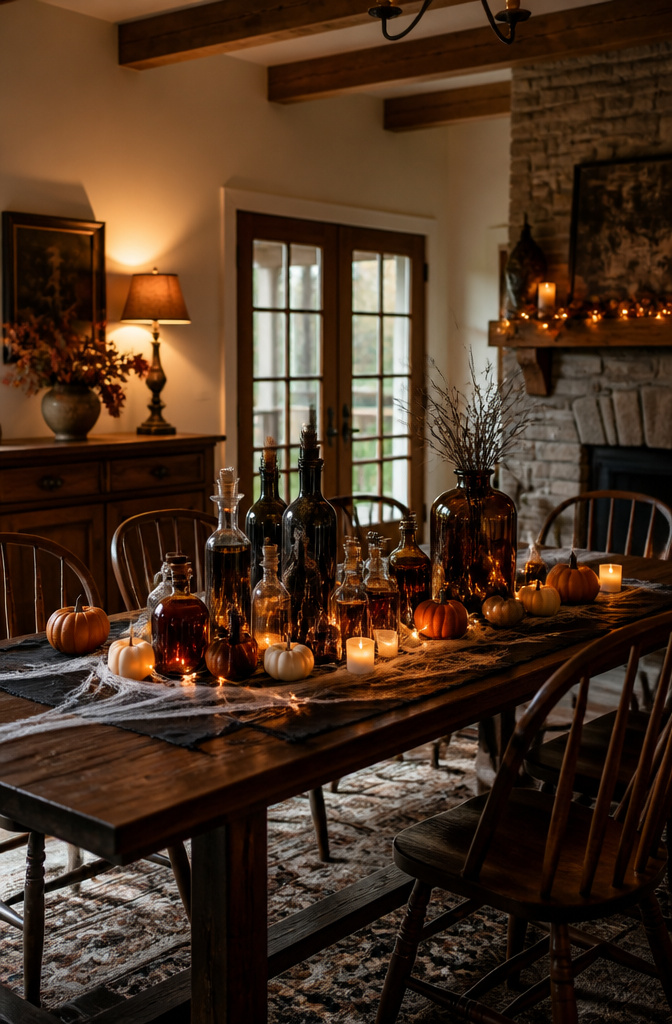
A finished bottle sitting alone on a shelf reads as craft-project leftovers rather than decor. Grouping matters more than the bottles themselves. Cluster odd numbers, three or five, with the tallest at the back and smaller ones forward so each label catches light. The source ideas that stuck with me were the ones that treated the shelf as a stage: LED string lights or flameless candles set behind the glass so the contents glow instead of the bulb showing. Faux spider webs, skulls, and small pumpkins fill the gaps without competing for attention. On a table, the same logic holds for a centerpiece, though the height needs watching. Anything above eye level blocks conversation across the dinner table, so keep the tallest bottle under about a foot and let the mixed-media textures do the work up close. Layered wax pastes and metal bits read as found objects rather than bought decor, which is the point of the assemblage style. The budget stays intact because the bottles are already made; the display costs whatever string lights and a bag of plastic spiders run at the seasonal aisle.
Classic Wine Bottles
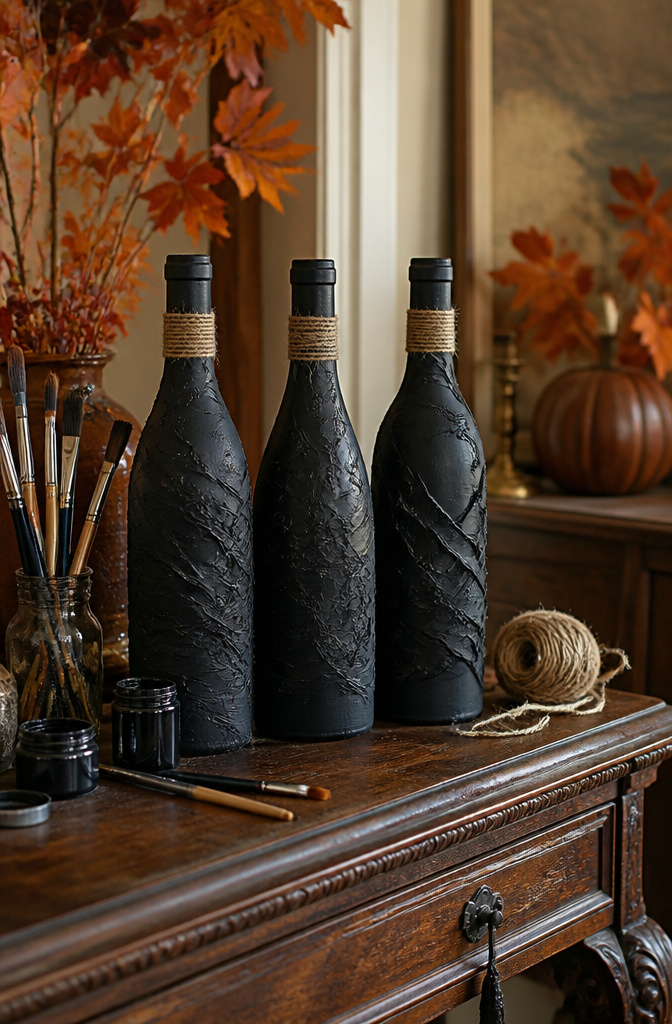
Wine bottles with their dark glass and familiar shape are the natural starting point for Halloween potion bottles, and most of the ones in my collection came from neighbors who were happy to save them rather than recycle. Three bottles minimum makes a grouping that actually reads as a display rather than a stray object on a shelf.
The classic approach builds texture first. Ripped paper towel pieces get mod podged onto the glass in patches; once that layer dries overnight, two coats of black acrylic paint go over the top. The paper underneath creates subtle ridges that catch light the way smooth paint never would. Some makers leave the glass bare and paint only in washes, but full coverage reads more finished from across a room.
Paint color shifts the mood without changing the technique. Black keeps it traditional, though I’ve seen coral and peach tones used for a softer, vintage-apothecary look that pairs well with neutral fall decor. Either way, two coats is the minimum for opacity.
The neck gets wrapped in twine secured with hot glue, sometimes with a small plastic ring or skull glued at the end for weight. Labels finish the job, attached with more mod podge or tied on with string through a hole punch.
Mixed Media Bottles
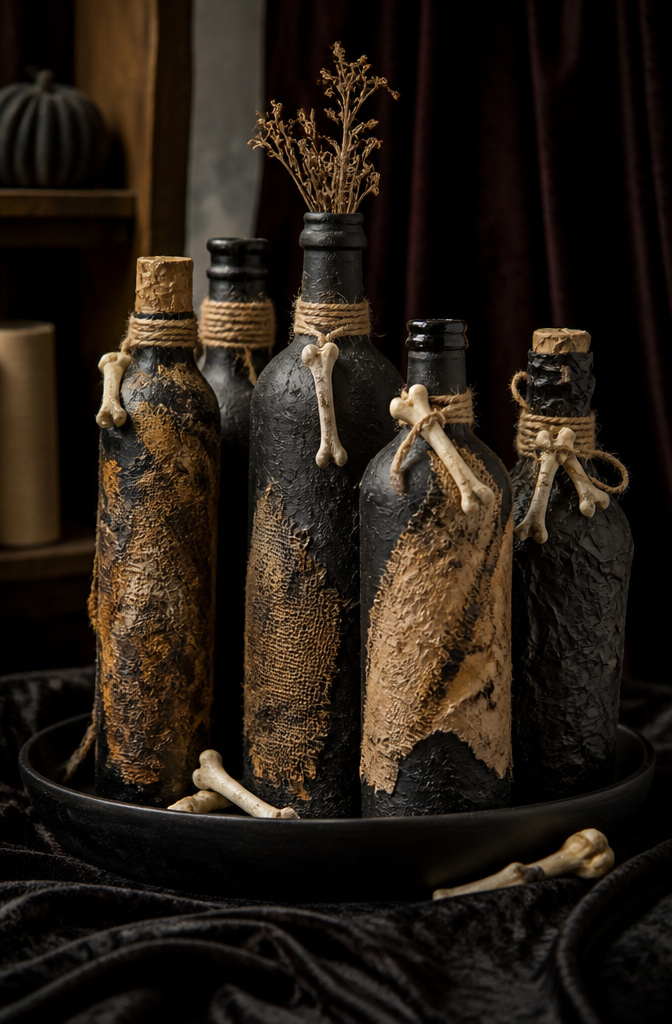
Mixed media bottles pull together whatever odds and ends you already have, and that is exactly why they work for a one-weekend project on a tight budget. Layering paper towel strips with Mod Podge builds a wrinkled, almost leather-like texture that catches candlelight later in the evening. Once that base dries, black acrylic paint goes over it in two coats, and the real fun starts. Plastic spider rings, cut from their bands and hot-glued at odd angles, read as genuine from across a dim room. Twine wrapped around the neck hides the bottle’s original shape and gives you a place to tuck dried stems or a loose feather. One approach that stuck with me pairs these textured bottles with a black tray and a few plastic bones, letting the different heights and surfaces do the work instead of any single dramatic piece. The trick is stopping before the bottle looks crowded: three textures, maybe four, then set it down and move on to the next one.
Faux Mercury Glass Bottles
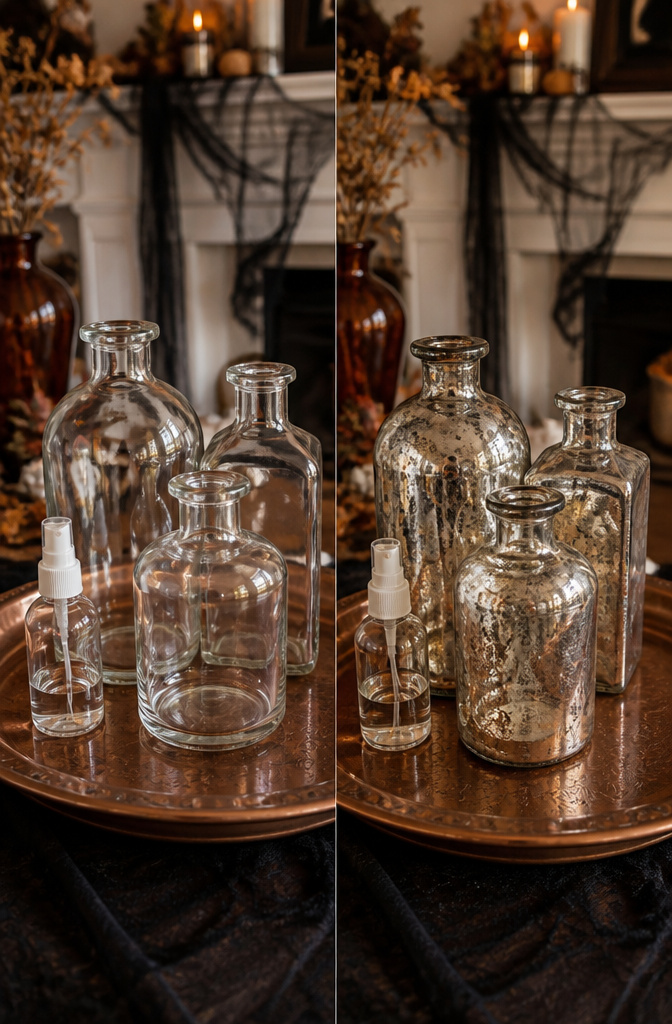
The mercury glass technique starts with two specific spray paints: oil rubbed bronze and mirror glass. Oil rubbed bronze goes down first as a base coat on clean glass bottles, giving the dark underlayer that shows through once the top coat distresses. Mirror glass spray paint follows, and that reflective layer is what sells the aged-antique look when you break it up.
White vinegar in a spray bottle is what creates the mottling. A light mist of vinegar on wet mirror paint causes a chemical reaction that keeps the finish from bonding in spots, leaving those soft, cloudy patches real mercury glass gets after a century of oxidation. The trick is timing: hit the mirror coat while it is still tacky, let the vinegar sit a few minutes, then blot with a paper towel rather than wiping. Wiping drags too much paint off and leaves hard edges.
Matte Mod Podge seals everything once the paint has cured fully, though the sources disagree on whether to seal at all. One treats the vinegar step as the finish, the other adds Mod Podge as a protective layer. For bottles that will sit on a mantel and never be handled, skipping the sealer keeps the surface more convincing. If the display gets bumped or the bottles double as vases, the Mod Podge matters. Oil rubbed bronze plus mirror spray, broken up with vinegar mist, is the whole method, and it works on any straight-sided bottle with a cork top.
Textured Bottles

Tissue paper builds the softest layer of texture on a bottle, and it costs next to nothing. I tear it into irregular pieces rather than cutting clean edges, brush on a thin coat of craft glue, and press the paper into the wet adhesive. A second layer after the first dries deepens the rumpled, skin-like surface that reads as old parchment under Halloween lighting. Burlap frayed at the edges gives a completely different effect, rough and agricultural, like something dragged from a root cellar. Scraps of onion-bag mesh, lengths of rope, and torn corrugated cardboard packing pieces glue on in the same haphazard way. The randomness is the point; precision flattens the look into craft-fair territory. Once the materials set, an even coat of black gesso or black acrylic paint unifies the chaos and gives the colored wax pastes something to grip later.
Materials That Make This Work

Most of these projects start with bottles you already have. Wine bottles, vinegar bottles, old glass jars from the recycling bin; anything with a neck that can hold a label works. One builder used two wine bottles and a vintage-style glass bottle from Dollar Tree, which tells you the hunt for supplies does not need to go past your kitchen and the nearest discount store.
Here is what else you will need, and why:
- Acrylic paint in two coats minimum. Black covers well and reads as potion-bottle classic, though coral and honey brown also show up in the examples. Craft-store brands like Americana, Ceramcoat, and FolkArt all work; the point is coverage, not prestige.
- Mod Podge for texture and adhesion. It glues paper-towel strips onto glass for a wrinkled, aged surface, and it is the standard way to attach labels printed on regular paper or cardstock. Matte finish is the usual choice.
- Twine for the neck. A few wraps with hot glue at the ends, and the bottle stops looking like it came from a grocery shelf. Plastic rings or small skulls glued at the twine ends add detail without adding cost.
- Labels and embellishments. Free printable potion labels circulate among craft bloggers; print on plain paper and Mod-Podge them on, or punch a hole and tie them to the neck. Plastic spiders, bats, and webbing finish the look if you have them on hand from prior Halloweens.
The whole list should run under ten dollars if you are starting from zero, and under three if your craft drawer already holds paint and glue.
Labeling Techniques and Free Printables

Free printable labels are easy to find if you know where to look. I printed mine on regular paper, though cardstock works too, and the backing peeled away clean after a quick soak. The trick is measuring first, since wine bottles curve differently and a label that sits flat on one will wrinkle on another.
Mod Podge on both sides is what seals the deal. I brush a thin layer on the back of the label, smooth it onto the glass exactly where I want it, then brush another coat over the top to protect the paper. It dries in about ten to fifteen minutes. For the mercury glass bottles, the process shifts slightly: print the text backwards on a laser printer, apply with Mod Podge, then wet and rub the paper backing away with your fingers until only the image remains. One more coat of Mod Podge over the top finishes it.
Display Suggestions Beyond the Shelf
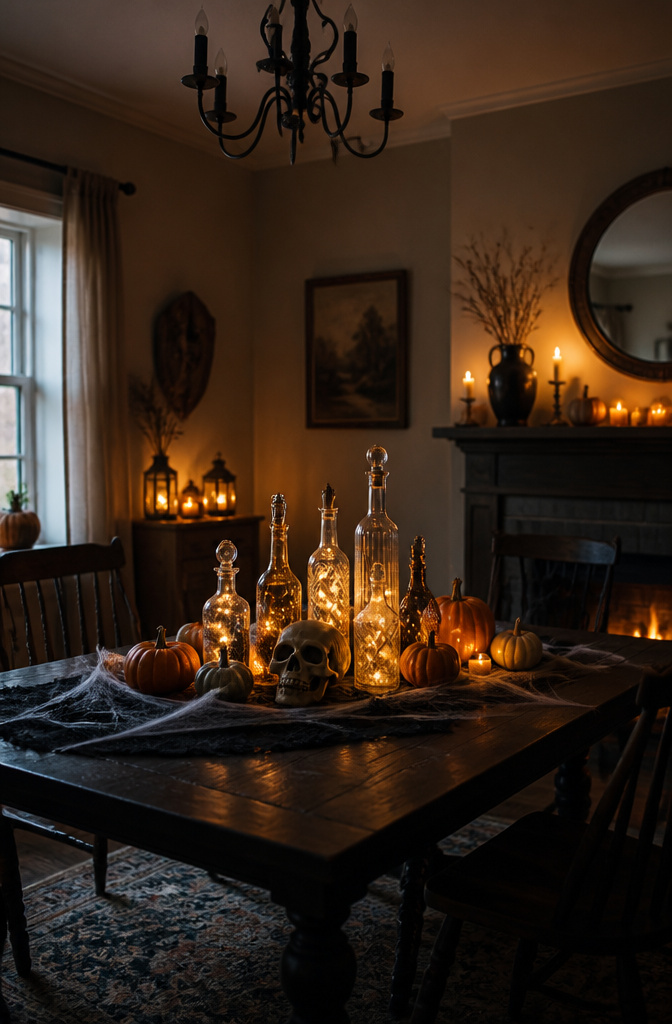
A shelf of potion bottles reads flat without something moving the eye around. I learned this the hard way last year, lining mine up like library books and wondering why the display felt dead.
Cluster plastic spiders in threes, not evenly spaced. Glue two on one bottle and one on another so they look like they crawled there. A pack from the dollar store covers a whole mantel.
Candles do the heavy lifting after dark. Taper candles in wine bottles or behind the row give the only light that makes colored glass worth the paint you put on it. Flameless ones behind the bottles work if you rent and the landlord flips switches to check.
For a centerpiece, build up from a tray: tallest bottle at the back, shortest at the front, one spider trailing off the edge like it escaped. Add a skull or small pumpkin between heights so no two bottles sit at the same level.
LED string lights behind the back row turn a daytime shelf into something else entirely once the room dims.
Frequently Asked Questions
How do you make DIY Halloween potion bottles?
Start by collecting old bottles and soaking them in warm water until the labels peel off. Paint each bottle with two coats of black acrylic, mixing baking soda into the second coat for a textured, aged surface. Wrap the neck in twine secured with hot glue, add a plastic skull or charm as a focal point, and finish with a label attached using Mod Podge.
What materials do I need for Halloween potion bottles?
You need empty bottles, black acrylic paint, Mod Podge, twine, and hot glue. Baking soda thickens the paint for texture. Plastic skulls, spider rings, old keys, or charms add detail. Free printable labels work for the text, and LED string lights or flameless candles help with display.
How do you remove labels from bottles?
Soak the bottles in warm water for a long soak; the labels peel off easiest after that. For painted bottles, use Goo Gone to strip the sticky residue water leaves behind. Let the bottles dry completely before decorating, since trapped moisture under paint or paper will bubble and ruin the finish within a day or two.






