
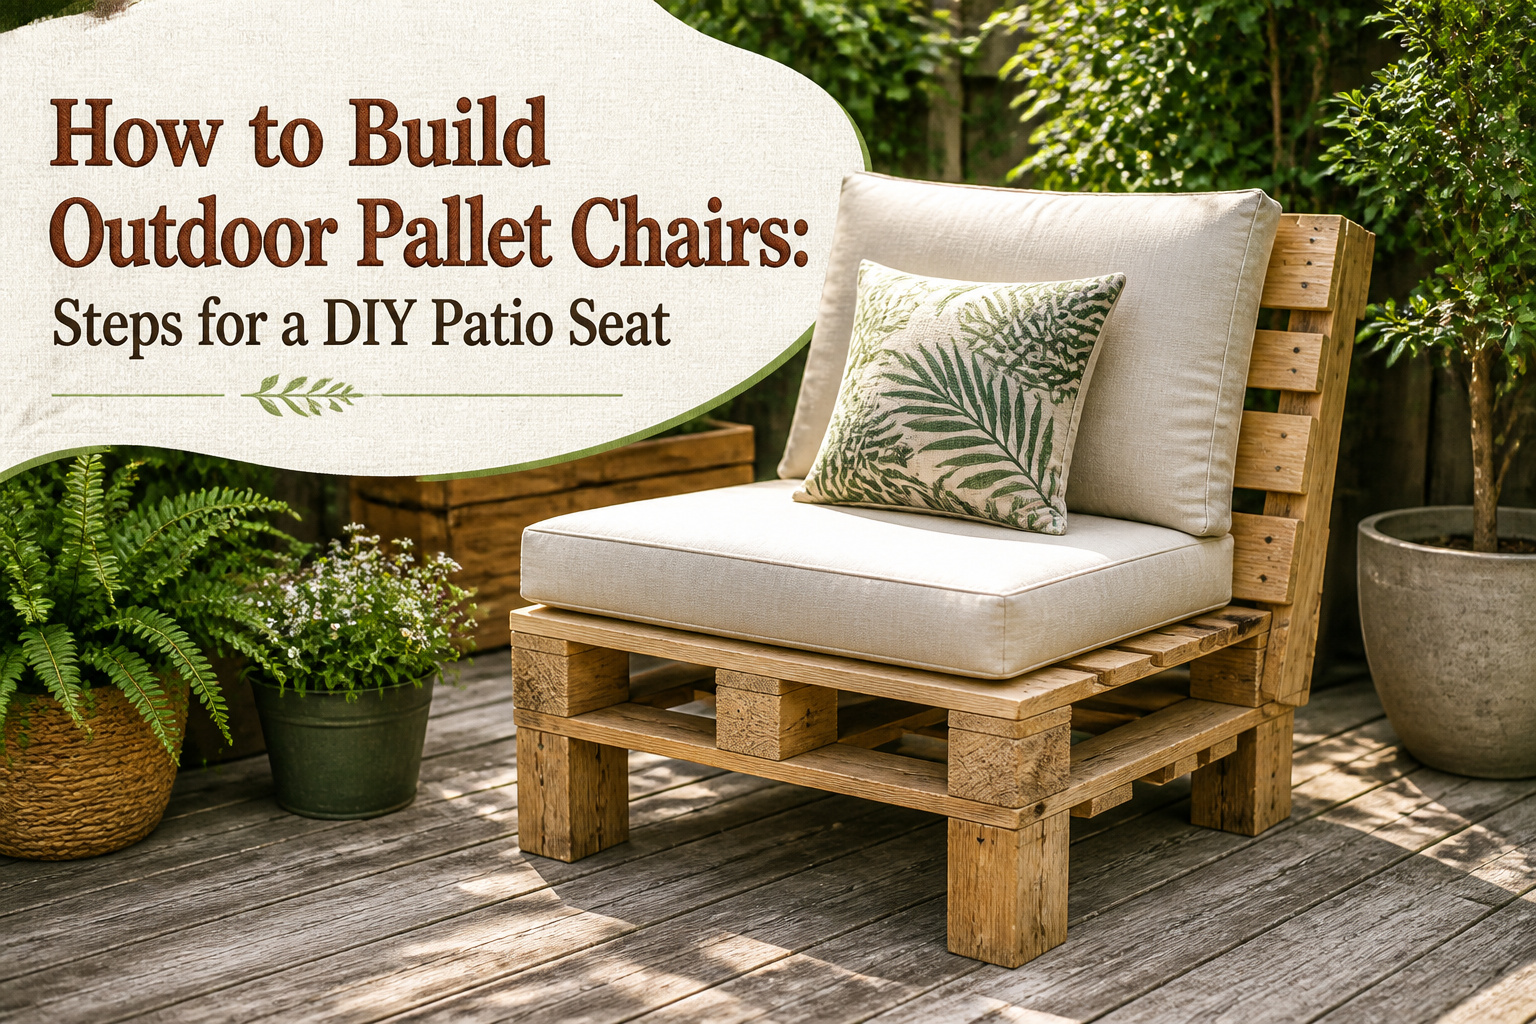
Outdoor pallet chairs are rough-framed seating built from reclaimed shipping pallets, sanded and screwed into a seat and backrest that sits on cut legs. The catch is the cushion: five inches of foam runs about $100 per chair at an RV upholstery shop, which pushes the total close to what you’d pay for finished seating at a big-box store. Heat-treated pallets marked HT are the ones you want; anything stamped MB was dosed with methyl bromide and belongs nowhere near bare skin.
1. Select Two Matching Pallets
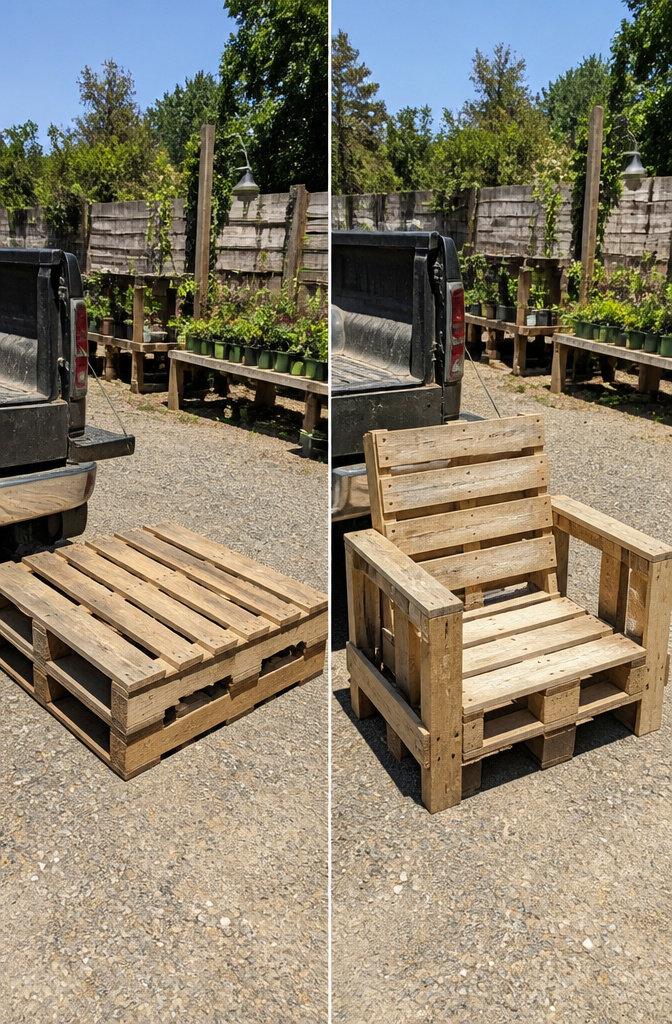
Two matching pallets are the starting point, and 48" x 40" is the standard North American size you’ll want for both the seat and backrest. Mismatched pallets throw off every cut that follows, so measure before you load them into your truck.
Solid wood construction matters more than perfect looks. Knock on the deck boards and listen for a dull thud that says the wood is still sound, not rotted through. Flip each pallet and check the blocks or stringers underneath for cracks that would split under someone’s weight.
The ISPM stamp tells you how the wood was treated. MB means methyl bromide, and pallets carrying that mark are not what you want near your skin or your lungs. Heat-treated pallets, marked HT, are the safer bet for anything you’ll sit on.
Skip anything with chemical stains, mold, or the telltale sawdust trails that mean pests have moved in. A little surface dirt sands off. Deep contamination does not, and sealing it under epoxy is more trouble than finding a cleaner pallet to begin with.
2. Sand Every Surface

Pallet wood arrives rough. The factory sanding mentioned in some guides only takes the surface down to a point where forklifts won’t snag; it does not make the slats safe for bare skin. For outdoor chairs that get sat on in shorts and tank tops, every edge needs hand-checking.
I start with 80-grit on an orbital sander to knock down the high ridges and splinters, then step to 120-grit for the surfaces that contact skin. The armrests, seat front edge, and top rail of the backrest deserve extra passes. A palm sander works if that is what you own, though a belt sander moves faster on the worst boards. The 80-grit stage is non-negotiable on reclaimed pallets; skipping it leaves fibers that lift into slivers the first humid afternoon.
Grain direction matters less here than on fine furniture, but sanding with the grain still saves time and paper. Run a hand over every slat after the final pass. If you feel a catch, the next person who sits down will feel it sharper.
3. Cut and Size the Legs

Leg height is where a lot of pallet chair builds go wrong, because the number that looks right on paper changes the moment you sit down. Aim for roughly 25 inches from ground to the top of the bare seat frame, then subtract whatever padding you plan to add. Most outdoor cushions run about 5 inches thick in the foam layer, which drops your working leg height to somewhere near 17 inches if you want that same finished seat height. I like to mock this up with scrap lumber or cinder blocks before cutting anything, since a 1-inch mistake here is a full year of uncomfortable knees.
Pre-drilling matters more on pallet wood than almost any other material. The boards are dry, brittle, and full of old nail holes that turn a screw into a wedge. A pilot hole the diameter of the screw’s solid core, not the threads, lets the fastener grip without forcing the grain apart. Skip this and you will split a leg ten minutes from the end of the project.
4. Dry-Fit Before Screwing

Lay every piece on the driveway or patio before a single screw goes in. Seat slats, backrest, legs, arms: stack them in place and step back. A dry-fit costs ten minutes and saves an afternoon of backing out stripped screws from a frame that does not square up.
Mismatched pallets are the usual culprit. One might run 40 inches long where its partner runs 38, or the slat spacing lands half an inch off so the seat gaps look drunk. Walking around the dry assembly shows it immediately. The same pass catches a backrest cut too steep or too lazy; the source passages note you can lean the back pallet against a railing for angle, or rig a support board behind it if the chair stands free. Either way, you want to see that pitch with your eyes and your hips before it is fixed.
Armrests need the same check. Hold them flush to the front of the seat and mark the angle where they meet the backrest. That line is your cut line, and it is easier to correct in pencil than after the blade has gone through.
5. Attach the Legs With Long Screws

The legs need about 13 cm of screw to hold through a pallet’s thickness and still bite deep into the upright below. That length sounds excessive for indoor furniture, but outdoor pieces take more stress from shifting weight and seasonal movement, so the extra engagement matters.
Pre-drilling comes first. A pilot hole through the seat pallet and into the leg keeps the grain from splitting when the screw tightens, and it lets you drive the fastener straight without fighting resistance. I countersink each hole so the head sits flush with the surface; raised metal catches on clothing and pools water, and neither problem improves with time. The flush head also gives the seat a cleaner look if the cushion shifts.
Four screws per corner, driven from the seat pallet down into the leg, is the usual arrangement. The long screws pull the two pieces together hard enough that the joint stays rigid even when someone sits back and the frame racks sideways. Without that length, the connection loosens over a summer of use, and a wobbly pallet chair is not a project anyone wants to revisit.
6. Add Armrests

Armrests turn a basic pallet box into something you can actually settle into for an afternoon. The scrap wood left over from broken pallets works fine for this, or any other outdoor-grade scrap you have on hand. I like to hold the board against the side of the seat and backrest to eyeball the height before cutting anything; subtract the thickness of whatever backing piece you’ll attach later so the armrest sits level where you want it. The height depends on your seat and cushion setup, since a 5-inch foam cushion on a 12-inch frame changes where your arms naturally fall.
The key move is securing each armrest to both the seat frame and the backrest, not just one or the other. Screws about 13 cm long driven through the slat and into the seat at multiple points keep the whole chair from racking sideways when you push up to stand. The front edge of the armrest can stay flat for setting down a drink, or you can trim it with a jigsaw for a cleaner line. Either way, the back piece of the armrest is where most of the stability comes from, so don’t skimp on the length there.
7. Choose Outdoor Cushions or Upholstery

Five inches of cushion foam turned out to be the sweet spot for my pallet chair, though the single seat ran about $100 just for the foam. RV upholstery shops will cut it to size, which saves you the headache of wrestling a full sheet with a bread knife. Outdoor foam exists, but it can double that price, so most weekend builders skip it and haul cushions inside when rain threatens.
The real fork in the road is built-in versus removable. Staple fabric straight to the pallet frame and you get a cleaner look, no cushion to slide off, and nothing to store. Removable cushions let you dry them flat, replace worn covers without rebuilding the chair, and stash everything in a shed when the season ends. For a project meant to last a few summers on a real budget, removable wins. Weather-resistant outdoor fabric, ordered online or picked up by the yard, holds color through two seasons of full sun and occasional downpours. Drop cloths work in a pinch but mildew fast; the upgrade to proper outdoor fabric costs more upfront and pays back the first time you do not have to remake the covers.
8. Paint or Stain for Weather Protection
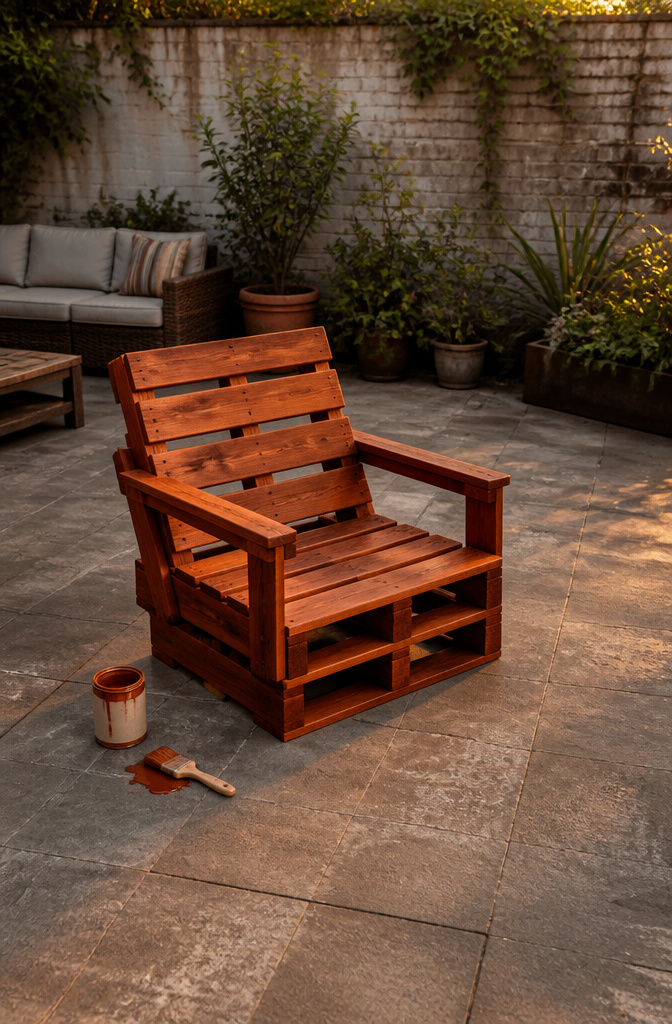
Paint or stain matters more for these chairs than the exact shade you pick. A smooth, sealed surface keeps water from working into the grain and splitting the boards over a couple of summers. I like the look of stain because the wood texture still shows through, while paint gives a solid, even color that hides patchy pallet wood. One finish that holds up outside is Behr Terra Cotta, a weatherproofing wood stain in shade #5077 that another builder used on a pallet sectional and reported back on. Whether you brush or spray, two thin coats beat one heavy coat that pools in the cracks. The real protection comes from coming back every two years or so to touch up worn spots: armrests, seat edges, anywhere the sun hits hardest. Skip that step and the wood softens, screws loosen, and the chair starts to rack. Color is what people notice first; reapplication is what keeps the chair standing.
9. Optional Upgrades

Wheels turn a fixed patio set into furniture you can roll out of the rain or rearrange for a party. The sources mention sturdy casters with two locking brakes, which matters more than it sounds: a loaded pallet chair on a slope will roll itself if every wheel swivels free. I would lock the brakes when anyone sits, full stop.
Cup holders sit at the other end of usefulness. One build used a cedar plank wide enough for a coffee cup, sanded to splinter-free smoothness. That width, about the span of a standard mug, is the minimum worth building to; anything narrower and the cup lives on the ground anyway.
The choice between the two upgrades comes down to how you actually use the space. Wheels suit patios where the sun moves or the grill smoke shifts. Cup holders suit spots that stay put, especially paired with a stationary bench where you are already committed to one view. Both add weight and cost, so I would pick one or neither rather than bolt on every option.
Tools You Actually Need

A cordless drill and an orbital sander are the two power tools worth having for this build. The drill drives the long screws that hold the frame together, and the sander saves hours on the rough pallet surfaces. A miter saw speeds up the cuts, but a 22-inch handsaw like the Irwin Jack First Fix 880 Plus will get the same result if you borrow one or already own it.
Borrow or rent the saw if you only need it for this weekend. The sander is harder to find as a rental, so buying a budget orbital model pays off on any future pallet project.
- Cordless drill screwdriver (impact driver works too)
- Orbital sander
- Miter saw or handsaw
- Long wood screws, roughly 13 cm, or long nails as an alternative
- 80-grit sandpaper, then 120-grit for the final pass
- Wood glue, optional
Skip the wood glue if you are driving screws deep enough. I have built both ways, and the glued joints held no better through a humid summer than the screwed ones.
What Pallet Chairs Cost to Build

Pallets themselves run free to cheap if you ask the right place. A community market or small grocery store often has a pile the vendors do not want back, which beats the hardware store pile that usually has to be returned. The real hit comes after the wood. Foam for one seat ran about $100 at an RV upholstery shop, and that was for 5-inch standard foam, not the outdoor-grade kind that doubles the price. Fabric to wrap it adds more. Screws for legs and arms are minor, but stain or paint to keep the chair from turning gray in the rain is not optional.
Finished outdoor seating starts around $100–$150 per chair at the big-box stores, so building your own does not automatically save money once you count the cushion. The break-even point depends on whether you already own a sander and a drill. Where to cut: thinner foam, or bringing standard foam indoors when it rains instead of buying outdoor-rated. Where not to: skipping the weather coating. Bare pallet wood weathers fast, and a chair that warps in six months is not a bargain.
Where to Find Free Pallets

Free pallets tend to pile up where freight moves through. Hardware stores, garden centers, and small community markets often have stacks sitting behind the building that they pay to have hauled away, so asking the manager during a slow morning can turn up more wood than your trunk holds. Firetruck manufacturers and other industrial shops receive parts on heavy-duty pallets that are often larger and sturdier than standard retail ones, which matters when you need 4×4 material for legs.
The mark to look for is the ISPM stamp, specifically the "HT" for heat-treated. That means the wood was baked to kill pests rather than doused with methyl bromide, which carries the "MB" mark you do not want near skin or lungs. Heat-treated pallets are the safer bet for anything you will sit on regularly.
Some businesses hand them over gladly; others, particularly national chains with pallet-return programs, may charge a deposit fee or refuse outright. Smaller, local operations usually have less red tape. If a pallet shows mold, chemical stains, or bird droppings, pass on it even if it is free. Sanding and bleach handle surface grime, but deep chemical penetration is not reliably sealed by epoxy or any finish you want to spend a weekend applying.
Five Pallet Chair Designs Compared

The five standard builds split cleanly by space and effort. A pallet armchair needs just two pallets and basic tools, making it the obvious pick for a small balcony where you want seating without a footprint fight. The pallet sofa scales up to three pallets and starts to dominate a corner; it only makes sense if you have the yard to host around it. I kept coming back to the sectional when I read builds like the L-shape someone stacked on a deck using 4 x 4 legs and tie plates: more complex, but it solves the wraparound problem for actual gatherings. The pallet swing sits apart, not because the wood changes but because hanging hardware and motion stress turn it into a different project entirely. For durability, anything left natural will gray and check; the same stain matched to decking held up in the one detailed account, though that builder was only a season in. Cushions help every option except the swing, where they read as a liability.
| Design | Pallets | Best for | Comfort | Complexity | Durability |
|---|---|---|---|---|---|
| Armchair | 2 | Small balcony | Moderate | Low | n/a |
| Sofa | 3 | Full yard, gatherings | Moderate with cushions | Low | n/a |
| Armchair (standalone) | 2 | Accent seating | Moderate | Low | n/a |
| Sectional | 3+ | Corner, large deck | High with back support | Medium | Tie-plate construction helps |
| Swing | 2+ | Porch or tree limb | n/a | High | Depends on hanging hardware |
Frequently Asked Questions
What type of pallets should I use for furniture?
Stick to solid wood pallets in the standard 48" x 40" North American size. Knock on the deck boards to check for a dull thud that means the wood is still sound, and flip each pallet to inspect the blocks or stringers underneath for cracks. Heat-treated pallets marked HT are the safer choice for anything you’ll sit on.
How do I ensure my pallet furniture is safe?
Skip pallets with the MB stamp, which means they were treated with methyl bromide. Pass on anything showing mold, chemical stains, or sawdust trails that signal pests. A little surface dirt sands off, but deep contamination cannot be reliably sealed and is not worth the risk.
What tools do I need to build pallet furniture?
A cordless drill and an orbital sander are the two power tools worth owning for this build. A miter saw speeds up cuts, though a 22-inch handsaw will get the same result. You will also need long wood screws roughly 13 cm, 80-grit and 120-grit sandpaper, and optionally wood glue.
How much does it cost to make pallet furniture?
Pallets themselves often run free, but the real expense comes after the wood. Foam for one seat ran about $100 at an RV upholstery shop, and fabric to wrap it adds more. Finished outdoor seating starts around $100–$150 per chair at big-box stores, so building your own does not automatically save money once you count the cushion.






