Which kitchen appliance closet fits depends on one fact: whether you rent or own, since a freestanding storage cart or freestanding appliance cabinet moves with you, while a built-in appliance closet, alcove or pantry counter needs walls and electrical work you control.
Storage here goes from a freestanding cart to a tall appliance cabinet, and what sorts everything inside is how often you use each machine.
Daily appliances stay within arm’s reach, and anything that weighs 20 pounds or more, like a stand mixer, belongs low or on a pull-out shelf.
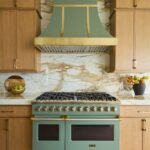
1. Appliance Garage
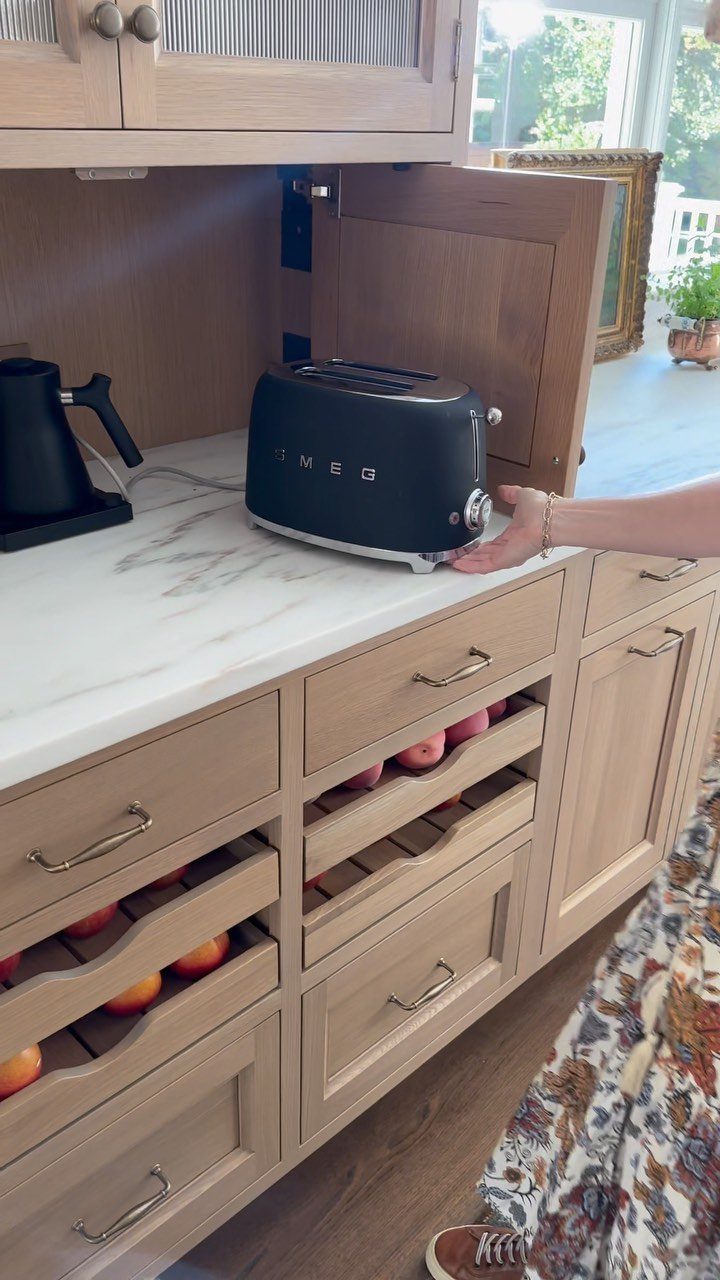
A door that opens onto the counter itself is what separates an appliance garage from an ordinary cabinet.
The toaster and kettle stay in place and ready to use, so a morning cup of tea takes one hand and no hauling.
Shut the door and the marble stays clear. Light wood is my pick for the cabinetry, because it reads as part of the kitchen instead of a box added on top.
2. Pantry Appliance Storage
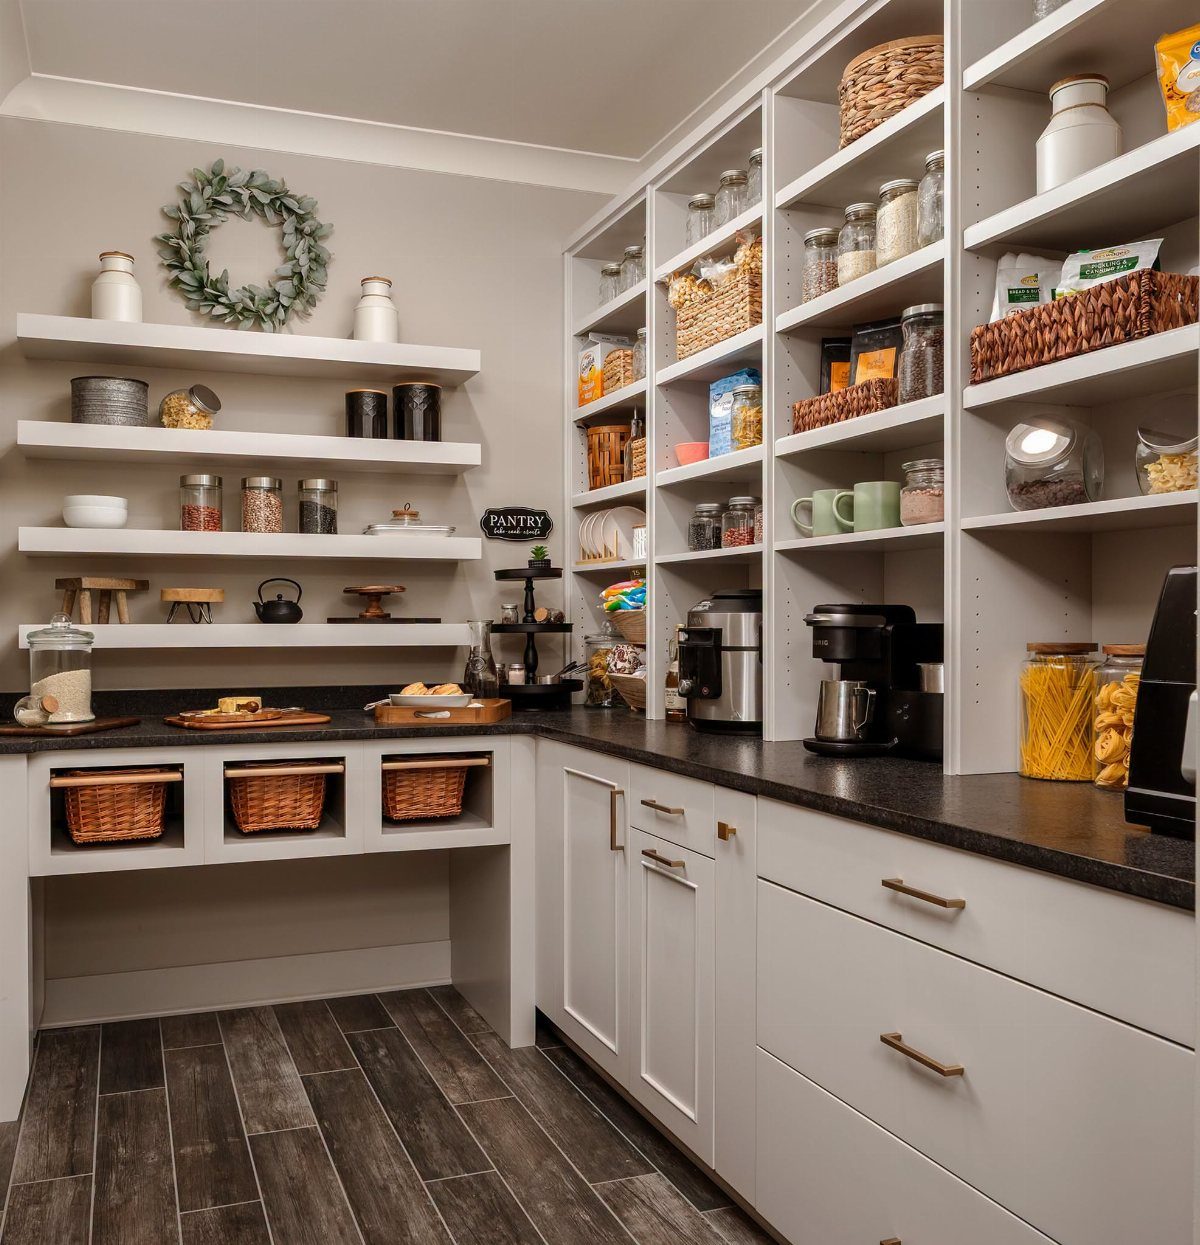
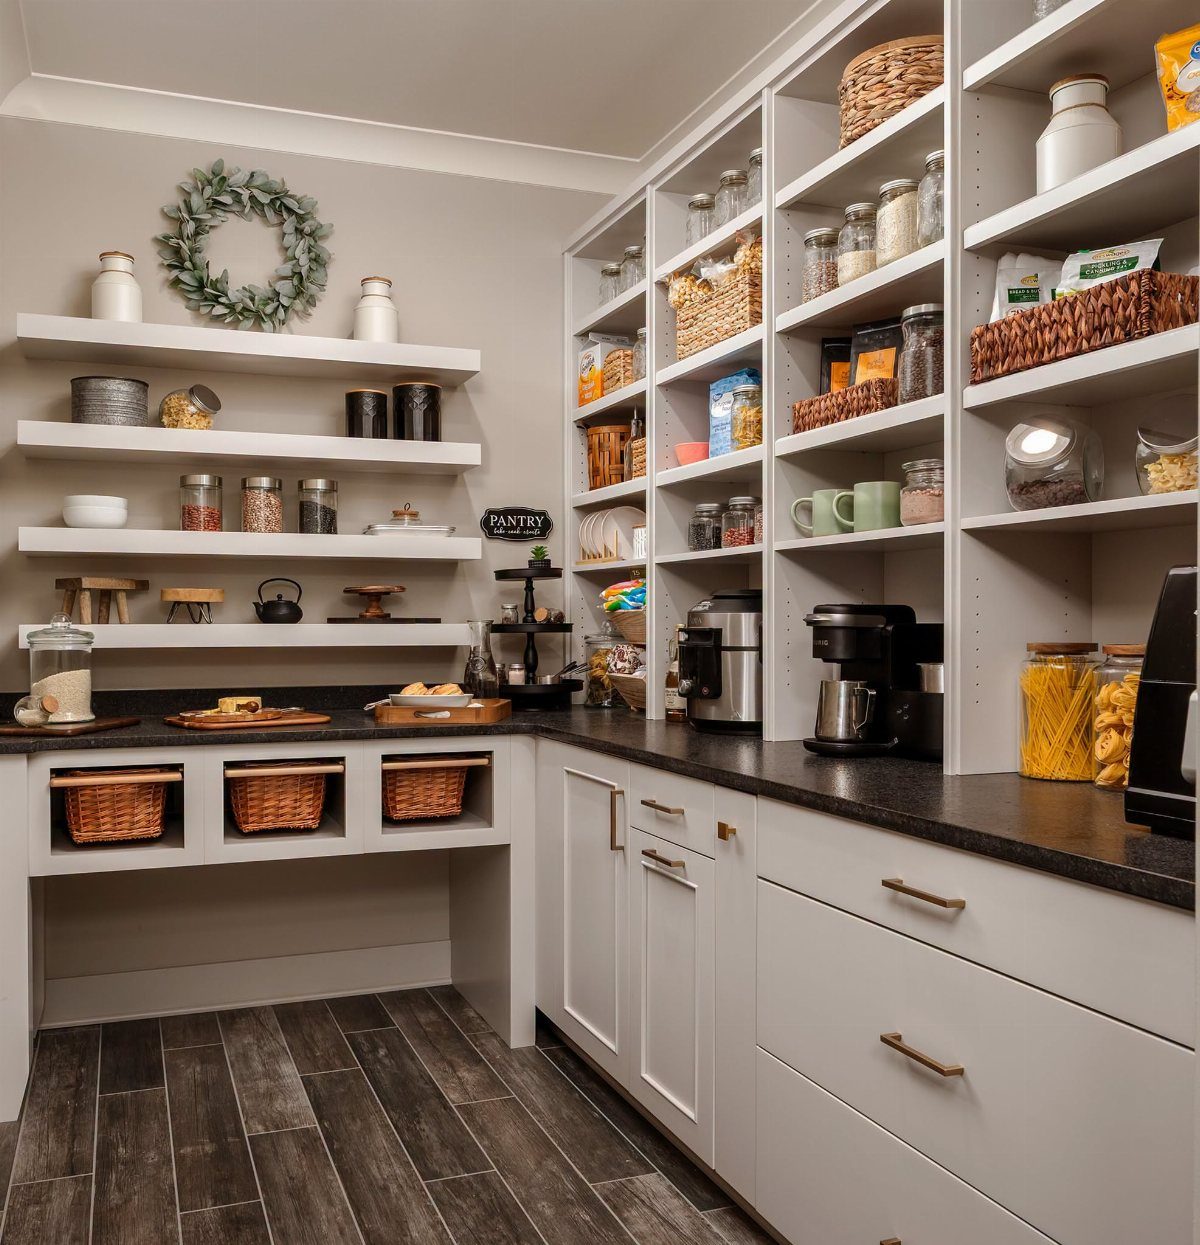
Appliances used a few times a month don’t need prime counter space, and a walk-in pantry gives them somewhere better to wait. Put them on the open shelves or in the lower cabinets and floor space.
Daily machines like the coffee maker and toaster belong on the pantry counter, where you can grab them without moving anything else. I’d store the heaviest pieces low, so nothing has to be lifted down from overhead.
3. Pull-out Shelves
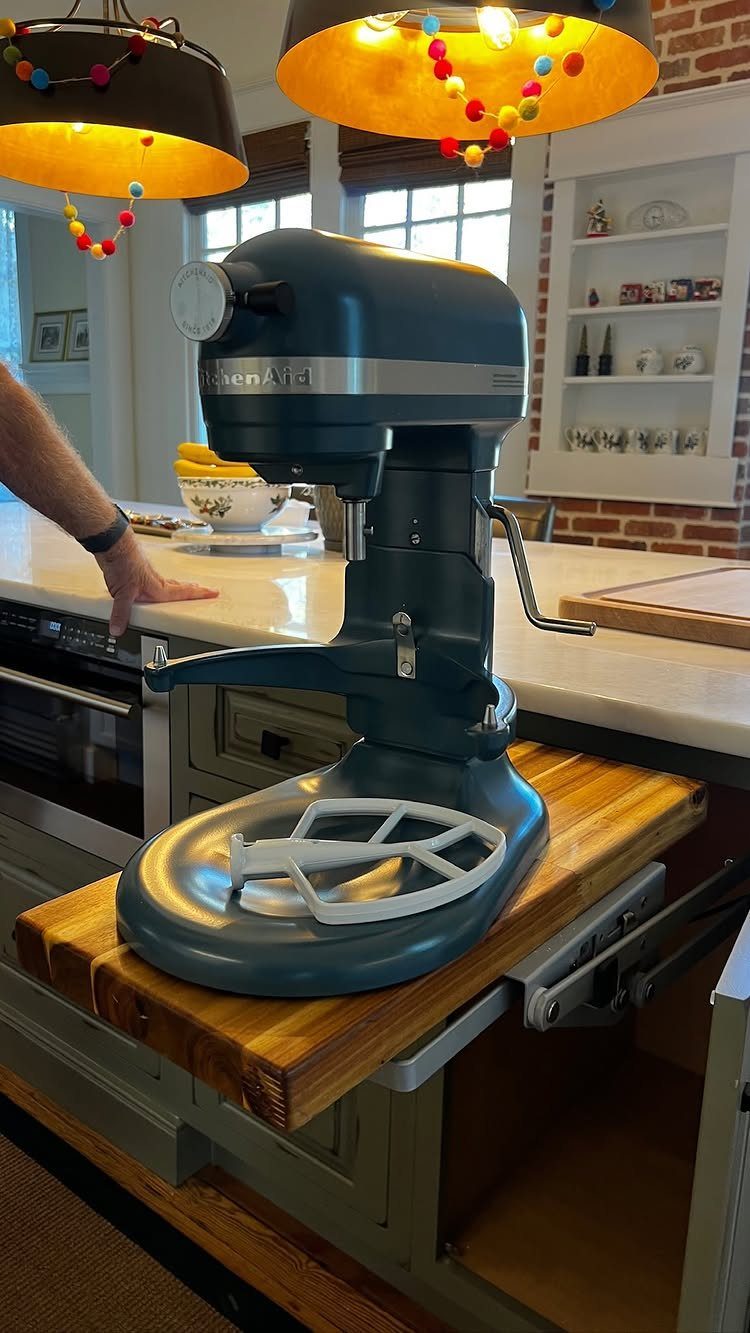
Heavy appliances are the ones worth putting on a sliding shelf. A stand mixer on a pull-out board rolls forward to the front of the cabinet, so you never lift it over a cabinet lip or reach into the back.
Check the slide’s weight rating before loading a mixer on it. Solid wood, as in this one, makes a good shelf surface because it’s easy to wipe clean.
4. Kitchen Appliance Stations
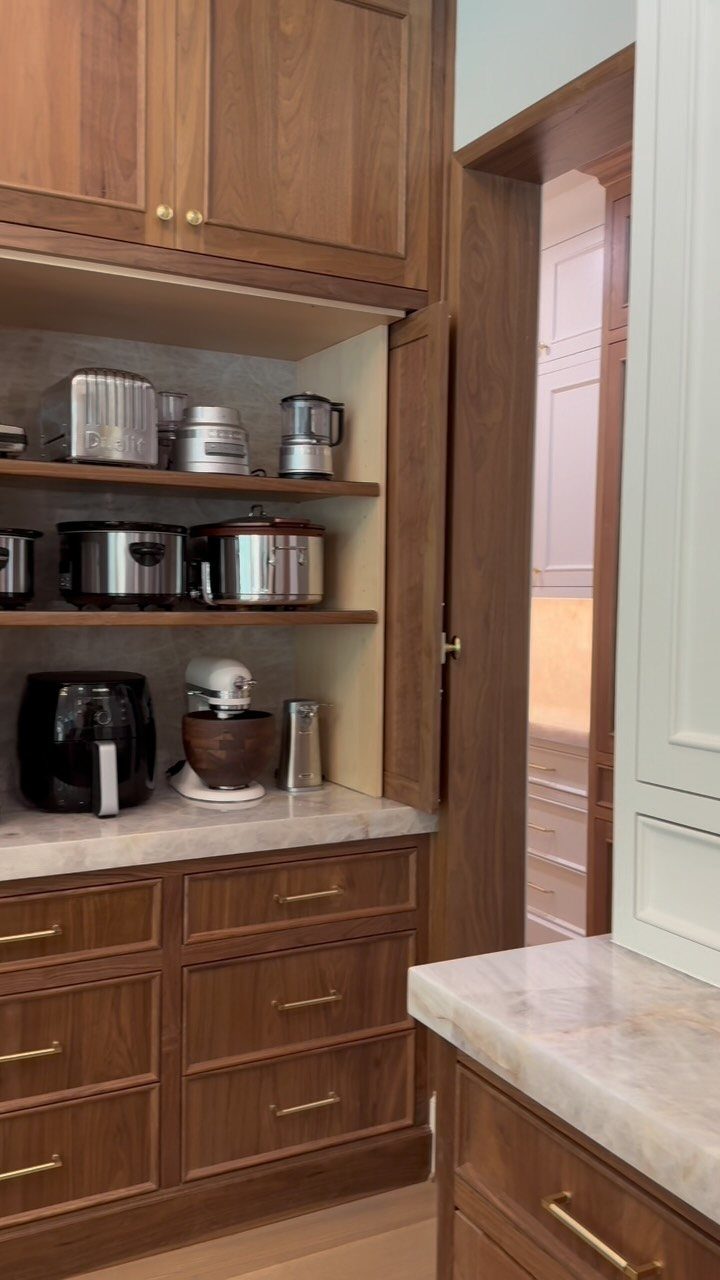
Breakfast, baking and smoothies each get their own shelf in this setup. Toaster, blender and air fryer sit with the tools they work with, so you grab one group instead of hunting through several cabinets.
Drawers below are handy for the small stuff: cords, attachments, baking supplies. I’d label each zone by task before deciding what goes where, because that makes the groupings obvious to everyone in the house.
5. Freestanding Storage Cart
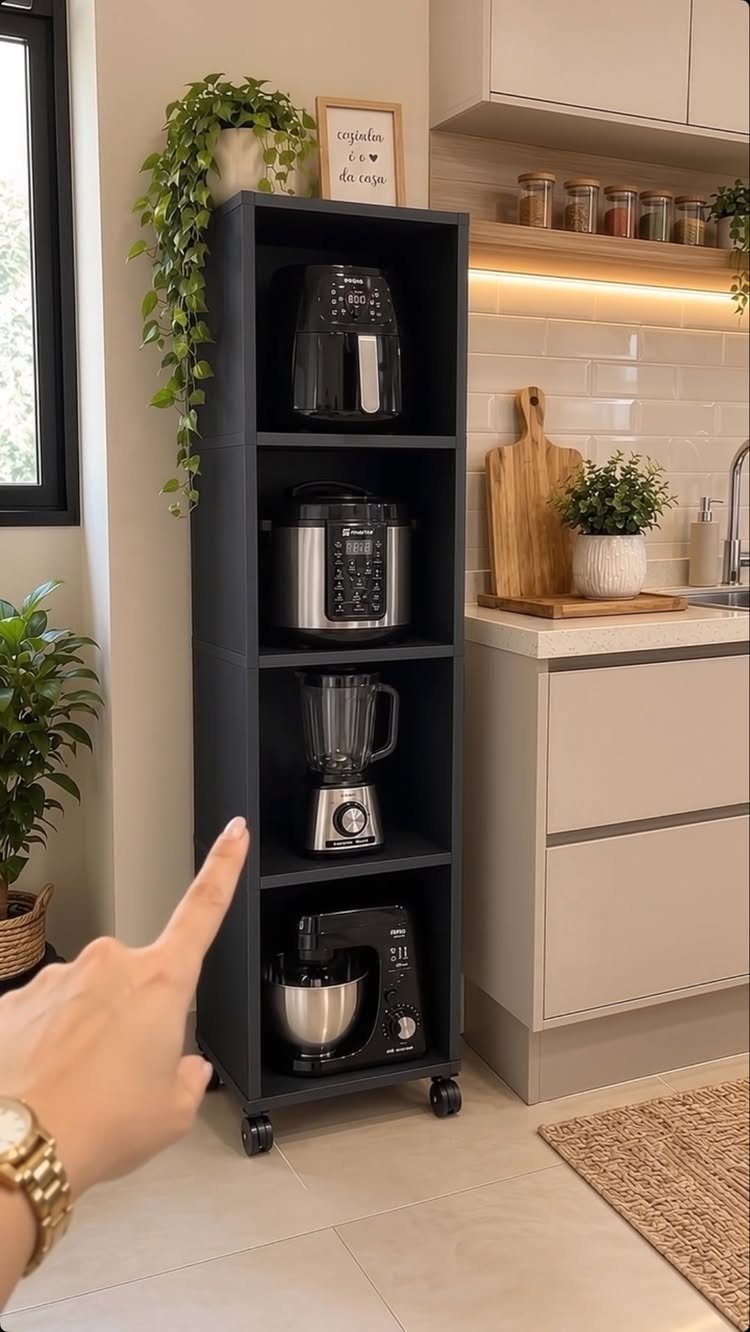
4 tiers on wheels hold an air fryer, pressure cooker, blender and stand mixer in about the footprint of a small cabinet. Nothing gets installed, which makes this the best fit for renters.
Roll it to the counter when you cook and park it by the cabinets afterward. Put the heaviest appliance on the bottom tier so the cart stays stable, and use wheel locks if yours has them.
6. Appliance Storage Closet
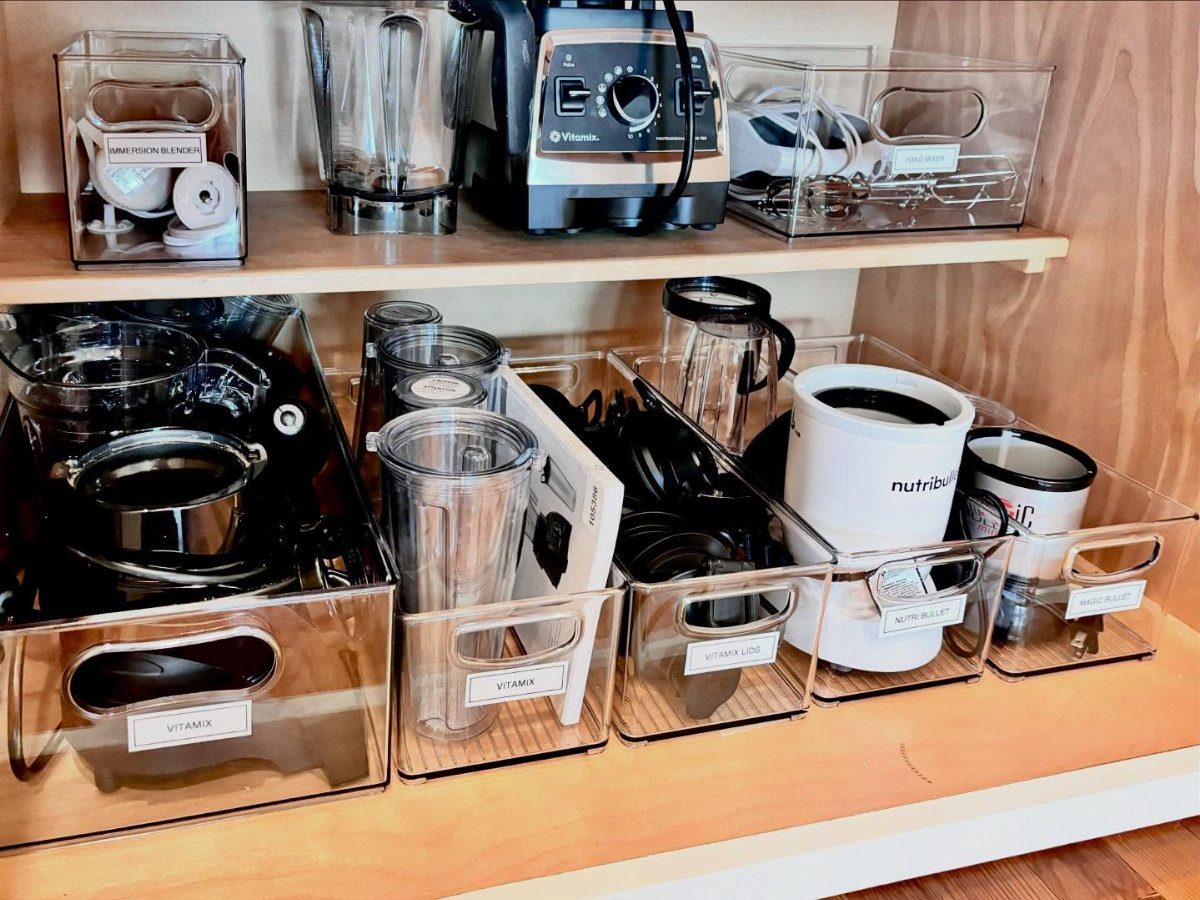
Blender lids vanish more often than blenders do, and clear bins fix that because you can see the lid, the blade base and the cord at a glance.
Each appliance gets its own labeled box, with the jars, lids and base kept together.
Wooden shelves in a spare closet near the kitchen are enough to start.
Because the bins are see-through, you can spot a missing part at a glance. Labels like "VITAMIX" and "NUTRIBULLET" keep everyone in the house putting things back in the right place.
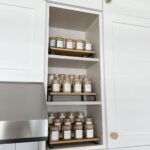
7. Refrigerator-top Cabinets
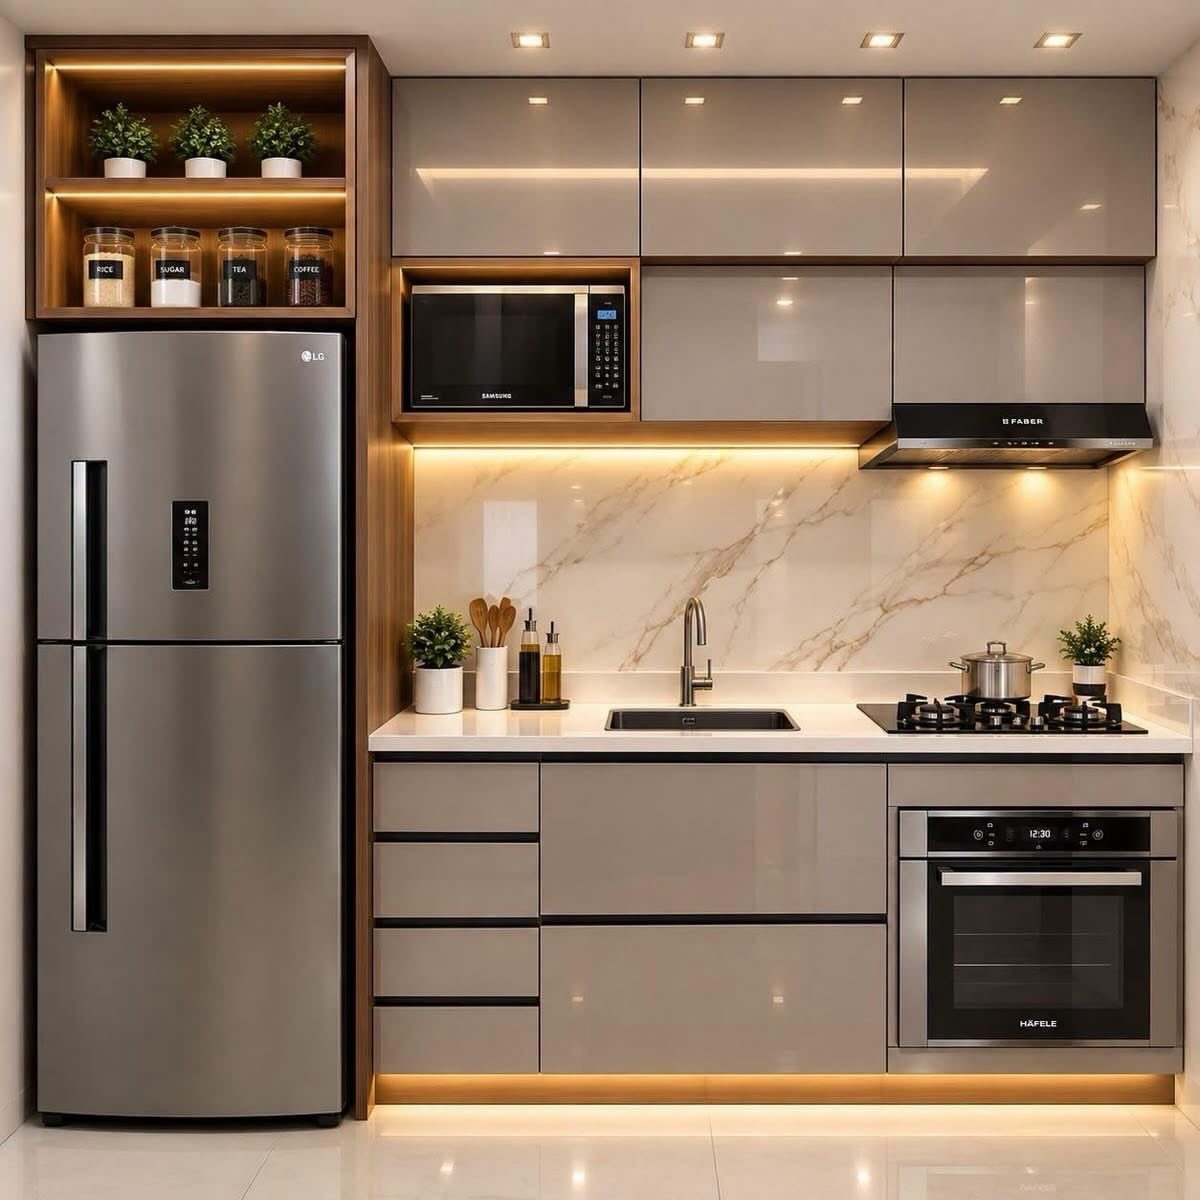
Cabinets above the fridge hold the appliances you pull out a few times a year, like a pot you use for holiday batches or a waffle maker.
That height is awkward for daily reach, so I’d keep anything you use weekly somewhere lower.
Open wood shelves like these suit lighter, tidier pieces, and small plants and jars soften the look. Closed doors hide the clutter, and I’d choose them if your appliances aren’t pretty.
8. Butler’s Pantry Storage
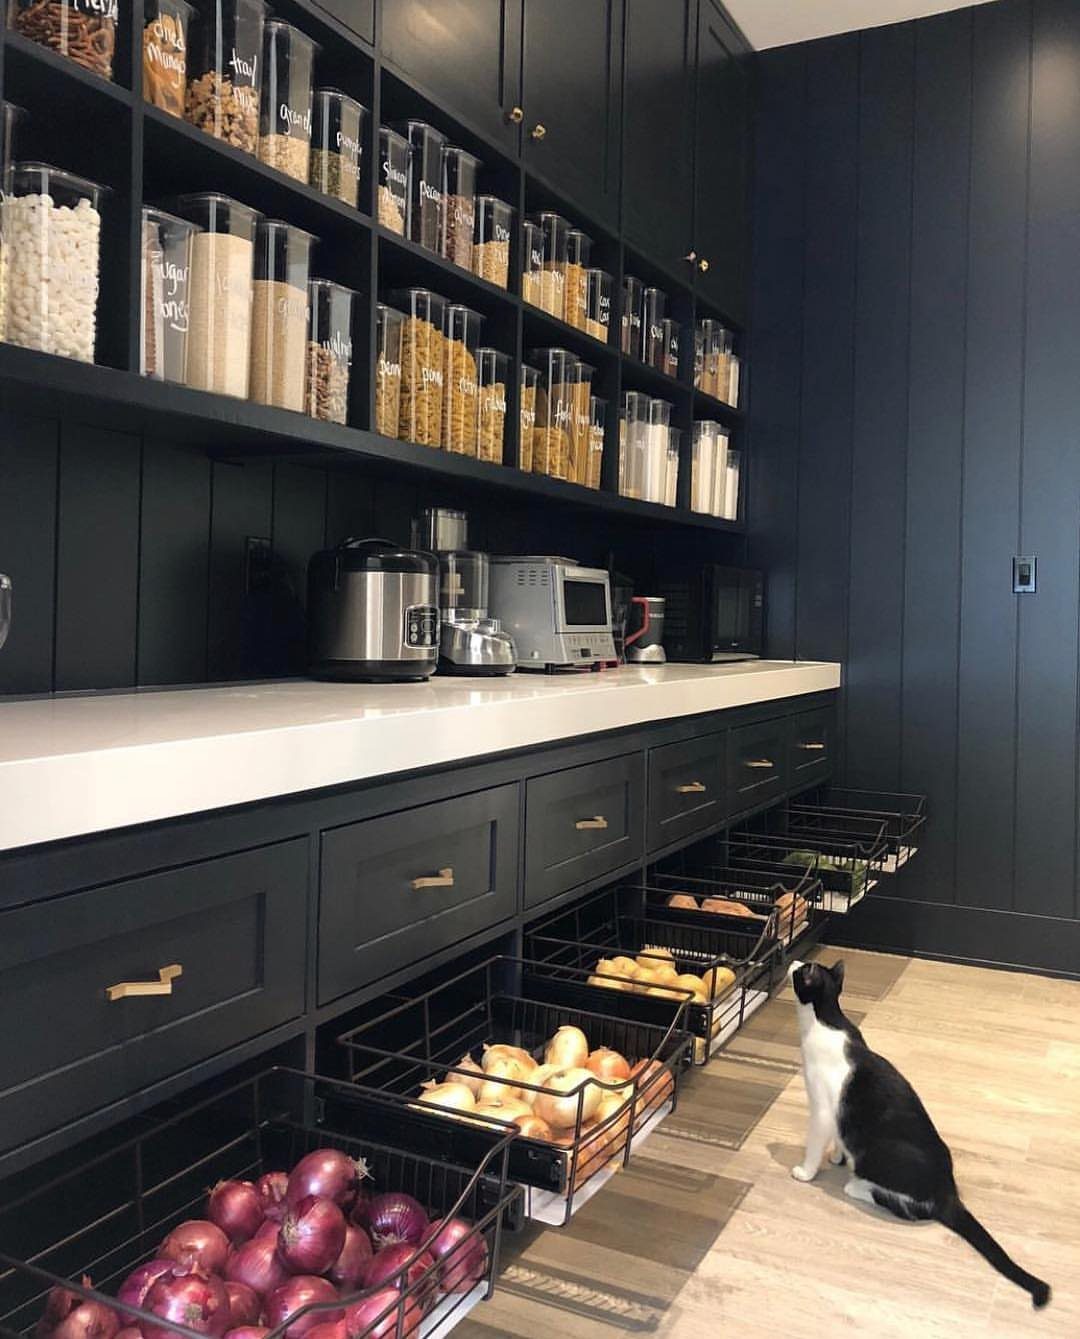
Navy cabinets and a white counter give a butler’s pantry a calm, finished look, and the counter works as a landing spot for a slow cooker and toaster oven.
Plug them in where they sit so dinner prep never crowds the main kitchen.
Open lower cabinets with pull-out baskets keep produce close to those appliances. A cat on the floor is a good reminder to keep cords tucked toward the wall.
9. Alcove Appliance Storage
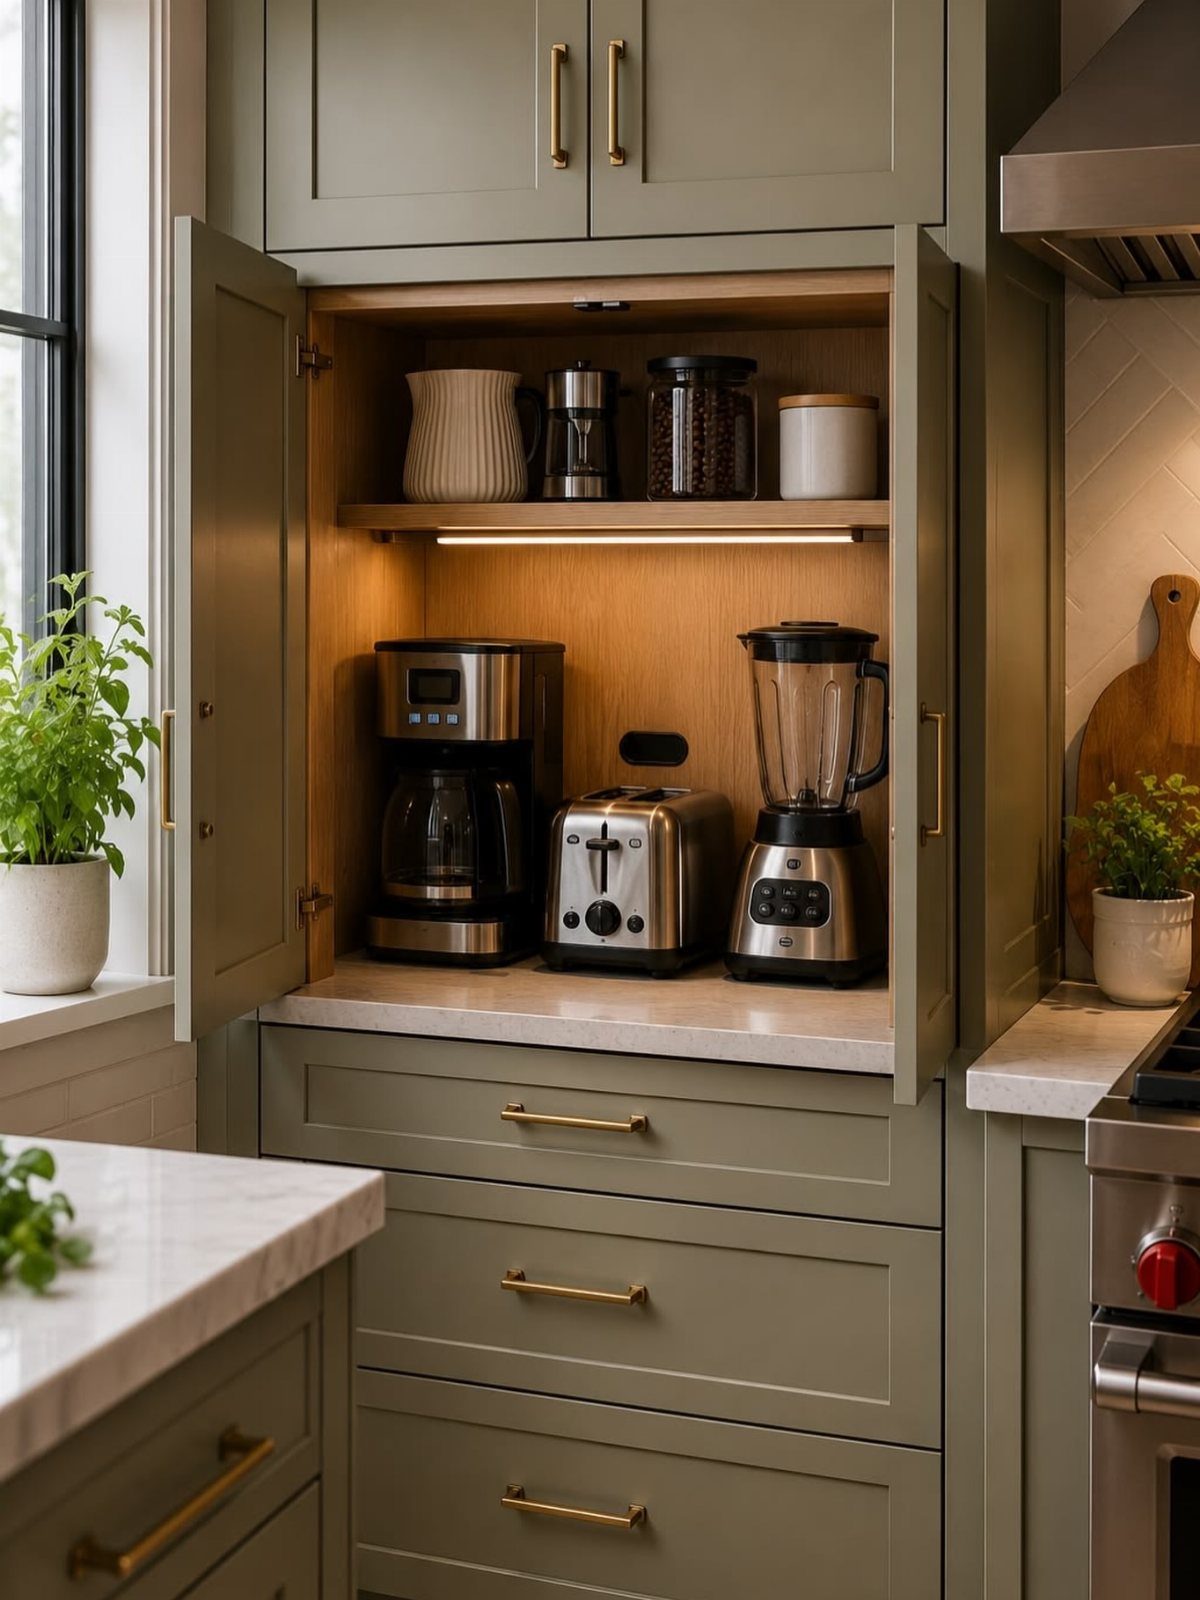
A recess in the wall costs no floor space, and a set of doors lets it disappear when closed.
Measure the opening before buying anything, and leave room for the doors to swing clear of the appliances. If you can add an outlet inside, do it: running machines in there beats carrying them out each time.
10. Cubby Unit
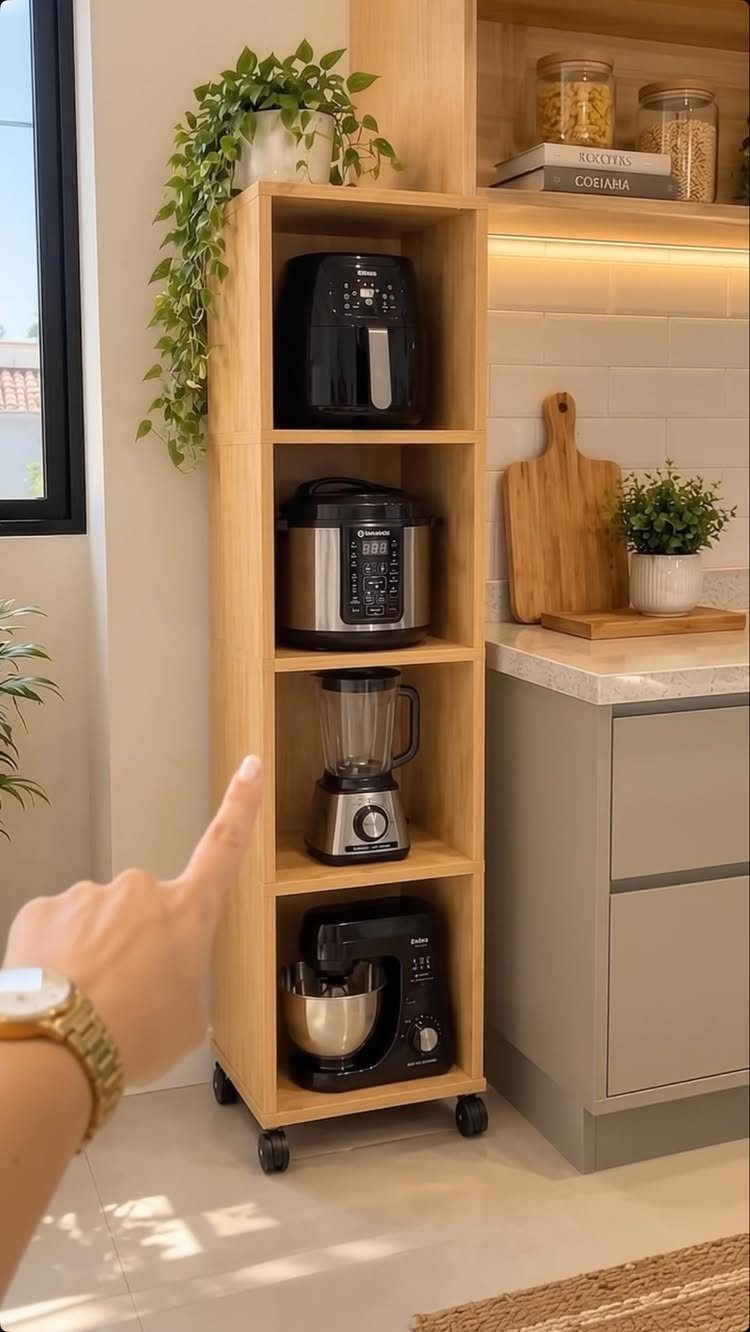
Cubbies give every appliance its own slot, so an air fryer never ends up wedged on top of a blender.
A cubby unit on casters holds an air fryer, slow cooker, blender and stand mixer, and it rolls to wherever you’re cooking.
For renters, that mobility is the selling point. I’d measure your tallest appliance first and pick a unit whose cubbies clear it, since mixers are usually what doesn’t fit.
11. Corner Carousel Cabinet
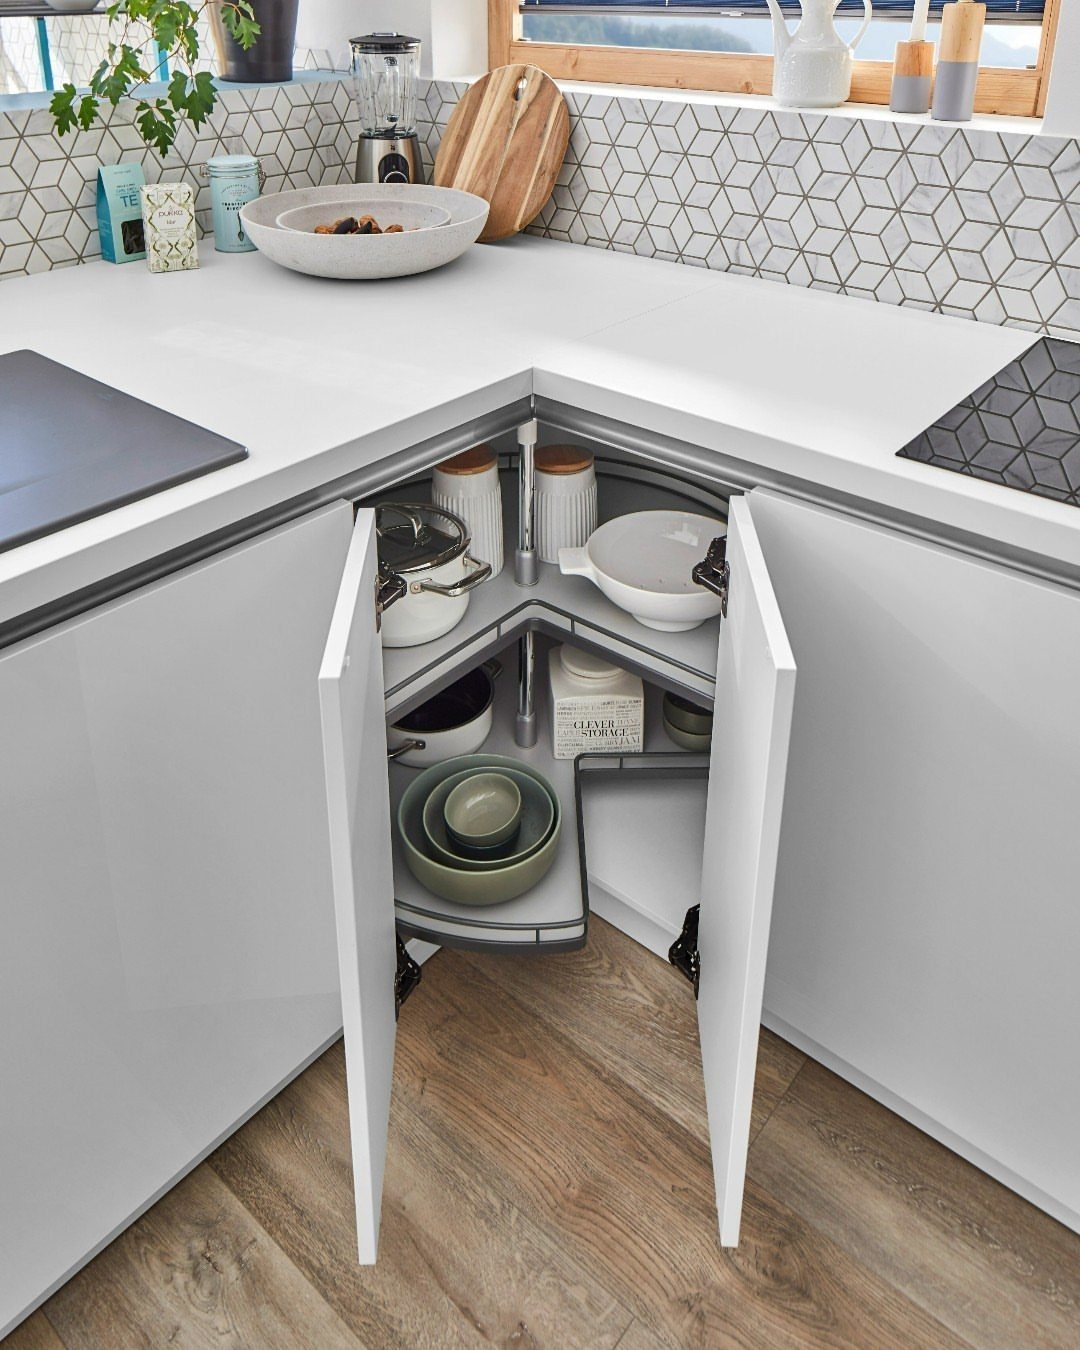
Blind corners swallow bowls and pots because everything ends up pushed to the back. A rotating carousel brings the back to you with a spin, and it’s one of the cheaper upgrades for a cabinet you already own.
I’d use it for round or bulky items like mixing bowls and pots, then keep appliance bases and attachments on the shelves. Check the cabinet’s door opening and interior depth first, then place your order.
12. Built-in Appliance Closet
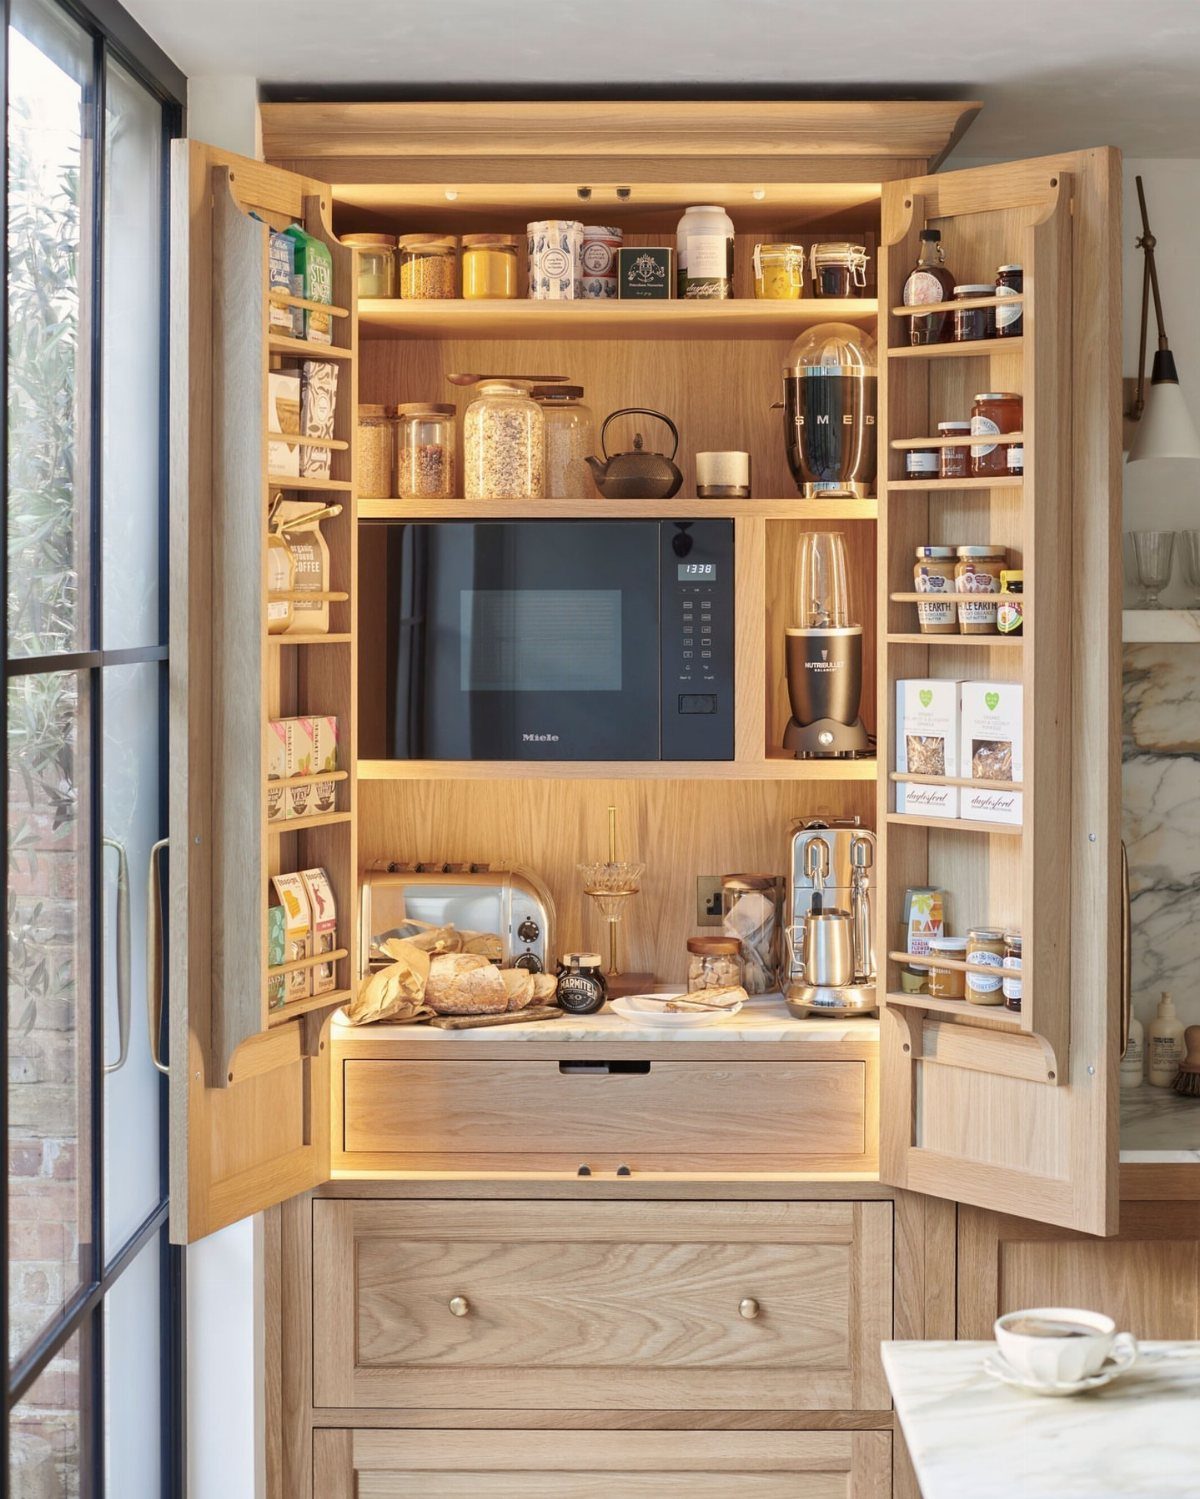
A tall light wood cabinet with doors that open wide turns a stretch of wall into a full appliance station.
Lit shelves keep the microwave, blender and toaster easy to see, and the counter in the middle is where you actually use them.
Pantry items on the shelves nearby mean ingredients and machines live together. I’d pick light wood for a small kitchen, since it keeps a big cabinet from feeling heavy.
13. Pantry Closet with Appliances
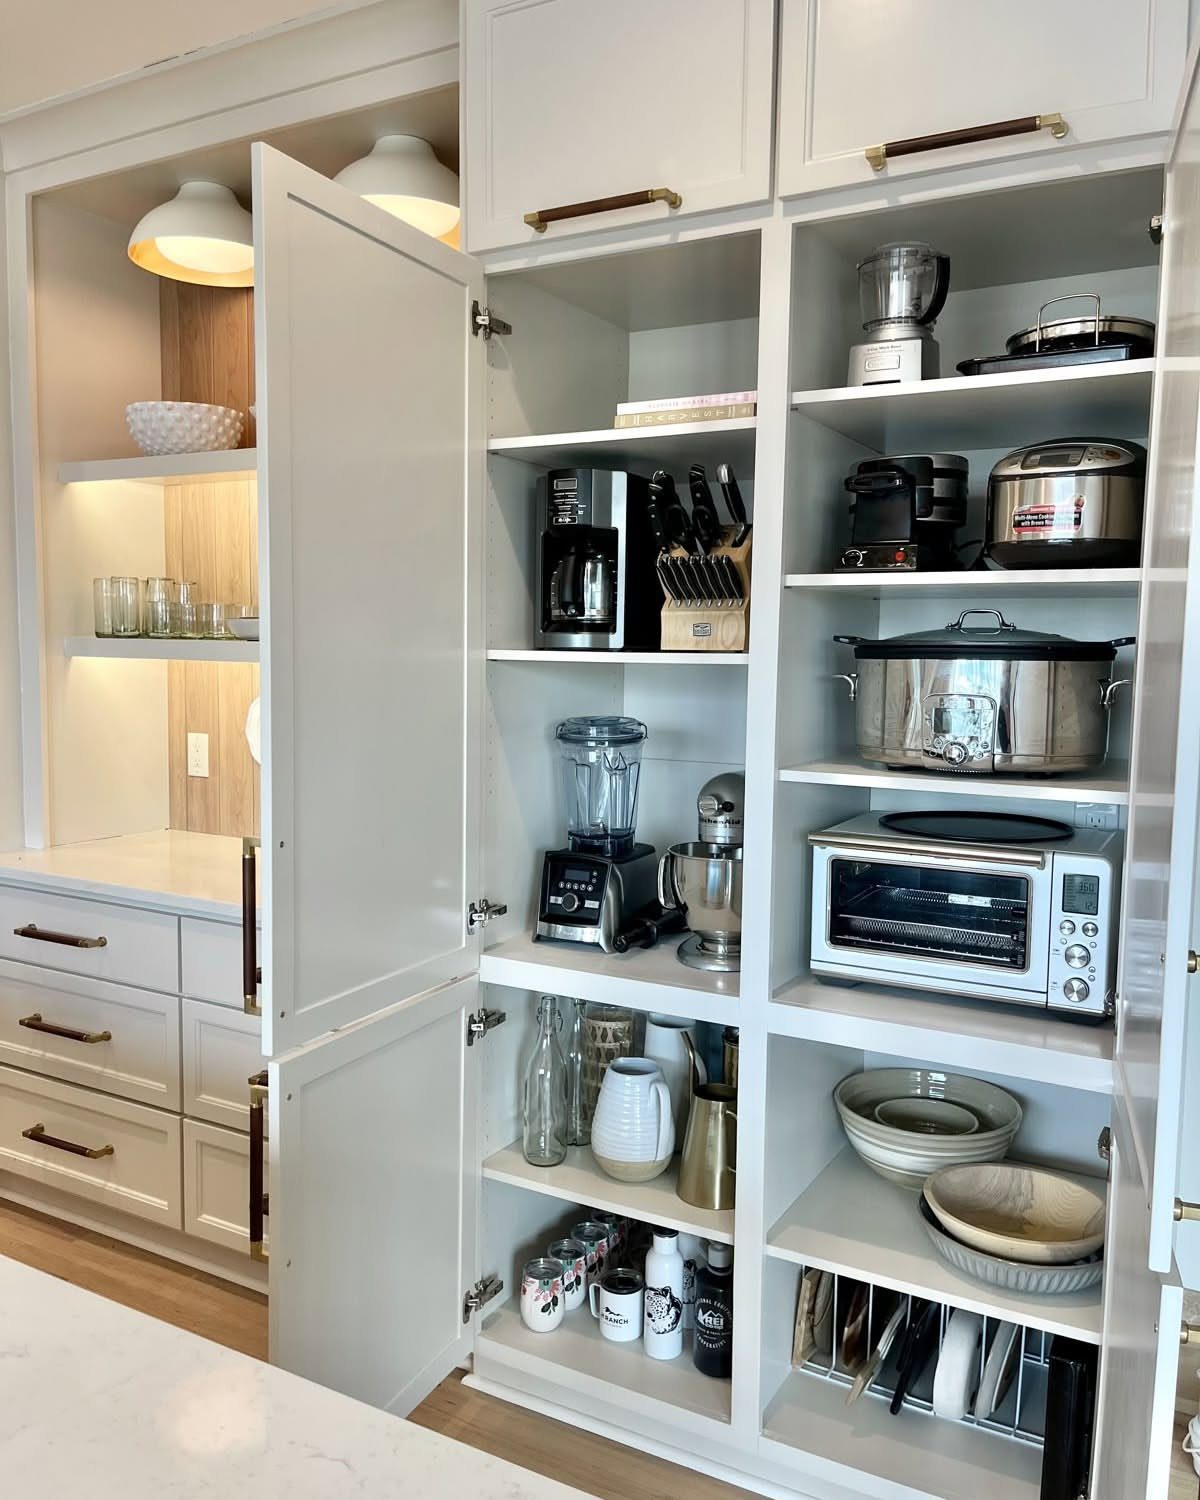
Bowls share the shelves with the coffee maker, blender and toaster oven here, so one closet covers both cooking gear and the dishes that go with it.
The small lit countertop is the working spot, and I’d save it for whatever you use daily.
Gold hardware warms up all that white without adding clutter. Anything that doesn’t earn counter space goes on the shelves around it.
14. Tall Appliance Cabinet
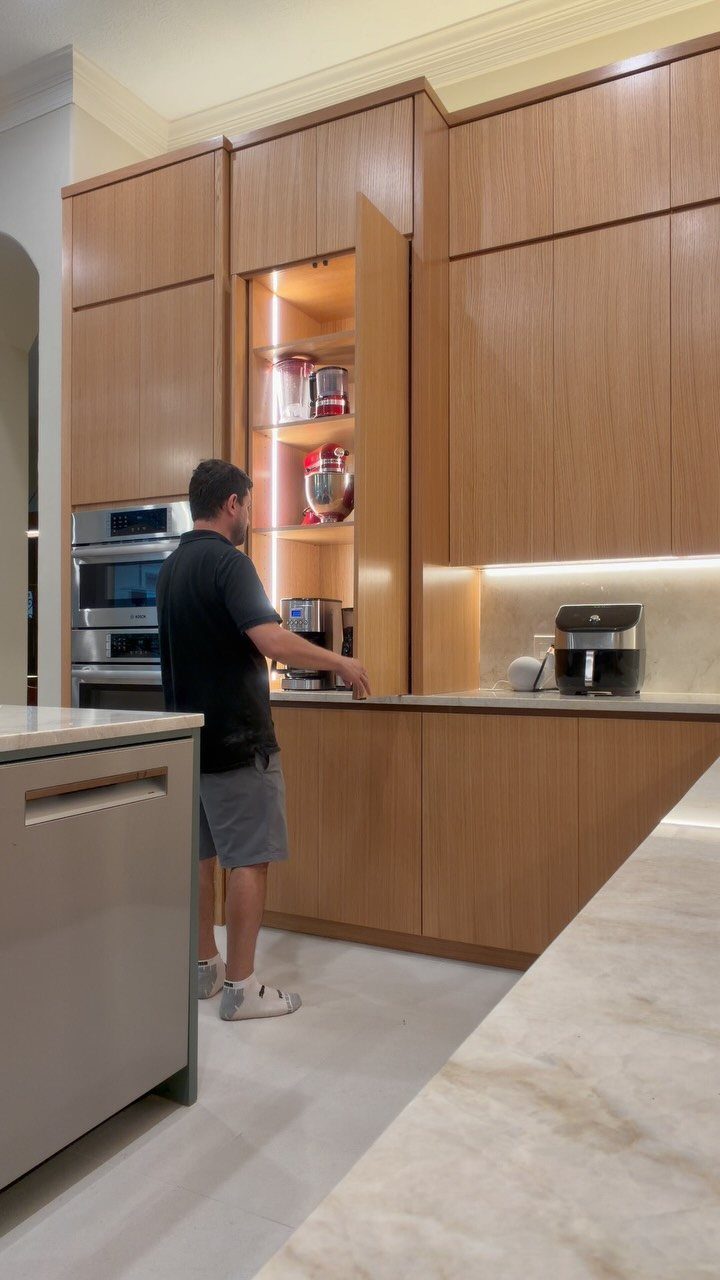
Interior lighting turns a deep wood cabinet into something you can read at a glance, and a stand mixer is easy to spot and pull out.
Close the doors and the mixer, with the appliances around it, is out of sight.
I’d give the mixer its own shelf at a height where you slide it out instead of lifting it.
15. Open Appliance Shelving
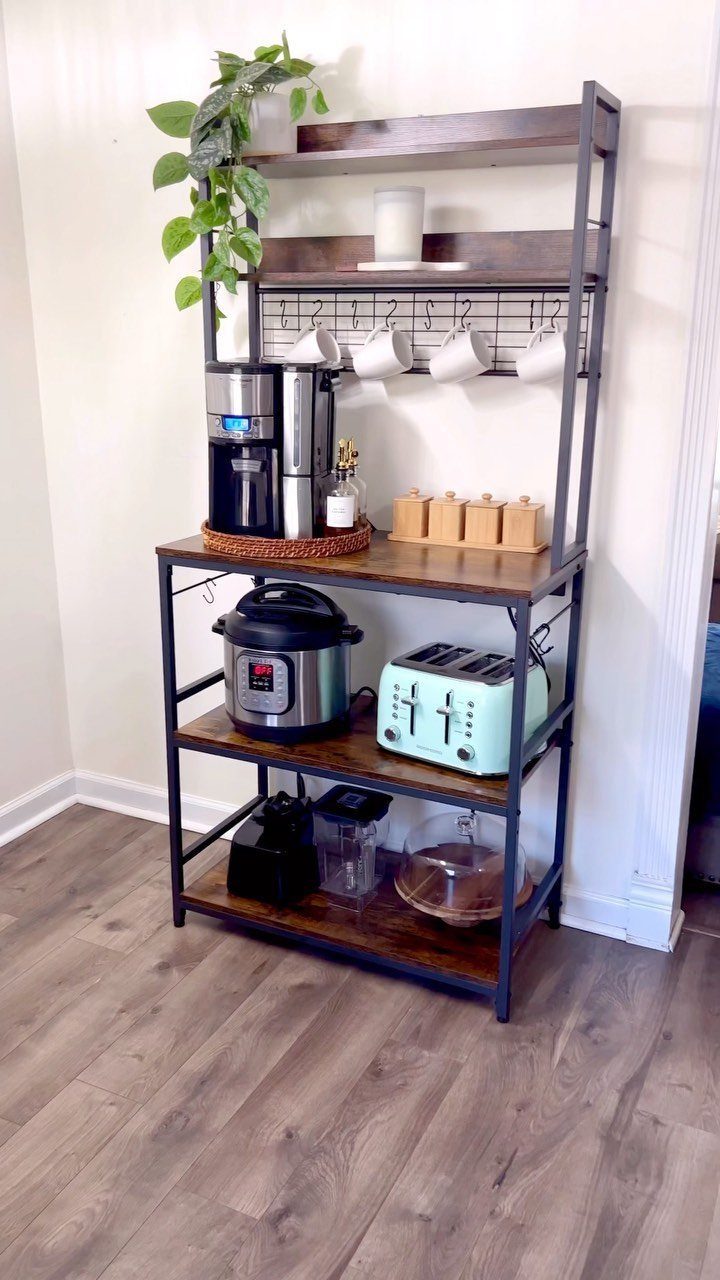
Nothing hides on an open shelving unit, so I’d only put out what you use and what looks decent: a coffee maker, a toaster, a slow cooker.
The slow cooker sits best on the lowest shelf, and the coffee maker at a comfortable middle height.
Because the unit is freestanding, there’s no installation, and it moves with you.
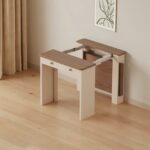
16. Freestanding Appliance Cabinet
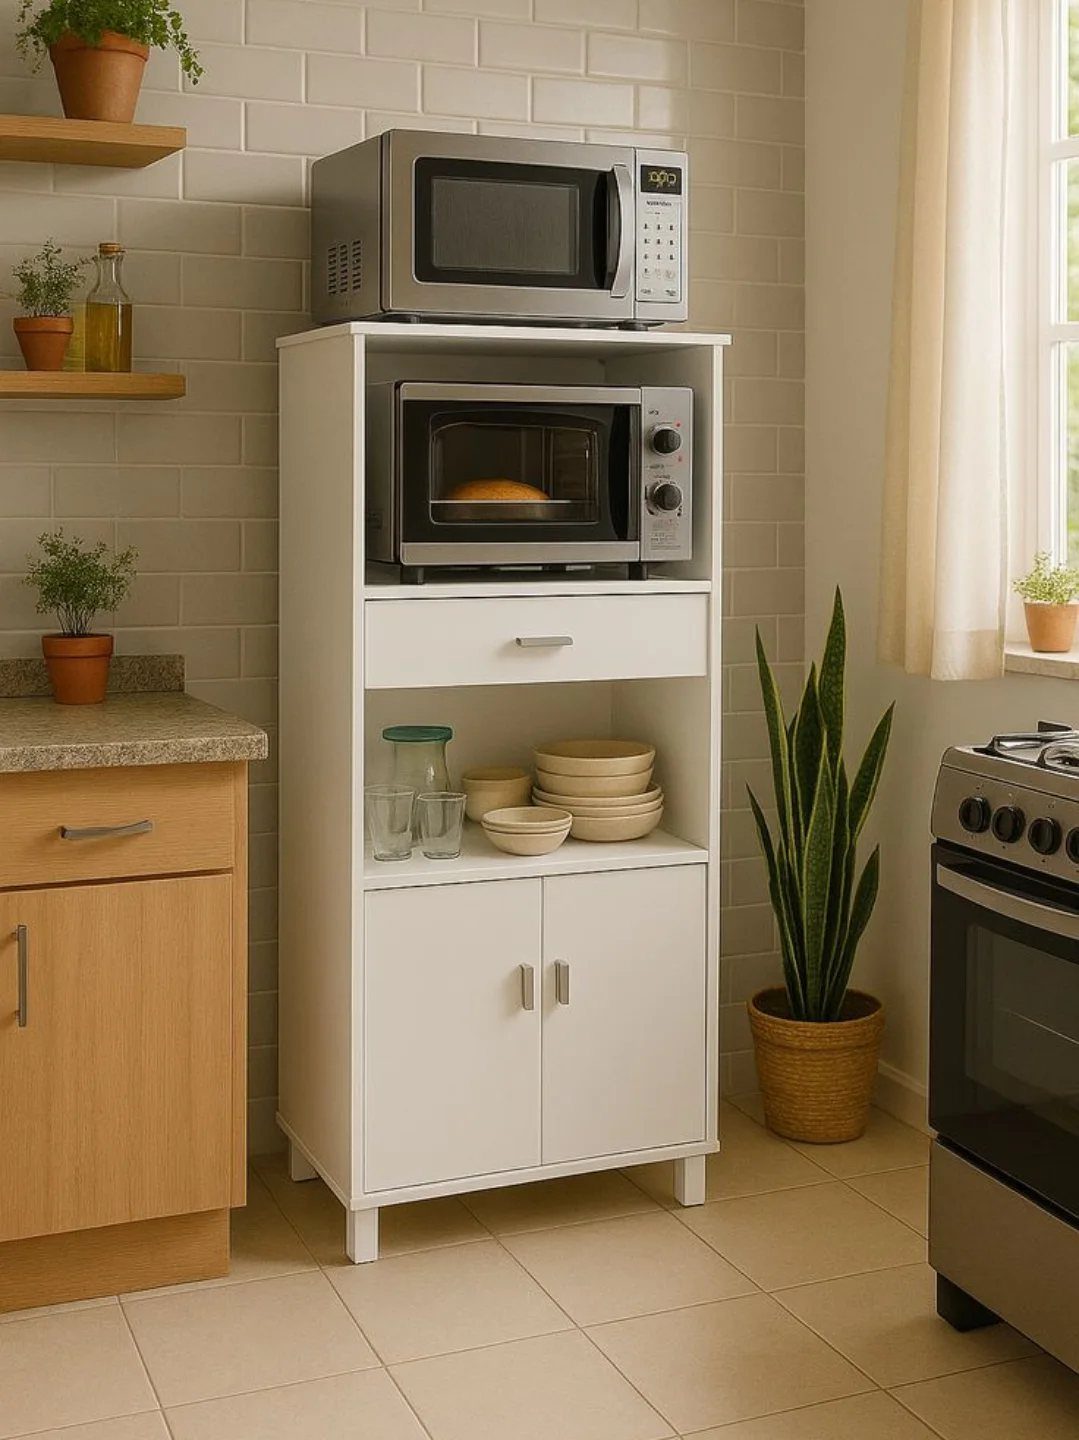
A microwave and a toaster oven stacked on open shelves free up the counter beside the stove, and the drawer and cupboard underneath take the rest.
I’d use the drawer for oven mitts and cords, and the cupboard for a bulkier appliance.
Measure the microwave, and check its manual for the clearance it needs around the sides and top. White blends into a tiled wall, and a couple of plants soften the look.
17. Appliance Counter in Pantry
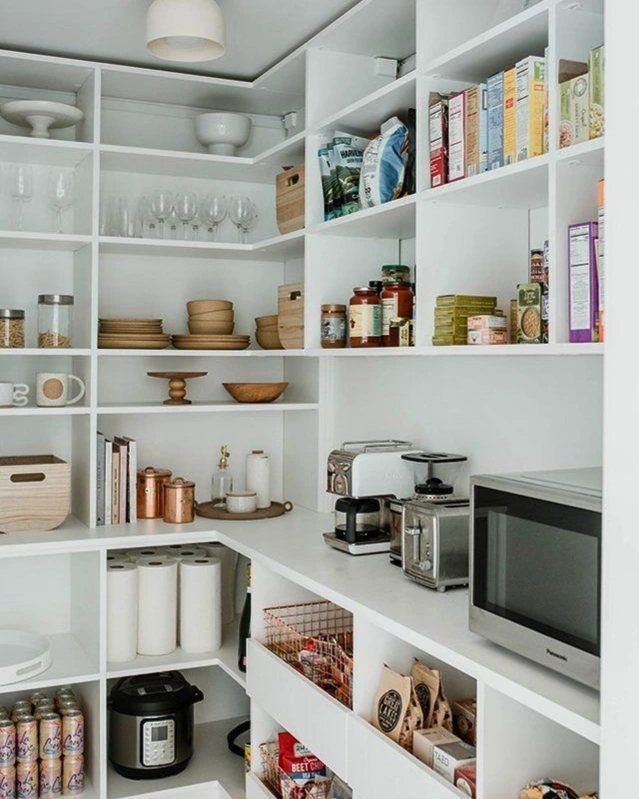
Food and glassware on the shelves, machines on the counter: that split lets breakfast come together in one spot. The coffee maker, toaster and microwave all sit on the pantry countertop, plugged in where they stand.
White paint keeps a pantry this full from looking busy.
18. Pantry Coffee Counter
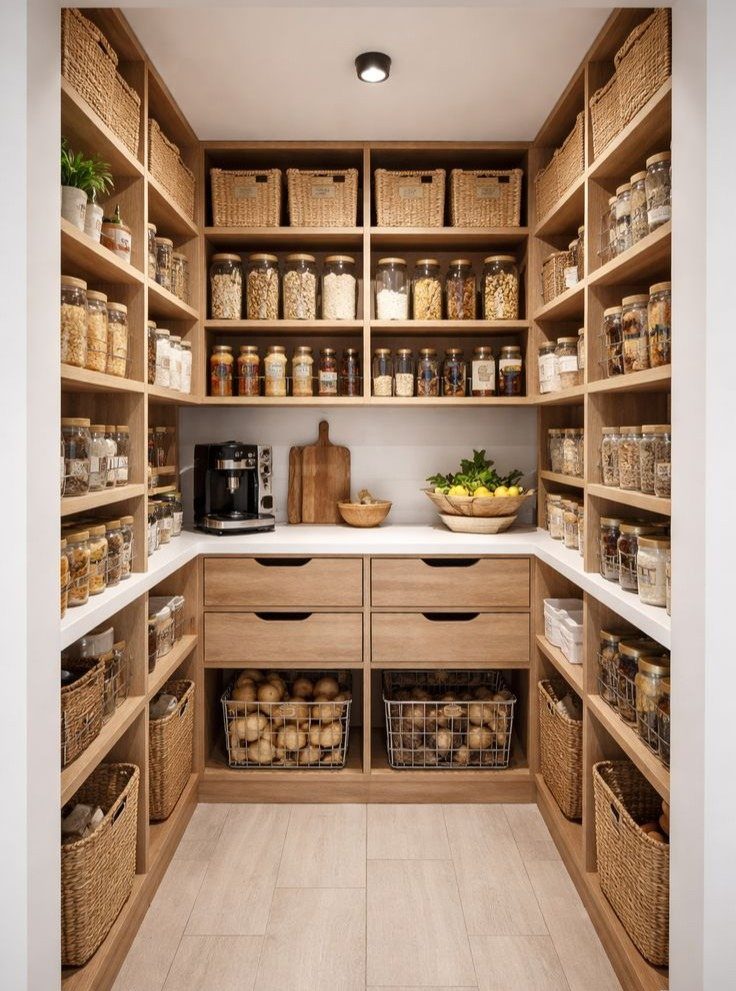
Coffee gets a counter of its own in this walk-in pantry, away from the main kitchen traffic. Glass jars hold beans, sugar or other dry goods, and wicker baskets corral the loose extras like filters and tea.
Drawers are the right place for spoons and measuring scoops. I’d keep the counter nearly bare apart from the coffee maker, with a bowl of lemons for color.
Sort by Use and Frequency
Pull everything out of your cabinets and sort it by how often you actually use it. Coffee maker, toaster, microwave: those are daily, so they belong on the counter or within arm’s reach.
Air fryer, blender, slow cooker: weekly, and they can go in a cabinet or pantry as long as you don’t have to move 3 other things to reach them.
Waffle maker, fondue pot, extra mixer attachments: monthly or seasonal, and they belong high, low or in a closet outside the kitchen. If you haven’t used something in a year, donate it or box it up for offsite storage.
Island shelving works well for medium appliances like panini presses and electric kettles, and larger island shelves can hold instant pots.
Tambour doors roll up and out of the way, so appliances stay visible while you cook and hidden when you’re done.
Safe Placement for Heavy Appliances
A stand mixer weighs 20 pounds or more, and lifting it down from an upper cabinet is awkward at best and unsafe at worst.
Put heavy appliances in lower cabinets near the food prep zone, or on a shelf at waist height where you slide them out instead of hoisting them.
Blenders, instant pots and food processors belong down low too, especially if you use them regularly.
Bending to reach a lower shelf is easier than lifting a mixer overhead, but if bending hurts, a pull-out shelf at mid-height is the better answer.
When appliances pile on top of each other in one overloaded cabinet, you forget what you own and nothing is easy to grab.
Electrical and Heat Safety
A toaster or coffee maker running inside a closed cabinet with too little clearance can overheat, which is a fire risk nobody wants behind a shut door.
Leave clearance around any appliance that produces heat, and check the manual for the inches it needs on each side and above.
Some outlet systems cut power when a cabinet door or drawer closes, and in-drawer outlets shut off above 120 °F. Both keep heat from building up while appliances sit idle.
Heat warps and scorches wood over time, so a cabinet near a toaster or microwave should either let the appliance slide out into open air on a pull-out shelf or have metal or heat-resistant doors.
Frequently Asked Questions
How to hide kitchen appliances on a countertop?
An appliance garage is the most direct way: a section of counter enclosed by a door, so the toaster and kettle stay plugged in and out of sight.
Tambour doors slide up into the cabinet, so the toaster and blender stay within reach while you cook and disappear from view once the meal is done.
If you rent or can’t change your cabinets, a freestanding cabinet with doors or a rolling cart hides appliances with no installation.
What is the best organizer for kitchen cabinets?
It depends on what is giving you trouble.
Heavy gear like a stand mixer rides best on a pull-out shelf, a corner carousel handles bowls and pots lost in a blind corner, and labeled clear bins stop blender lids and other small parts from going missing.
A stand mixer can weigh 20 pounds or more, so read the slide’s load rating before you set one on a shelf.
Do I need an appliance garage or an appliance drawer?
Decide by your available space, how easy you want access to be, how many appliances you own and how big they are, and whether you can modify your cabinetry.
If the cabinets are already built, a drawer is the easier add; a garage works best when it goes in during the cabinet planning.
A garage also takes taller items like a blender or coffee maker that may not fit in a drawer.
Are appliance garages a good idea?
Usually, yes. They clear counter space and keep daily appliances within reach behind a door.
The downsides are a higher cost than standard cabinets and some lost cabinet storage. Leave clearance around anything that gives off heat, since a toaster running in a closed space can overheat and scorch wood over time.
What are appliance garages?
Think of it as a stretch of counter with its own door, either a hinged one that swings shut or a panel that slides across, with the appliances parked behind it.
Appliances sit on the counter, ready to use, and disappear from view when the door is down. You can build one into a new kitchen or add one to an existing run of cabinets.
Where can you store small kitchen appliances?
Small appliances end up in 1 of 3 spots: out on the counter, inside a cabinet or cupboard, or in the pantry.
Match the spot to how often you use the appliance: daily machines on the counter, weekly ones in a nearby cabinet, and monthly or seasonal ones in the pantry or a closet outside the kitchen.
Keep the heavy ones low in whichever spot you pick.
What appliances are best stored on a kitchen counter?
Keep out what you use every day or several times a day, like a coffee maker, toaster, toaster oven or microwave.
Anything you reach for less often earns a spot in a cabinet or pantry instead. That keeps the counter clear for actual prep.
What appliances are best stored in a kitchen cabinet?
Weekly appliances like a blender, air fryer, slow cooker or indoor grill fit a cabinet well.
They stay put away but close to where you cook. Just make sure you can reach them without moving 3 other things first.
What appliances are best stored in a kitchen pantry?
Appliances you use a few times a month fit best, such as a stand mixer, food processor, Instant Pot or Crock-Pot. Put the heaviest on low shelves or in lower cabinets so you never lift them down from overhead.
A pantry with a countertop and an outlet can hold the coffee maker or toaster too, which puts the daily machines right where you reach for them.
How should small appliances be arranged and placed in the kitchen?
Sort everything by how often you use it.
Anything you use every day stays on the counter or an arm’s reach away, weekly tools move to a cabinet or the pantry, and monthly or seasonal pieces go on a high or low shelf, or in a closet outside the kitchen.
Heavy pieces like a stand mixer, which weighs 20 pounds or more, belong in a lower cabinet near your prep area or on a waist-height shelf that slides out.