
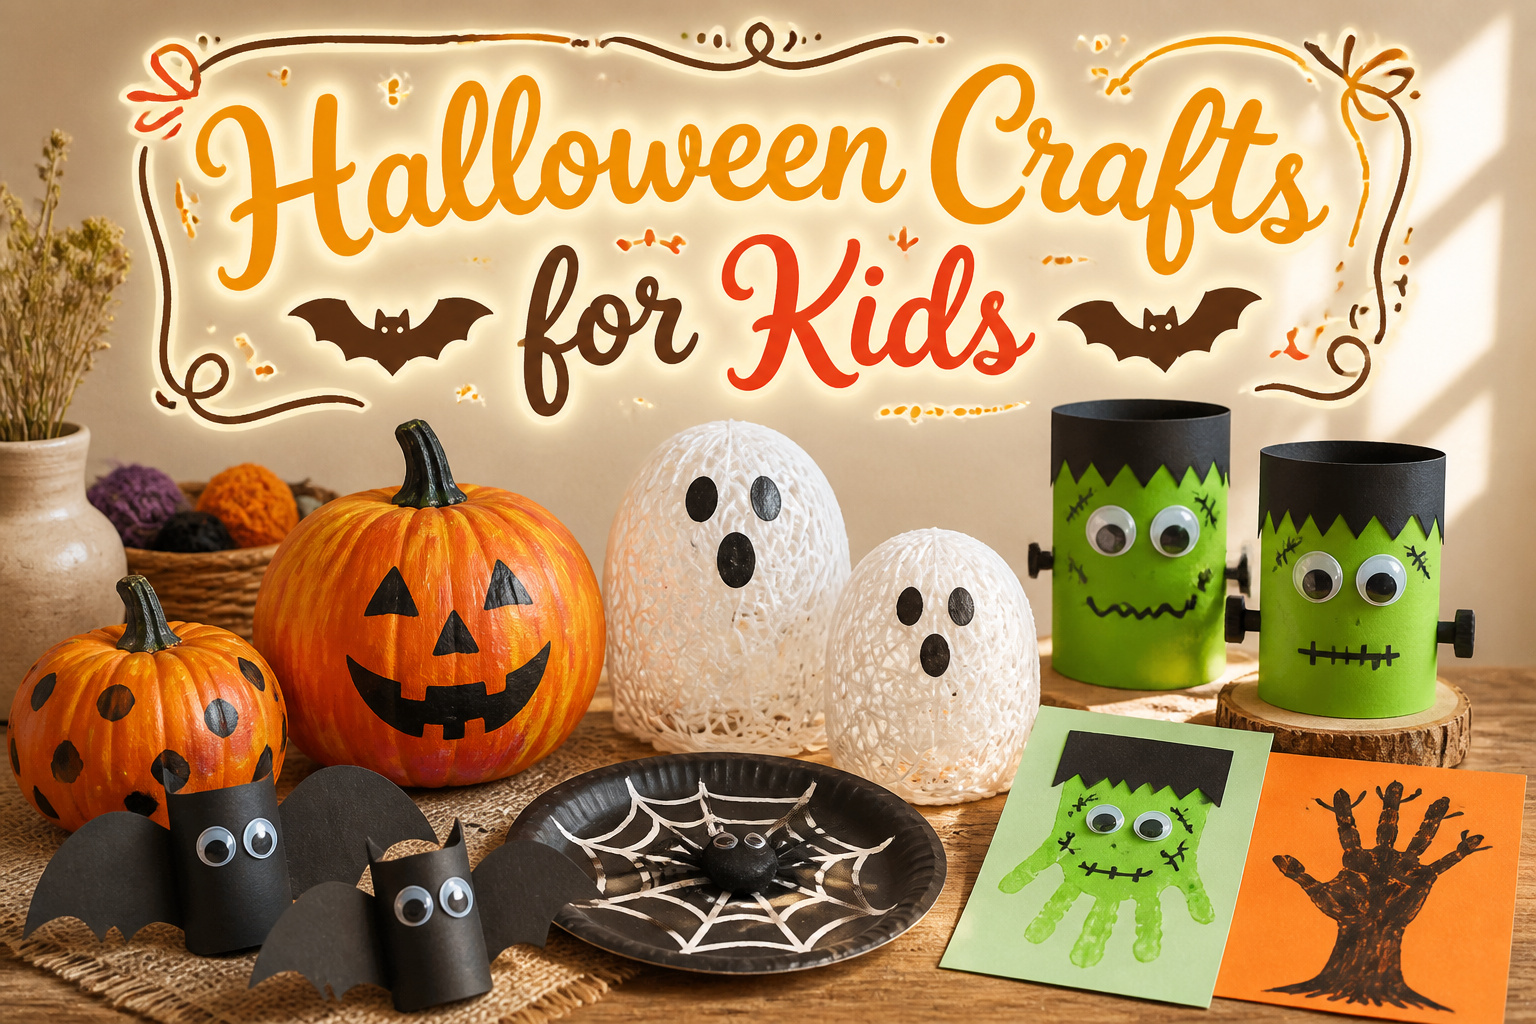
The best Halloween craft for your household depends on one thing: how much patience you have for drying time. Projects like yarn ghosts need overnight before the balloon comes out, while handprint Frankensteins go home the same afternoon. A half-and-half ratio of white school glue to water is the line where yarn holds its shape but still threads easily through small fingers.
1. Noodle Pumpkins

Wheel pasta and spiral noodles give these pumpkins texture you cannot get from construction paper. The wheels, with their holes and ridges, read as ribbed pumpkin skin once painted. Spirals become curly vines or wild stems. Acrylic paint works best on dried noodles, and the fastest way to coat them is inside a zip-top bag with a generous squirt of paint, shaken until the pieces are mostly covered. The holes in the wheel pasta stay stubborn, so a quick touch-up with a brush saves the look.
Assembly is where patience matters. Painted noodles stay slick, and googly eyes slide on wet glue. A dab of tacky glue on a paper plate, with the face pieces pressed in and left undisturbed, keeps everything from drifting. The ridges on the wheels help them grip the paper better than flat pasta would. Spiral noodles need a thicker blob of glue at the contact point or they uncoil while drying.
2. Leaf Ghosts

Flat, broad leaves hold paint without curling up the way narrow ones do. Maple and sycamore work better than oak, which tends to cup and crack as it dries. Two thin coats of white acrylic cover green better than one thick one, and the second coat goes on faster because the first seals the surface. A black Sharpie, not paint, gives the face its edges; the marker bleeds slightly into matte acrylic in a way that looks soft and ghostly, whereas glossy paint leaves the lines sitting on top like stickers. Matte finish also catches less light, so the ghosts look pale in a window rather than shiny. Dry time runs about twenty minutes between coats, which is just enough to collect more leaves for the next batch.
3. Bat Handprint Craft

Handprint bats work best when you stop fighting the symmetry and let the thumbs do the job they already want to do. Press the handprint so the thumbs point outward at roughly ten and two o’clock, and those two thick digits become ears without any extra cutting. The fingers spread behind them like wing membranes, and the palm forms the body.
Paint on colored paper, not white; the contrast against black tempera matters more than you think, and the cheap stuff from the school-supply aisle holds up fine. A glue stick handles the googly eyes once the print dries, which takes longer than the kids want it to. I have watched a three-year-old crumple three sheets because her fingers curled under and the wings looked like torn leaves. The fix is simpler than coaching those fingers flat: rotate the paper ninety degrees and call the smears a "flying bat." The craft keeps the memory either way, and handprint crafts are the ones that survive in the drawer.
4. Straw Skeletons

White plastic straws cut to matching lengths make the cleanest bones, and a bag held open underneath catches the pieces before they scatter across the table. I line up five or six straws and snip them together with sharp scissors so the segments stay identical; uneven lengths throw the whole skeleton off balance. Hot glue is the adhesive that actually grips slick plastic; school glue beads up and dries without a bond, which I learned after two collapsed ribcages. A dot at each joint sets in about ten seconds, so the kids can keep building without the frustration of holding pieces in place for minutes. For the skull, a wider scrap of straw or a small paper circle with drawn eyes fills the top, and a bow tie cut from scrapbook paper dresses the chest if plain white feels too clinical. The skeleton stands on its own once the legs are angled slightly apart and the feet are glued flat; anything narrower topples at the hip joints when a breeze from the doorway hits it.
5. Salt Painted Spiderwebs

Salt painting works because the glue lines act like tiny dams and the salt crystals wick the watercolor outward through capillary action. When the paint hits the salt, it travels along the crystalline structure and leaves a faded, almost frosted edge as it dries. The kids get to watch the color spread in real time, which is half the point of the project.
Black cardstock is the only paper worth buying for this. The contrast makes the pale salt lines read as actual spiderweb silk instead of gray smudges on white. Construction paper bleeds and warps too fast; cardstock holds its shape through the wet stage.
The salt layer is where most spiderwebs get ruined. A heavy sprinkle that fully coats the glue is enough; a pile that sits above it will warp the paper and leave chalky clumps that refuse to take color evenly. Shake the excess off into the trash before the paint ever touches it. You can paint while the salt is still damp or wait until it dries; the colors stay slightly more vivid if you let the salt set first, though either way works.
6. Frankenstein Handprints
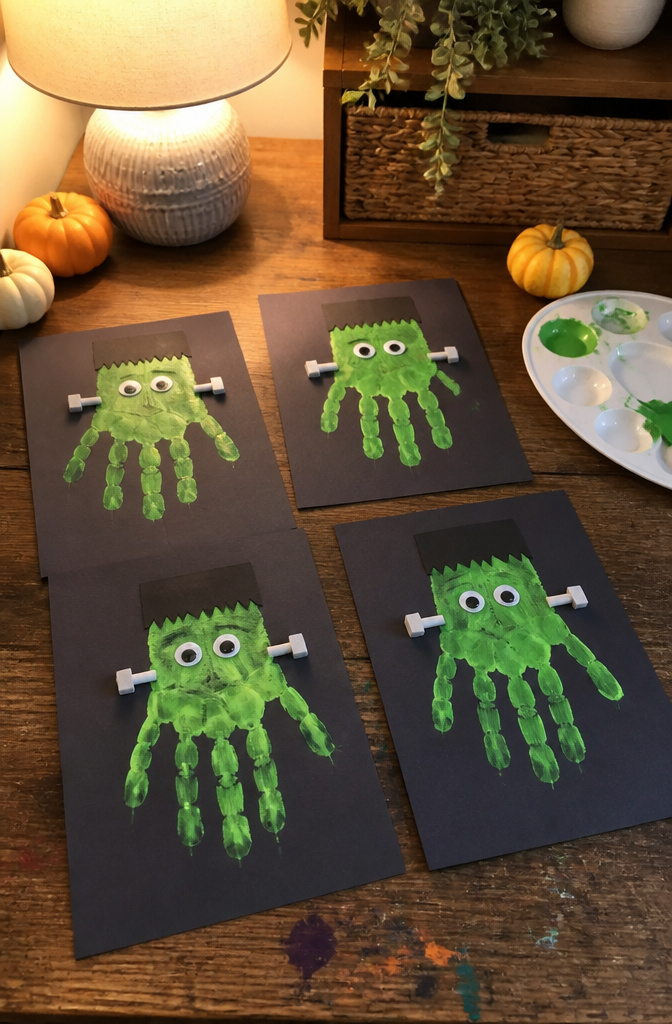
Green tempera paint stays flexible enough that a palm print on construction paper won’t crack the way acrylic does once it dries. For the Frankenstein shape, the fingers stay together and the thumb tucks in; that flat top where the wrist meets the palm becomes the squared-off head without any extra cutting. Two small black paper rectangles, glued at the ear position rather than out on the sides, read as bolts from the neck. Googly eyes placed slightly lower than center keep the face from looking surprised; a drawn stitched mouth and a couple of marker scars finish it. The whole thing takes one wet print and ten minutes of drying before the paper pieces go on, which means a preschooler can carry it home the same afternoon.
7. Paper Bag Haunted Houses

A standard lunch sack, opened so the bottom flaps become a floor, will stand on its own and give you four walls to work with. Acrylic paint covers the paper boldly; a dry-brushed layer of gray over black, or brown dragged across orange, reads as aged siding rather than clean craft-store color. The trick is leaving streaks.
Cotton balls, pulled apart and glued in place, shift meaning depending on where they land. On the roof they read as snow if they stay fluffy and white, as smoke if you gray them with a quick wash of diluted paint, and as cobwebs only when you stretch them thin and add a plastic spider. The source builds show broken-up cotton on the roof for webs, but the same material reads wrong if it sits too thick; wispy strands in window corners sell the effect, clumps look like insulation.
Cardstock cut into two rectangles and two semi-circles makes windows, with scrapbook paper rectangles for panes. A roof piece slightly larger than the bag top, attached with hot glue, overhangs enough to shadow the face. A chimney rectangle goes on back, a paper ghost on the door. Hot glue holds the spider and roof; a glue stick works for lighter paper parts against paper.
8. Halloween Puppets

Cardboard tubes from paper towels or toilet paper are the right width for small hands to grip without strain. A full paper towel tube cut in half gives you two puppet bodies roughly five to six inches long, which is enough space for a face and a moving part without the puppet turning unwieldy.
For jaws that open and close, fold a piece of construction paper in half for the mouth and tape the fold to the inside top rim of the tube. The jaw hangs down and the child’s thumb on the craft stick handle pushes it up from below. No brad needed, and the tape hinge survives more abuse than you would expect.
Arms work the same way. Cut two strips of paper, fold a tab at the top of each, and tape the tabs to the back of the tube so the arms swing freely. The weight of the paper keeps them hanging down until the puppet tilts, which is enough motion for a kid’s story.
A craft stick taped inside the tube beats a finger puppet for this age. It gives real control, and the child is not stuck with a tube on their hand when they want to switch characters mid-play. Paint the tube first and let it dry for at least two hours before attaching anything; wet tempera will loosen tape and soggy construction paper tears where the hinge needs to flex.
9. Yarn Ghosts

Yarn ghosts start with a balloon as a temporary mold, which is the part that either makes the craft or turns it into a soggy mess by morning. Blow the balloon to whatever size ghost you want, then set it in a cup or bowl so it stays still while you work. The glue mixture matters more than the yarn choice. Too thin and the strands slide off the balloon; too thick and you get clumps that dry brittle and crack. A half-and-half ratio of white school glue to water is usually the line where the yarn holds its shape but still threads easily through your fingers. Dip, squeeze off the excess, and wrap in random loops rather than neat rows. Neat rows collapse inward once the balloon deflates.
Drying time is where patience pays. Four hours sounds generous, but humidity and how thick the yarn sits both push that number. The balloon comes out through a gap in the wrapping once the shell feels rigid, not just dry to the touch. Pop it too early and the ghost folds in on itself; leave it too long and the latex bonds to the glue in spots. A pair of googly eyes glued on after finishes the thing. The whole project runs under $10 if you already have balloons and glue, and one evening of dipping plus an overnight dry fits a weekend schedule without stress.
10. Toilet Paper Roll Monsters

Toilet paper rolls flatten into long bodies or stay round for squat little creatures, and a single snip at the top turns one into rabbit ears or horns depending on the angle. The cardboard is brown, and acrylic paint without primer stays streaky and chips at the creases, so a coat of white school glue or cheap gesso underneath saves the finished look. Googly eyes look friendly for about a day, but the glue that holds them to painted cardboard softens in humid bathrooms or backpacks, and the plastic backs pop off if a kid squeezes the roll. I stopped trusting them for anything that leaves the kitchen table; a dot of hot glue from an adult, or drawing eyes on with a Sharpie, survives the actual life of the thing. Paint the primer in the morning, let it dry through lunch, and the kids still have the afternoon to finish before dinner.
11. Pumpkin Handprint Keepsakes

Orange tempera paint washes off little fingers in about two minutes with warm water and dish soap, so the mess stops being scary once you commit to it. I like to press one handprint at the top center for the stem base, then fan four more prints below it with palms overlapping slightly so the shape reads as round without needing a perfect circle. The thumb becomes the natural curve of each pumpkin section.
Canvas panels or glazed ceramic tiles let this survive past November in a way paper cannot. Canvas takes the paint texture without warping, and a tile with a sawtooth hanger glued to the back turns into a trivet or wall piece that stores flat. I have seen these given as grandparent gifts with the year written in the stem space in sharpie, and the recipients actually keep them on display through Thanksgiving.
12. Halloween Mummy Crafts
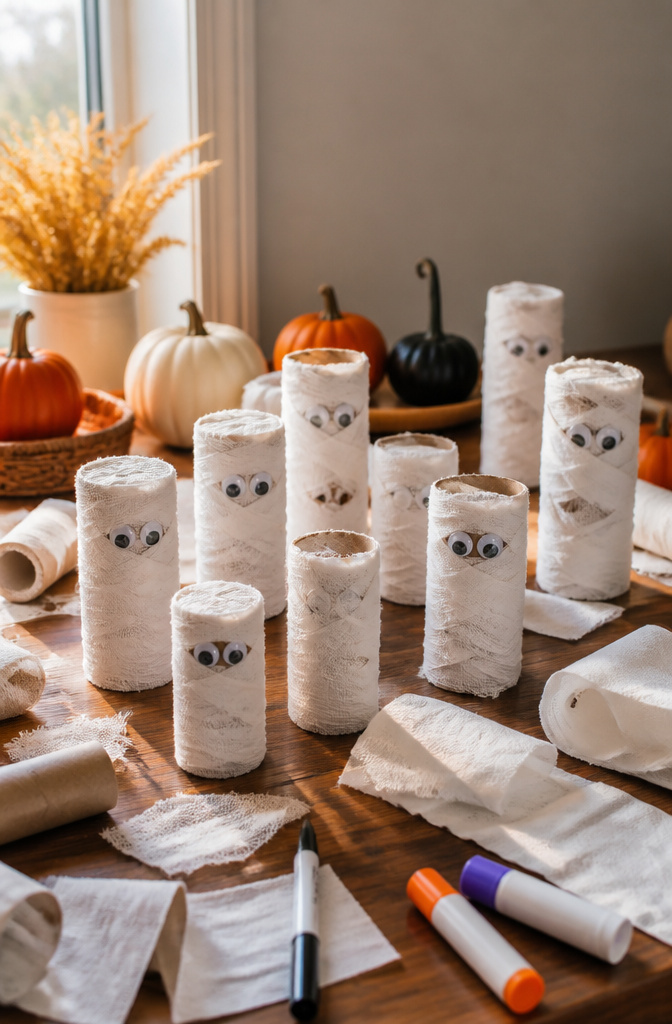
Toilet paper strips, gauze, and white yarn all turn a cardboard tube or balloon into a mummy, but the wrapping material changes how much of your weekend goes to taping down flyaways. Gauze frays the least, especially the medical kind with a tight weave; toilet paper needs a dab of glue at every torn edge to keep it from shedding white dust across the table. Yarn lands somewhere between, though fuzzy acrylic strands catch on themselves and stay put better than cotton twine.
The start of the wrap is where most kids’ mummies come undone. A dot of glue on the back of the form, pressed under the first turn, keeps the whole spiral from sliding off when little hands get enthusiastic. I have seen more than one mummy collapse into a pile of loose strips because someone skipped that anchor and tried to tuck the end instead.
Faces make or break the cute-to-creepy balance. Two black dots high on the head read friendly; eyes sunk low with a stitched-looking mouth lean unsettling fast. For younger kids, oversized wiggle eyes that peek through a single gap in the wrapping land in the sweet spot, spooky enough to count but not nightmare material.
13. Paper Plate Witches
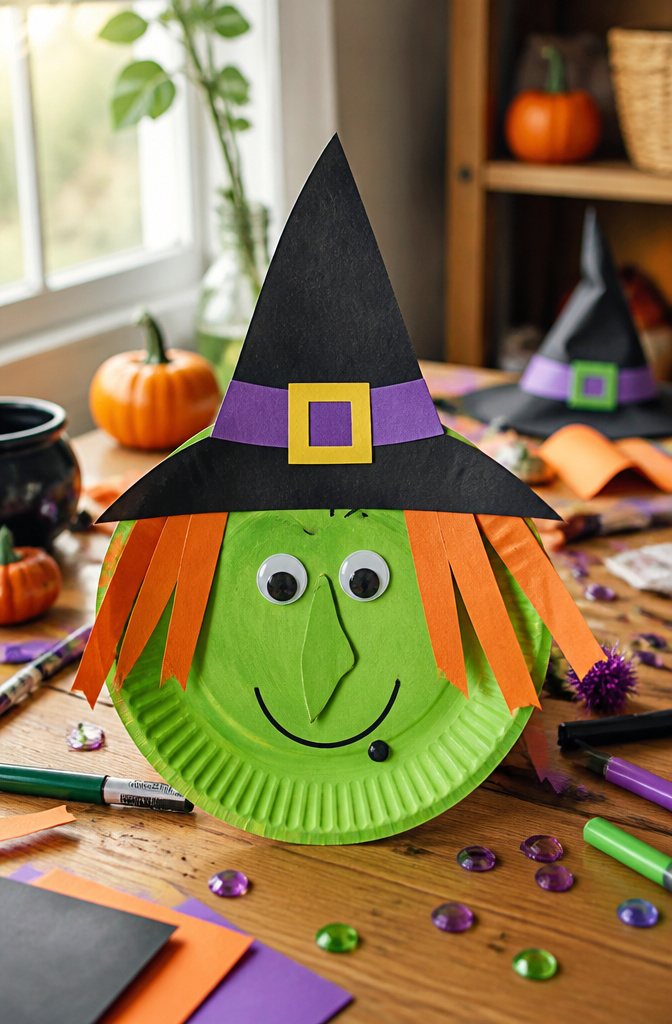
A paper plate witch lives or dies on how you handle the curve. Cut the rim into thirds and fold two flaps forward for a peaked hat brim; the remaining third stays flat for the face, so the whole thing stands off the table without extra support. Acrylic paint goes on thin here, two quick coats max, because anything heavier and the plate turns soft in the center while the kids are still adding construction-paper hair. Tempera works too if you let the first layer dry to the touch before the second.
For the hair, strips of construction paper need more than a glue stick. A line of white school glue across the top rim, pressed in place and left flat to dry, keeps the strands from drooping forward into the face. Yarn works the same way, though it tangles faster in small hands. Sparkly gems along the hat band, as one teacher described, buy you another ten minutes of focused gluing time.
The same plate cut into a crescent moon instead of a hat makes a quick mask with eye holes and side notches for yarn ties. A popsicle stick glued underneath turns either version into a puppet once the paint is fully set.
14. Candy Corn Crafts
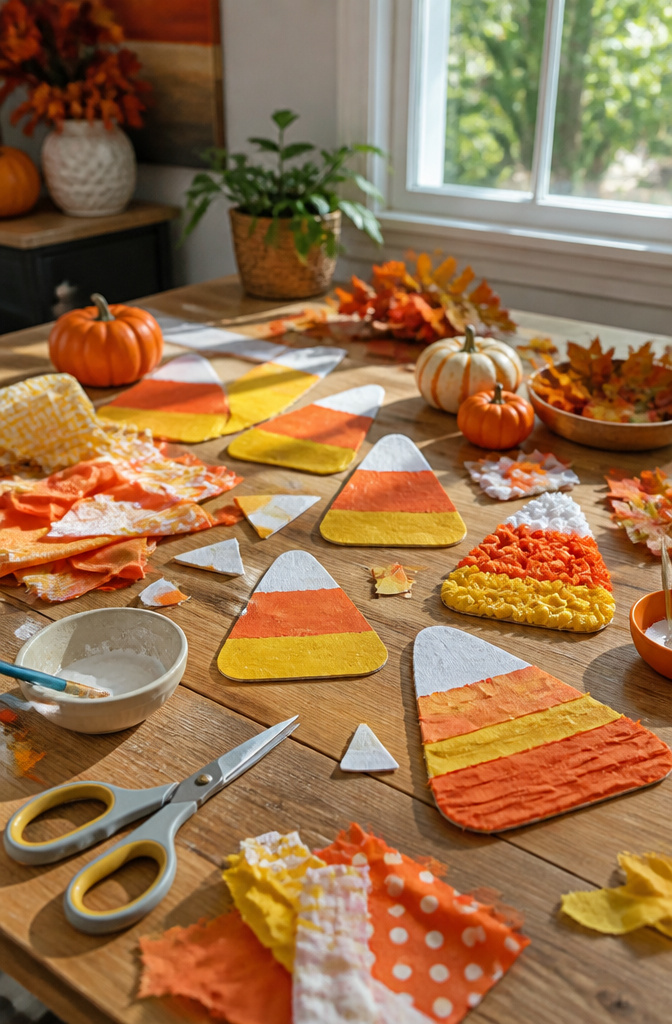
Candy corn’s three-color structure does more work than you’d expect. The white tip, orange belly, and yellow base read instantly as candy corn even when the material has nothing to do with Halloween, which is why fabric scraps in those three shades still scan as festive without any printed pattern. I saw this with a simple fabric candy corn craft: the subtle differences between similarly-colored scraps gave it more texture than paper or tissue paper versions usually manage, and the same approach works for any Halloween image built from layered color blocks.
Actual candy corn brings its own limits. The pieces are small, the dye transfers to fingers, and the wax coating resists glue more than you’d think. For younger kids, mimicking the geometry in paper or paint skips the mess entirely. A toilet paper roll shaped and painted in the three-band sequence becomes a treat box that holds up to handling, and the recycled material costs nothing. The scent of candy corn soap is almost good enough to eat, as one project put it, though that "almost" matters when you’re deciding whether to use real candy or just borrow its look.
The color sequence matters more than the material. Get the three bands in the right order, and kids recognize candy corn in construction paper, felt, or paint before they can name why.
15. Spider Web Art

String spider webs work best when the pattern stays simple enough that a child can finish it in one sitting. A basic wheel with four crossing lines and one spiral thread pulled around them gives the recognizable shape without the frustration of a true orb web. Glue-drawn webs on black paper run into the same problem: too many concentric rings and the radial lines collapse into a gray smudge before the glue dries. Four radials and one slow spiral is the ceiling for most kids under ten.
The web becomes the main event when it carries the light instead of sitting flat on a surface. Thread stretched across the open center of a cardboard ring, or woven through holes punched in a cardstock shape, catches side light and casts a faint shadow. Embroidery floss in pale gray or silver does this better than white crayon on black paper, which reads as decoration only. The dimensional version also solves the storage problem: a flat glued web creases if it survives October at all, while thread on a ring can hang in a window year to year.
Tape the thread ends on the back, not the front. Knots look neater but take small fingers twice as long and often pull through light cardstock. A small piece of clear tape pressed flat holds well enough for display and peels off clean if you need to restring it next fall.
16. Glow-in-the-Dark Ghosts

Clear plastic cups let the most light through, but the frosted ones from the dollar store actually work better for ghost faces because the haze softens the glow into something that looks like a body rather than a bare bulb. Snap a glow stick and drop it in, then draw eyes with a sharpie on the outside. The glow lasts about four to six hours, which sounds like plenty until you realize your kids want to set them out at dusk and still see them at bedtime. Plan this craft for the night of, not the morning before, because a spent glow stick is just a sad tube in a cup and no drawing fixes that.
Materials That Actually Show Up

Most Halloween craft lists assume you keep a stocked studio. I do not. My bin of supplies is a Rubbermaid I shove into the hall closet, and these are the things that actually get used when my kids and I pull it out in October.
- Acrylic paint beats tempera every time. Tempera looks vivid in the bottle and turns to colored dust once dry. Dollar store acrylic is usually fine, but skip the sets with the tiny tubes; they run out mid-project on anything larger than a paper plate. The 59-cent bottles at craft stores go on sale for 3-for-$2 around mid-September, and that is when I buy.
- Construction paper from the dollar store is a trap. It fades to gray in a week and the black sheets are really dark navy. Spend the extra two dollars for the proper sulphite stuff; it holds up to wet glue and still looks black when you hold it to the light.
- White school glue is the only adhesive you need. Glue sticks dry too fast for kids who are still deciding where the googly eye goes. Hot glue is your fingers’ enemy and it is not their project if you are doing the attaching. I keep one bottle of glue per kid so no one is waiting.
- Tissue paper and coffee filters both work for ghost bodies and lantern windows, but coffee filters are already round and they do not shed dye on the table. Tissue paper from the dollar store bleeds. Ask me how I know.
- Save your toilet paper rolls and egg cartons now. By October 15 every parent in America is trying to find them, and the recycling bin is suddenly empty. Flatten the cartons so they store in that same Rubbermaid without eating the whole space.
What Age Handles What

Not every project in the list belongs in every hand. Preschoolers manage the straw-blown ghost and the handprint bat because the motion is whole-arm and nothing goes in the mouth, but the yarn-wrapped mummy and anything needing scissors for detailed cuts wait until early elementary. The difference shows up fast once glue and small parts hit the table.
| Craft | Fine motor demand | Material to watch | Youngest workable age |
|---|---|---|---|
| Straw-blown ghosts | Low; straw grip only | None | Late toddler |
| Handprint bat | Low; paint and press | Paint supervision | Preschool |
| Paper plate mummy | Moderate; tape wrapping | None | Preschool |
| Yarn-wrapped mummy | Moderate-high; winding tension | None | Early elementary |
| Toilet paper roll bat | Moderate; cutting, gluing | Googly eyes under 1" are a choke hazard | Preschool with adult for eyes |
| Popsicle stick crafts | Moderate; aligning small sticks | None | Early elementary |
The glow-in-the-dark craft is the one I would pull from the younger group entirely. Glow stick chemicals are non-toxic in the small amounts used, but a cracked tube plus a three-year-old’s curiosity about liquid means the project sits better with kids old enough to read a do not bend warning and mean it.
When a Craft Fails

Paint peeling off a plastic bottle three hours before the class party is not the moment to discover acrylics need tooth-brushed sanding first. That was my first attempt at the monster lanterns, and the second try worked because I borrowed sandpaper from the garage and gave every surface a quick scuff till it held a fingerprint, not a shine. Plastic wants texture, not better paint.
Glue failures taught the same lesson. Regular school glue turned the paper bag houses into sagging ruins overnight; the fix was scoring the seams with a butter knife so the adhesive bit into the fiber instead of sitting on top. No specialty tacky glue required, just thirty extra seconds of prep.
The skeletons collapsed because I built them lying flat and expected them to stand. The second batch got ankles: a bent paperclip loop taped inside each foot, hidden by the straw wrapper, lowered the center of gravity enough that second graders could pose them without toppling. Structure problems usually mean the support was an afterthought, not that you need heavier wire.
Frequently Asked Questions
What are some easy Halloween crafts for kids?
Noodle pumpkins, leaf ghosts, bat handprints, and glow-in-the-dark ghosts are all straightforward projects that use basic supplies. Most of these need only paint, paper, and glue, and several can be finished in a single afternoon. The article includes sixteen crafts total, with options ranging from salt-painted spiderwebs to toilet paper roll monsters.
What materials do I need for Halloween crafts?
White school glue, acrylic paint, construction paper, and scissors cover most projects. Recyclables like toilet paper rolls, paper bags, and cardboard tubes form the bases of several crafts. For specific effects, keep yarn, plastic straws, coffee filters, and glow sticks on hand; the article also recommends saving egg cartons and balloons before mid-October.
Are these crafts suitable for preschoolers?
Many are, though not all. Handprint bats, leaf ghosts, and paper plate witches work for preschoolers with adult help, while yarn-wrapped mummies and detailed scissor work suit early elementary ages better. The article includes a table matching each craft to its youngest workable age and any material to watch, such as googly eyes under one inch being a choke hazard.






