
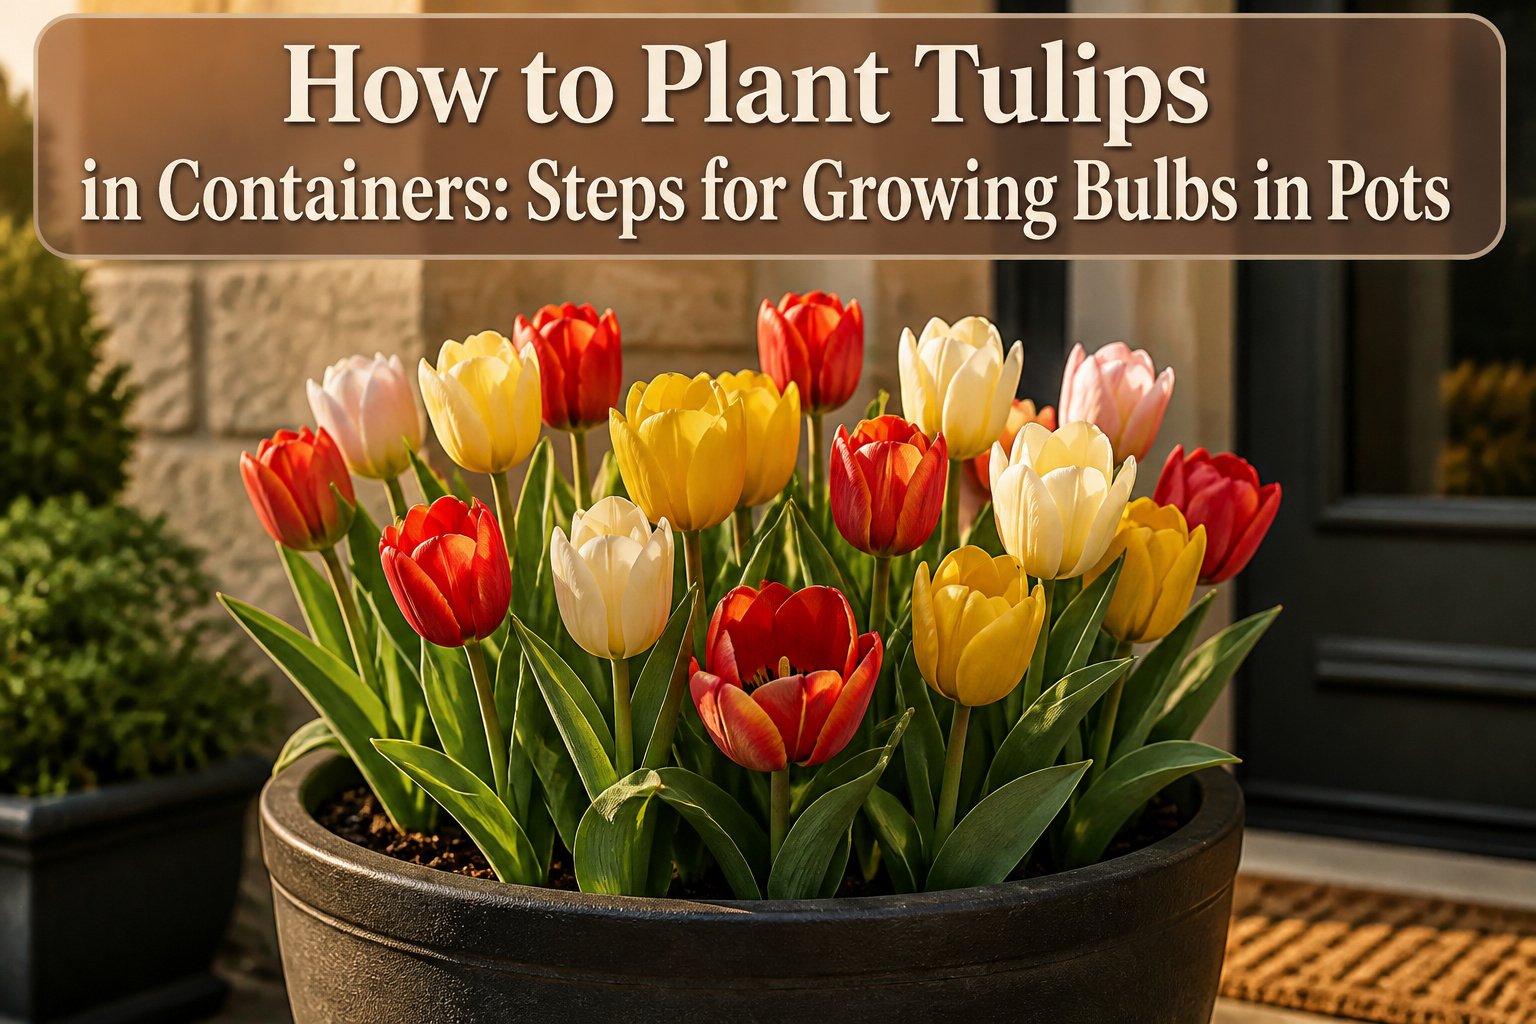
A full pot of tulips on a doorstep takes one season, a bag of bulbs, and a container you probably already own. The part most people misjudge is depth: six to eight inches of soil above each bulb, not the shallow tuck you might use in garden beds. Get that wrong and the stems come up weak or not at all.
1. Select the Right Container

A pot that is too small starves the bulbs before they even start. Most guides land on 18 inches in diameter and 15 inches tall as the workable minimum, though I have seen 12 inches passed off as enough if you plant sparingly. The catch is what happens after planting: roots need room to spread sideways and down to anchor the bulb and pull nutrients, and a cramped container either stunts the bloom or tips over once the stems get top-heavy. If the pot stays outside through winter, 24 inches is the safer bet. Soil volume that large insulates bulbs against freezing better than a thin ring of dirt pressed against a small wall.
Drainage holes matter as much as size, maybe more. Terracotta breathes and drains fastest, which is why it keeps coming up as the default for bulbs. Plastic and ceramic work fine if you watch your watering, but they hold moisture longer and give rot more of a foothold. I would not bother with a cachepot or anything decorative that blocks the holes; water has to leave the soil, not collect underneath it.
2. Use a High-Quality Potting Mix

Garden soil from the yard seems like the obvious choice for filling a pot, but it is the fastest way to kill tulip bulbs in a container. It compacts under its own weight, squeezes out the air pockets roots need, and turns into mud that refuses to drain. Well-draining potting mix means water runs through in seconds, not minutes, and the material stays light enough to dig your fingers into even after a full season of watering.
At the garden center, skip anything labeled "moisture control" or with fertilizer already mixed in. Those formulas hold water too long and can burn fresh roots. Look for a raised-bed potting mix instead; one reliable option is E.B. Stone Organics Raised Bed Potting Soil, which gives the loose structure bulbs need without the additives that cause trouble.
As for feeding, the bulbs themselves are the storage unit. Tulips ship with every nutrient required for that first spring bloom already packed inside. A quality mix provides enough for the container season, so the money is better spent on larger, premium-grade bulbs than on extra fertilizer you will not need.
3. Plant the Bulbs
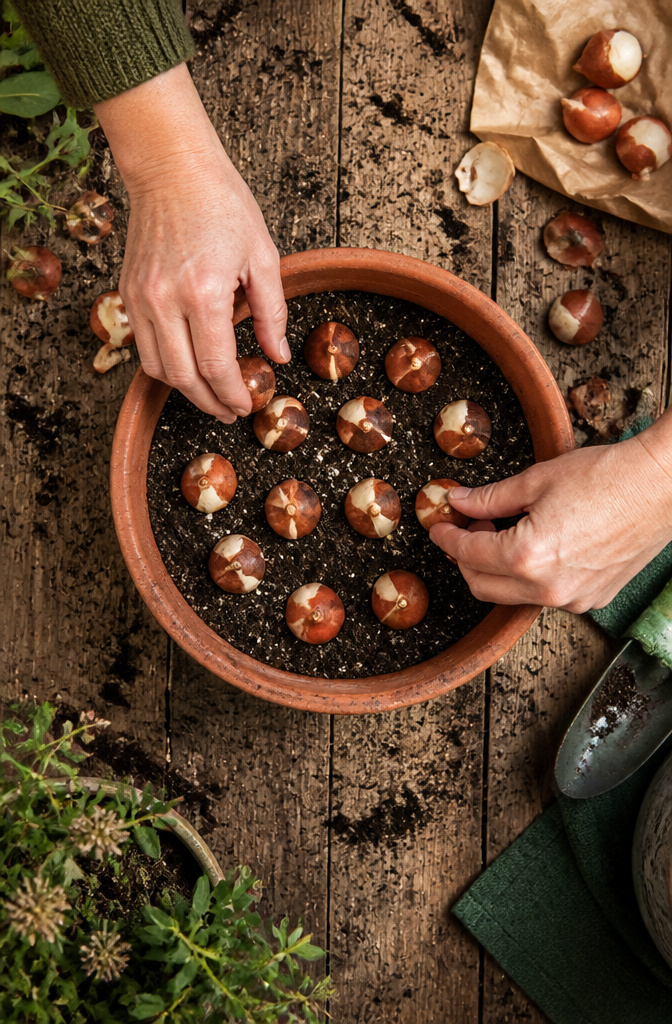
Bulbs in containers go deeper than most people expect. Plant them 6 to 8 inches down, measured from the soil surface to the base of the bulb, and set each one with the pointed end facing up. The orientation matters more than it seems; a sideways bulb will still find its way, but one planted upside-down wastes stored energy on a U-turn that weakens the bloom.
Spacing is where containers diverge from garden beds. In the ground, tulips sit 4 to 6 inches apart so they can multiply and return for years. In a pot, that logic does not apply. Pack them 1 to 2 inches apart, close enough that they almost touch, arranged in a tight circle rather than rows. The container itself limits how many years they will persist, so the goal is a single dense display, not a long-term colony. I have seen the difference between a polite scattering and a packed cluster, and the packed cluster wins every time for sheer color mass on a balcony or doorstep.
4. Water Thoroughly

A single deep soak right after planting settles the soil around each bulb and wakes up the roots. After that, the pot stays almost dry until spring. This dry stretch is what keeps the bulbs from rotting through winter. Out in nature, tulips sleep through cold months in ground that drains away snowmelt. A container has nowhere for water to go once the drainage hole freezes solid, so extra moisture pools against the papery skin of the bulb and breeds mold.
I water once at planting, set the pot where rain will not keep hitting it, and do not lift the can again until green tips push through in March or April. Some growers in wetter climates cover their pots with a sheet of plywood or wire mesh against squirrels; that same cover blocks some rain, which helps. The soil should feel barely damp, not wet, through the chilling weeks. Come spring, water only when dry spells arrive, and always at soil level so the leaves stay dry and fungal problems stay away.
5. Store the Pots for Chilling

The bulbs need a solid 10 to 16 weeks at 35–45°F to form proper flowers inside those papery skins. An unheated garage works if you live in USDA Zones 4 through 7, and that is where I settled mine last fall after reading that freeze-thaw cycles turn potted bulbs to mush. Water once after you move them in; the soil stays moist enough through winter without another visit until March.
No garage? A refrigerator set near 40 degrees will do the job. Cover the pots with a perforated plastic bag if you are storing them near apples or onions, since ethylene gas off produce can distort the blooms. Basements and attics are riskier. The temperature there wanders, and a swing of 5 degrees either way is tolerable but a hard freeze is not. Tulips tolerate less abuse than daffodils in that regard. Cluster outdoor pots together, mulch around them, or tuck them behind a windbreak if you are leaving them out in the open. The goal is always the same: cold, steady, and just above freezing.
6. Move Outdoors in Spring

Yellow shoots poking through the soil are your signal to act. Once those sprouts appear and the weather outside settles around 60 degrees, the bulbs have finished their dormant period and are ready for light. Move the pots to a sunny spot and start watering regularly; blooms typically follow in one to three weeks, though the exact timing depends on variety and whether spring cooperates. If a cold snap threatens, shift the containers back to a protected area or bring them indoors until freezing risk passes. Pots that spent winter in a very sheltered garage or basement need gradual hardening off, a week of low to medium light and 50–60 degree temperatures before full sun, so the green shoots do not scorch. Rotate the containers every few days once they are in full sun. Tulips bend toward the light, and uneven exposure leaves you with a lopsided display.
7. Post-Bloom Care

The petals drop and the show ends, but the leaves stay on the clock for another six weeks. Let them yellow completely before you cut anything; the bulb is banking next spring’s energy through every fading blade, and shearing too early weakens the whole account.
Container-grown tulips face a harder second act than their garden cousins. The forcing cycle stresses the bulb, and rebloom in the same pot is unlikely. Two paths split from here. One is to treat them as annuals, composting once the foliage collapses, which is what most renters I know end up doing. The other is to lift the bulbs after the leaves brown, dry them for about a week, and store cool and dry until fall replanting in open ground. Ground planting gives the best odds, though even then they may skip a year before flowering again. Species tulips are the exception; left to seed, they naturalize and return slighter but still present, with shorter stems and smaller blooms than the first season’s display.
Best Tulip Varieties for Containers
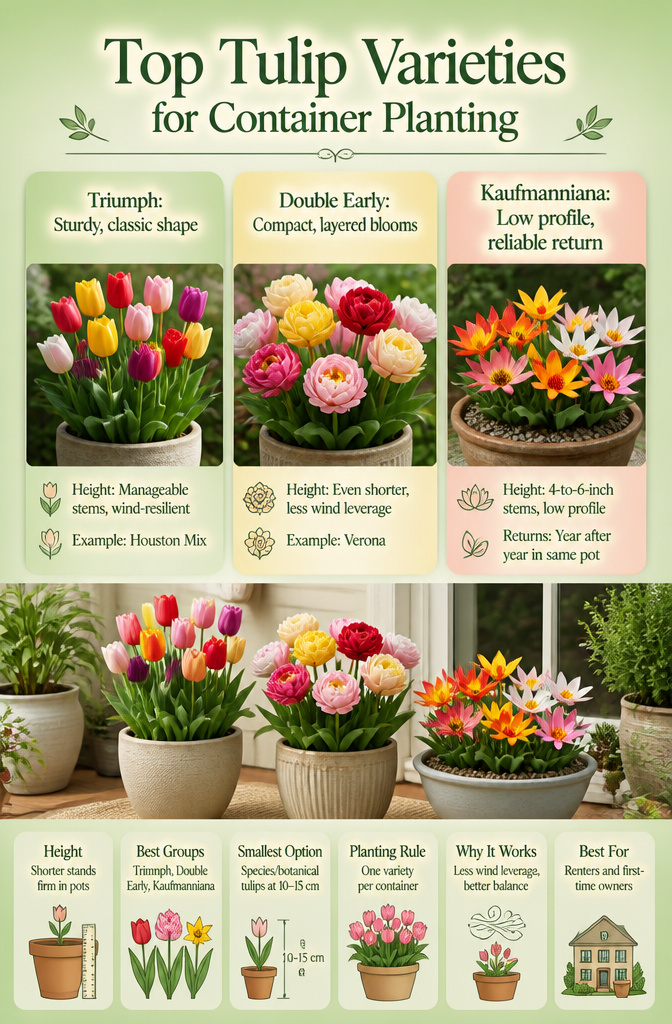
Tall tulips in pots look wrong the moment a breeze hits. The stems catch wind like sails, and a container that already weighs less than garden soil gives way. Shorter varieties solve both problems at once: they keep the proportions of a pot in balance and stand firm without staking.
The three groups worth buying for this are Triumph, Double Early, and Kaufmanniana. Triumph tulips such as Houston Mix hold stems to a manageable height and still carry the classic cup shape most people picture. Double Early types like Verona run even shorter, with layered blooms that read as peonies from a few steps back; the compact frame means less leverage for wind to work against. Kaufmanniana hybrids add a lower profile still, often with water-lily-shaped flowers that open wide on 4-to-6-inch stems and return reliably year to year in the same pot.
Species or botanical tulips stay smallest of all at 10–15 cm, but for most renters and first-time owners the three named groups give enough choice without hunting specialty catalogs. One rule from the growers holds: whatever you pick, plant one variety per container so every pot blooms together rather than in scattered shifts.
Container Size Compared

A 12-inch pot holds roughly a dozen tulip bulbs, enough for a modest cluster on a balcony railing but not the kind of display that stops someone on the sidewalk. Step up to 18 inches and the bulb count jumps to about 20–25 while the visual weight changes completely; the stems have room to spread without leaning on each other, and the pot itself looks planted rather than crowded. The 24-inch diameter is the one to choose if the container sits outside all winter, since the extra soil volume insulates bulbs against hard freezes in a way a smaller mass simply cannot.
| Pot diameter | Typical bulb count | Best use |
|---|---|---|
| 12 in | ~12 | Small-space accent, sheltered spot |
| 18 in | 20–25 | Standard front-door or patio display |
| 24 in | n/a | Winter-hardy outdoor placement, maximum insulation |
Drainage matters more than diameter. A 24-inch pot with plugged holes rots bulbs faster than a 12-inch pot that sheds water. Terracotta breathes and helps dense plantings avoid the soggy conditions that trigger basal rot, though any material works if the holes are open and the mix is right. My own leaning, after reading enough rotted-bulb stories, is to size up and then check the drainage before adding a single handful of soil.
Squirrel and Pest Protection

Hardware cloth with half-inch squares laid flat over the bulbs, then buried under the compost, stops squirrels from digging out tulip bulbs in containers. Chicken wire works the same way if that is what you have on hand. I like to set the mesh so it sits an inch or two below the soil surface; that leaves room for the shoots to push through without getting snagged, but puts enough dirt over the wire that a squirrel gives up before it hits the barrier.
For pots already planted, holly sprigs or a dusting of chilli flakes across the top of the compost can buy you time. Rats and mice notice those too, so the protection is broader than just squirrels. Monitor the first several nights after you set any barrier. A determined squirrel will test your work immediately, and one hole in the mesh is all it takes to lose a bulb. If the wire holds for two or three nights, the bulbs are usually safe for the season.
Placement matters almost as much as the barrier itself. A pot sitting on a low wall or railing is easier for a squirrel to work from than one on the ground surrounded by open space. I keep my tulip pots on a second-floor fire escape where nothing can dig from below, and that alone has cut my losses more than any wire did downstairs.
Reusing Bulbs From Last Season

Most guides treat container tulips as annuals for a reason. The bulbs exhaust themselves in that cramped, artificial cycle, and the odds of a strong second-year bloom in the same pot are genuinely low. The stress of forcing, the limited nutrients, the temperature swings, all of it leaves them spent.
Replanting in the ground changes the math. Sources note that bulbs moved to garden soil after one container season often skip a year, then flower again the following spring. The ground offers what a pot cannot: steady moisture, root room, and the slow feed of decomposing matter.
If you want to try keeping them anyway, let the foliage yellow completely before you cut it back. Dry the bulbs for about a week, then store them cool and dark until fall. Daffodils handle this routine far better than tulips do, so plan your color scheme knowing you may be buying fresh tulip bulbs each autumn. That annual replacement is not failure, it is just the honest cost of growing them in pots.
What to Do After Leaves Die Back
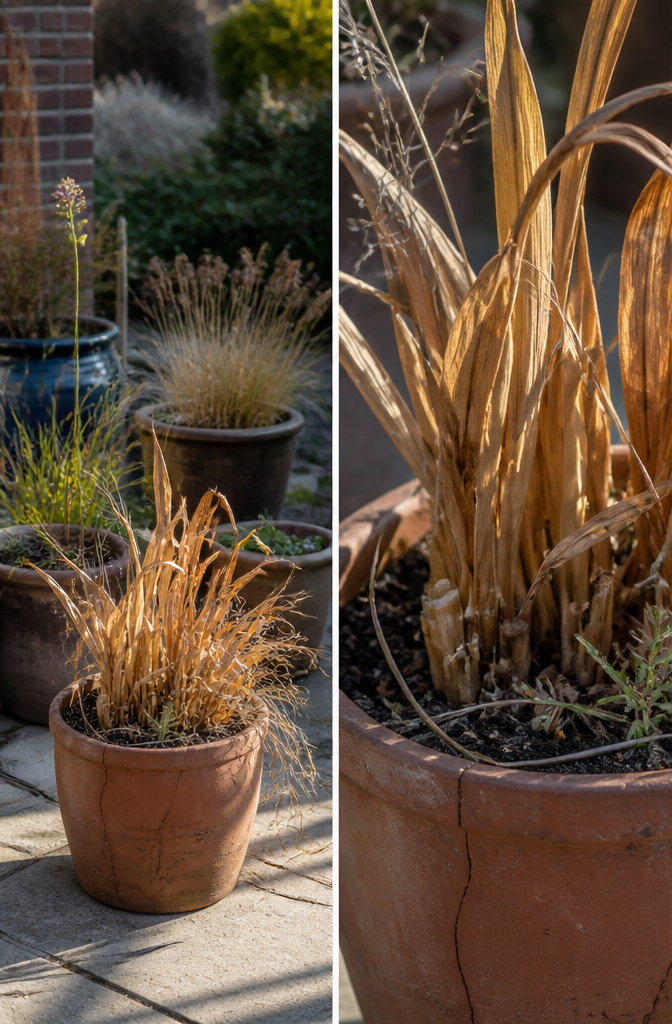
Container-grown tulips dry down faster than garden-planted ones, and that changes the whole timeline. The potting mix warms quicker in late spring, so the foliage yellows and dies back a few weeks ahead of in-ground bulbs. Wait until every leaf has turned straw-brown before you cut anything, even if the stems look ready sooner. The bulb is still banking energy through those last dull leaves.
Once the foliage is fully dead, you have two paths. You can lift the bulbs with a hand fork, cut off the stem, peel away the flaky outer coating, and let them dry before storing in a paper bag somewhere cool, dry, and airy. Or you can leave them right in the pot, move it under cover, and stop watering entirely through summer. The pot method only works if the container stays genuinely dry; a rain-soaked pot rots bulbs fast.
Lift them with a hand fork once the foliage has turned yellow, a month or so after flowering… Leave the bulbs to dry and then store them in a paper bag in a cool, dry and well-ventilated environment.
That month-or-so window is your signal, not the calendar date. Forcing bulbs in pots usually exhausts them more than garden planting, so even with perfect aftercare, many will skip a bloom year or flower smaller. I treat lifted offsets separately; they need planting about 25 cm deep in autumn and usually wait a year before performing.
Frequently Asked Questions
How deep should I plant tulip bulbs in pots?
Plant them 6 to 8 inches deep, measuring from the soil surface to the base of the bulb, with the pointed end facing up. A bulb planted upside-down wastes stored energy on a U-turn that weakens the bloom. Spacing can be tight in containers; set bulbs 1 to 2 inches apart for a dense display rather than the wider spacing used in garden beds.
What type of soil is best for tulips in containers?
Use a well-draining potting mix, not garden soil, which compacts and suffocates roots. Skip anything labeled moisture control or with premixed fertilizer; those hold water too long and can burn fresh roots. A raised-bed potting mix gives bulbs the loose structure they need without problematic additives.
Can I leave my tulips in pots after flowering?
Yes, but let the leaves yellow completely before you cut anything, then stop watering and move the pot under cover for summer. The bulb banks next spring’s energy through every fading leaf, so shearing too early weakens the whole plant. Even with perfect aftercare, container-grown tulips rarely bloom well a second year in the same pot; lifting and replanting in open ground gives better odds, though they may skip a year before flowering again.






