
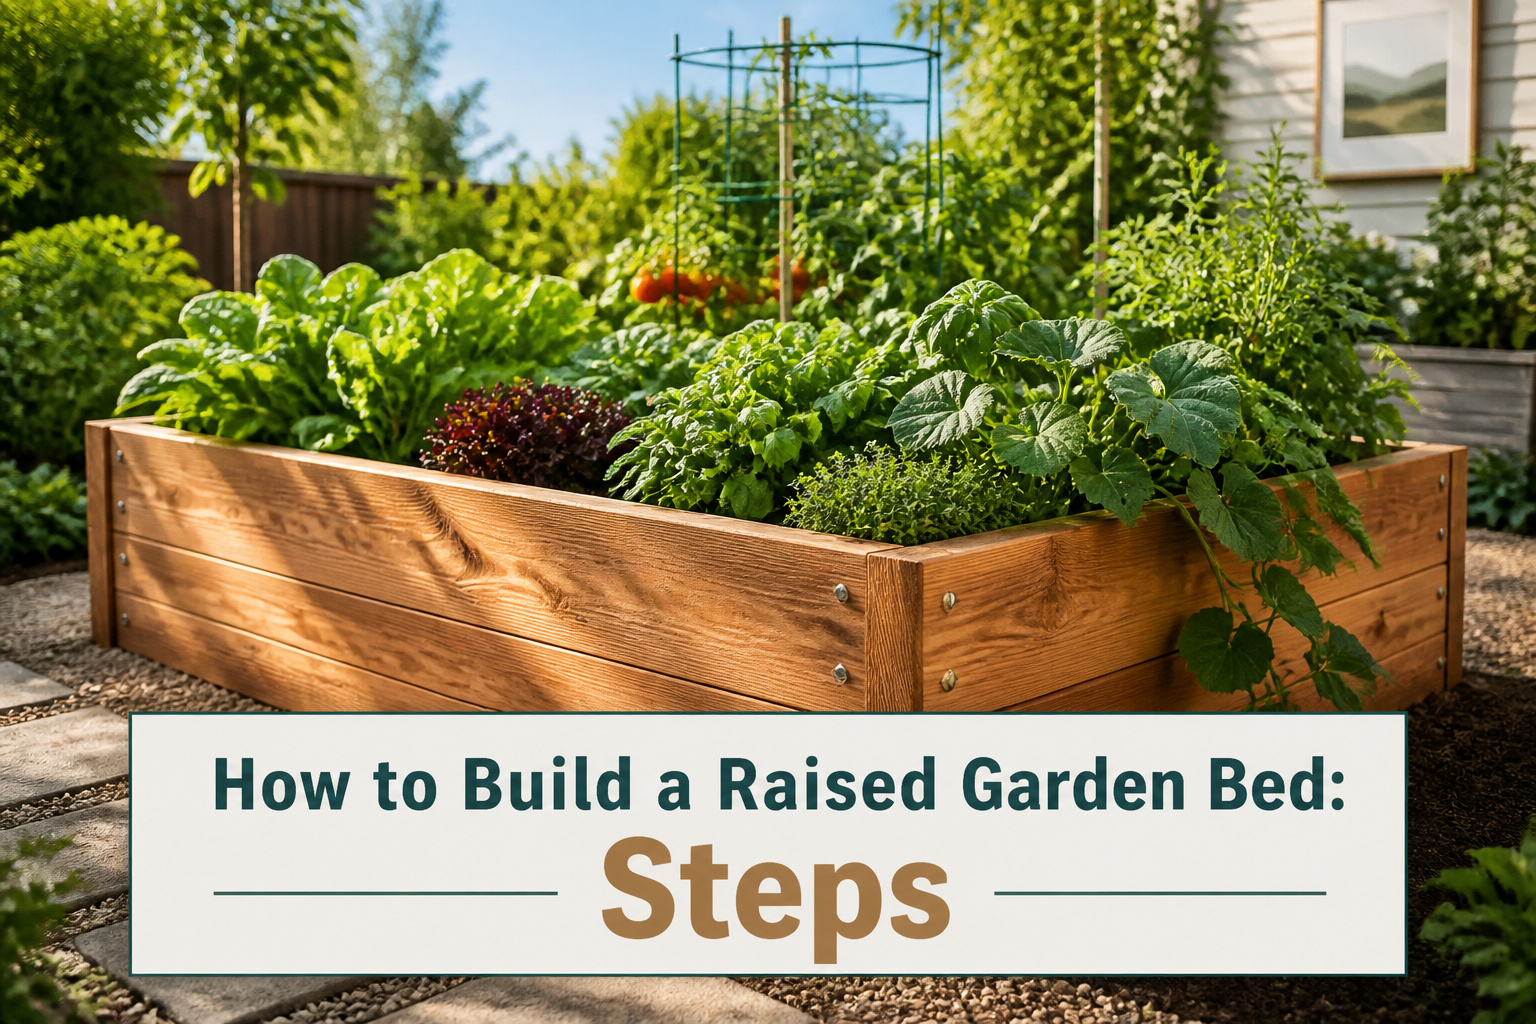
You can frame out a raised bed in a weekend with ordinary lumber and about $100 to $300 per bed, depending on whether you spring for cedar or stick with pine. The width is where first-timers slip up: 4 feet lets you reach the center from either side without stepping in and compacting the soil you just paid to fill, but the bed I sized by eye at 5 feet left a center strip I could not comfortably touch all season.
How to Build a Raised Garden Bed

Clay that bakes into brick and soil that grows nothing worth eating share the same fix. A raised bed lifts your roots above the problem and heats them faster in spring, and the whole thing frames out in a weekend with ordinary lumber from any big-box store.
The standard footprint is 4 feet by 6 or 8 feet, a width you can reach across from either side without stepping in and compacting the soil you just paid to fill. Depth is where builders disagree. Some say 12 inches gets the job done; others insist on 18 or even 24 for root vegetables and long-term drainage. I land in the middle for most beds and go deeper only where carrots or parsnips are planned.
What you actually spend lands between $100 and $300 per bed for the frame itself, lumber and screws included. That range wobbles with your local cedar or fir prices and whether you spring for hardware cloth to stop burrowing pests. Filling it is a separate ticket, and bulk delivery beats bagged soil by a lot if you are building more than one.
1. Select the Site
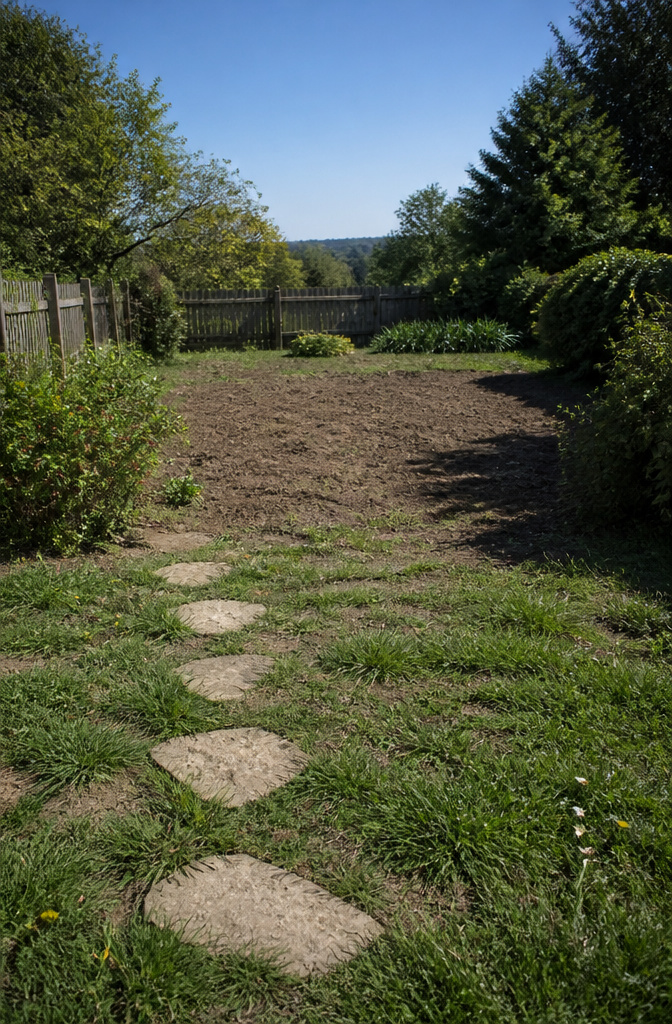
Most vegetables need 6 to 8 hours of direct sunlight, and the difference between six and eight matters more than I expected. Greens and root crops manage on the lower end, but tomatoes and peppers sulk through anything less than a full day.
Level ground keeps the frame from twisting as soil settles. I skip the level tool and use a shovel to check by eye, then walk the spot after rain to see where water pools.
Distance from trees and shrubs is where I learned the hard way. A bed I placed four feet from an old maple looked bright in April, but by July the canopy filled in and morning shade stretched past ten. Roots found the rich soil within two seasons. Now I stay at least ten feet from anything with a trunk wider than my wrist, and I watch the sun path across a full year before I commit to a permanent bed. South-facing fences are the exception; they bounce light instead of blocking it.
Water access and daily foot traffic matter too. A bed you walk past twice a day gets weeded. One tucked behind the garage turns into a tomato graveyard by August.
2. Choose the Size

A 4-by-8-foot box is the workable standard most plans start from, though 4 by 6 feet handles smaller yards without much waste since 8-foot boards cut clean in half. Depth runs from 10 inches on the shallow end to 24 inches for tomatoes and other crops that want room to root down deep. One real approach I keep coming back to is stacking three 2-by-6 boards, which gives you 16.5 inches of soil height since a 2-by-6 actually measures 5.5 inches face to face. That height hits the range where most vegetables get happy without turning into a soil bill that breaks the weekend budget.
The width matters more than I expected at first. Four feet across is what lets you reach the middle from either side without stepping into the bed and packing down the soil you just loosened. I figured this out the hard way with a first bed I sized by eye, a generous 5 feet across, and spent the season leaning and stretching to weed the center strip I could not comfortably touch. If you are setting a bed against a fence or wall where only three sides are open, 3 feet is the better limit.
3. Gather Materials

Untreated cedar, redwood, or pine will all work for the frame, but the price gap at the register is real enough to stop you mid-reach. Cedar and redwood last a decade or two without any stain or sealer, while pine gives you roughly 3 to 7 years depending on how wet your climate runs. Pine cost me about two-thirds what cedar did for the same eight-foot 2x10s, and that difference covered the soil I filled it with.
Thickness matters more than species for bowing. A 2×10 or 2×12 stands stiff across an eight-foot span without center bracing; 1x boards sag and 2x4s twist. I buy 2x10s for anything over six feet long and reserve 2x6s for short beds or second tiers. For hardware, deck screws and a drill handle assembly, and a circular saw rips the boards to length. Skip treated lumber entirely; the chemicals are not something I want leaching where I grow tomatoes.
4. Cut the Wood

The cedar 2-by-10s came in 8-foot lengths, so the first cuts were straightforward: two boards at a full 72 inches for the long sides, then two more at 45 inches for the ends. That 45-inch figure is the one that matters. The shorter boards sit sandwiched inside the longer sides, which adds an inch and a half on each end. Skip the adjustment and your finished bed measures 48 inches wide instead of 45.
I learned this the hard way on my second bed. I had cut one end board to 46 inches, not 45, somehow adding instead of subtracting. The board came out an inch short once the sides went on, leaving a gap at the corner that a clamp couldn’t close. I used it anyway, screwed it tight, and that corner has leaked soil ever since. The third bed I built got the 45-inch cut right, and the joints sat flush without fighting me.
5. Assemble the Frame
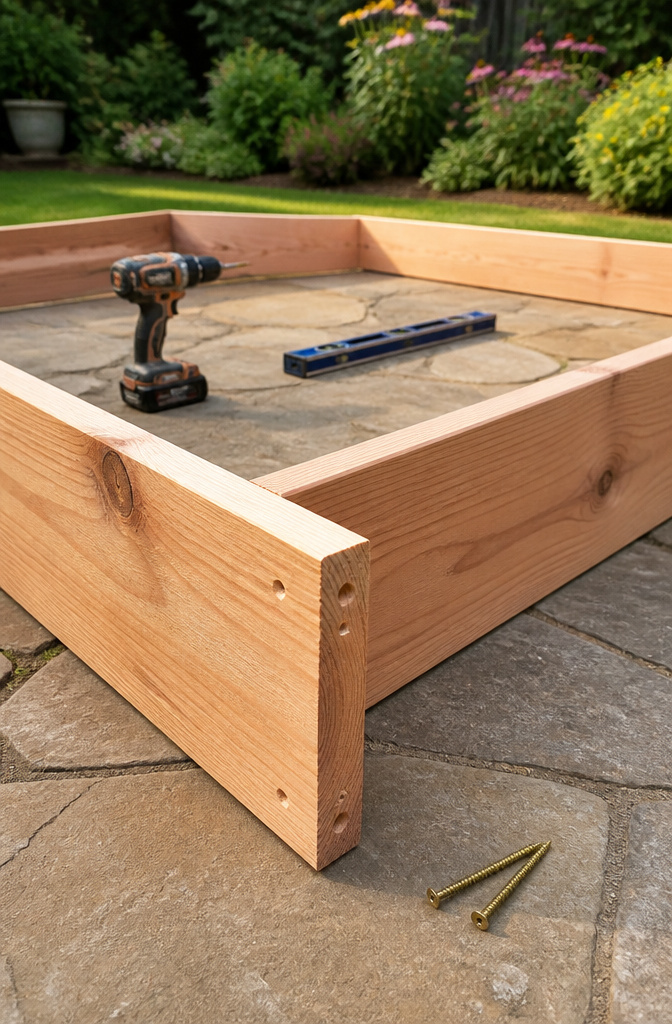
The 4-foot boards sit inside the 6-foot boards, which is the detail that keeps the frame from looking lopsided once it is filled. I line them up on edge and drive 3-inch exterior screws through pilot holes into the ends of the shorter boards. Two per corner is enough if the holes are pre-drilled; skip the pilot holes and the wood splits, especially near the ends of cedar or pine.
Squaring the corners is where I have lost time more than once. The first bed I built measured 49 inches on one diagonal and 47 on the other, and I only caught it after four screws were already in. Now I measure corner to corner in both directions before I tighten anything. When the two diagonal measurements match, the rectangle is square. If they do not, I push the longer diagonal corners toward each other until the numbers even out, then add the last screws.
The long boards go on last, fastened into the center of the corner posts rather than the short-side boards. This means the screws sit a little further in from the edge, which took me a minute to adjust to on the first corner. Driving downward while the frame stands on edge keeps the boards from skating around the way they do when everything is flat on the ground.
6. Add Support

A 4-by-8 foot bed looks modest until you fill it. Six feet of wet soil against a single span of cedar or pine will bow the wall outward by midspring, and once the boards curve they never pull straight again. I learned that the hard way on a bed I built three seasons back; by June the center had bulged three inches, the soil cracked along the edge, and the whole frame was wobbling whenever I leaned in to weed.
For beds longer than 6 feet, add a middle support. A 12-inch galvanized steel mending brace will span all three side boards on a bed 16.5 inches tall and hold the wall in a tight straight line as the soil settles and swells. Some builders screw in an extra 2-by-4 or 2-by-2 instead, which works but adds bulk inside the planting space and will eventually rot where it meets the dirt. The metal brace stays slim, weighs almost nothing, and outlasts the wood around it. Fit it when you assemble the frame, not after the bed is full and the bow is already set.
7. Line the Bottom

Voles tunneled through my in-ground plot two summers ago and took out every carrot before I knew what happened. That is why I now staple ½-inch hardware cloth across the bottom of every frame I build. The mesh keeps burrowing pests from below while still letting roots push through and water drain out.
Landscape fabric is the cheaper, lighter option, and it does stop weeds from creeping up into fresh soil. What it does not do is stop a determined rodent. Hardware cloth handles voles, gophers, and moles but will not block every weed seed that drifts in from the sides or blows in on top. Most weekends, I end up choosing one or the other based on what problem hit the yard last. Cloth if the tunnels are back, fabric if the dandelions won. Either way, the bed needs filling within a day or two so the material does not sag and tear under its own weight.
8. Fill with Soil
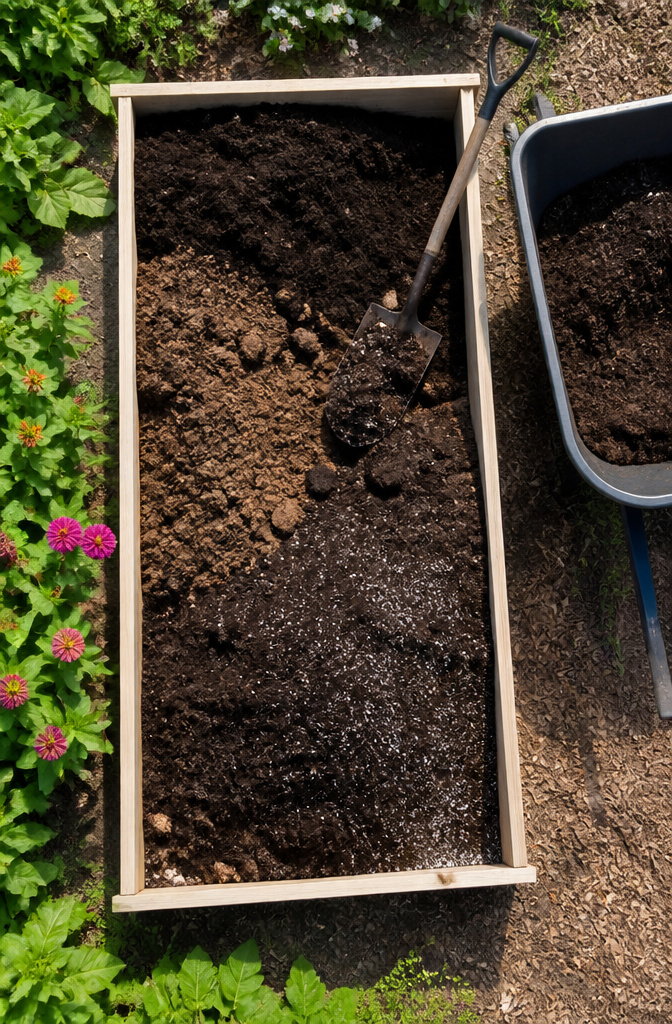
Soil settles more than you expect, so the mix matters from the start. The ratio that keeps coming up is 60% topsoil, 30% compost, 10% potting soil. That last bit loosens the structure so roots can move without turning the bed into an expensive container garden.
Depth depends on what you are actually planting. Twelve inches handles most greens and herbs. Root vegetables or deep tomatoes want the full two feet if your frame can hold it.
Bagged soil versus bulk delivery is where the budget breaks. Bagged is easier to move alone, but for anything over a single 4-by-4 bed, bulk starts winning fast. The math is straightforward: length times width times depth gives cubic feet. A 4-by-6 bed filled nine inches deep takes about 18 cubic feet, or six wheelbarrow loads. Scale up or down from there, and buy a little extra. The surface always looks lower after the first two waterings.
9. Plant

The first spring, I treated the bed like a blank slate and planted what looked good on the seed rack. Tomatoes went in the sunniest corner, lettuce filled the middle squares, and I tucked carrots along the edge because the packet art was convincing. None of those carrots survived. The soil was too loose and too fresh; they forked, stalled, or rotted before August. The tomatoes, meanwhile, grew into a jungle that shaded the lettuce into bolting early. I had read "thin to 3 inches" for the carrots and planted 16 per square, but I never thinned them. Crowding plus unstable soil equaled a waste of seed and a summer of false starts.
Year two, I matched the plant to the spot instead of forcing the spot to fit the plant. Greens and root crops went where the light dropped to about six hours; the full-sun blocks got tomatoes and bush beans thinned to proper spacing, nine per square. I kept seed beds moist with shallow watering and laid a light mulch on top instead of letting the surface crust. The yield was higher with less effort, mostly because I stopped pretending the bed was a showroom and started treating it like a working space that needed attention every few days. The carrots still were not perfect, but enough came up whole to make seeding worth it.
Raised Bed Types Compared

Cedar and redwood hold up longest among the common wood choices, though the price gap over pine can sting if you are filling more than one bed. Pine runs cheapest and still gives a solid 5–7 years in most climates, longer where humidity stays low. Pressure-treated lumber lasts but carries the chemical question for anything you will eat.
Metal, cinder block, fabric grow bags, and elevated kits each solve a different problem. Metal heats soil in summer and can dent. Cinder block is permanent, which landlords rarely love. Fabric bags cost least and fold flat, yet they sag and dry out fast. Elevated beds spare your back but need refilling often and cap out at shallow-root crops.
| Material | Cost | Lifespan | Best for |
|---|---|---|---|
| Cedar/Redwood | High | 10–15+ years | Permanent beds, willing to spend upfront |
| Pine (untreated) | Low | 5–7 years | Budget builds, replacing as needed |
| Metal | Mid–High | 10–20 years | Clean look, no rot worries |
| Cinder block | Low–Mid | Decades | Owned ground, heavy-duty paths |
| Fabric/Grow bags | Lowest | 1–3 seasons | Renters, trial beds, tight spaces |
| Elevated | High | 5–10 years | Mobility limits, patios, no bending |
My own leaning: start with pine if you are new to building raised garden beds and not sure the spot will stay a garden. Upgrade to cedar once you know the layout works.
Wood That Lasts

Cedar and redwood last the longest because their natural oils fight rot and insects without any chemical help. I used untreated cedar for my last bed, partly for that resistance and partly because untreated wood keeps whatever you grow free of anything that might leach from stains, sealers, or pressure-treated lumber. Pine costs less up front, but plan on 3 to 7 years before it starts giving way, maybe 5 to 7 in a drier climate. Thicker boards buy time no matter the species. A 2-inch board outlasts a 1-inch fence picket by a wide margin, and 2×6 or 2×8 stock holds up better than 2×4 framing. For corners, 4×4 posts keep the box square through years of wet soil pushing outward. If the budget stretches, heart redwood is denser than common construction redwood and shrugs off termites too, though it has gotten pricey. FSC-certified lumber is worth hunting for when you can find it, and skipping any bowed or cracked boards at the yard saves regret later.
What Raised Beds Fix
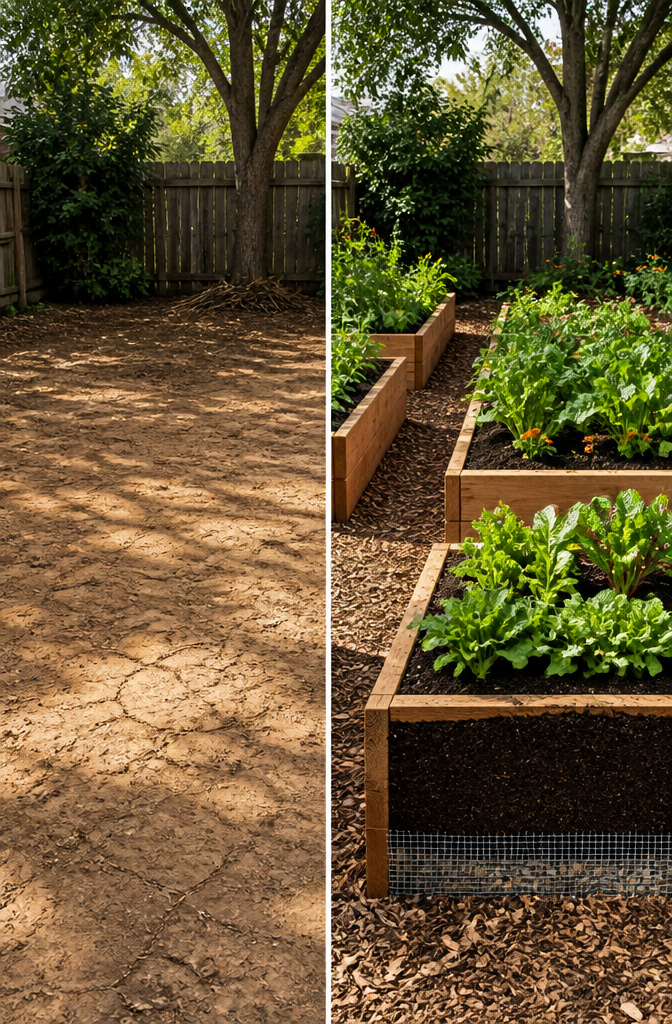
My backyard in 2019 was half clay and half where the previous owner had parked a truck for two years. Tomatoes planted straight in the ground rotted at the stem, weeds came back weekly, and bending to weed the rows left my lower back tight for days. Raised beds changed all five problems at once.
The 11-1/4 inch walls lifted the root zone above the compacted layer, so water drained instead of pooling. I lined the bottom with hardware cloth to block gophers and landscape fabric against the bindweed that had choked the old plot. The soil inside was compost, topsoil, and chicken manure I mixed myself; after one season it was black and crumbly, nothing like the gray clay beside it. My back stayed straighter working at that height, and the dog ran the perimeter without trampling the loose soil the roots needed.
The unplanned benefit was the soil itself staying fluffy. Nobody walked in the beds, so the tilth I built that first spring lasted until fall. Plants I had nursed along in the ground grew faster with less water, and I watered each bed independently through a hose bib instead of flooding the whole yard.
Frequently Asked Questions
What is the best wood for raised garden beds?
Untreated cedar or redwood lasts longest, often a decade or more, because natural oils fight rot and insects without chemicals. Pine costs about two-thirds the price but lasts 3 to 7 years depending on humidity. Skip pressure-treated lumber entirely to keep anything from leaching into soil where you grow food.
How deep should a raised garden bed be?
Twelve inches handles most greens and herbs, while root vegetables and tomatoes want 18 to 24 inches of soil. Stacking three 2-by-6 boards gives 16.5 inches, a middle-ground height that satisfies most crops without breaking the soil budget. Go deeper only where carrots or parsnips are planned.
How much does it cost to build a raised garden bed?
The frame itself runs $100 to $300 per bed for lumber and screws, with actual cost swinging on local cedar or fir prices and whether you add hardware cloth for pests. Filling the bed is separate, and bulk soil delivery beats bagged by a wide margin if you are building more than one.
What should I fill my raised garden bed with?
A mix of 60% topsoil, 30% compost, and 10% potting soil gives roots room to move without turning the bed into an expensive container garden. Soil settles more than expected, so buy a little extra; the surface always looks lower after the first two waterings.
How do I prevent pests in my raised garden bed?
Staple half-inch hardware cloth across the bottom to stop voles, gophers, and moles from tunneling up into fresh soil. Landscape fabric is cheaper and blocks weeds creeping up from below, but it will not stop a determined rodent. Either way, fill the bed within a day or two so the material does not sag and tear.






