When it comes to home improvement, few things can be as frustrating as dealing with water stains on your ceiling tiles. They can make your space feel drab and uninviting. You might be looking for a quick fix to cover these unsightly marks while also adding a personal touch to your gardening space. That’s why I created this post – to share creative and eco-friendly ceiling tile makeover ideas that will help you transform your ceiling in no time.
If you’re someone who loves sustainable gardening or simply enjoys sprucing up your home, you’re in the right place. This guide is perfect for DIY enthusiasts, hobby gardeners, or anyone wanting to brighten their living area with affordable solutions. You’ll discover various ways to enhance your ceiling tiles while staying true to eco-friendly practices.
In this post, I’ve pulled together 15 affordable ceiling tile makeover ideas that not only cover water stains quickly but also add character to your home. From botanical prints to upcycled tiles, each suggestion is designed to inspire creativity and make your space more inviting. Get ready to dive into these quick and easy DIY ceiling upgrades!
Key Takeaways
– Discover 15 creative ideas to transform your ceiling tiles while effectively covering water stains.
– Learn about eco-friendly options like reclaimed wood panels and fabric-covered tiles for sustainable gardening spaces.
– Explore decorative methods such as stenciled murals and hanging planters that add a personal touch.
– Find budget-friendly solutions that allow for easy DIY ceiling upgrades without breaking the bank.
– Get tips on how to maintain your ceiling’s aesthetics, ensuring an inviting atmosphere for your gardening haven.
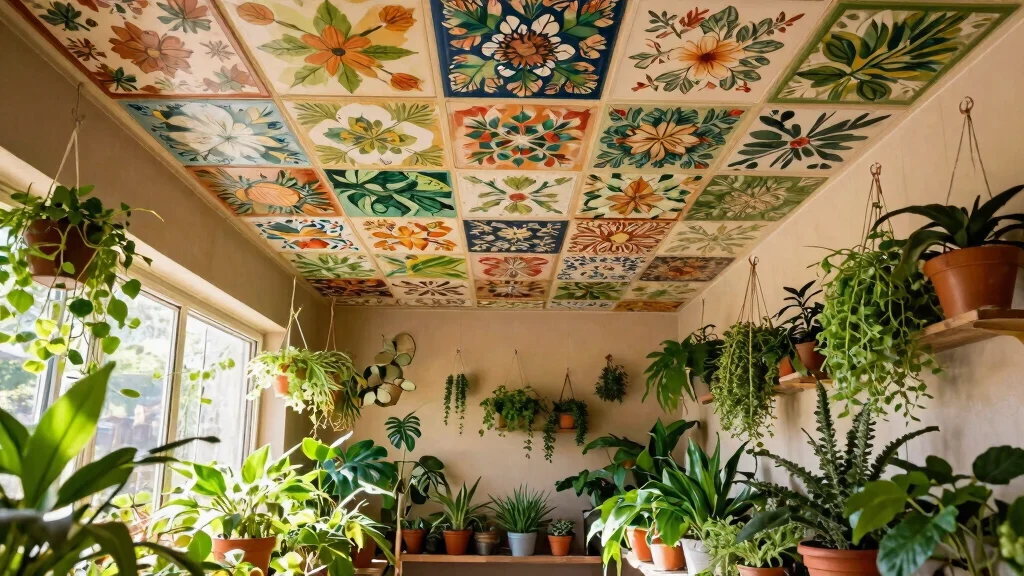
1. Botanical Prints for a Lush Look
Infuse your ceiling with botanical prints that celebrate the beauty of nature. This design elevates your space, creating a serene oasis that resonates with your gardening passion. Imagine leafy greens or delicate florals adorning your ceiling, harmonizing beautifully with your indoor plants and decor colors.
To bring this idea to life, opt for eco-friendly paints and consider creating stencils inspired by your favorite foliage. A soft monochromatic palette with various greens enhances relaxation, while a matte finish keeps the focus on the artwork without any distracting shine.
Consider these suggestions to maximize your botanical ceiling:
– Pair botanical stencils with soft green colors.
– Use eco-friendly paint to maintain indoor air quality.
– Install ceiling tiles for easy application and design flexibility.
This design not only conceals water stains but also creates a lush backdrop that enhances the overall ambiance of your gardening space.
Key Trade-offs & Our Top Pick
Option 1: Botanical Prints for a Lush Look
– Pros:
– Adds a vibrant touch to any space.
– Can distract from water stains effectively.
– Easy to apply and remove.
– Cons:
– May not suit all decor styles.
– Prints can fade over time.
– Requires careful placement for maximum impact.
– Best for: Spaces that need a fresh and lively atmosphere, particularly in a gardening area.
Option 2: Reclaimed Wood Panels
– Pros:
– Eco-friendly choice that adds charm.
– Durable and long-lasting material.
– Provides excellent insulation.
– Cons:
– Installation can be time-consuming.
– May require regular maintenance.
– Price can vary based on availability.
– Best for: Homeowners seeking a rustic look while promoting sustainability in their gardening space.
Option 3: Chalkboard Paint for Creativity
– Pros:
– Allows for personal expression and creativity.
– Easy to modify with new designs.
– Can be used for notes and reminders.
– Cons:
– Requires special chalkboard paint for best results.
– Can wear out if not maintained properly.
– Might not cover all water stains effectively.
– Best for: Families or individuals looking for a unique way to customize their ceilings.
Option 4: Fabric-Covered Tiles
– Pros:
– Softens the look and feel of any room.
– Variety of patterns and textures available.
– Can help reduce sound in a space.
– Cons:
– Fabric can attract dust and allergens.
– May be challenging to clean.
– Can be less durable compared to other options.
– Best for: Those wanting to create a cozy, inviting atmosphere in areas like home offices or reading nooks.
Expert Recommendation:
Best Overall: Reclaimed Wood Panels
Reclaimed wood panels stand out as the best overall option for ceiling tile makeovers. They offer excellent value for money due to their durability and timeless appeal. Their eco-friendly aspect aligns perfectly with eco-conscious gardening spaces. Plus, these panels blend versatility with a rustic charm that can elevate any room.
Why We Picked This:
While reclaimed wood panels are our top pick, those who prefer a more creative or playful approach might enjoy chalkboard paint or botanical prints. If you’re focused on a warm, soft atmosphere, fabric-covered tiles could be your best bet. Each option has its own benefits, so consider your specific needs and style preferences when making your choice.
2. Reclaimed Wood Panels
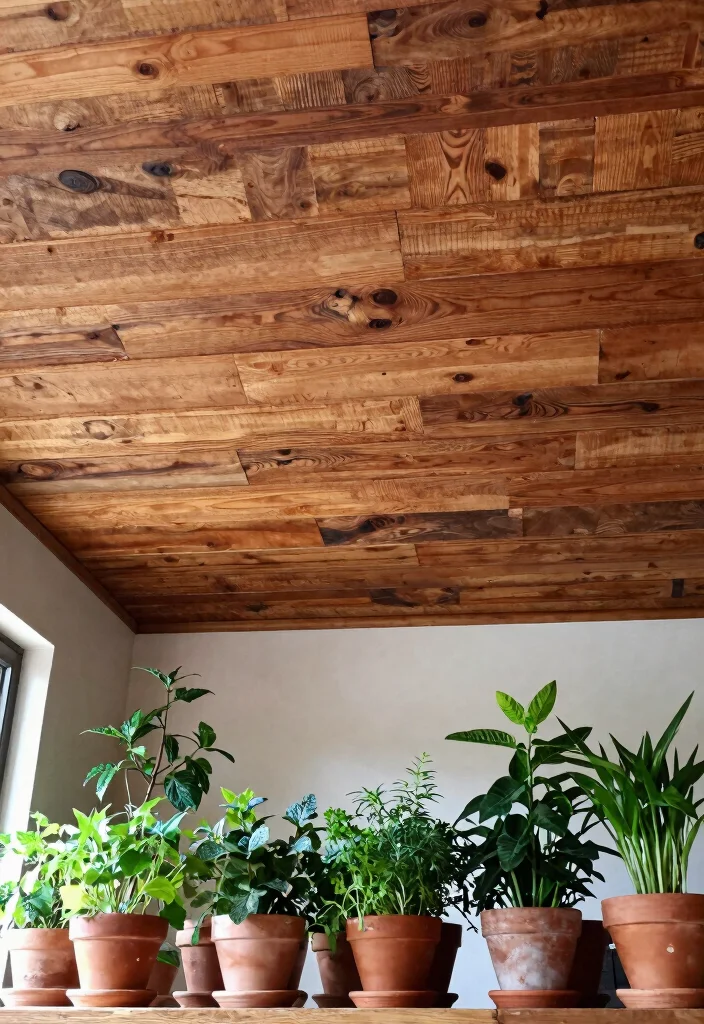
Add rustic charm to your ceiling with reclaimed wood panels. This sustainable choice not only covers imperfections but also infuses your space with warmth and character. Imagine the inviting look of natural wood complementing your plants, making your room feel cozy and grounded.
To implement this idea, look for reclaimed wood at local suppliers or renovation sites. Cut the panels to fit over existing tiles, securing them with adhesive or nails based on their weight. This simple project brings a touch of nature indoors while enhancing your gardening theme.
Follow these steps to achieve a rustic ceiling:
– Source reclaimed wood from local salvage yards.
– Cut panels to fit snugly over old tiles.
– Secure them with glue or nails for a sturdy finish.
This approach not only hides stains but also creates a warm, inviting atmosphere that nurtures your plants and your soul.
3. Fabric-Covered Tiles
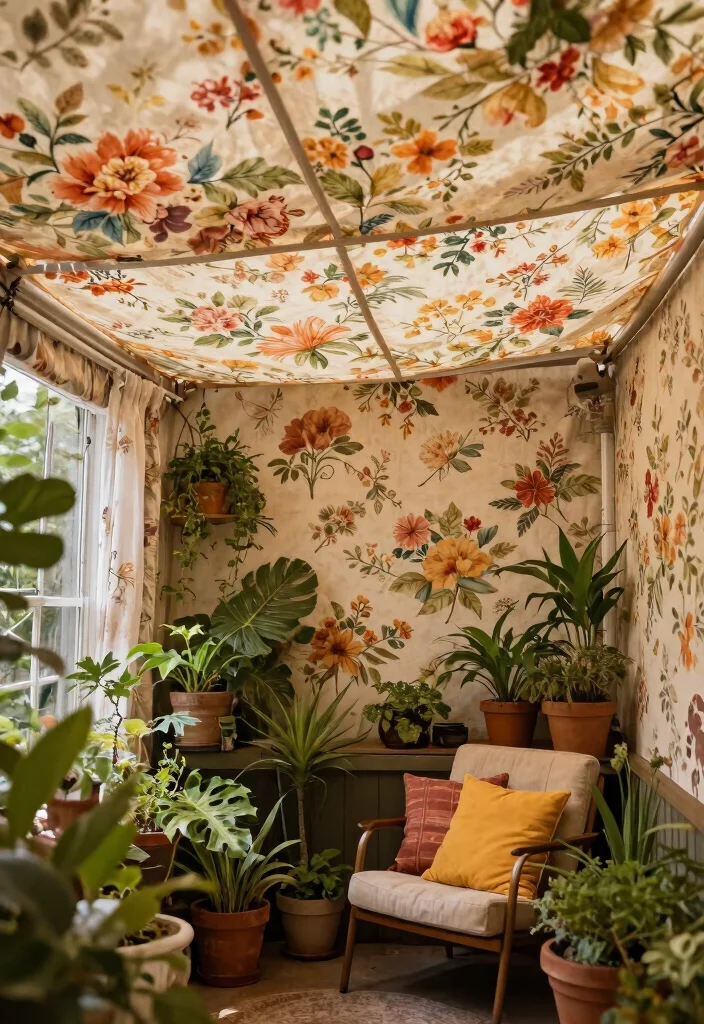
Transform your ceiling with fabric-covered tiles that add texture and color. This fun DIY project allows you to choose fabrics that reflect your gardening theme—think soft florals or earthy tones. It’s a stylish way to conceal unsightly stains while enhancing the cozy feel of your space.
When starting this project, select lightweight fabric that won’t weigh down the tiles. Use a spray adhesive for easy application, and consider adding batting for extra cushioning. This method is perfect for creating a relaxing retreat where you can unwind among your plants.
Here’s how to create fabric-covered tiles:
– Select lightweight fabrics that resonate with nature.
– Use spray adhesive for a smooth application.
– Add batting for extra texture and comfort.
This design choice not only hides imperfections but also invites warmth and softness into your gardening sanctuary.
4. Chalkboard Paint for Creativity

Unleash your creativity with chalkboard paint on your ceiling! This versatile option effectively hides stains while providing a canvas for your imagination. You can draw plant illustrations, jot down care reminders, or share motivational quotes that inspire your gardening journey.
Chalkboard paint is easy to apply and can be refreshed whenever you desire a change. This engaging feature encourages family interaction and creativity, making your space feel alive. It’s a playful way to document your plants’ growth and care schedules.
Consider these ideas for using chalkboard paint:
– Paint sections of the ceiling for easy updates.
– Encourage family members to add their own designs.
– Use chalk to document plant care schedules.
This idea not only conceals water stains but also cultivates a lively atmosphere, perfect for nurturing your gardening passion.
Chalkboard paint is a game-changer for a ceiling tile makeover—draw plant doodles, write care reminders, and spark family creativity. It’s easy to apply, refreshable, and keeps your sustainable gardening space feeling alive and practical.
5. Hanging Planters for Vertical Greenery

Elevate your ceiling makeover by incorporating hanging planters. This functional decor not only covers stains but also brings your gardening passion into the vertical space. Picture macramé hangers or modern plant holders showcasing vibrant greenery, creating a stunning visual impact.
Vertical gardening maximizes space while enhancing air quality, making your environment feel fresher. By adding movement and life to your ceiling, hanging planters become a focal point that draws the eye upward.
Here’s how to create a vertical garden:
– Hang planters with macramé or stylish holders.
– Use a variety of plants for visual interest.
– Ensure proper lighting for plant health.
This approach not only distracts from ceiling imperfections but also enriches your space with nature’s beauty.
6. Stenciled Murals

Transform your ceiling into an artistic display with stenciled murals that celebrate your love for gardening. Choose designs featuring flowers, vegetables, or garden scenes, turning your ceiling into a vibrant canvas that cleverly conceals stains.
To create stunning murals, select designs that resonate with your gardening aesthetics. Use eco-friendly paints to ensure a safe environment, and layer your stencils for added depth and intrigue. This bold design choice not only covers imperfections but also sparks conversation and reflects your gardening passion.
Follow these steps for stenciled murals:
– Choose your favorite garden-themed designs.
– Use eco-friendly paints for a healthy space.
– Layer stencils for a rich, textured look.
This captivating style elevates your ceiling while showcasing your unique artistic flair.
7. Metallic Accents for Glamour

Introduce a touch of elegance to your ceiling with metallic accents. Gold, silver, or copper details can create a striking contrast against your green decor, enhancing the overall aesthetic of your gardening space.
To incorporate metallics, use paint or leafing to create geometric patterns or subtle accents. Pair these elements with soft lighting to reflect and amplify the shine. A balanced approach ensures that the metallics enhance the beauty without overwhelming the space.
Here’s how to add metallic accents:
– Use metallic paint for geometric designs.
– Pair with ambient lighting to enhance shine.
– Keep metallic areas minimal for balance.
This chic upgrade not only covers stains but also lends a sophisticated touch to your eco-friendly haven.
Metallic accents take your ceiling tile makeover from basic to glam. Use gold, silver, or copper leafing to create subtle geometric patterns, then pair with soft lighting for a reflective glow that brightens your sustainable gardening space.
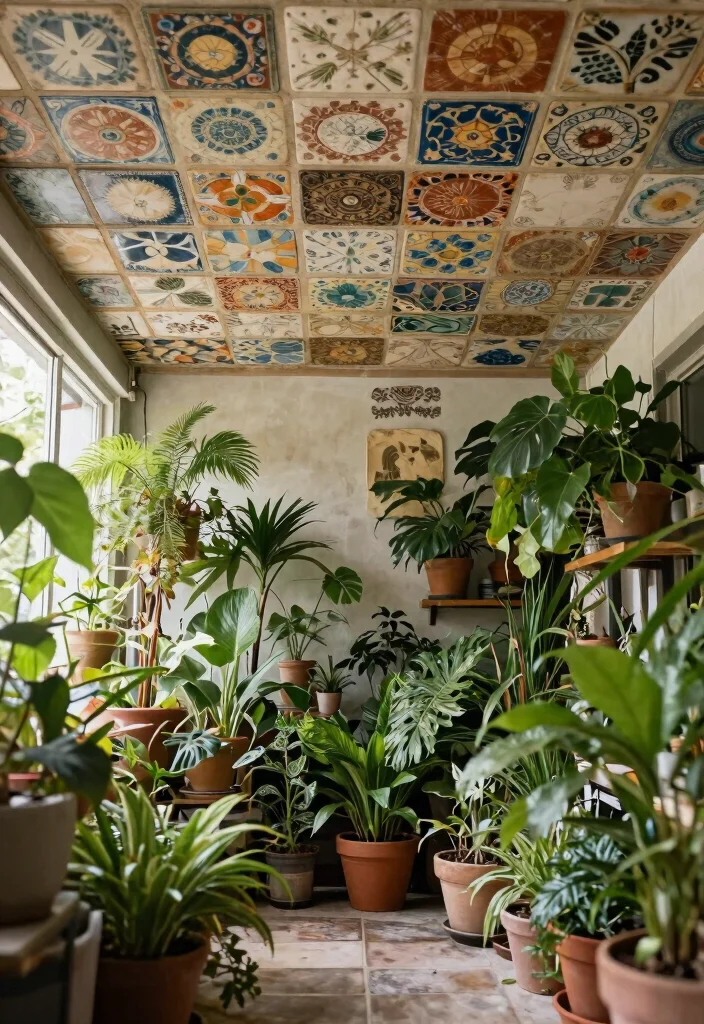
8. Mosaic Tile Design

Transform your ceiling into a colorful mosaic masterpiece using eco-friendly materials. Recycled tiles or glass pieces can create unique designs while effectively covering stains, adding a vibrant and tactile element to your gardening space.
Before starting, plan your design on paper to ensure a cohesive look. Use non-toxic adhesives to secure the tiles, and seal with an eco-friendly topcoat for durability. This creative endeavor encourages personal expression while revitalizing your ceiling.
Consider these tips for a mosaic ceiling:
– Sketch your design before starting.
– Secure tiles with non-toxic adhesives.
– Seal for extra durability and shine.
This approach not only hides imperfections but also transforms your ceiling into a colorful expression of your style.
9. Colorful Paint Splashes
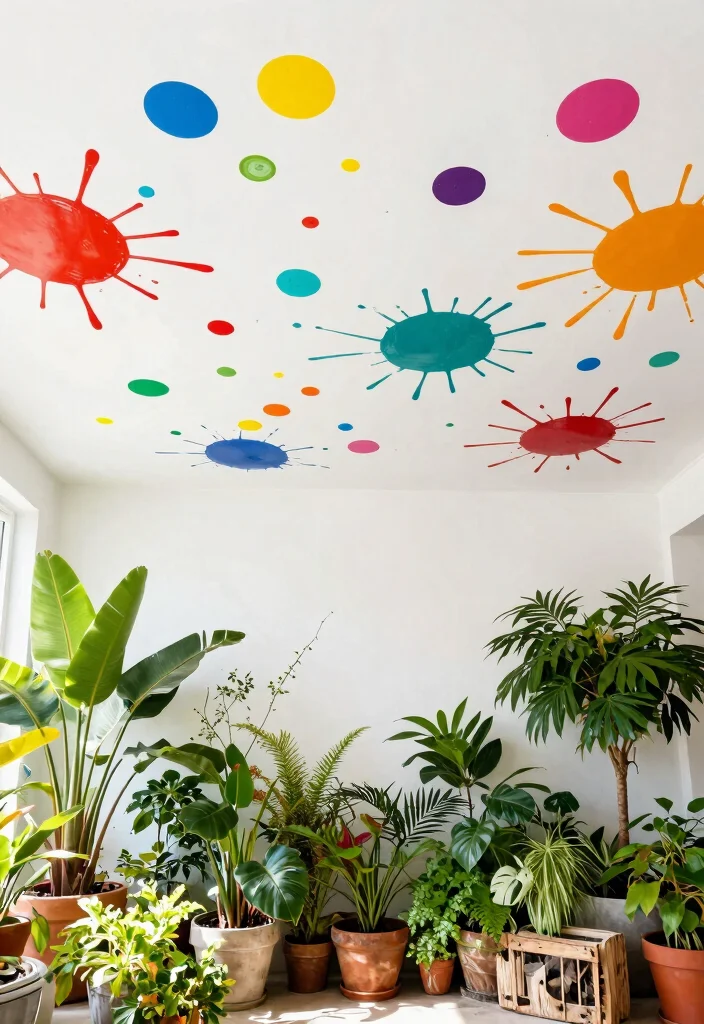
Add an element of fun to your ceiling with colorful paint splashes. This playful design can effectively hide stains while infusing your space with personality. Choose bright colors that complement your gardening decor or create a wild mix for an energetic vibe.
For this project, opt for eco-friendly, washable paint for easy maintenance. Experiment with different techniques like splatter or drip painting to find your perfect style. Incorporate colors that resonate with your favorite plants for a cohesive look.
Try these tips for paint splashes:
– Use washable, eco-friendly paint for easy cleanup.
– Experiment with splatter or drip techniques.
– Choose colors that match your gardening theme.
This lively design cultivates a cheerful atmosphere, making your gardening space feel vibrant and inviting.
10. Eco-Friendly Wall Decals

Wall decals offer a quick and effective solution for ceiling tile makeovers. Opt for eco-friendly options featuring floral designs or garden motifs that can easily conceal water stains. These removable decals make it simple to refresh your decor whenever you desire a new look.
Choosing decals means easy application and removal, allowing you to change your ceiling without damaging the tiles. Available in various designs, they can seamlessly align with your personal style while offering a temporary solution for seasonal changes.
Consider these benefits of wall decals:
– Easy to apply and remove without damage.
– Available in diverse designs for personal expression.
– Perfect for seasonal decor changes.
A ceiling adorned with beautiful decals can instantly uplift your gardening space while promoting a sustainable approach.
11. Vintage Tin Tiles
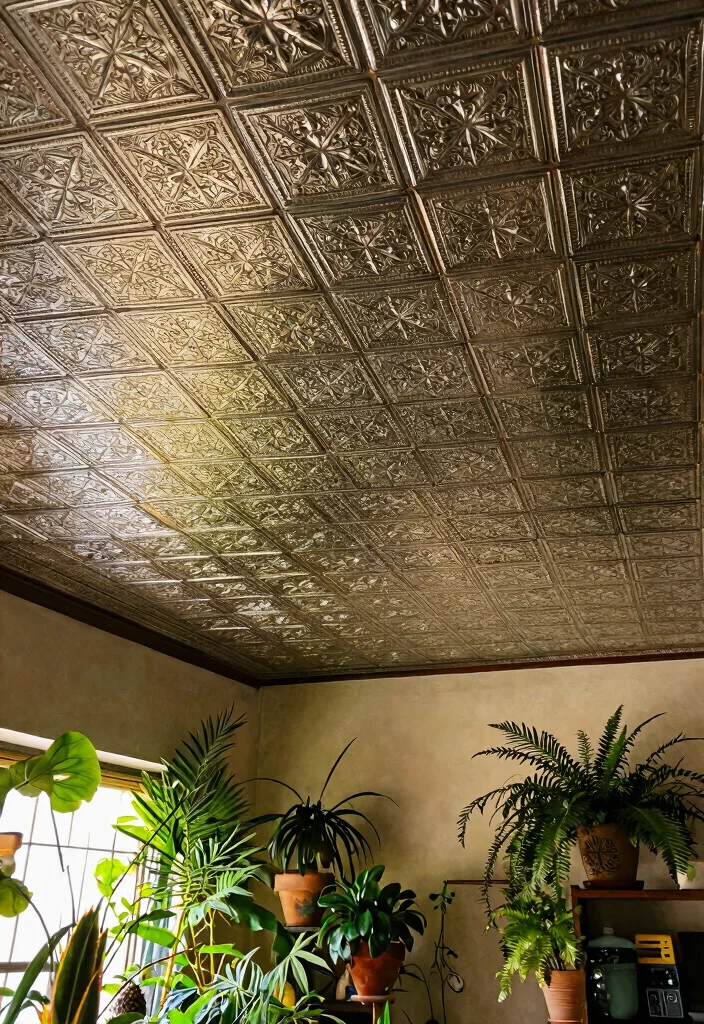
Introduce a nostalgic charm to your ceiling with vintage tin tiles. These tiles not only provide an attractive aesthetic but also effectively cover any imperfections. With various styles available, you can find options that perfectly resonate with your gardening sanctuary.
For installation, secure the tiles using adhesive or nails, ensuring they completely cover any stains. Consider painting them in colors that complement your decor while preserving their vintage appeal. Mixing different styles can create a unique and interesting design.
Here’s how to work with vintage tin tiles:
– Secure tiles with glue or nails for stability.
– Paint them to match your decor for cohesion.
– Mix styles for a creative, eclectic look.
This timeless choice adds character and history to your space while enhancing its overall charm.
Did you know? Vintage tin tiles not only add nostalgic charm, they hide water stains in a snap. Secure them with adhesive or nails, then paint to match your gardening sanctuary—an eco-friendly ceiling tile makeover you can DIY this weekend.
12. DIY Grid System with LED Lights

Create a modern ceiling design with a DIY grid system that incorporates LED lights. This stylish upgrade effectively conceals water stains while adding a functional and aesthetic element to your space. Choose energy-efficient bulbs for an eco-friendly twist on this contemporary project.
Start by planning your grid layout on paper, considering your room’s dimensions. Use lightweight wood or metal strips to form the grid, and install LED lights within the grid for a cozy glow. This method not only covers imperfections but also enhances your gardening area with a fresh, modern flair.
Follow these steps for a DIY grid ceiling:
– Plan the grid layout carefully on paper.
– Use lightweight materials for easy installation.
– Install LED lights for an inviting atmosphere.
This creative approach not only conceals stains but also brings a sleek, contemporary feel to your gardening space.
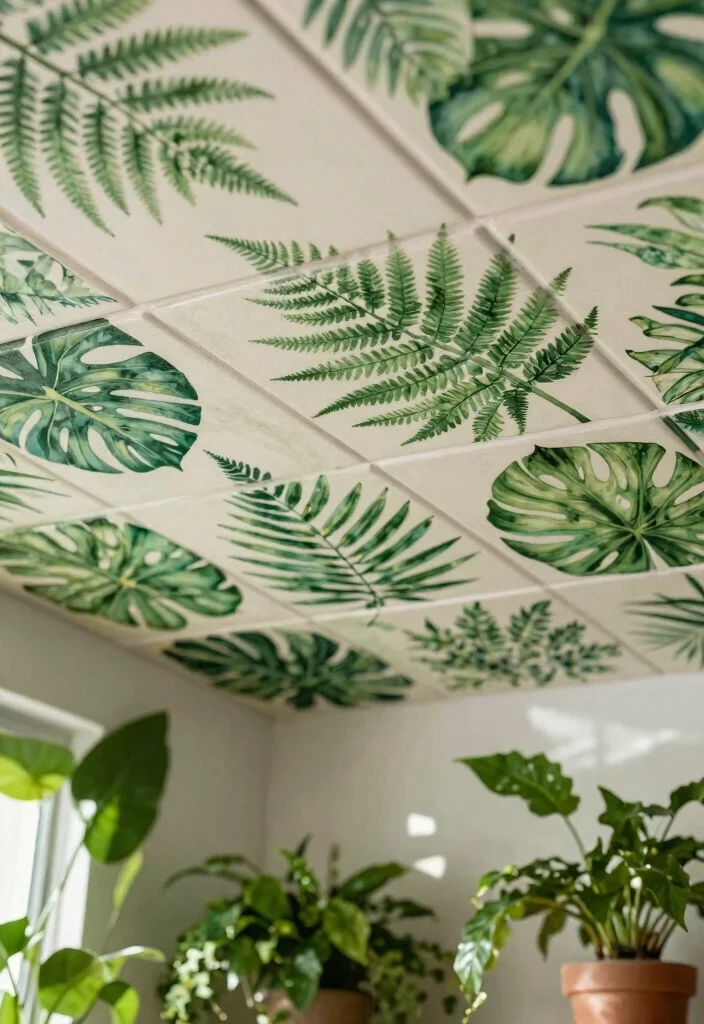
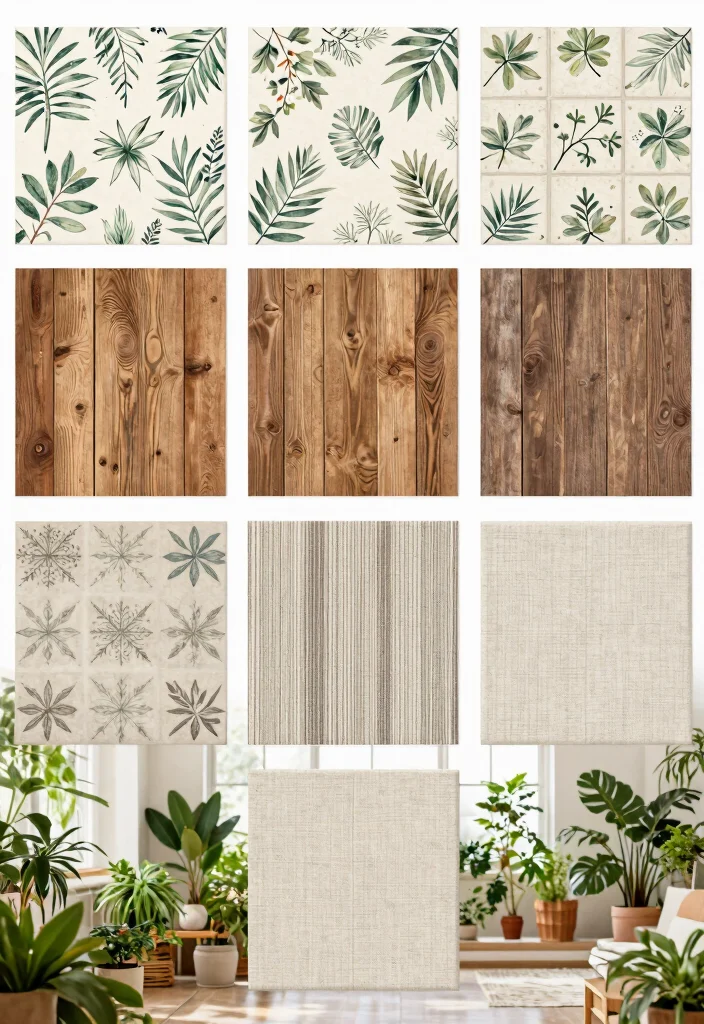
13. Painted Ceiling Tiles with Natural Patterns

Elevate your ceiling with painted tiles that reflect natural patterns like wood grains or leaf motifs. This technique cleverly masks water stains while fostering a sense of tranquility and connection with nature. Imagine your ceiling becoming a soothing focal point that enhances your gardening experience.
To achieve this look, use natural earth tones for a calming palette. Consider patterns mimicking textures found in nature, and mix different designs to create an engaging collage. This thoughtful design invites the essence of the outdoors into your home.
Here’s how to paint natural patterns:
– Use earthy colors for a soothing effect.
– Choose patterns that evoke natural textures.
– Combine various designs for a captivating look.
This design choice brings a touch of nature indoors, creating a serene atmosphere for your gardening activities.
14. Upcycled Ceiling Tiles
Upcycling old ceiling tiles into beautiful new designs is an eco-friendly option that effectively covers stains. You can paint, stencil, or decoupage them with images that resonate with your gardening theme, adding a personal touch to your space.
Start by cleaning and preparing the tiles to ensure a smooth finish. Get creative with colors and designs that align with your decor, and experiment with layering techniques to add depth and interest. This sustainable approach not only hides imperfections but also adds character to your ceiling.
Consider these tips for upcycling tiles:
– Clean and prep tiles for a flawless finish.
– Experiment with colors that reflect your style.
– Layer designs for added depth and texture.
This approach promotes sustainability while cleverly concealing blemishes and enhancing the overall aesthetic of your space.
15. Seasonal Decor Swaps

Inject a dynamic flair into your ceiling with seasonal decor swaps. This creative approach encourages you to refresh your space according to the time of year, effectively covering any stains while keeping the atmosphere lively and engaging.
To implement seasonal swaps, use removable adhesive hooks to easily attach and detach decorations. Create themes for each season—think autumn leaves, winter snowflakes, spring flowers, and summer sunshine. Store decorations neatly for quick and easy changes throughout the year.
Here’s how to organize seasonal decor swaps:
– Use removable hooks for easy attachment.
– Develop themes that resonate with each season.
– Store decorations for quick access and easy changes.
This idea not only provides a unique flair but also keeps your space feeling fresh and inspiring all year long.
Conclusion
Refreshing your ceiling tiles doesn’t have to be a daunting task. With these innovative ideas, you can effectively cover water stains while enhancing your eco-friendly gardening space. From botanical prints to seasonal swaps, each suggestion offers a unique way to express your style while staying sustainable. Which idea are you excited to try? Let’s keep the conversation going—share your own ceiling makeover stories or tips in the comments!
Frequently Asked Questions
What exactly is a ceiling tile makeover and why is it a smart choice for eco-friendly gardening spaces?
A ceiling tile makeover is upgrading your ceiling tiles with affordable, DIY methods to cover water stains and refresh the look. For eco-friendly gardening spaces, choose moisture-friendly tiles (PVC, cork, or recycled mineral fiber) and opt for low-VOC paints or finishes. Practical steps include: 1) assess moisture and tile type, 2) prep the ceiling, 3) install with peel-and-stick tiles or a simple grid, 4) finish with a ceiling tile decor that complements your green space. This approach delivers ceiling tile makeover benefits with affordable ceiling solutions for sustainable gardening areas.
How can I handle water stains on ceiling tiles quickly without harsh chemicals?
First locate and address the moisture source to prevent future stains. Then use gentle, effective options like a hydrogen peroxide solution or a baking soda paste to lift stains without damaging tiles. Blot rather than scrub, let dry, and if needed, apply a light coat of paint or a decorative finish to hide any remaining marks. For garden spaces, consider moisture-resistant tiles and eco-friendly finishes to keep things looking fresh with water stain removal as a priority in your ceiling tile makeover plan.
What are some affordable ceiling solutions and DIY upgrades I can try on a budget?
You can achieve a stylish, budget-friendly look with peel-and-stick ceiling tiles, repainting existing tiles, or using reclaimed tiles for a sustainable vibe. Add simple ceiling tile decor like botanical decals or stencil patterns to personalize your space. If you prefer a quick update, consider lightweight grids or floating panels that you can install with basic tools. All of these are practical examples of DIY ceiling upgrades and affordable ceiling solutions that fit a gardening budget.
Which DIY ceiling upgrades work best in a sustainable gardening space?
Choose moisture-resistant tiles and materials with recycled content to suit humid, plant-filled environments. Enhance light reflection with bright, clean finishes to help your plants thrive, and add plant-themed ceiling tile decor to connect the ceiling with your garden. Easy upgrades include painted patterns, cork or bamboo tiles, and upcycled tile accents that reduce waste while delivering a fresh look—perfect for home improvement ideas in eco-friendly spaces.
What maintenance tips help ceiling tile decor last longer in damp garden spaces?
Regular cleaning with mild, non-abrasive cleaners keeps tiles looking new. Avoid harsh solvents that can damage finishes, and quickly address any signs of mold or moisture around the edges. Inspect grout or seams periodically and reseal if necessary. When tiles show wear or water damage, replace them promptly to maintain the overall look of your ceiling tile makeover and keep your garden space feeling fresh with affordable ceiling solutions.
Related Topics
ceiling tile makeover
water stain removal
DIY ceiling upgrades
sustainable gardening
eco-friendly decor
affordable ceiling solutions
quick fixes
interior design
home improvement
budget friendly
beginner projects
decorative tiles