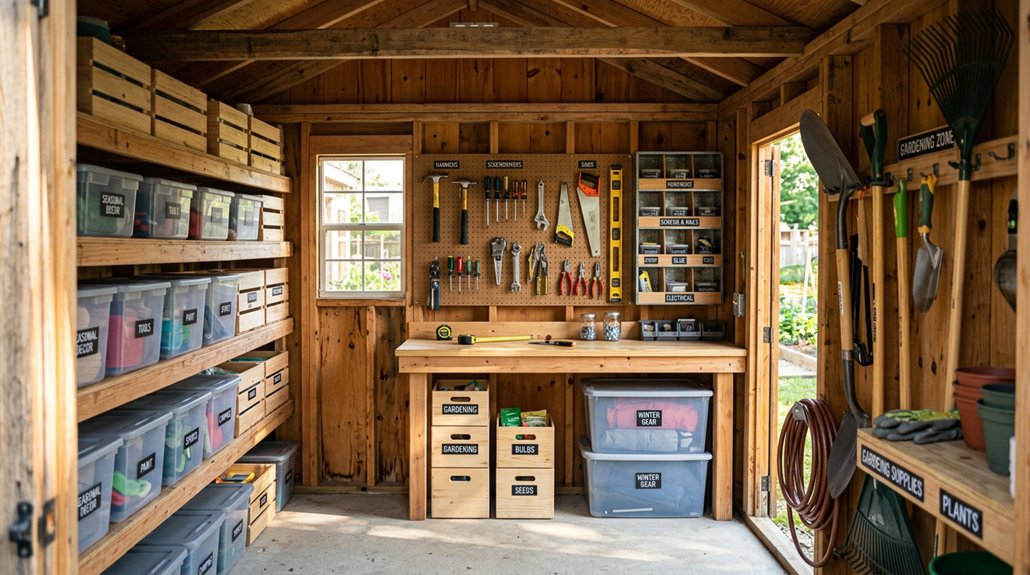
I’ll transform your chaotic shed into an organized powerhouse by measuring your space first, then emptying it completely for a deep clean.
Next, I’ll sort everything by category and use frequency: daily tools at arm height, seasonal items higher up.
You’ll donate ruthlessly using the 24-48 hour rule, then install pegboards and adjustable shelves for vertical storage.
Label clear bins with categories like “Garden Hoses” and “Tools,” position heavy equipment on lower shelves, and conduct seasonal audits to keep everything in check.
Keep reading to discover how these specific steps work together.
Step 1: Measure Your Shed and Plan Storage Zones
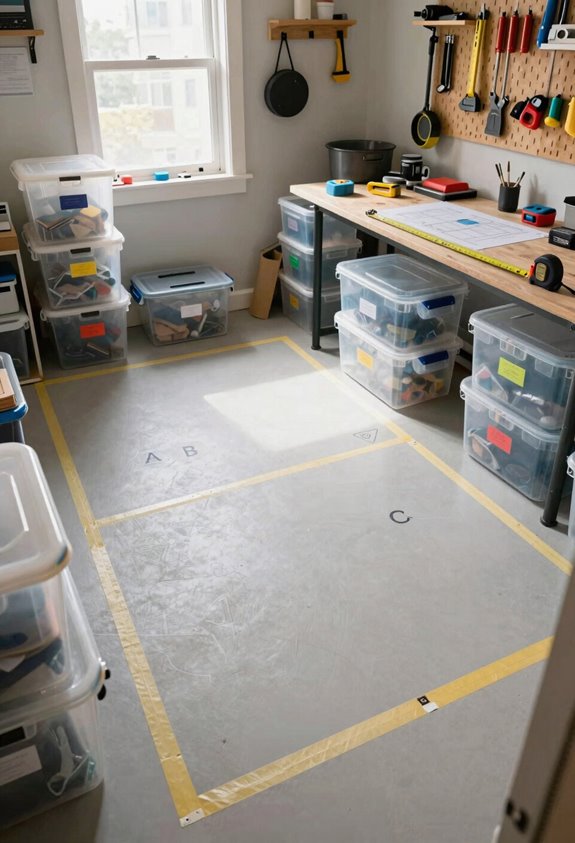
Before you buy a single shelf or hammer a single nail, you need to understand what you’re working with by measuring your shed from top to bottom. Start by mapping your entire space, noting ceiling height, wall length, and floor square footage. This information guides your shelving layout and helps you identify where each storage zone will live. Measure door clearance carefully, as bins that don’t fit through the doorway cannot be used. Next, create a simple floor plan sketching where tools, seasonal items, and bulk storage belong. Consider lighting and ventilation as part of your planning. By establishing these zones upfront with clear boundaries, you create an organized, functional space that supports your daily needs.
Step 2: Remove Everything and Deep-Clean the Space
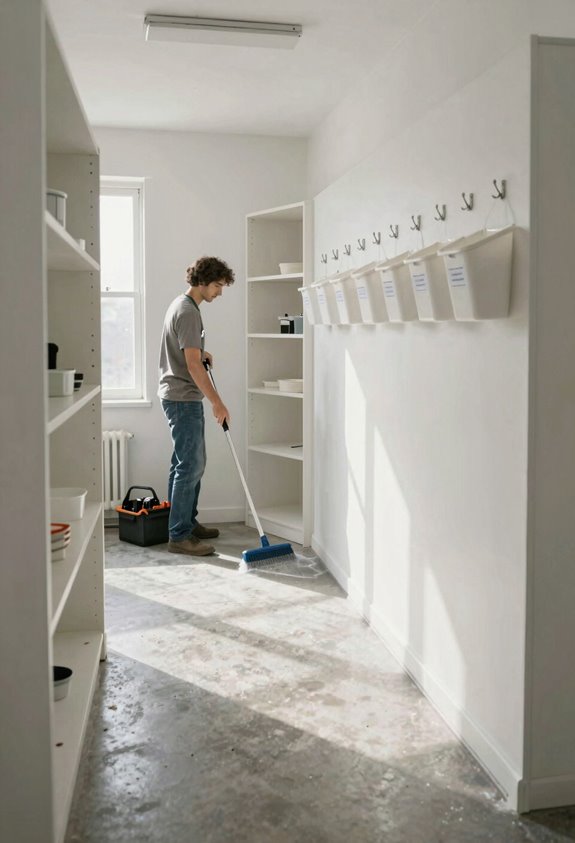
Empty your shed completely and give it a thorough cleaning. Pull everything out into your yard or driveway. This blank canvas lets you see what you’re actually working with.
Deep-clean every surface. Sweep floors, wipe shelves, and scrub corners where dust bunnies hide. Don’t forget ventilation areas and windows, as they significantly improve freshness.
While tackling this task, start your inventory. Separate items into piles: keep, donate, recycle, discard. This declutter phase helps you understand what actually deserves space in your organized shed.
Check for pest damage and seal any gaps you discover. This protective step prevents future problems and ensures your newly cleaned space remains in good condition for reorganization.
Step 3: Sort Items by Category and Use Frequency
How you organize your stuff makes a difference.
Now that your shed’s clean, it’s time to sort everything by frequency of use and categories. Group similar items together, such as garden tools with garden tools and fasteners with fasteners, so you can locate items quickly. Then create three zones: daily-use items at waist height, seasonal stuff on middle shelves, and rarely touched belongings up high or in the back.
| Zone | Best Location |
|---|---|
| Daily-use | Waist to shoulder height |
| Seasonal | Middle shelves |
| Rarely used | High shelves/back |
| Tools | Open bins, pegboards |
| Supplies | Labeled containers |
This approach saves time. By placing frequently grabbed items in accessible bins near the front, you eliminate time spent searching. When everything has its place, you know exactly where to find what you need.
Step 4: Declutter Without Mercy-Donate or Sell Ruthlessly
This is where the real magic happens. You need to evaluate what you’re actually using versus what’s just taking up valuable floor space. When looking at a shed, ask yourself tough questions: Is this broken beyond repair, do I have duplicates, or will I genuinely use this tool in the next year? Donating or selling the items you don’t need is smart. It creates immediate benefits: you’ll have room to breathe and space for the tools that really matter.
Evaluate Items for Usefulness
When you’re staring at a shed packed with mystery boxes and forgotten gear, pull everything out and face the truth. Removing every single item prevents bias from existing clutter and reveals what you’re actually keeping.
Here’s my evaluation system:
| Item Category | Action | Timeline |
|---|---|---|
| Weekly-use tools | Keep immediately | Use now |
| Seasonal equipment | Store carefully | Need within year |
| Broken or duplicate items | Donate or sell | Remove today |
Create a quick inventory list as you decide each item’s fate. This prevents rechecking later. This shed organization approach works because you stay honest about what you’ll genuinely use. Broken items with missing parts get removed. Duplicates taking up space get sold. When you evaluate usefulness this way, your declutter efforts produce lasting results, and you reclaim valuable space.
Free Up Floor Space
The magic happens when you remove at least 20-30% of the stuff you don’t actually use. Your storage floor space becomes your best friend when you’re ruthless about decluttering.
Here’s how I tackle shed organization:
- Donate or sell items in good condition that you rarely touch, especially duplicates
- Apply the 24-48 hour rule to each item during your full cleanout
- Move bulky equipment to wall storage or sturdy bins to prevent tripping hazards
- Reserve floor clearance for essential gear and low-profile tools only
- Document what you removed so you stay accountable long-term
I periodically repeat this process because clutter sneaks back in. When your floor stays open and accessible, you’ve created a workspace where you actually want to spend time. An organized floor directly improves efficiency and safety in your shed.
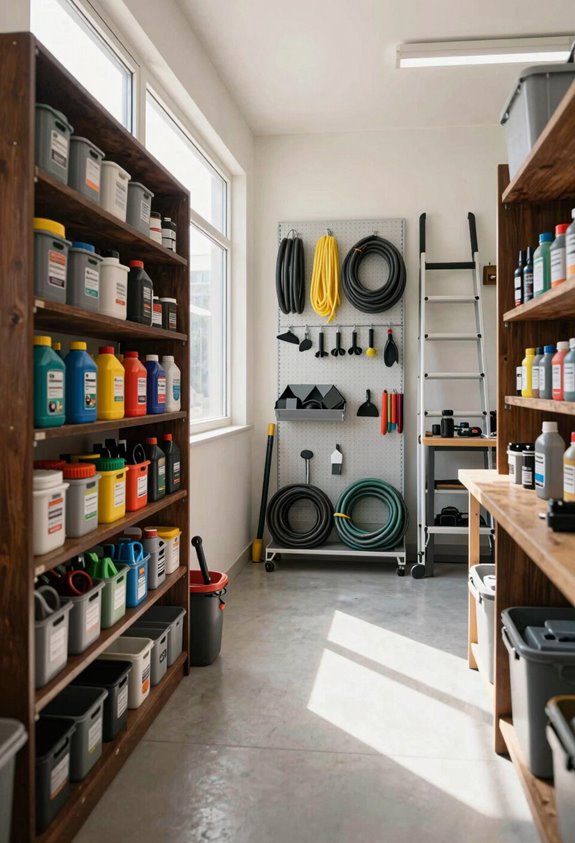
Step 5: Choose Your Storage Method (Walls, Shelves, Bins, or Overhead)
Deciding how you’ll store everything requires selecting from several effective options. Pegboards and wall-mounted hooks transform vertical space into functional storage, keeping tools at arm’s reach without consuming floor area. Adjustable shelves work well for organizing bins, and clear totes let you instantly spot contents without opening them. Gasket-sealed containers protect against moisture and pests, reducing damage and contamination. For seasonal items or infrequently used equipment, overhead storage maximizes your shed’s usable space. Combining these methods strategically creates a system tailored to your needs. You’ll know exactly where everything is stored and the reason for its placement.
Step 6: Install Wall Storage and Pegboards for Tools
I’m going to show you how to transform your shed’s walls into an incredibly efficient tool storage system using pegboards. Mount your board at waist-to-shoulder height so you can reach your most-used tools without stretching or bending, then choose the right hooks and organize your items by frequency of use. Your favorite tools should stay front and center, while occasional-use items live higher up or lower down. This approach makes your entire workspace faster and more functional to use.
Pegboard Layout and Placement
Where should your most-grabbed tools go on that pegboard? Place them right at arm height where you can access them instantly. Your pegboard layout makes all the difference in creating effective wall-mounted storage that works for you.
Here’s a winning strategy for tool organization:
- Place frequently used items at comfortable arm height (around 48-60 inches)
- Position less-used tools higher or lower to keep prime real estate clear
- Group similar tools together for intuitive accessibility
- Use various hook sizes that match your specific tools
- Add small baskets and shelves for odd-shaped items like gloves and rags
This thoughtful pegboard layout transforms your workspace into an organized area. You’ll spend less time hunting and more time creating. Strategic placement reduces the time spent locating tools and increases your efficiency when working.
Hook Selection and Installation
The right hooks make all the difference between a pegboard that actually works and one that frustrates you every time you reach for a tool. Selecting varying hook sizes transforms your wall storage system into something genuinely functional. Small hooks grip lightweight items like screwdrivers and brushes, while larger J-hooks securely hold hammers and mallets. When installing them, space hooks about six inches apart, leaving room for baskets and small shelves that catch oddly shaped accessories. Position your most-used tools at comfortable arm height to avoid constantly stretching or bending. This hook selection creates tool organization that works intuitively, making your pegboard an effective shed storage system.
Organizing Tools by Frequency
Once you’ve hung those perfectly sized hooks, organizing your tools by how often you actually use them transforms your wall storage from chaotic to brilliant.
Your system for tools by frequency:
- Daily-use tools get premium pegboard real estate at eye level for lightning-fast grabs
- Weekly tools live slightly higher or lower, still visible but not prime space
- Occasional tools occupy the upper or lower zones, keeping clutter minimal
- Seasonal items go highest or lowest, perfectly out of the way
- Bulky equipment anchors the bottom for superior stability and safety
Label them clearly with chalkboard outlines so you’re never hunting for what you need. This system reduces the time spent searching during quick projects. Your shed becomes organized and functional.
Step 7: Build Shelving to Reclaim Vertical Space
By installing adjustable shelving units, you’ll transform your shed from a cluttered floor-level mess into an organized, accessible storage system.
Heavy-duty shelves anchored to studs provide vertical space without sacrificing floor room. Place frequently used items at eye level (roughly 48 to 60 inches high) for quick access, while seasonal items go higher up. Heavy items belong on lower shelves for stability, and clear bins let you see contents instantly.
Adjustable shelving adapts as your storage needs change. Whether you’re storing tools, paint cans, or garden equipment, you can customize each shelf’s height to fit your inventory. Wall-mounted options also boost airflow, reducing moisture damage behind stored items.
This upgrade converts your shed into an efficient space where everything has its designated place.
Step 8: Select and Label Your Storage Bins and Containers
How do you find anything in a dark shed without opening every single container? Smart storage bins and labeling make all the difference.
I recommend these essentials for your shed:
- Clear, stackable totes maximize shelf space and let you see contents instantly
- Gasket-sealed lids protect seasonal items from moisture and pests
- Opaque lighter-colored bins reduce heat gain in sunny areas
- Durable labels with legible text and icons stay put through weather
- QR code labels linked to digital inventory streamline your searching
Grouping items by category like Garden Hoses, Tools, and Frost Blankets makes everything easier to locate. Use clear adhesive labels on transparent storage bins and permanent Sharpie markings on opaque ones. This organization system transforms your shed into a functional workspace where you can efficiently locate what you need.
Step 9: Position Large Equipment and Finalize Your Floor Layout
With your bins labeled and organized, you’re ready to tackle the biggest challenge in shed organization: fitting everything in without creating an obstacle course. Start by positioning your large equipment strategically. Place your riding mower in the center of your floor layout so you can access it easily from all sides. Next, arrange smaller power tools and bikes along the perimeter, then wall-mount everything possible. Weed eaters, pole saws, and leaf blowers belong on sturdy walls. This overhead storage keeps your walkway clearance open and safe. Accessibility matters more than appearance. You’ll avoid having to move three items just to grab one. An uncluttered floor space reduces tripping hazards and makes equipment retrieval faster for you and your family.
Step 10: Keep Your Shed Organized-Audit and Adjust Seasonally
I’ve found that the real secret to keeping your shed organized long-term is performing a seasonal inventory assessment every few months, which lets you swap out-of-season items like winter shovels or summer garden tools with ease. By adjusting your storage systems quarterly, moving frequently used gear to arm height and tucking away off-season equipment overhead, you’ll maintain that open floor space and quick access to exactly what you need. This simple rotation habit means your shed stays functional year-round instead of becoming cluttered.
Seasonal Inventory Assessment
When winter winds down and spring arrives, your shed’s layout needs updating. Conducting a thorough seasonal inventory assessment transforms how you use your storage shed organization.
- Identify items you won’t need for months ahead
- Sort gear into donation, recycling, or storage piles
- Update labels and labeled zones for current season
- Move frequently used items to eye level
- Relocate rarely used equipment higher or toward back
Creating a quick seasonal layout plan takes just minutes but saves hours searching later. Verify tool conditions, sharpen blades, and test batteries before storing anything. This approach means you know exactly where everything is located. Your shed becomes functional storage that supports your needs.
Adjust Storage Systems Quarterly
Your shed’s seasonal inventory assessment gives you a fantastic foundation. Your storage system requires ongoing maintenance and adjustment rather than a one-time setup. I conduct quarterly audits to keep my shed organization sharp and responsive. During each shed organization review, I reassess which tools I’m actually using and shift them accordingly. Frequently grabbed items move to lower, accessible shelves, while rarely used equipment heads upward. I tighten my storage optimization by reallocating pegboard hooks and reorganizing bins based on my current workflow patterns. My labeling system gets updated whenever locations change, keeping everything tagged and findable. I document the refreshed layout with a simple floor plan, which transforms future audits into quick, manageable tasks. This quarterly audit rhythm ensures my shed stays organized, efficient, and genuinely helpful for my projects.