Here is why I put this post together. I notice my bedroom mood shifts with what I see on the wall. A plain board can feel dull, but a small, well styled board can wake up the space. When I add a mix of color, quotes, photos, and tiny reminders, I feel ready to start the day.
Who it’s for. If you’re into cozy rooms, simple DIY projects, or you share a space with a roommate or a student budget, this is for you. This post speaks to anyone who wants a more personal, practical way to keep daily motivation near their bed and desk.
What you’ll get. I pulled together 25 bulletin board ideas for the bedroom that stay fresh daily. They are easy to add, easy to change, and they feel calm yet motivating. You’ll get practical setups using cork boards, magnets, fabric, and photos. Each idea comes with simple steps and a quick materials list.
How to use them. Start with 1 or 2 ideas. Pick a small corner, mount a cork board, and add a few swap-ready pieces. Use washi tape to create sections for quotes, goals, and reminders. Rotate weekly to keep it fresh. The key is simplicity. You can update it in 10 minutes.
Style tips you can try. For a calm vibe, choose a soft color like beige or sage, add a photo grid, and a small plant. Use a magnetic strip for notes, or hang a string with clips for photos. This keeps the board flexible and easy to refresh.
Next steps. Here is what you can do today to start building your own bedroom bulletin board setup. Pick one idea to test this week, gather a few inexpensive supplies, and snap a quick photo of your board when you finish. If you share a shot, you may spark ideas for someone else and keep your space feeling you.
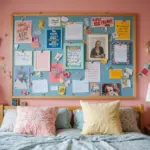
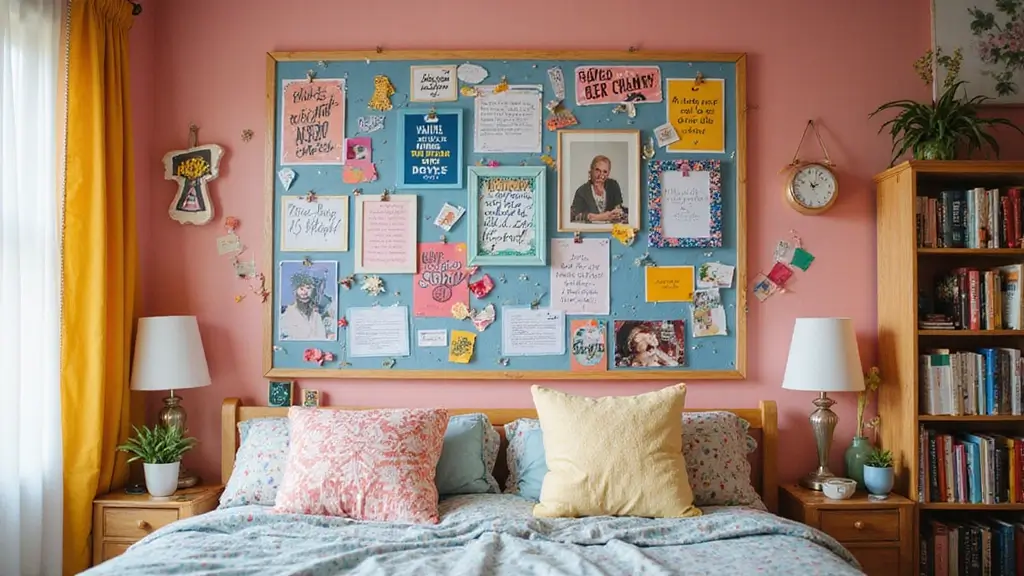
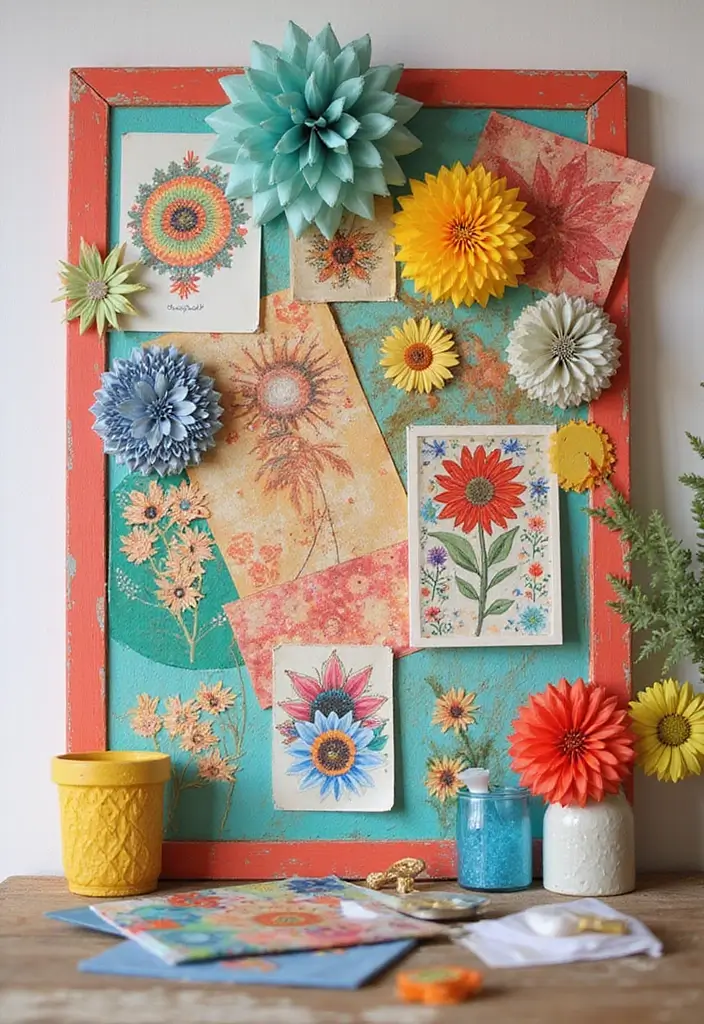
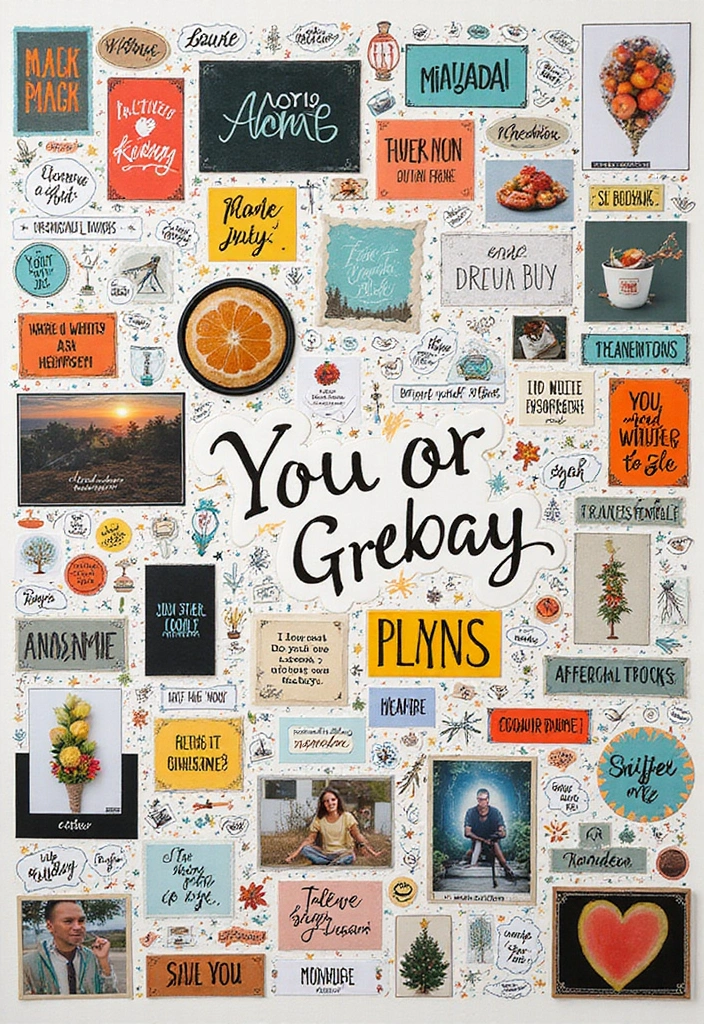
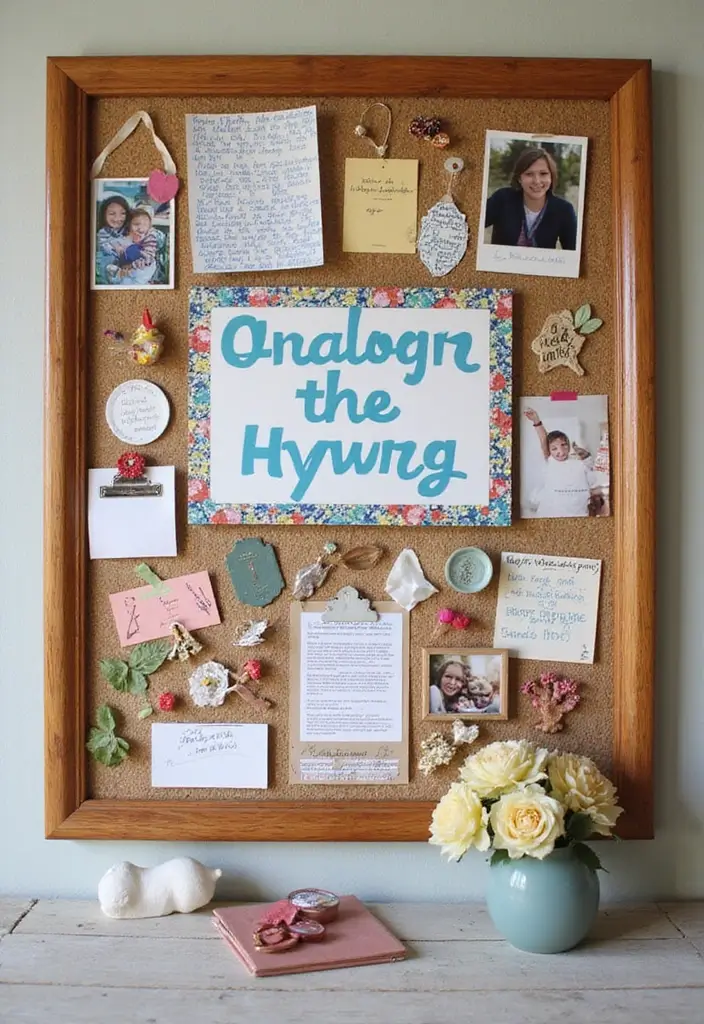
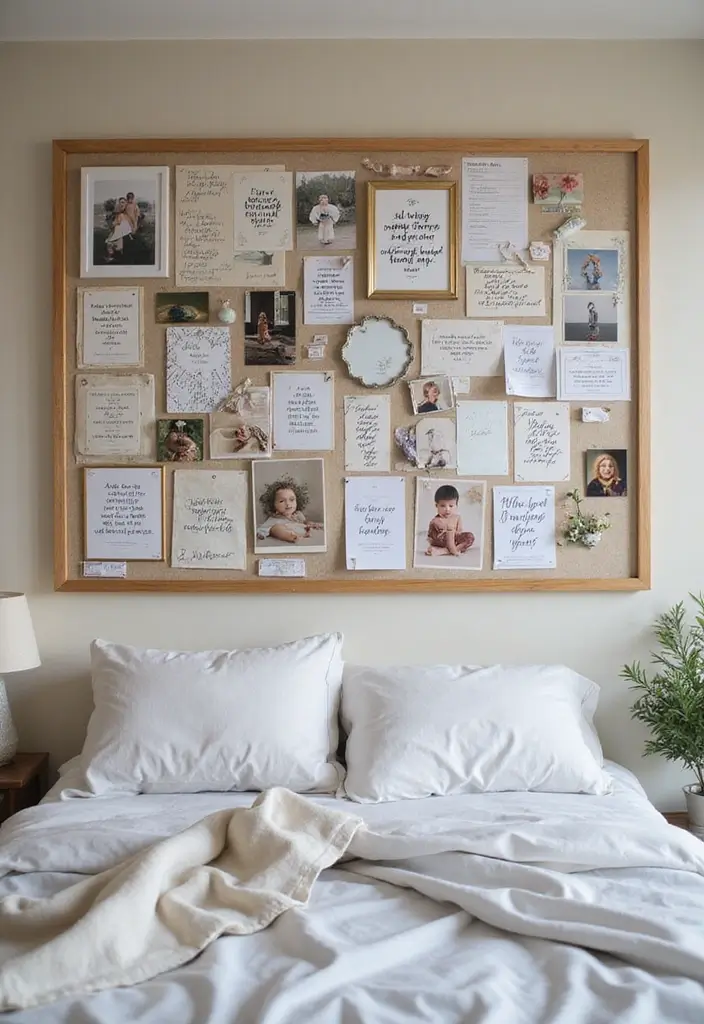
1. The Colorful Collage Board
Want a bedroom that sparks ideas every day? This bulletin board idea can do that.
Start with a board you like; a corkboard works well. Or use a thin wooden panel. Paint it in a color you love.
Fill it with items. Put photos, magazine cutouts, short quotes, and small keepsakes. Use push pins in fun shapes to add texture.
Choose a theme to keep the look cohesive. Travel, music, or fashion are solid choices. Stick to a simple color set, like blues, pinks, and creams.
Plan the layout. You can go for a neat grid or a freeform collage. Leave some space so things don’t feel crowded.
Seasonal updates keep it fresh. Swap in new finds monthly. Rotate quotes or photos.
Add light touches. Hang fairy lights around the edge or tuck a string along the frame.
Place it where you see it most. Eye level on a bedroom wall works best. A desk or bedside is ideal.
What you gain is a daily mood boost. A quick reminder of goals. A stylish spot for memories. A ready-made chat starter for guests.
Next steps. Grab a board, pick a color, and start collecting today. Then plan a simple layout and pin items.


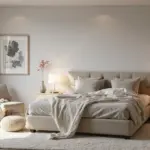
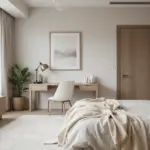
2. The Minimalist Inspiration Board
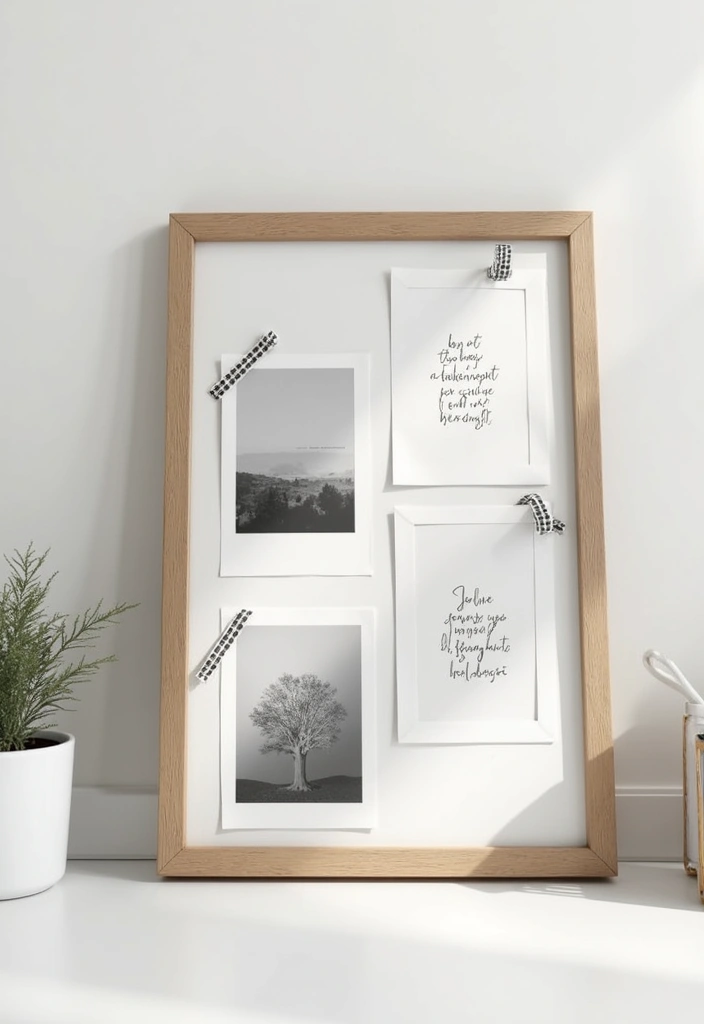
If you want a calm, clean bedroom, this board keeps you focused. Start with a simple white or wooden board. Pick a monochrome color scheme and keep the look quiet and neat. Display only what moves you: a photo, a short quote, or a tiny sketch.
– Limit the items Keep the board light. A few pieces make each one count.
– Color and layout Stick to black, white, gray, or natural wood. Let space breathe between pieces.
– Attachment method Use washi tape for a finished look. It holds items gently and is easy to swap.
– Finishing touch Add a small plant, a smooth stone, or a simple figurine at the base to ground the display.
This setup serves as a daily reminder of your goals without crowding the room. It grows with you. Swap items as your aims shift, not all at once. If you try a change, you’ll feel a small spark every time you glance at it. Ready to try it this week? Start with two photos, one quote, and a single sketch. See how light the board feels when you keep it simple.
3. The Travel Memory Board
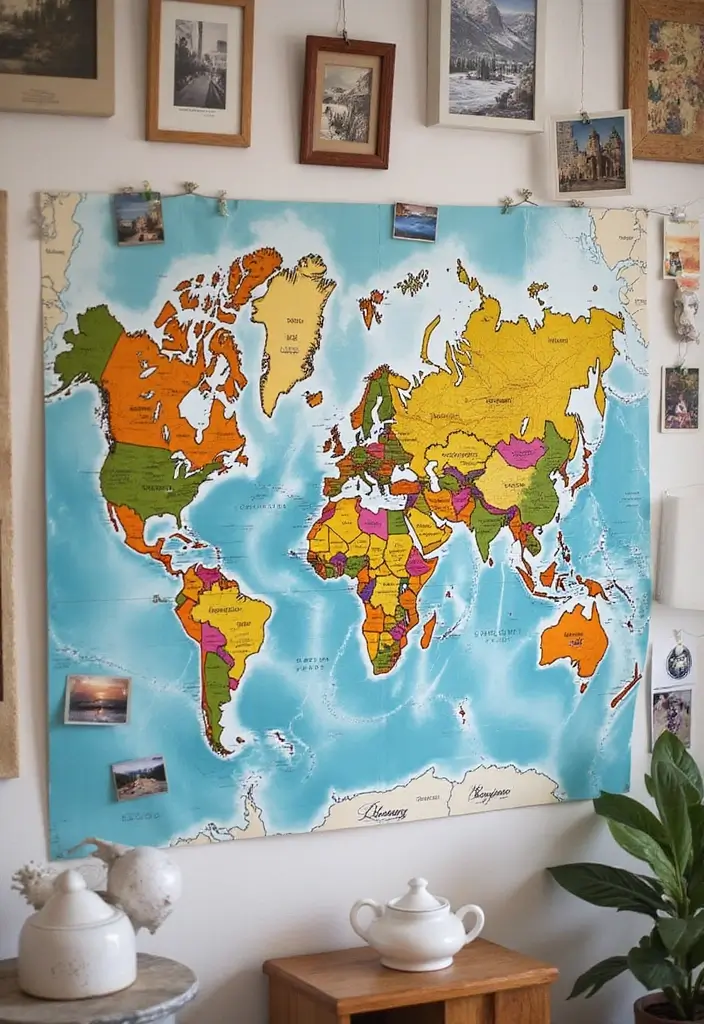
Feeling stuck with wall art that feels dull after a week? A travel memory board can lift a room and lift your day. It makes your trips feel close, even when you are home.
What you need
– A large map or map wallpaper as the background
– Photos from trips or small keepsakes
– Thin string or twine and mini clips or pins
– A few postcards or ticket stubs
– Short travel quotes on cards
How to set it up
1) Hang the map where you will see it often. Make sure it’s level.
2) Place photos and mementos around the map first. Don’t rush the layout.
3) Connect each photo to its place with a string. Pin the end at the city or country on the map.
4) Tuck in postcards and ticket stubs near the photos.
5) Add 1–3 short quotes to spark future plans.
Practical tips
– Use a simple color theme so the board stays calm and easy on the eyes.
– Label dates or years on small tags to track your journey.
– Leave space to grow as you visit more places.
Maintenance
Dust lightly and rotate items every few months. Store extra pieces in a labeled box.
Next steps
Pick a spot near your desk or bed. Start gathering photos and mementos, then set up the board this weekend. It’s a tiny project with a big payoff: daily inspiration and a map you can touch.
4. The Vintage Chic Board
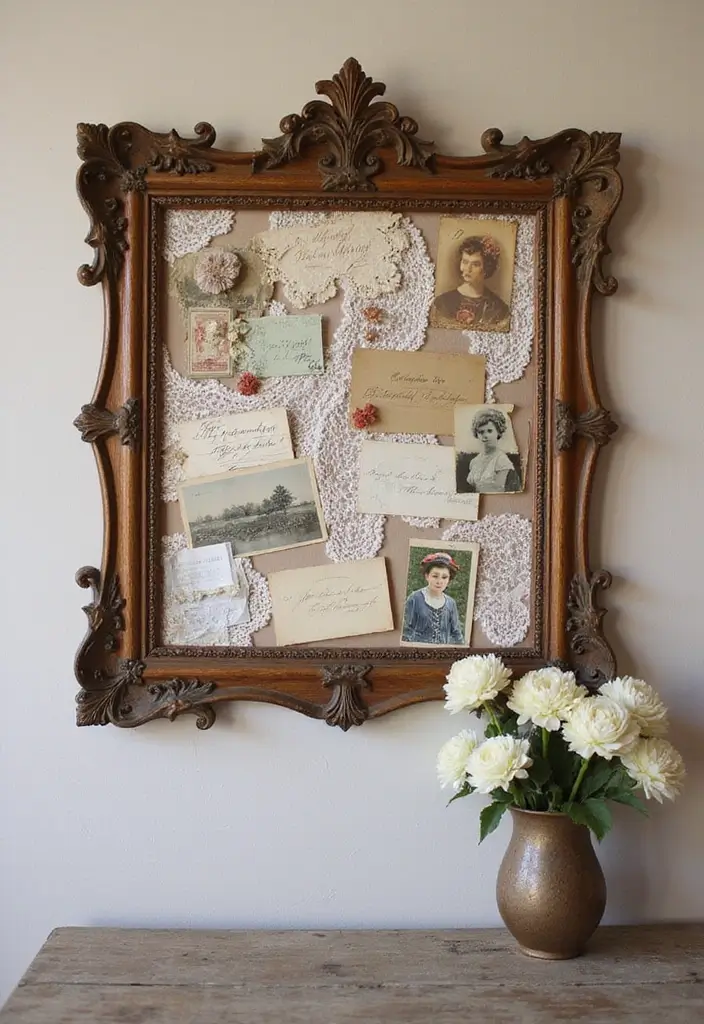
The Vintage Chic Board
Want a bedroom idea that sparks ideas every day? The Vintage Chic Board gives you a warm, personal touch. Start with an antique or weathered wooden frame. It sets a timeless mood in seconds.
What to fill it with
– Vintage postcards and old photos
– Lace scraps and small fabric swatches
– Floral patterned papers or pressed leaves
– Dried flowers or tiny vintage jewelry for a subtle glow
– Old clothespins or ribbons to hang items
Layering tricks
Layer fabrics over paper and mix textures. This adds depth and keeps the board from looking flat. You can tuck a piece behind another to peek out at different angles. Choose colors that match your bed, pillow, or rug for harmony.
Simple steps
– Arrange items in small groups rather than a straight line
– Clip or tie pieces with the clips or ribbons
– Leave space for air so the board looks calm
Why it helps
The mix of textures and colors catches the eye and feels cozy. It adds a personal note to your room that you can change with your mood.
Next steps
Pick a frame, gather your pieces, and test layouts. When you like what you see, hang it in your favorite spot and swap items weekly to stay inspired.
5. The Quote Wall
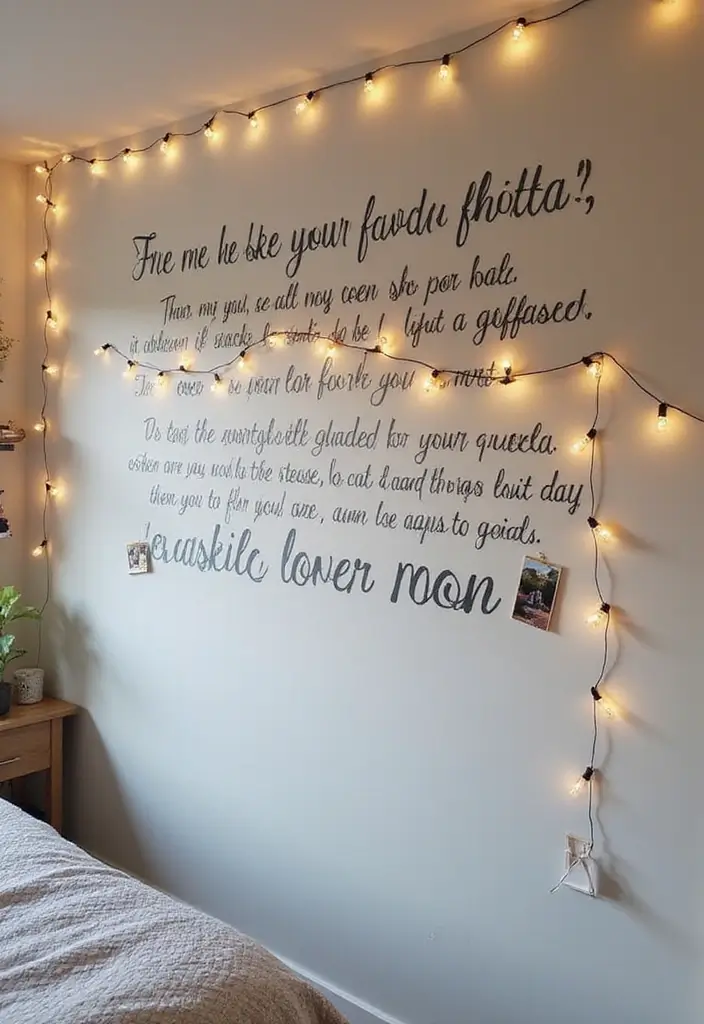
Here is why you want a quote wall in your bedroom. It stays in your line of sight and lifts your mood as you start each day. You can turn a plain wall into a tiny art corner with simple steps.
– Choose a wall you pass often. Use painter’s tape to make a grid or fun shapes. The tape acts like a guide, not a big project.
– Pick quotes that fit your life. You can handwrite them on cards or print and frame them. Mix short lines with longer quotes so the wall feels lively.
– Play with fonts and sizes. Use bold words for emphasis and lighter type for rest. This adds contrast and energy.
– Add easy decor that fits your vibe. A strand of warm lights, small photos, or a fabric banner can link quotes to real moments.
– Reserve space for new quotes. Put a small note card in a pocket or clip on a string. Swap them monthly to keep the wall fresh.
– Keep it practical. Update the wall after a busy week or when you read a new line that fits your day.
Next steps: gather supplies, pick your wall, and start layout today. Your daily dose of inspiration is waiting.
Transform your space with a quote wall! Choose words that lift you daily and watch your mood soar as you turn a plain wall into your very own art corner of inspiration.
6. The Artistic Canvas Board
You want a bedroom wall that keeps your ideas flowing. A DIY canvas board can do that. It’s simple and easy to update.
Here is a straight path to a board you can grow with.
Materials
– Canvas board or sturdy backing
– A light paint or a calm neutral
– Glue or removable putty
– Scissors and tape
– Small prints, photos, sketches, fabric swatches
– A few light 3D items like buttons or beads
Steps
1) Start with a blank canvas. Paint a soft background or leave it plain.
2) Choose colors that match your room and feel upbeat or peaceful.
3) Lay out your pieces first. Move them until the balance looks right.
4) Attach items with safe fasteners. Pins for paper, glue for fabric, putty for photos.
5) Add texture with a couple of tiny 3D items.
Make it personal
– Set aside space for a ticket stub, a photo, a quote, or a doodle.
Pro tips
– Use bright colors to energize the view.
– Mix materials for depth.
– Leave space to add new finds over time.
Care and refresh
– Rotate items every 2–4 weeks.
– Use removable adhesives to keep options open.
Style ideas
– Monochrome look for clean lines.
– Bold collage of favorites.
– Tiny nature scene for calm.
Next steps: Gather supplies and start with a blank wall spot.
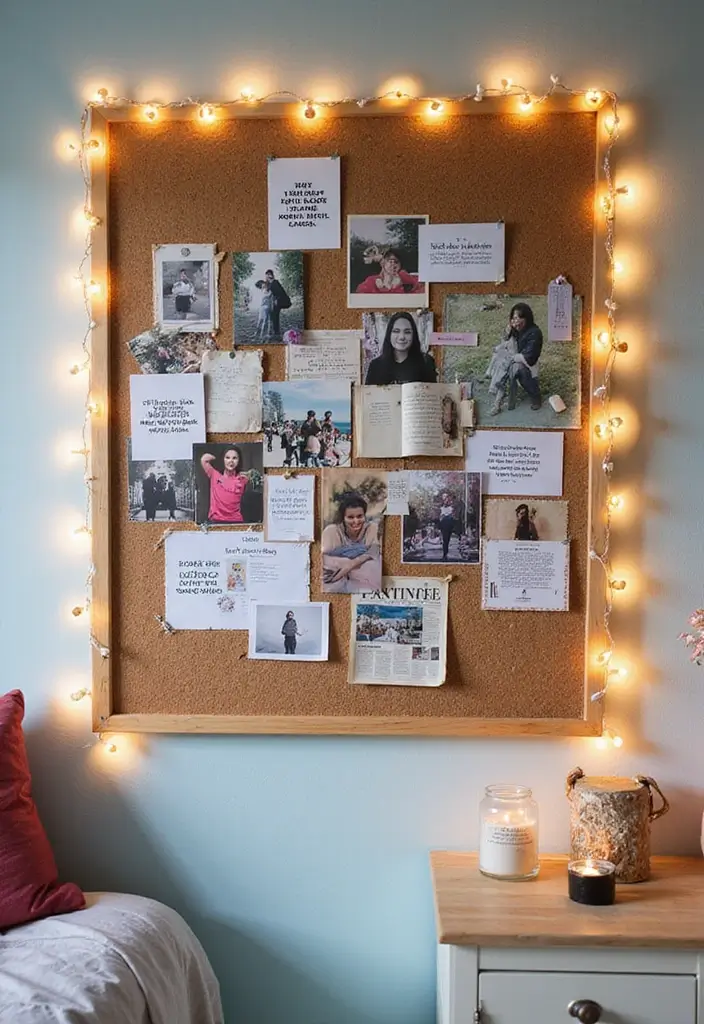
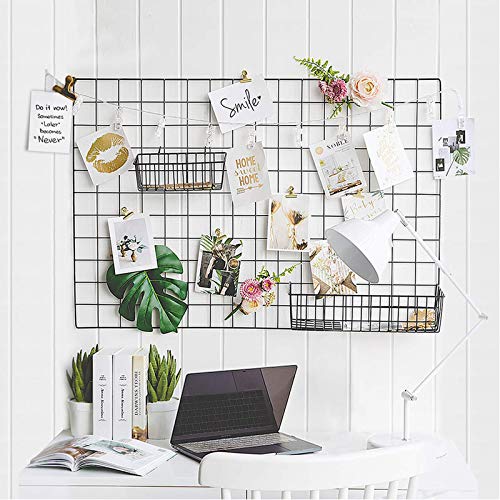
7. The Photo Grid
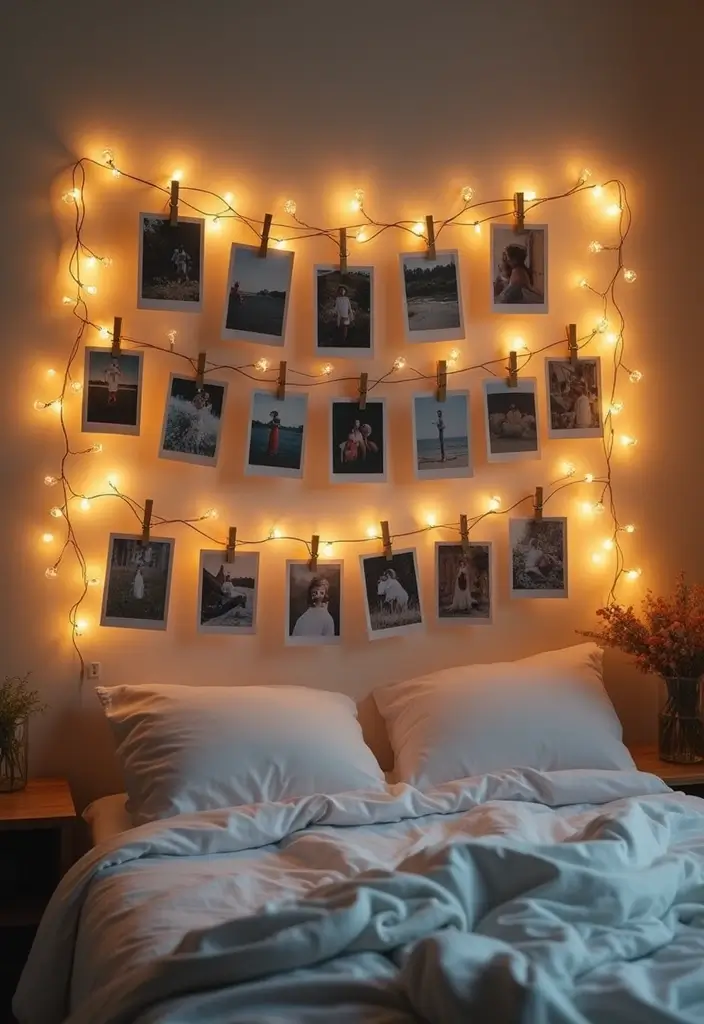
Here is why you want a photo grid in your bedroom. It keeps your memories visible and alive. A wall grid made with string lights or decorative wire becomes a playful, stylish display that you can swap as often as you like. You can swap photos anytime.
What you need
– A wall grid made from string lights or decorative wire
– Wooden clothespins or small clips
– Printed photos, tickets, or small keepsakes
– Tape, nails, or hooks to secure your grid
– A few tiny plants or word quotes for around the edges
– Optional warm lights for a cozy glow
Set it up
– Pick a wall that you use every day. Mark a simple grid with light pencil guides.
– Hang the wire or string in the grid shape. Keep it level so the photos hang neatly.
– Clip your photos in a story order. Start with a chapter from your last trip, then add a birthday, then a simple moment at home.
– Add the small plants or quotes around the grid. They lift the look without crowding it.
– If you want more warmth, weave in string lights. A soft glow makes the photos feel alive at night.
Tips to keep it fresh
– Swap photos as seasons change. It stays relevant and fun.
– Try different layouts. A timeline, a grid, or a random collage both work.
– Keep care simple: change a clip or two, not the whole grid.
Next steps: map your space, gather a dozen photos, and set up your DIY photo grid this weekend.


8. The Fabric Board

Seeking a soft touch on your wall that keeps you inspired? A fabric bulletin board delivers both. It feels warm to the touch and gives you a ready space for quotes, photos, and little notes.
Here is how to make it:
– Pick a foam board that fits your wall.
– Cut fabric a few inches bigger on all sides.
– Stretch the fabric taut over the board and pin the edges to hold it tight.
– Add a few decorative pins or clips that match the fabric style.
Design tips
– Choose fabrics that show your personality. Floral patterns, denim, or suede can all work.
– Secure items with decorative pins or clips that fit the vibe of the fabric.
– Layer two or three textiles for depth and texture.
– Try linen for a clean look, velvet for depth, or twill for a sturdy base.
This board blends function with decor. It adds warmth, texture, and a personal touch to your room, while giving you a simple place to pin reminders, quotes, and photos. Next steps: hang it at eye level, keep a small tray of pins nearby, and rotate items seasonally to stay inspired.
With the right fabric, your board can grow with you. You can switch it up with the seasons.


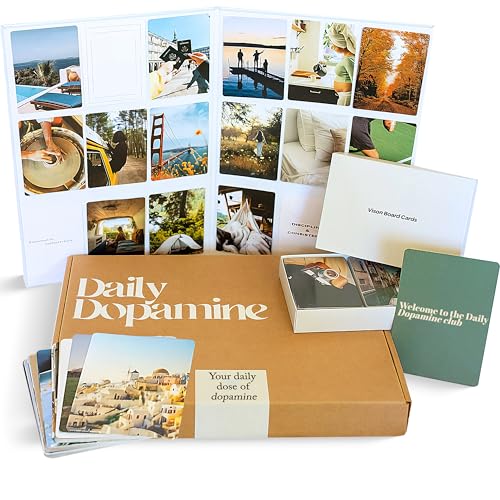
9. The Inspirational Vision Board
You want a simple way to stay focused on your goals each day. A vision board in your bedroom can help. It shows your plans in one place and nudges you to act.
Next steps:
Materials
– A large poster board or cork board
– Scissors, glue, tape
– Magazines, prints, or photos
– A few personal items or small trinkets
Where to place
– Put the board where you will see it first thing in the morning and last at night
Layout tips
– Start with your top goal in the center so it grabs attention
– Add sections for school, arts, health, and friends to keep things clear
– Use color blocks and bold words to make ideas stand out
– Leave space for new ideas so you can grow the board
Content ideas
– Clip words, photos, and quotes that speak to you
– Include a photo of your dream, a badge, or a reminder you can touch
Make it live
– Swap items as your goals shift. A quick update keeps it fresh
– Do a quick weekly check to move items that have changed
Tech option
– Save a digital photo of your board on your phone for a quick reminder
This board acts as a daily nudge. It shows what matters and what you will do next.


10. The Nature-Inspired Board
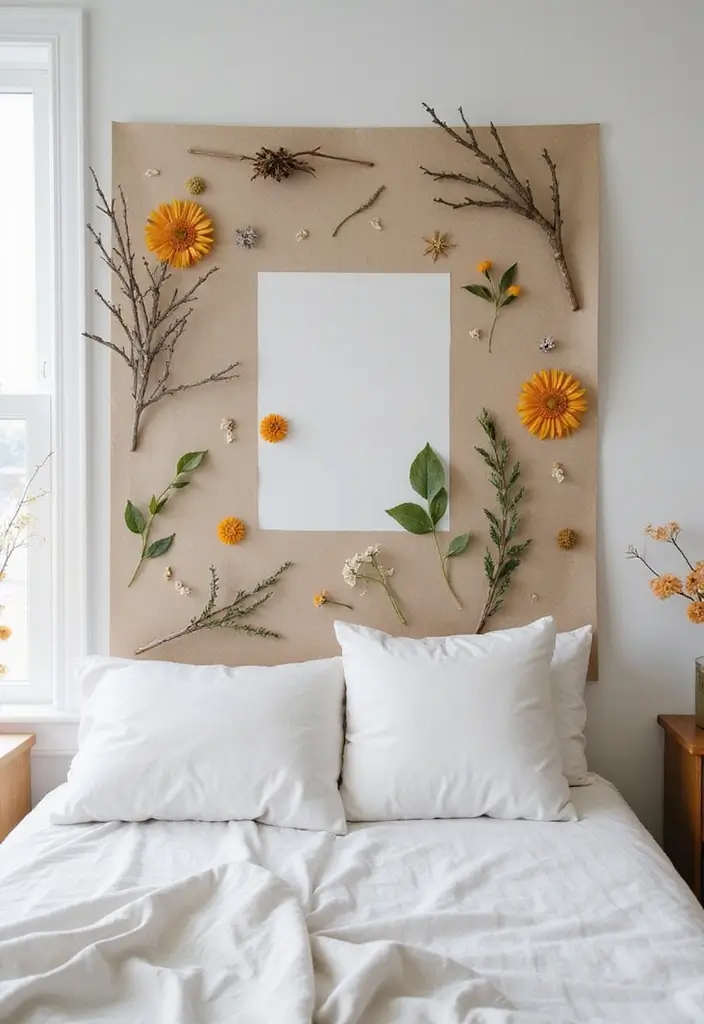
Want a calm, inviting bedroom that feels close to the outdoors? A nature-inspired bulletin board can give you that with just a few natural elements. Twigs, leaves, and pressed flowers create a soft backdrop that adds texture and a sense of quiet you can see and touch.
To Create:
– Choose a neutral board in cream, sand, or soft gray so the natural pieces stand out.
– Gather simple pieces: slim twigs, dried leaves, and pressed flowers. Keep colors soft for a restful vibe.
– Attach with eco-friendly fasteners like jute twine or small wooden clips.
– Frame the board with a thin natural wood border to boost the organic look.
Next steps and tips:
Keep the setup easy to change. Avoid direct sun to prevent fading. If a piece wilts, swap it for a fresh one. Rotate items every couple of weeks to keep the display feeling new.
Variations you can try:
Use a shallow shadow box to add depth, or place a small plant nearby for living texture. You can press a few leaves between glass and add a tiny photo to tell a story.
Ready to start? Pick a spot near your bed, gather a few natural pieces, and begin building tonight for a daily dose of nature.
This board is easy to refresh. Swap colors with the seasons.
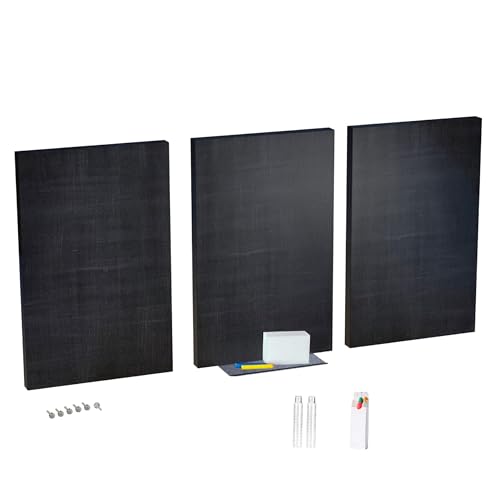
11. The DIY Chalkboard
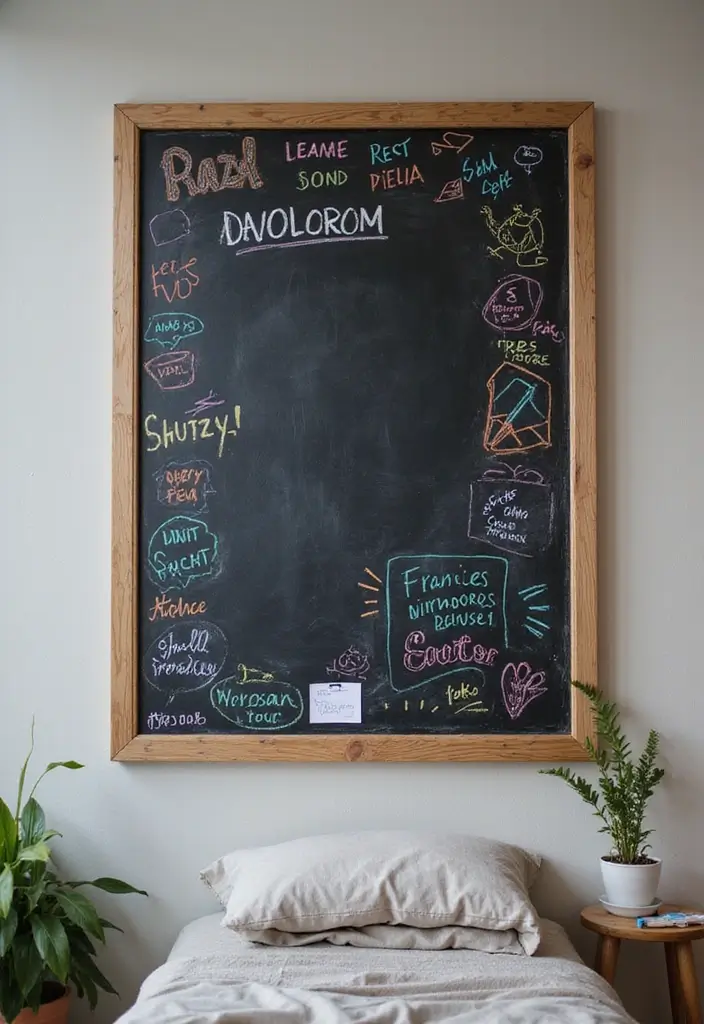
Want a simple space in your bedroom for notes, to-do lists, or quick sketches? A chalkboard wall patch gives you a ready answer. You can write and erase every day, so ideas stay fresh. Here is why it helps: it fuels daily habits and keeps clutter away.
How to set it up:
– Pick a spot on the wall and plan a panel about 2 by 3 feet. It’s roomy but not overwhelming.
– Choose your finish. Chalkboard paint works well on a wood board. You can also use chalkboard wallpaper or a pre-made panel.
– Prep the board. Sand it smooth. Wipe clean so the paint sticks.
– Paint or mount. If you use paint, apply two thin coats. Let it dry between coats.
– Add a frame. A simple frame or trim makes it look neat. It also protects the edges.
– Start writing. Use colored chalk for lists, quotes, or tiny drawings.
– Keep it fresh. Erase with a dry cloth or chalk eraser. Wipe with a damp cloth when it looks dull. Repaint when needed.
Next steps:
– Keep a small chalk set handy. A cup on the dresser is fine.
– Pair the board with a few magnets if you want photos or notes stuck on the edge.
– Schedule a quick weekly update so your board stays useful.
This idea fits doodlers and planners alike. It’s affordable, flexible, and quick to change.


12. The Layered Artwork Display
Are you tired of a plain wall in your bedroom? A layered artwork display adds color without extra clutter. You stack frames and photos on one board. The result has depth and life. It feels like a small gallery you can refresh anytime.
What you’ll need
– A large cork board or a sturdy frame grid
– Several frames in different sizes
– Removable adhesive or mounting putty
– A string of small lights or a tiny LED strip
– Optional: a ruler, scissors, level
How to set it up
– Step 1: Choose a wall near your bed. You will see this most.
– Step 2: Lay pieces on the floor to plan. Look for a balance of big and small.
– Step 3: Start with a main piece in the center or at the top. Build layers around it.
– Step 4: Attach pieces with removable adhesive. This keeps walls safe and lets you move items.
– Step 5: Add a mix of sizes and styles. The contrast adds depth.
– Step 6: Tuck a few lights between layers. The soft glow makes art feel alive.
– Step 7: Step back and adjust spacing. Hang pieces at eye level for easy viewing.
Tips for best results
– Pick a color family to tie pieces together
– Rotate a few pieces each month
– Keep the display from feeling crowded
Next steps: If you rent, use command strips and remove them easily when you move.
13. The Dream Catcher Board
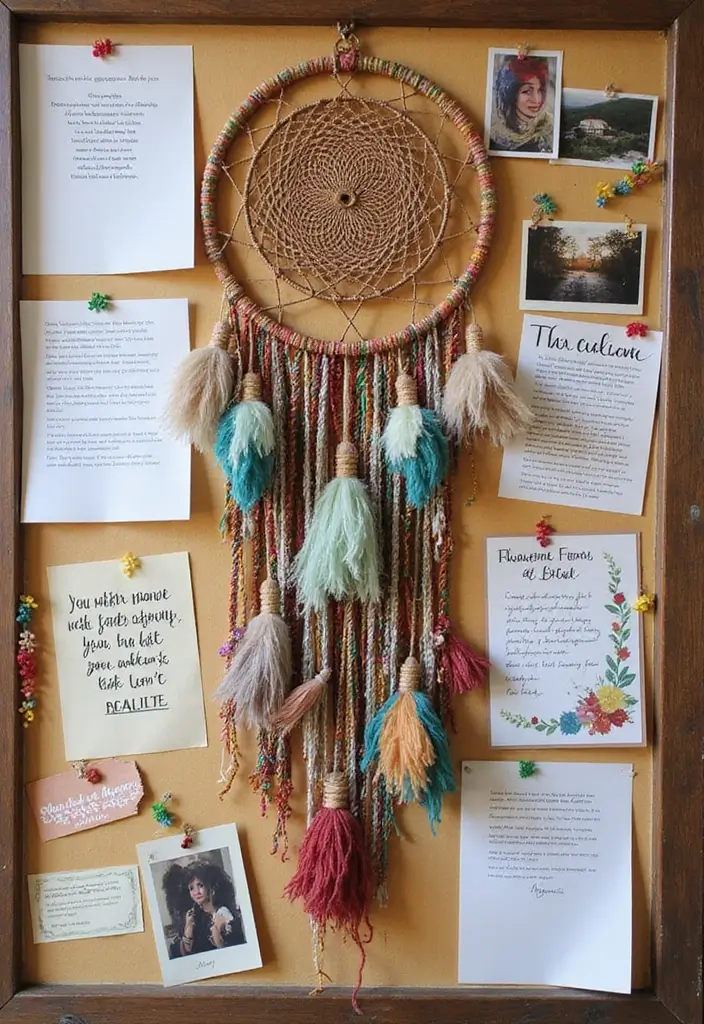
Is your bedroom bulletin board missing a spark that keeps you on track? The Dream Catcher Board adds calm and a clear focus. Hang a simple dream catcher in the center. Surround it with notes, goals, quotes, and small photos. This combo feels pretty and practical.
Here is how to set it up and keep it useful:
– Use bright yarn to weave the web.
– A pop of color draws the eye.
– Add feathers and beads for texture.
– Include personal pieces. Photos, tickets, or a keepsake make it yours.
– Pick a color plan. Tie the board to your room style with blues, pinks, or earthy tones.
– Attach items with pins or clips. You can swap notes without wrecking the board.
– Update often. Move notes weekly so ideas stay visible.
Why this helps
You have a friendly display that guides your day. It brings calm to your space and keeps goals in sight. A quick note of caution: a dream catcher is decor. Use safe materials and keep small pieces out of reach for little ones.
Next steps
Gather a dream catcher, yarn, feathers, beads, and a few notes. Build your board and start your daily routine with inspiration.
14. The Organized Study Zone Board
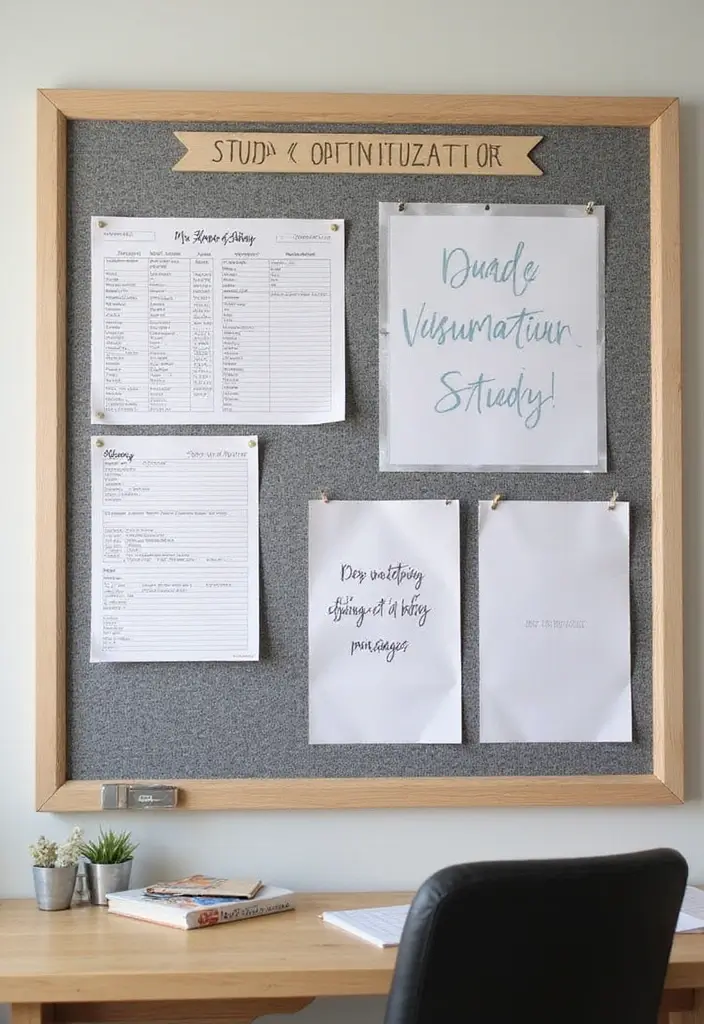
Is your study space a jumble? A clean bulletin board can keep you on track and calm. You see tasks clearly and meet deadlines more often. This organized study zone board helps you focus and stay motivated daily.
Here is why it works. Let’s break it down into simple steps.
– Choose a spot and mount a cork board where you can see it first thing each day.
– Create four zones for Schedules, Assignments, Deadlines, and Quotes using color-coded sticky notes.
– Color code sections by subject or priority so you spot items at a glance.
– Add a calendar or planner panel to track important dates and due dates.
– Reserve a quotes area for one quick line to lift your mood during study.
– Keep the board tidy by limiting notes and moving finished items to a Done section.
– Do a quick daily check, 2 minutes max, to update it before you study.
– Materials: cork board, pins, sticky notes, a marker, ruler.
Next steps.
Gather supplies, pick colors, and set up your board. Use it every day and adjust as needed.
Keeping it simple helps your brain read the board fast. You will finish more tasks, feel calmer, and study with less stress.
15. The Holistic Wellness Board
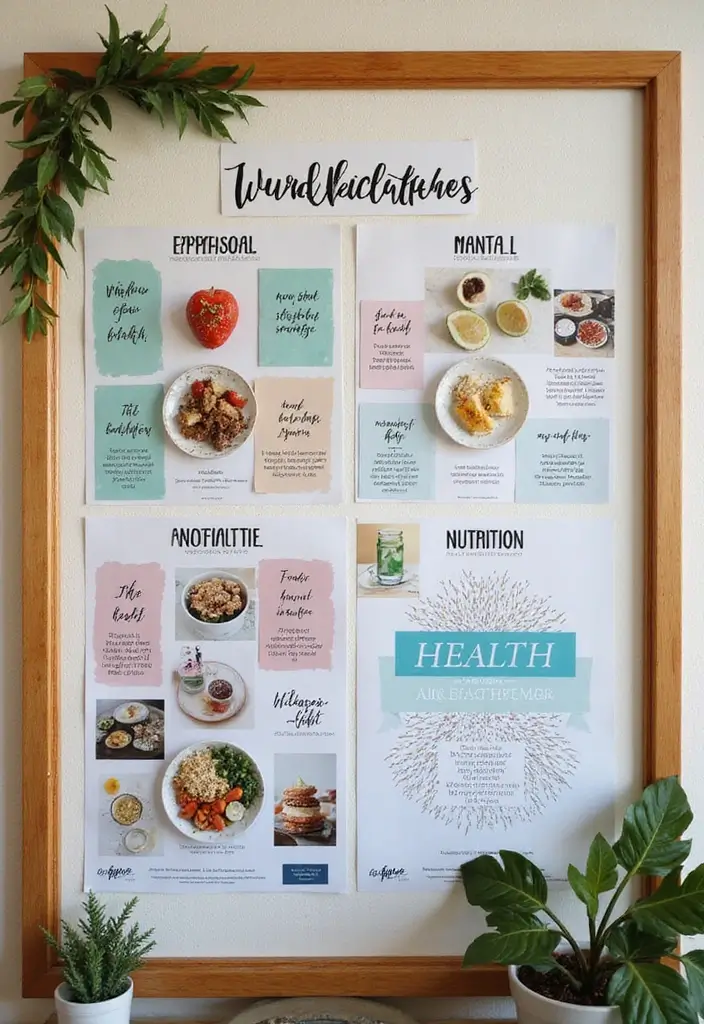
Struggling to stay on track with mind and body? A wellness board helps you see progress at a glance. It splits into three zones: Physical health, Mental health, Nutrition. You track goals, plans, and wins in one place. Here is why this works: it turns daily care into small, clear steps.
– What to include
In Physical health, track workouts, steps, sleep, and water.
In Mental health, note mood, stress, and quick self-care ideas.
In Nutrition, list meals, snacks, and new recipes.
– How to set it up
Gather a corkboard, index cards, markers, and colored stickers.
Label zones with simple titles and colors.
Use photos or drawings to visualize goals.
– Daily use
Add a weekly plan card: 5 days of movement, 2 days rest.
Add a daily check card: Today I drank 8 cups water and wrote 3 lines.
Celebrate small wins with a sticker.
– Tips for consistency
Place the board where you see it every day.
Update weekly, not hourly.
If you miss a day, reset and try again.
– Tools and options
Paper cards or a digital board on a tablet.
A family board works too for support.
Next steps: pick a spot, gather cheap supplies, and start today.
Small steps lead to big changes. Create your holistic wellness board and watch how tracking your mind and body goals transforms your daily routine into a journey of inspiration!
16. The Seasonal Board
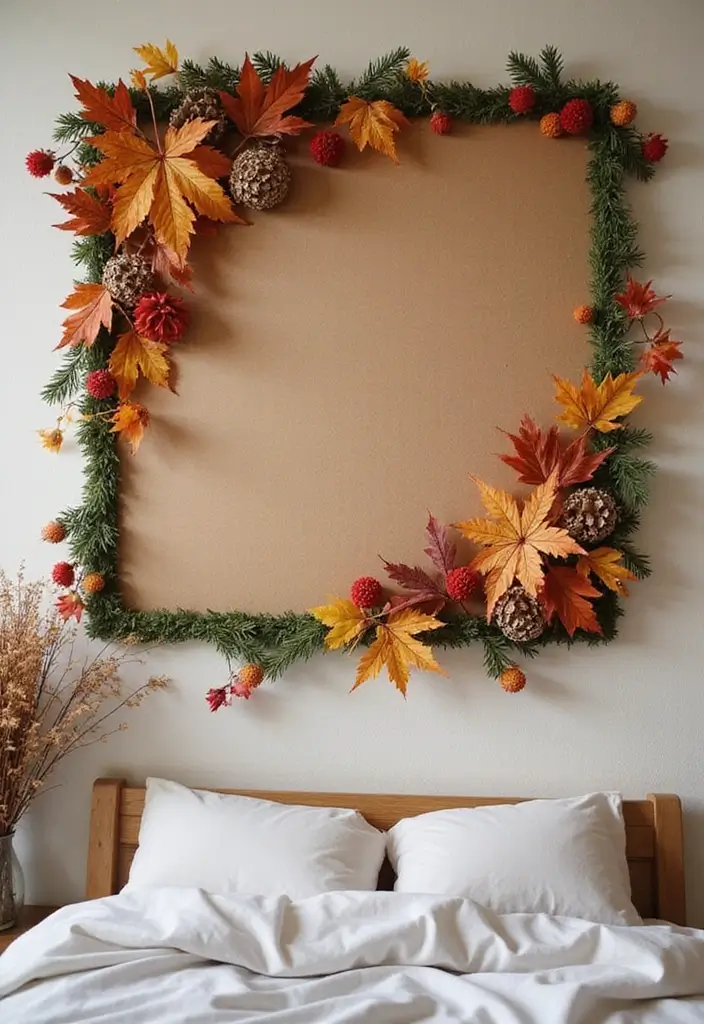
Is your room stuck with the same look? A Seasonal Board can refresh it fast. You swap colors and small pieces as the year turns, so the space feels new.
– Set a season theme. Here’s why: a simple plan keeps you focused. Pick fall with browns and oranges, winter with blues and white, spring with greens and pinks, or summer with yellows and blue skies. Think about the mood you want—cozy, bright, or calm.
– Collect seasonal pieces. Gather leaves, pine cones, dried flowers, mini pumpkins, or tiny ornaments. Add fabric swatches, ribbon, and a small tag with the season name. Keep a tiny stash ready for quick swaps.
– Play with layouts. Try a scrapbook look with a memory for each season. Use pockets to hold items you’ll swap later. Label seasons with simple words so rotation stays easy.
– Update quotes and art. Change the saying each season. Short lines fit on a small card. You can print tiny notes or sketch a simple doodle.
– Care and placement. Hang it where you see it daily, near your desk or bed. Dust lightly. Use removable pins so you swap pieces without damage.
– Maintenance plan. Every 2-3 months swap in fresh pieces. Keep a small stash labeled by season so the change is quick.
With this board, you get a quick mood lift and a room that grows with you.
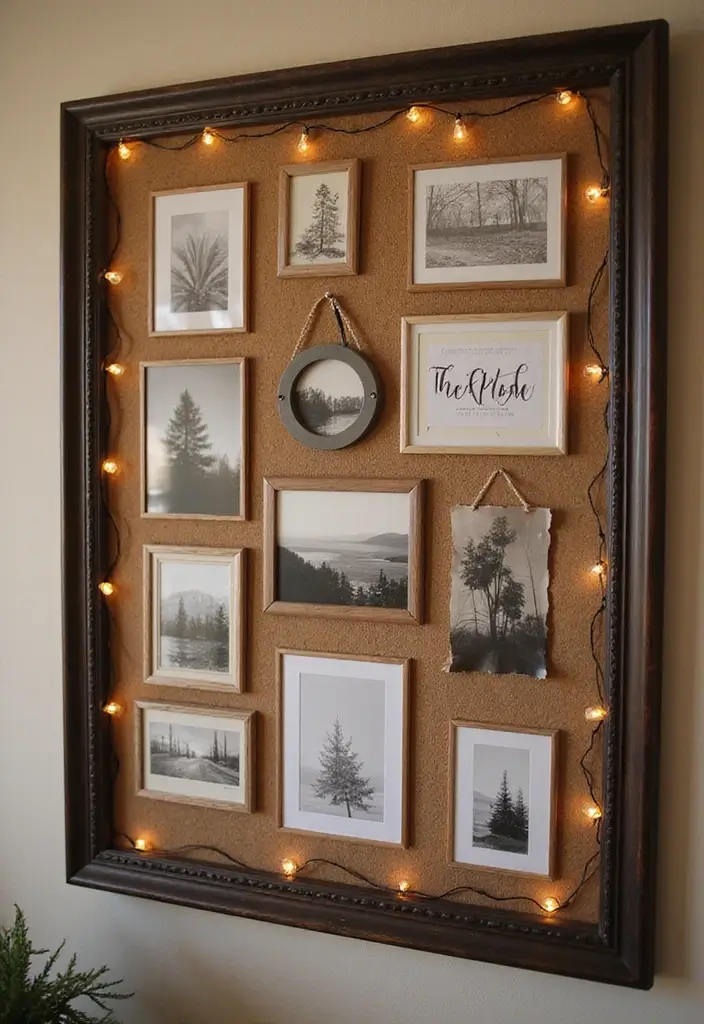
17. The Repurposed Frame Board
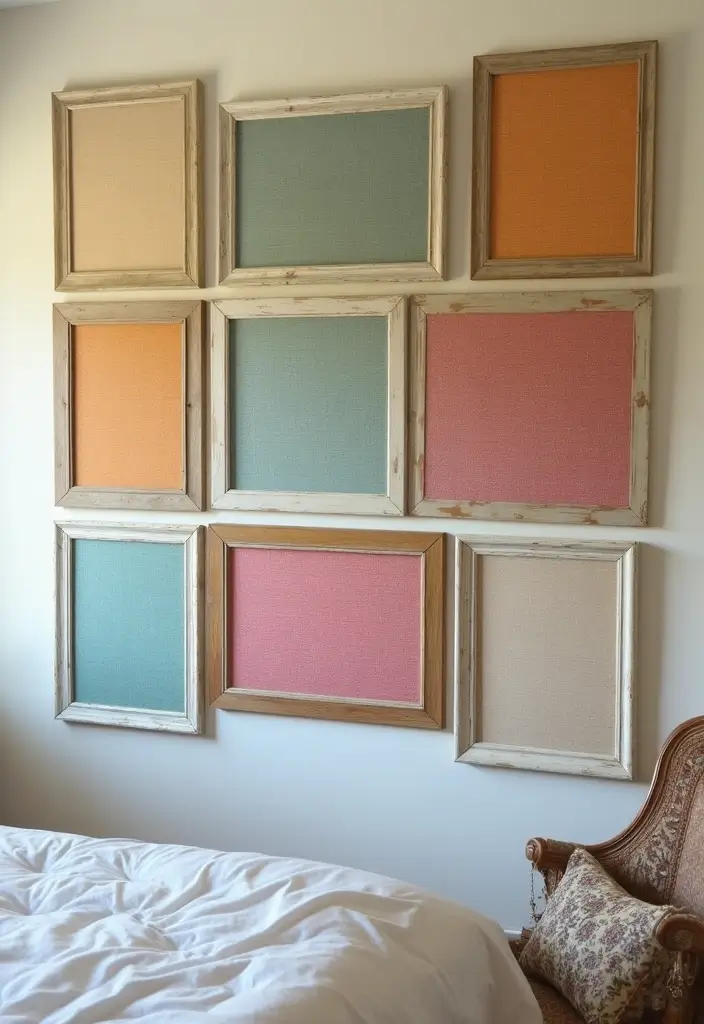
If you crave a simple way to keep ideas in sight, try a repurposed frame bulletin board. It uses old frames, fabric, and a little effort to become a daily inspiration spot in your bedroom. You save money and cut waste at the same time. It fits small spaces too.
What you’ll need
– Frames in various sizes
– Fabric or canvas to cover each frame
– A staple gun and staples
– Spray paint or acrylic paint for the frames
– A thin cork sheet (optional) for extra pin grip
– Scissors, measuring tape, and a hammer
Step by step
– Remove glass from each frame.
– Paint the frames in colors that match your room.
– If you add cork, glue it to the back of each frame so pins grab well.
– Stretch fabric tightly, staple at the back. Trim.
– Pin photos, notes, or lists directly into the fabric. Arrange pieces like a mini gallery.
Tips
– Use medium-weight fabric for a clean pin surface.
– Mix two or three frame colors for a lively display.
– Mount the boards at eye level for easy daily use.
Next steps: hang your boards where you’ll see them most, then start filling them with small prompts. You’ll feel fresh daily.
Turn your old frames into inspiration hubs! A DIY repurposed frame bulletin board not only beautifies your space but also keeps your dreams in sight, while being budget-friendly and eco-conscious. Let your creativity shine!
18. The Friendship Board
You want a daily reminder of your friends. A friendship board keeps those bonds in sight. It turns photos, notes, and small memories into a wall you can touch. Here is why it helps you stay inspired. You see it every day, so your mood stays warm. Here is how to make it.
Materials
– Choose a cork board or sturdy poster board you can pin to.
– Use pins, magnets, or clips that hold items neatly.
– Gather photos, notes, postcards, and small keepsakes from friends.
– Pick colored paper, markers, and a roll of washi tape for borders.
– Keep string or ribbon to hang extra items and connect memories.
Setup
– Place the board where you will see it each day.
– Hang it at a height you can reach easily.
– Start with a simple layout, grid or collage, that fits your space.
– Add a short title like “Friends” to set the mood.
Creative touches
– Use bright color blocks that match your room.
– Include a real friendship bracelet or a postcard you got.
– Invite friends to add their own photos and notes when you meet.
Keep it fresh
– Refresh the board each month with new memories.
– Rotate items and swap in fresh notes.
– Take a quick photo of the board at the end of the month.
Next steps
– Decide on a spot, gather items, and start today.
19. The Music Inspiration Board
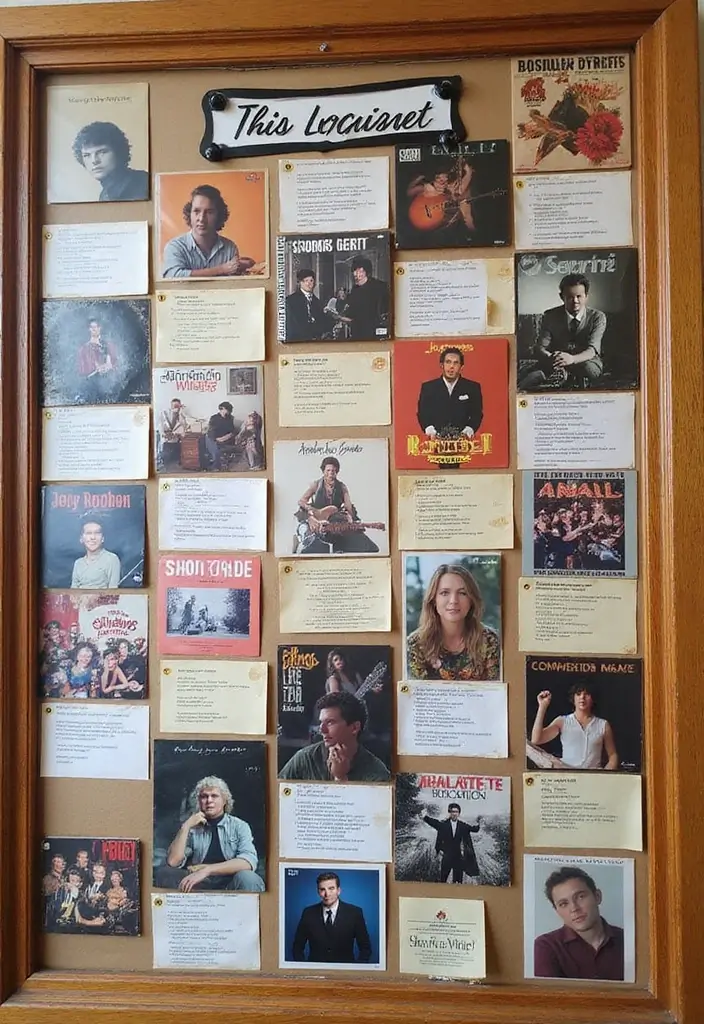
Are you chasing daily motivation from music? A music inspiration board can lift your mood and spark ideas. It puts your favorite sounds in plain view and makes you smile every time you walk by.
Here is why it works: music taps memory, tempo, and emotion. A splash of color and sound helps you stay on track.
How to build it:
– Materials: a corkboard or magnetic board; printed album covers; lyric cards; artist notes; washi tape; a marker.
– Create sections: group items by genre, by artist, or by mood to match your goals.
– Attach with care: use decorative tape to fix pieces. Don’t crowd the board; keep it legible.
– Add sound: place a tiny Bluetooth speaker nearby so you can play the tracks that spark your best work.
– Layout: mix photos, lyrics, and color blocks. Use one color per mood.
– Keep it fresh: swap in new covers weekly and add a favorite line on a sticky note.
Placement:
Place it near your desk or bed so you see it first thing. Take a few minutes daily to glance at it, so the music moves your work.
Next steps:
Set a five-minute playlist and start a new note with a lyric that fits today.
20. The Pet Love Board

Want a daily pick‑me‑up that stays close to your heart? A pet love board is a perfect fit in your bedroom. It puts your furry friends front and center. You’ll see photos you adore, quick breed facts, and little notes about what you love most.
What you need
– A cork board, magnetic board, or sturdy frame
– Push pins, magnets, or clips
– Photo prints of your pets and small paw‑print art
– Washi tape and a marker for captions
– A tiny notebook or sticky notes for quick notes
Ways to style
– Start with a favorite photo as the anchor image
– Add bite‑size breed facts near the top for quick reads
– Sprinkle paw print doodles to tie the theme together
– Use colors that match your pet’s personality
– Leave space for new memories and growth
What to put on the board
– Your best pet photos, one per pet
– A short note about what you love most about each one
– A small fact or discovery about their breed
– A mini growth section with a yearly photo
Keep it fresh
– Swap photos monthly to capture changes
– Switch color accents with the seasons
– Add a new note after big moments like trips or vet visits
This board becomes a daily reminder of the joy pets bring. Ready to start your pet love board today?
21. The Mood Board

If you want a simple way to keep your bedroom looking fresh and your ideas clear, try a mood board. It brings colors, textures, and photos together in one place. Here is a plan you can use.
What a mood board does for you
It guides your choices for bedding, furniture, and decor. It also sparks new design ideas, from fashion inspirations to room ideas. You can see how color blocks and fabrics work side by side.
What to gather
– Fabric swatches that feel nice when you touch them
– Magazine cutouts of rooms and outfits
– Personal photos that make you feel a vibe
– Paint chips or color swatches
– Small samples of textures like linen, velvet, or wood
How to build it
1) Start with a base board in a neutral shade.
2) Layer in color blocks, textures, and photos.
3) Group items by color family or by mood (calm, bold, cozy).
4) Review the board after a week and remove pieces that don’t fit.
How to use it daily
Look at the mood board before you shop for bedding or wall art. Let it steer your picks so every piece fits your style. Update it every month or when your tastes shift.
Practical example
If you love calm blues, add a blue photo, a velvet swatch, and a linen sample. See how they feel together and adjust as needed.
Next steps
Gather a few items tonight and pin them on a cork board or save them in a digital mood board. Start small, grow it gradually, and watch your room and projects stay inspired.
A mood board is your creative compass! It blends colors, textures, and inspirations, helping you design a bedroom that truly reflects you. Gather your favorite swatches and let your ideas flow!
22. The Book Lover’s Board

Here is why a book lover’s board fits your room. It keeps your favorite reads in sight and your imagination close. It becomes a daily nudge to pick up a book.
Here is how to set it up in simple steps.
– Choose a board and space: Pick a cork board or magnetic sheet. Mount it near your desk or bed for easy reach.
– Pick a color plan: Use calm colors like cream, tan, or soft blue. This helps you relax and stay focused.
Next steps for what to display.
– Current read: A space for the book you are reading now.
– Quotes: Favorite lines in a neat card, either handwritten or printed.
– Favorites and genres: Small labels for fiction, mystery, fantasy, and more.
– Bookmarks and trinkets: Bookmarks, tiny bookends, and little literary goodies.
– To-read list: A short stack of titles you want to try soon.
Update tips:
– Change one item weekly. Leave space for new reads.
– Rotate featured books to match your mood.
What you gain:
– A calm, bookish vibe in your room.
– Quick ideas when you don’t know what to read next.
– Easy motivation to finish pages.
Materials you’ll need:
– Cork board, pins, tape, and scissors
– Printed quotes or handwritten cards
– Small decor items like tags and mini bookends
Next steps to maintain it on a budget.
– Use inexpensive frames for quotes.
– Reuse decorative items from other rooms to keep costs low.
– Keep the board clean and tidy so ideas stay clear.


23. The Tech-Savvy Board
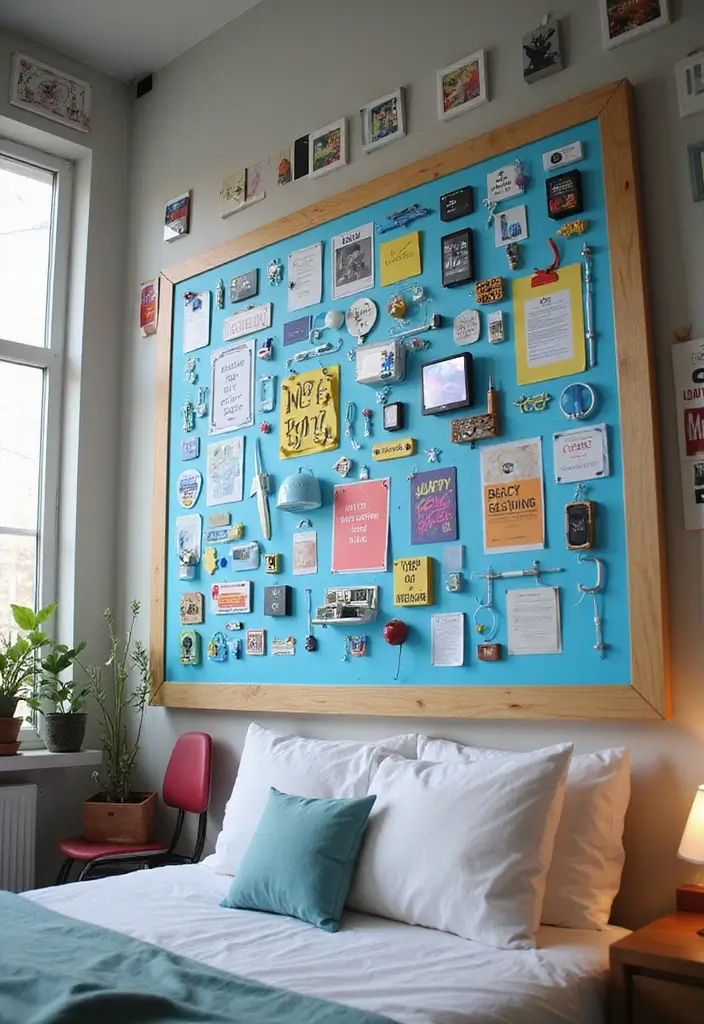
You want a board that fits your love for tech and keeps you energized. The Tech-Savvy Board does that. It shows gadgets you admire, quotes that spark ideas, and quick notes that push you to try new things. This simple addition can brighten your space and your daily work.
What to put on the board
– Gadgets you admire: photos or small magnets of your favorite devices.
– Tech quotes: short lines that push you to think and build.
– Projects and ideas: quick sketches, flow charts, or mini mind maps on light cards.
– Shortcuts and code: handy commands or a tiny cheat sheet for coding.
– Links you love: QR codes that open tutorials, blogs, or your repo.
– Games and media: icons for top games or streams you follow.
Style and setup tips
– Use bright colors like neon or metallics to grab attention.
– Divide the board into sections for coding, gadgets, and ideas.
– Label each area with simple, clear tags.
– Keep it tidy: swap out old items once a month.
Make it interactive
– Add QR codes that link to your GitHub, a favorite blog, or a useful resource.
– Add a small notebook page for ideas you want to test soon.
Next steps
Here is why this board helps you daily. It keeps you curious, shows progress, and gives a quick boost each morning.
Start small. Gather five photos, a few quotes, and a printed code snippet. Put them up and see what sticks.
24. The DIY Craft Board

You want a simple way to show your crafts and stay inspired each day. A DIY craft board does just that. It helps you see your work at a glance. It also makes planning new projects easy.
– Choose the base: Pick a corkboard, magnetic board, or fabric-covered panel that fits your space.
– Add small baskets: Attach tiny baskets or cups to hold beads, brushes, ribbons, and clips.
– Use clips and magnets: Clip finished pieces and future ideas with colorful clips or magnets.
– Label the zones: Add simple labels so you know where supplies go and what to try next.
– Rotate items often: Swap in new crafts and ideas every week to keep your mind fresh.
– Plan a theme: Try color blocks or seasonal vibes to guide what sits on the board.
– Keep it tidy: Clean the board weekly and keep the clips in place.
– Show a path: Pin a quick project idea that you can start today.
Set it up in a spot you pass every day. Start with a small display today and add a new item this week. You will feel the craft spark every time you glance at the board.
25. The Personal Reflection Board
You want a board that helps you grow and stay calm. A reflection board makes that possible. It sits in your bedroom and invites you to pause, breathe, and check in with yourself.
Set it up simply
– Use a small cork board in a quiet corner.
– Pick soft colors. Pastels feel calm and friendly.
– Gather markers, photos, and sticky notes.
What to put on it
– Daily reflections: one sentence about how you felt or what you learned.
– Affirmations: short, positive lines you want to hear.
– Small goals: 1 or 2 concrete tasks for the week.
How to use it every day
– In the morning, read what’s there and decide what to add or move.
– In the evening, write a quick lesson from the day.
– Weekly, refresh the board with notes that fit your growth.
Tips to keep it practical
– Limit to 3-5 items at a time.
– Add images or symbols that are meaningful to you.
– Use easy-to-switch notes so you can reflect as your mind changes.
Common questions
– Q: How often should I update? A: Try weekly, or when your focus shifts.
Next steps
– Set aside 10 minutes today. Start with three cards: one reflection, one affirmation, and one goal.
Conclusion
Creating a personalized bulletin board is not just a fun DIY project; it’s a way to infuse your space with your unique personality and inspirations. With these diverse ideas, you’re sure to find a style that resonates with you.
Don’t be afraid to mix and match these concepts to create a board that’s completely your own. Keep your room fresh, organized, and inspirational by updating your board regularly. What are you waiting for? Get crafting!
Frequently Asked Questions
What materials do I need to create a DIY bulletin board for my bedroom?
Creating a DIY bulletin board is a fun and rewarding project! You’ll typically need a base like a corkboard or a wooden panel, paint or fabric for decoration, and tools like scissors and glue. Add decorative elements like string lights, photos, or quotes to make it truly personal! The options are endless, so gather your favorite materials and let your creativity shine!
Don’t forget to think about your bedroom organization and how you’ll use the board to inspire you daily!
How can I make my bulletin board reflect my personality?
Your bulletin board is a canvas for your personality! Start by selecting colors and themes that resonate with you. Incorporate your favorite quotes, photos of friends, or even art that inspires you. You could try different styles, like a vintage chic board or a travel memory board, depending on what speaks to you. The key is to make it a space that feels uniquely you and motivates you every day!
Remember to refresh it regularly to keep the inspiration flowing!
What are some creative display ideas for my bedroom bulletin board?
There are so many creative display ideas to explore! Consider using a photo grid with string lights for a playful touch or a quote wall to keep your favorite sayings visible. You might also enjoy a layered artwork display for a more artistic flair. Each of these ideas can help maintain a vibrant and engaging atmosphere in your bedroom, ensuring you stay inspired daily!
Don’t be afraid to mix and match different styles to create a unique look!
How can a bulletin board help with bedroom organization?
A bulletin board can be an excellent tool for bedroom organization. You can pin up important reminders, to-do lists, or inspirational images that keep you focused on your goals. For instance, an organized study zone board can help you track assignments and deadlines, while a holistic wellness board can inspire you to stay on top of your health goals. This way, your board not only beautifies your space but also keeps you organized and motivated!
Use it as a central hub for everything you want to achieve!
Can I change my bulletin board according to the seasons?
Absolutely! A seasonal board is a fantastic way to keep your bedroom feeling fresh and aligned with the time of year. You can swap out colors, themes, and decorations as the seasons change—think warm colors for fall and bright pastels for spring. This not only keeps your space looking new but also allows you to reflect the mood and essence of each season. Plus, it’s a fun way to express your creativity!
Let the changing seasons inspire you to update your board regularly!
Related Topics
bulletin board ideas
DIY bedroom decor
inspirational wall art
teen bedroom organization
creative display ideas
minimalist design
seasonal decor
photo grid
easy DIY projects
motivational boards
vintage style
budget friendly